
Next.js is an open-source React-based framework built on top of Node.js that is aimed at developing web apps. It includes handy features such as hybrid static & server rendering, TypeScript support, smart bundling, and route pre-fetching.
In the 2020 State of JavaScript survey, Next.js was the second most used back-end framework (behind Express) but claimed the top spot when it came to satisfaction, with 92% of its users stating they are satisfied with the framework.
In this article, we’ll look at how you can integrate Jscrambler into your Next.js app development workflow. This will enable you to protect your JavaScript source code, through a combination of advanced obfuscation, code locks, anti-tampering, and anti-debugging.
Pre-Requisites
In order to properly integrate Jscrambler into your Next.js build process, there are two things we need to do first: creating a Next.js app and configuring Jscrambler. Let's go through those steps.
Creating Your Next.js Application
If you are not very experienced with Next.js yet, feel free to check their "Create a Next.js App” tutorial before moving forward. We will actually be using this example app in our integration tutorial, so let’s install it:
git clone https://github.com/JscramblerBlog/nextjs-jscrambler-integration-tutorial.git
Now, let's install all app dependencies using npm:
cd nextjs-jscrambler-integration-tutorial
npm i
The (simplified) base project structure of our Next.js application is as follows:
nextjs-jscrambler-integration-tutorial/
|-- package-lock.json
|-- package.json
|-- README.md
|-- .next
| |-- static/
| | |-- chunks/
| | | |-- pages/
|-- node_modules/
|-- pages/
|-- public/
package.jsoncontains all the configurations which are related to npm such as dependencies, version, and scripts.The
pagesdirectory features all the source code of the application. The sources are then built and packed into the.next/static/directory. This is where our protected HTML and JavaScript files will be placed after the build.The
publicdirectory contains all publicly accessible files, such as images.
We can easily run a development server just to make sure that the app is running properly.
npm run dev
You will get an URL in the console with the development server and, after opening it, you should see the app running as shown below.

And this is pretty much it in terms of our Next.js app. Let's move forward to protecting it with Jscrambler.
Configuring Jscrambler
If you haven't created a Jscrambler account yet, be sure to do so before moving forward.
All of Jscrambler's configuration will reside inside a single file: .jscramblerrc. As such, we will need to create this file to specify which transformations we wish to use.
The quickest way to achieve this is via the Jscrambler Web App. Once there, create a new app. Now, check the Templates and Fine-Tuning tabs to select the template or transformations you want to use to protect your code. In this tutorial, we'll be selecting the Obfuscation template. If you need help with these steps, please refer to our guide.
Now, we simply have to download a JSON file with all this configuration, which will be used only for quickly getting the required settings.

Now, let's create a new file named .jscramblerrc on the Next.js project’s root folder. Open the jscrambler.json file we just downloaded and copy all its contents to the .jscramblerrc file. After that, we just have to add two new sections to .jscramblerrc, which are filesSrc and filesDest (see below). Your final .jscramblerrc file should look like this:
{
 "keys": {
   "accessKey": <ACCESS_KEY_HERE>,
   "secretKey": <SECRET_KEY_HERE>
 },
 "applicationId": <APP_ID_HERE>,
 "filesSrc": [
   "./.next/**/*.html",
   "./.next/**/*.js"
 ],
 "filesDest": "./",
"params": [
    {
      "name": "objectPropertiesSparsing"
    },
    {
      "name": "variableMasking"
    },
    {
      "name": "whitespaceRemoval"
    },
    {
      "name": "identifiersRenaming",
      "options": {
        "mode": "SAFEST"
      }
    },
    {
      "name": "globalVariableIndirection"
    },
    {
      "name": "dotToBracketNotation"
    },
    {
      "name": "stringConcealing"
    },
    {
      "name": "functionReordering"
    },
    {
      "options": {
        "freq": 1,
        "features": [
          "opaqueFunctions"
        ]
      },
      "name": "functionOutlining"
    },
    {
      "name": "propertyKeysObfuscation",
      "options": {
        "encoding": [
          "hexadecimal"
        ]
      }
    },
    {
      "name": "regexObfuscation"
    },
    {
      "name": "booleanToAnything"
    }
  ],
  "areSubscribersOrdered": false,
  "useRecommendedOrder": true,
  "jscramblerVersion": "<7.X>",
  "tolerateMinification": true,
  "profilingDataMode": "off",
  "useAppClassification": true,
  "browsers": {}
}
Because we got this information directly via the Jscrambler Web App, our accessKey, secretKey and applicationId fields are already filled. If you wish to retrieve them manually, refer to our guide.
It's important to note that the params section specifies the transformations that will be used to protect your Next.js app. These can be hand-picked by you, by selecting them in the Web App or setting them manually. You can find documentation on all the available transformations here.
You can also change filesSrc to match the files you need/want to protect. For our example—and all Next.js apps—we recommend protecting the .html and .js files. Certainly, with a better understanding of the project, you may identify what’s critical and essential protecting.
By using filesDest: './', the files we send to protect will be overwritten by their protected version.
Integrating Jscrambler in the Build Process
Using the CLI is likely the most common way of generating your build. We will use our boilerplate app to showcase how to integrate Jscrambler into the build process.
The first step of our integration with Jscrambler is installing the Jscrambler API Client. Simply run:
npm i jscrambler --save-dev
To integrate Jscrambler in our application's build process via the CLI, we need to create a CLI hook in the scripts section of package.json. The section should look like this:
  "scripts": {
    "dev": "next dev",
    "build": "next build && jscrambler",
    "start": "next start"
  },
The specific "build": "next build && jscrambler" hook will trigger the jscrambler command after the build process is finished.
In order for this command to be executable, we need to make sure that the .jscramblerrc file that we created before is in our project's root folder.
We are now ready to protect our code and build our application via the CLI:
npm run build
This will create the protected production files on .next/static/.
And you're done! Now all your HTML and JavaScript files are protected with Jscrambler against code theft and reverse-engineering. Remember that you can always fine-tune your protections to manage eventual performance hits. If that's the case, be sure to follow our tutorials on Code Annotations and Profiling.
Testing the Protected Next.js App
As a final step, let's check if the app is running successfully with the newly protected source code:
npm run start
Open the URL provided in the console and it will open up a server with the production files.
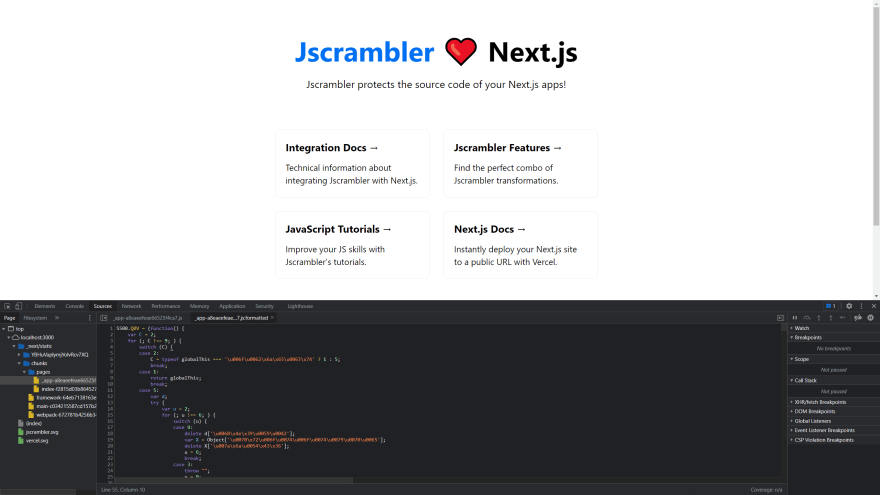
Now, you can check what your protected code looks like. This can be achieved simply by opening the browser's debugger and opening the files from the "Sources" tab. The protected code should look like this:
Conclusion
Next.js has truly been a rising star in the web development ecosystem. The 4-year-old framework has been growing rapidly and bringing several welcome features for developers, making it much easier to release production-ready applications.
If you're building Next.js applications which have sensitive logic, want to prevent reverse-engineering, licensing violations, and tampering, a security solution such as Jscrambler is a must.
Integrating Jscrambler into Next.js's build process is simple and enables protecting your code with the most sophisticated polymorphic obfuscation, code locks, and self-defensive capabilities.
This all comes with premium support, so be sure to contact us if you have any questions!

Top comments (0)