
Introduction
Open Data Kit (ODK) is a set (components) of free, open-source software used for facilitating data collection using mobile devices. ODK Central or Central is the server component. Without the server, the process of data collection cannot proceed.
Installing ODK Central on a DigitalOcean server is the recommended method and is well documented. Where situations demand installing Central on a different cloud provider, documentation of the process is either scanty or altogether lacking.
This post steps through the process of installing Central on a custom Linux server not hosted by DigitalOcean and contains the following sections:
- Prerequisites
- Checking DNS Propagation
- Checking for Available Disk Space
- Installation of the Docker Engine
- Customizing Docker Engine Data Root Folder
- Configuring Docker Engine to run as a non-root user
- Installing Docker Compose
- Installing ODK Central
- Starting Up ODK Central
- Create ODK Central Administrator
Prerequisites
- You can SSH to your server using a user who has
sudorights. - You have purchased a domain name. In this post, I will be using odk-central.example.com as the domain name. Remember to substitute the domain name with your domain name.
- You have created the domain (odk-central.example.com) and sub-domain (www.odk-central.example.com) names on your cloud provider. If the www sub-domain is not created, Let’s Encrypt fails with Challenge failed for domain odk-central.example.com when validating requests for SSL certificates for your domain.
- You have updated the A/AAAA records for your domain and sub-domain to point to your server. An A-record links your domain name or sub-domain name to an IP address for your server.
Checking DNS Propagation
Using the ping command, we will test whether our domain name is reachable from our local computer.
Open a terminal or command window and run the following command ping odk-central.example.com -c4. The -c4 option species the number of requests. The -c4 option is not required when running the command from a Windows computer; windows defaults to four ping requests. Replace odk-central.example.com with your domain name.
If the response you get is similar to "ping: cannot resolve odk-central.example.com: Unknown host" or "Ping request could not find host odk-central.example.com. Please check the name and try again.", then your server is not reachable.
Changes you make to the A-records could take several hours to propagate. There are online tools that may assist in checking the reachability of your domains and sub-domains. Some of these tools are:
DNSPropagation, DNS Google, DNS Tester](https://www.dnstester.net/) among others can help in checking on the propagation process.
Do not forget to check whether you can also ping the www sub-domain.
Checking for Available Disk Space
ODK Central uses multiple Docker containers. During the installation process, Docker images required by ODK Central service get downloaded to the server. Before starting the install process, verify that your server has adequate space. Establish whether the available space is on one hard disk drive or spread over multiple hard disk drives.
To display the drives and space used, run df --human-readable or df -h command from a terminal window.
Running the df command on a server provisioned on DigitalOcean may display an output similar to the following:
Filesystem      Size  Used Avail Use% Mounted on
udev            3.9G     0  3.9G   0% /dev
tmpfs           797M  1.6M  795M   1% /run
/dev/vda1       155G   11G  145G   7% /
tmpfs           3.9G     0  3.9G   0% /dev/shm
tmpfs           5.0M     0  5.0M   0% /run/lock
...
The sample output shows that the server has one partition /dev/vda1 mounted on the root (/) directory with 145Gb of free space.
However, running the df command on my custom server displays a different output as shown below:
Filesystem                   Size  Used Avail Use% Mounted on
/dev/root                     29G  2.1G   27G   7% /
devtmpfs                     3.9G     0  3.9G   0% /dev
tmpfs                        3.9G     0  3.9G   0% /dev/shm
tmpfs                        796M  1.1M  795M   1% /run
/dev/sdb1                    503G   73M  478G   1% /data
...
From the output, observe that the custom server has two disk partitions; /dev/root mounted on root (/) directory with 27Gb of free space and /dev/sdb1 mounted on /data directory with 476Gb of free space. To avoid running out of disk space on the root directory, we need to configure the Docker Engine to store data on the data directory; likewise, we require to install ODK Central on the data directory.
Install Docker Engine
A Docker Engine installation on Ubuntu requires the server to be running a 64-bit version of Ubuntu 18.04 or higher.
You can check the installed version of Ubuntu on your server by running lsb_release -a or cat /etc/lsb-release command from a terminal window.
Use the following steps to install Docker:
Update the server's local repository package information by running the
sudo apt updatecommand. Running this command is required every time before you install or upgrade software.-
Install packages required to install Docker using
sudo apt install ca-certificates curl gnupg lsb-release-
ca-certificates- common digital certificates used to verify and encrypt data between a server and other websites -
curl- tool used to transfer data from one server to another server. -
gnupg- command line tool that encrypts and signs files; it also known asgpg. -
lsb-release- a utility that displays Linux Standard Base (LSB) information about a Linux distribution. o display your distribution information, run thelsb_release -aorcat /etc/lsb-releasecommand from a terminal window.
-
-
Download Docker's official GPG key specific to Ubuntu and save the key to /usr/share/keyrings/docker-archive-keyring.gpg file on our server.
curl -fsSL https://download.docker.com/linux/ubuntu/gpg | sudo gpg --dearmor -o /usr/share/keyrings/docker-archive-keyring.gpg -
Add Docker's stable repository to our server's local packages repository.
echo \
"deb [arch=$(dpkg --print-architecture) signed-by=/usr/share/keyrings/docker-archive-keyring.gpg] https://download.docker.com/linux/ubuntu \
$(lsb_release -cs) stable" | sudo tee /etc/apt/sources.list.d/docker.list > /dev/null
The following is an explanation of the sub-commands used in the previous command:
-
dpkg --print-architecture- determines the system's architecture such asamd64 -
lsb_release -cs- outputs the Linux distribution release codename, such asbionicfor Ubuntu 18.04 orfocalfor Ubuntu 20.04 -
teewill read input fromechocommand and write the output to /etc/apt/sources.list.d/docker.list file
-
Update packages in our server's repository -
sudo apt updateInstall the latest version of Docker Engine
sudo apt install docker-ce docker-ce-cli containerd.ioVerify Docker installation using
sudo docker -vcommand. This should output version number for installed Docker.The docker service starts automatically on Ubuntu; however, we can run the
systemctl enable dockercommand to confirm that the service will start.
Configure Docker Data Root Folder
By default, Docker stores all its data within the /var/lib/docker directory. You can verify the location by running docker info and looking for Docker Root Dir: entry from the output.
Our custom server has limited space on the root directory. As such, we need to configure Docker to save its data within our data directory.
The preferred option to configure Docker is through a /etc/docker/daemon.json JSON settings file. However, Docker does not automatically create the /etc/docker/daemon.json file.
Stop the Docker service by running the sudo service docker stop command.
Run the sudo nano /etc/docker/daemon.json to create the file.
Update the file with the following:
{
  "data-root": "/data/docker-data"
}
To save and close the /etc/docker/daemon.json file, press CTRL+X keys together, then Y to confirm that you want to save the modified file and finally press the ENTER key to confirm the file name.
Restart the Docker daemon by running the sudo service docker start command.
Confirm that Docker's storage location has been updated to match the entry in our /etc/docker/daemon.json file by running the docker info | grep "Docker Root Dir" command. The output should reflect the changes we made in our configuration file - Docker Root Dir: /data/docker-data
Use Docker As Non-Root User
Every time a non-root user runs the docker command, the user must prefix the command with sudo. To avoid typing sudo docker, add the connected user to the docker group.
Create the docker group by running the
sudo groupadd dockercommand.Add connected user to the docker group by running the
sudo usermod -aG docker $USERcommand. You can replace $USER with your preferred user -sudo usermod -aG docker kagunda.Activate the changes to groups by running the
newgrp dockercommand or log out and log back in again if running the command does not work.Verify that you can access and download Docker images without
sudoby running thedocker run hello-worldcommand.
Install Docker Compose
-
Run the following command to download the current stable release of Docker Compose:
sudo curl -L "https://github.com/docker/compose/releases/download/1.29.2/docker-compose-$(uname -s)-$(uname -m)" -o /usr/local/bin/docker-compose -
Assign execute permissions to the docker-compose binary:
sudo chmod +x /usr/local/bin/docker-compose -
Optionally, create a symbolic link to /usr/bin
sudo ln -s /usr/local/bin/docker-compose /usr/bin/docker-compose Test the docker-compose installation by running the
docker-compose --versioncommand.
Install ODK Central
UFW (Uncomplicated Firewall) comes pre-installed on Ubuntu but is disabled. However, you can run the
ufw disablecommand to confirm the firewall is disabled.On our custom server, we want to install ODK Central on the data directory. To change the directory, run the
cd /datacommand.-
Download the ODK Central software using the
sudo git clone https://github.com/getodk/centralcommand. If you connected to the server as a root user, omit thesudoprefix -git clone https://github.com/getodk/central
root@odk-server:/data#
root@odk-server:/data# git clone https://github.com/getodk/central
Cloning into 'central'...
remote: Enumerating objects: 1015, done.
remote: Counting objects: 100% (1014/1014), done.
remote: Compressing objects: 100% (499/499), done.
remote: Total 1015 (delta 550), reused 912 (delta 490), pack-reused 1
Receiving objects: 100% (1015/1015), 191.22 KiB | 5.03 MiB/s, done.
Resolving deltas: 100% (550/550), done.
root@odk-server:/data#
root@odk-server:/data#
After the above command completes, type the
cd centralcommand to move to the ODK Central installation folder.-
Download missing ODK Central components by running the
git submodule update -icommand.
root@odk-server:/data#
root@odk-server:/data# cd central/
root@odk-server:/data/central# git submodule update -i
Submodule 'client' (https://github.com/getodk/central-frontend.git) registered for path 'client'
Submodule 'server' (https://github.com/getodk/central-backend.git) registered for path 'server'
Cloning into '/data/central/client'...
Cloning into '/data/central/server'...
Submodule path 'client': checked out '5cc6fd79d112ce36d6298c61bb8817689c4c323b'
Submodule path 'server': checked out '1d1a3a59969e61383da74119e405e67778b7a170'
root@odk-server:/data/central#
root@odk-server:/data/central#
root@odk-server:/data/central#
Copy ODK Central settings template file by running the
mv .env.template .envcommand.-
Edit the settings file by running the
nano .envcommand. This will launch the nano editor and display the contents of the .env settings file.- Change the value of DOMAIN to use your domain name. In my case, the value will be DOMAIN=odk-central.example.com
- Change the value of SYSADMIN_EMAIL to use a valid email for your email. Let's Encrypt service will use this email address to notify you if something goes wrong when issuing your security certificates.
- Press CTRL+X keys together, then Y to confirm that you want to save the modified file and finally press ENTER key to confirm the file name.

Type
docker-compose buildto build the stack of applications required to run ODK Central service. The process will take download all required ODK Central Docker images and will take time. After the process completes, you should see a success message, and the terminal prompt gets displayed.Run the
docker-compose up --no-startcommand. This command tells Docker to create all containers required by ODK Central without starting these containers.
Starting Up ODK Central
Make sure you are still in the central directory and run the docker-compose up -d. The -d option starts the ODK Central containers in the background and leaves them running.
To check whether all ODK Central containers have finished loading, run the docker-compose ps command.
nginx is the web server container for ODK Central. It should display Up or Up (healthy) under the State column. If the state column displays Up (health: starting), give it more time to complete starting up. A state of Exit 0 for the secrets container means everything is fine.
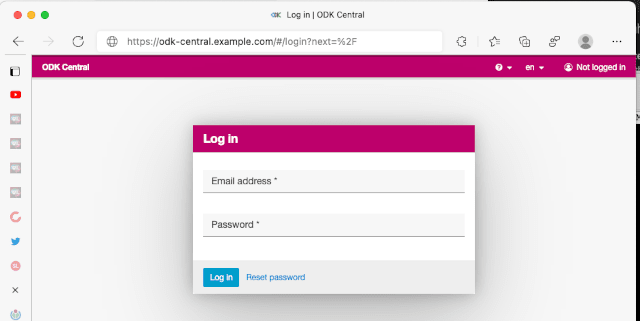
After the web server has started successfully, visit your domain in a web browser. If everything worked out as expected, the ODK Central login page should be displayed.
Create ODK Central Administrator
Make sure you are on the central folder. If you are in any other folder, move to the central folder by running the
cd /data/centralcommand. Substitute /data/central with the location where you installed ODK Central.-
Run the following command to create an account within ODK Central.
docker-compose exec service odk-cmd --email YOUREMAIL@ADDRESSHERE.com user-createSubstitute YOUREMAIL@ADDRESSHERE.com with the email for the user you wish to create. You will be requested to provide a password for the new account.
-
Promote the account to an administrator using the following command:
docker-compose exec service odk-cmd --email YOUREMAIL@ADDRESSHERE.com user-promote TTo create other users, navigate to your domain in a web browser, log in using the administrator account you have created and create new users from the ODK Central interface.
If you ever forget or lose the administrator's password, you can reset the password by running the following command:
docker-compose exec service odk-cmd --email YOUREMAIL@ADDRESSHERE.com user-set-password
Summary
ODK Central is the server-side software used for data collection using mobile devices. When installing ODK Central on a cloud provider other than DigitalOcean, you are on your own.
In this post, I installed ODK Central on a server with two hard drives and having limited space on the root directory. I started by looking at ways to check for DNS propagation for your domain names, installed Docker, configured Docker to save data in a custom directory, cloned the ODK Central repository, and finally configured and tested the ODK Central application was up and running.
I hope the post may be helpful to anyone wishing to install ODK Central on a custom cloud provider other than DigitalOcean.
Resources
- Install Docker Engine on Ubuntu
- Post-installation steps for Linux
- Configure the Docker daemon
- Where are Docker Images Stored? Docker Container Paths Explained
- Proposal: Docker Engine Keys for Docker Remote API Authentication and Authorization #7667
- Install Docker Compose
- Installing Central on DigitalOcean

Top comments (0)