In this tutorial I tried to show how to Install Ubuntu Server in Virtual Box.
Need Hardware Requirements At Least:
- CPU: 1 gigahertz or better.
- RAM: 1 gigabyte or more.
- Disk: a minimum of 2.5 gigabytes.
Step 1: First of all we have to download a virtual box and install it on your computer and download the Ubuntu server version iso file.
⇒ Virtual box download Link: https://www.virtualbox.org/wiki/Downloads

⇒ Ubuntu server Link: https://ubuntu.com/download/server

Step 2: After installing virtual box in your computer then open the virtual box and you will found this window and click “New” to start installation process.

Step 3: You will find this window and fill up the text box. Provide the name of your server in the name section - I provided the name is “ubuntu-server”, Folder is where you want to install the server I select F: drive to install this server, ISO Image is the ubuntu server iso file. Then click the “Next” button.

Step 4: Now fill up the text box such as username, password, hostname, domain name. I provided the username as “kamrul” and host name “localhost”.

Step 5: In the hardware section select your computer RAM(base memory) and Processor. Provide this resource according to your computer configuration . I provided RAM(base memory) as 2GB(2048 MB) and Processors 2 CPU. Now click the “Next” button.

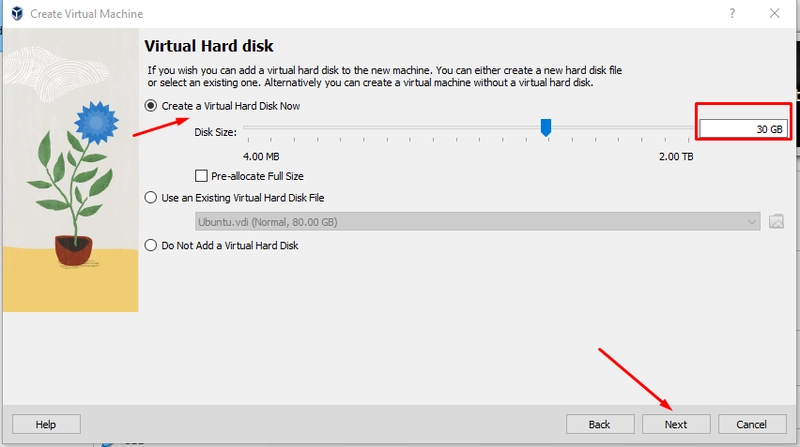
Step 6: In the Virtual Hard disk section. Provide the storage for the ubuntu server. I provided the 30GB storage for this server. Click the “Next” button.
Step 7: You will find the summary page . Here you can see the configuration of what you have done. Click the “Finish” button.

Step 8: For accessing this server from the outside you have to apply the “Bridged Adapter” Rule.
Select ubuntu-server > settings > Network > Adapter 1 > Enable Network Adapter as “Bridged Adapter” > Click OK.

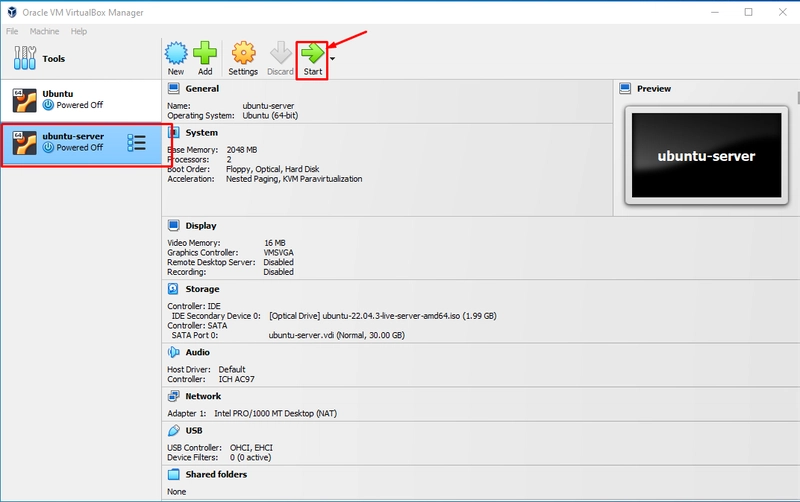
Step 9: Now select ubuntu-server and Click “Start” button. Then it will be started the installation process.
Step 10: You will find the this window and press the enter button on “Try or install ubuntu server” option.

Step 11: Select your comfortable language. I select “English” and press Enter.

Step 12: Select “Continue without updating” by using the arrow key on the keyboard then press Enter.

Step 13: In the “Keyboard configuration” just select “Done” and Press Enter.

Step 14: In the “Choose type of install” - select “Ubuntu Server” by pressing spacebar on your computer then it will be selected and ‘X’ sign will appear inside the parentheses. That means “Ubuntu Server” is selected. Then move down by pressing down arrow key and select the “Done” and press Enter.

Step 15: In “Network connections” - keep as it is and Just select “Done” and press Enter.

Step 16: In “Configure proxy” - keep as it is and select “Done” and press Enter.

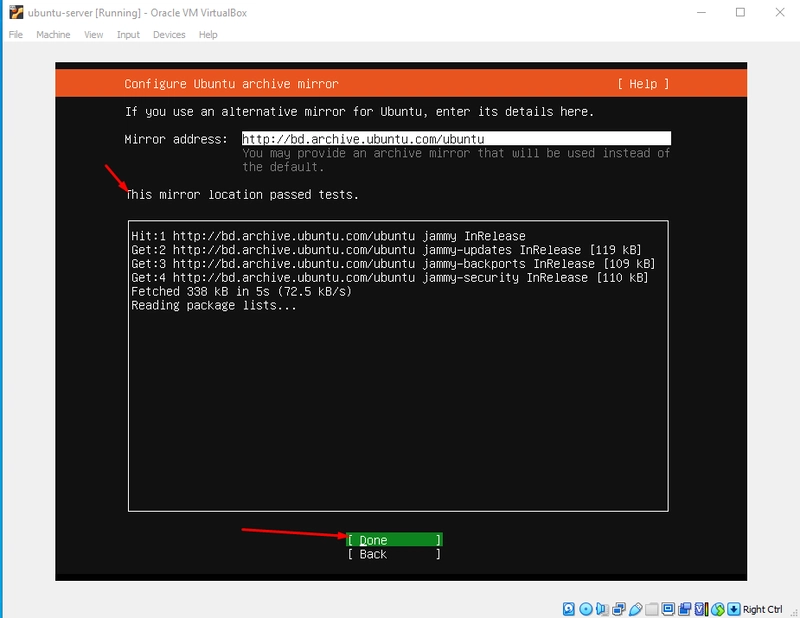
Step 17: In ‘Configure Ubuntu archive mirror“ - keep as it is and wait a few seconds for pass the tests then select “Done” and press Enter.
Step 18: In “Guided storage configuration” - move down using the down arrow key and select “Done” and press.

Step 19: In “Storage configuration” - select “Done” and press Enter.

Step 20: Select “Continue” and press Enter.

Step 21: In “Profile setup” - provide your name, your server’s name, pick a username, choose a password then select “Done” and press Enter.

Step 22: In “Upgrade to Ubuntu pro” - select skip now then select “Continue” and press Enter.

Step 23: In “SSH Setup” - Select “Install OpenSSH server” then select “Done” and press Enter.

Step 24: In “Featured Server Snaps” - skip the services and move down and select “Done” and press Enter.

Step 25: Now finally installing the system and it will take some time . keep patience and wait until the “reboot now” button appear on the bottom side.

Step 26: Now the “Reboot Now” button appears and Select it and press Enter. It will take some time to start the machine.

Step 27: Now your ubuntu server is ready to login . Provide the username and password for login into the server.

Step 28: When you are logged in then do some tests . such as create a file and display that file. Following this commands.
→ touch testfile
    → ls

Related Keywords:
Install Ubuntu Server in VirtualBox;
Ubuntu Server VirtualBox installation guide;
VirtualBox Ubuntu Server setup tutorial;
Step-by-step Ubuntu Server installation in VirtualBox;
Creating a virtual machine for Ubuntu Server in VirtualBox;
Installing Ubuntu Server on a virtual machine with VirtualBox;
Ubuntu Server virtualization with VirtualBox;
Beginner's guide to setting up Ubuntu Server in VirtualBox;
VirtualBox Ubuntu Server ISO installation;
Ubuntu Server virtualization tutorial for VirtualBox;
Kamrul devops; kamrul-hasan-devops; kamrul-hasan-aws-solution-architect; kamrul-devops; kamrul-cloud; kamrul-hasan-devops; kamrul-devops-engineer; devops-engineer; kamrul-hasan-devops-engineer;

Top comments (0)