In the previous article, I developed simple application with CRUD capability. In this article, I will update the same application by using other Ignite UI component.
Add menu
At this moment, the application has list feature only. But if I add more features, I'd like to have menus to easily navigate them.
Use Navigation Drawer
Ignite UI has NavDrawer control which lets you implement fly-out menu.
1. Add the module first. The name of module is NavigationDrawerModule, and it doesn't start with "Igx". This should be changed in the future release as there is an issue tracked in GitHub
src/app/app.module.ts
import { BrowserModule } from '@angular/platform-browser';
import { BrowserAnimationsModule } from '@angular/platform-browser/animations';
import { NgModule } from '@angular/core';
import { FormsModule } from '@angular/forms';
import { AppRoutingModule } from './app-routing.module';
import { AppComponent } from './app.component';
import {
  IgxNavbarModule, IgxIconModule, IgxScrollModule, IgxAvatarModule,
  IgxLabelModule, IgxInput, IgxDatePickerModule, IgxButtonModule, IgxRippleModule,
  IgxToastModule, IgxDialogModule, IgxCheckboxModule, IgxSwitchModule, IgxSliderModule,
  IgxRadioModule, NavigationDrawerModule } from 'igniteui-angular/main';
import "hammerjs";
import { ListComponent } from './list/list.component';
import { DetailComponent } from './detail/detail.component';
import { UserService } from './user/user.service';
import { NewComponent } from './new/new.component';

@NgModule({
  declarations: [
    AppComponent,
    ListComponent,
    DetailComponent,
    NewComponent
  ],
  imports: [
    BrowserModule,
    BrowserAnimationsModule,
    AppRoutingModule,
    FormsModule,
    IgxNavbarModule,
    IgxIconModule,
    IgxScrollModule,
    IgxAvatarModule,
    IgxLabelModule,
    IgxInput,
    IgxDatePickerModule,
    IgxButtonModule,
    IgxRippleModule,
    IgxToastModule,
    IgxDialogModule,
    IgxCheckboxModule,
    IgxSwitchModule,
    IgxSliderModule,
    IgxRadioModule,
    NavigationDrawerModule
  ],
  providers: [UserService],
  bootstrap: [AppComponent]
})
export class AppModule { }
2. I add the drawer to app module. The reason I set pinThreashold to false is that, by default, it behaves differently if the screen width is larger than 1024.
src/app/app.component.html
<igx-navbar [title]="title" actionButtonIcon="menu" (onAction)="drawer.toggle()">
  <igx-icon name="add" (click)="onClickAdd()"></igx-icon>
</igx-navbar>
<!-- Add Drawer -->
<igx-nav-drawer #drawer [pinThreshold]="false" width="280px">
  <div class="ig-drawer-content">
    <nav class="nav">
      <!-- Drawer Header -->
      <span class="nav-item header">menus</span>
      <!-- Add menus -->
      <span class="nav-item" [routerLinkActive]="'active'" routerLink="/">
        <igx-icon fontSet="material" name="list"></igx-icon>
        <span>List</span>
      </span>
      <span class="nav-item" [routerLinkActive]="'active'" routerLink="grid">
        <igx-icon fontSet="material" name="grid_on"></igx-icon>
        <span>Grid</span>
      </span>
    </nav>
  </div>
</igx-nav-drawer>

<router-outlet></router-outlet>
3. Use css to make menus looks pretty. I took the sample css from GitHub. Interestingly, the NavDrawer items are places in app.component, not in NavDrawer sample folder.
src/app/app.component.css
.ig-drawer-content {
    background: #fff;
}

.ig-drawer-content ::-webkit-scrollbar {
    width: 3px;
    background: #e4e4e4;
}

.ig-drawer-content ::-webkit-scrollbar-thumb {
    background: #ec6f74;
    border-radius: 0;
}

.nav {
    position: absolute;
    width: 100%;
    height: 100%;
    border-right: 1px solid #e4e4e4;
    overflow-y: scroll;
    overflow-x: hidden;
}

.nav-item {
    display: flex;
    flex: 1 0 100%;
    flex-flow: row nowrap;
    color: #383838;
    max-height: 48px;
    padding: 12px 16px;
    cursor: pointer;
    font-size: 14px;
    align-items: center;
    font-weight: 600;
    user-select: none;
    outline: transparent;
    white-space: nowrap;
}

.nav-item.active {
    background-color: #fcc5de;
}

.nav-item:hover {
    background-color: #f0f0f0;
}

.nav-item > * + * {
    margin-left: 32px;
}

.nav-item.header {
    font-size: 16px;
    color: #9c9c9c;
    font-weight: 400;
    cursor: initial;
}

.nav-item.header:hover {
    background-color: transparent;
}
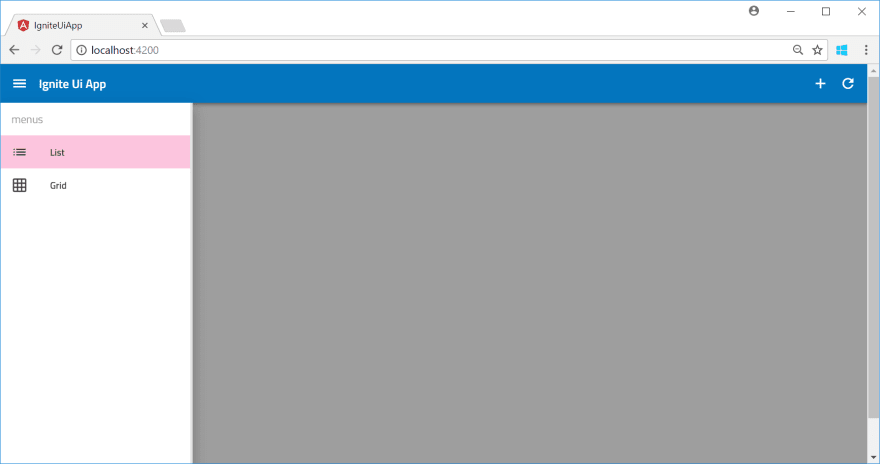
4. Save them all and check how it works.
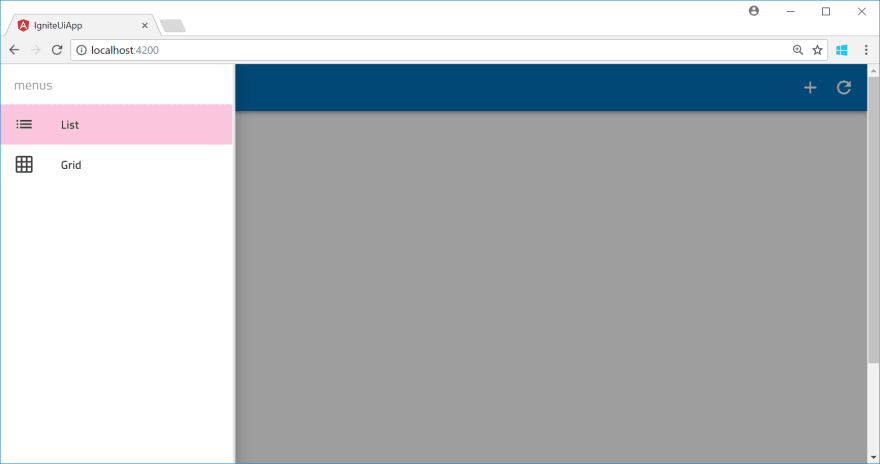
5. As you can see, menu works as expected, but it hides the menu bar. I prefer it
shows just under the menu bar, so add additional css elements.
src/app/app.component.css
/* Add this at the end of existing css */
igx-nav-drawer >>> .ig-nav-drawer-overlay,
igx-nav-drawer >>> .ig-nav-drawer {
 margin-top: 56px;
}
Convert List component to Angular module
List feature is implemented inside app module at the moment. Before adding other features, I will convert it as Angular module and separate from app module.
1. Move new and detail folders under list folder as they are part of List module.
It is not requirement but easy to maintain in this way. It is similar to app.module.ts but it also contains routing information. By this routing, new and detail pages are now accessible as list/new and list/detail.
2. Add list.module.ts under src/app/list, and add component information. This makes List Module.
src/app/list/list.module.ts
import { NgModule } from '@angular/core';
import { CommonModule } from '@angular/common';
import { FormsModule } from '@angular/forms';
import { Routes, RouterModule } from '@angular/router';

import { ListComponent } from './list.component';
import { DetailComponent } from './detail/detail.component';
import { NewComponent } from './new/new.component';
import {
    IgxIconModule, IgxScrollModule, IgxAvatarModule,
    IgxLabelModule, IgxInput, IgxDatePickerModule, IgxButtonModule, IgxRippleModule,
    IgxToastModule, IgxDialogModule, IgxCheckboxModule, IgxSwitchModule, IgxSliderModule,
    IgxRadioModule
} from 'igniteui-angular/main';

// Specify routes including children.
const listRoutes: Routes = [
    {
        path: 'list', component: ListComponent, children: [
            { path: 'detail/:id', component: DetailComponent },
            { path: 'new', component: NewComponent }
        ]
    }
];

@NgModule({
    declarations: [
        ListComponent,
        DetailComponent,
        NewComponent
    ],
    imports: [
        // Register root module including child modules.
        RouterModule.forChild(listRoutes),
        CommonModule,
        FormsModule,
        IgxScrollModule,
        IgxAvatarModule,
        IgxLabelModule,
        IgxInput,
        IgxDatePickerModule,
        IgxButtonModule,
        IgxRippleModule,
        IgxToastModule,
        IgxDialogModule,
        IgxCheckboxModule,
        IgxSwitchModule,
        IgxSliderModule,
        IgxRadioModule,
    ],
    exports: [RouterModule]
})
export class ListModule { }
3. Add the list module to app.module.ts, and remove Ignite UI modules from app modules which only used in the list module. *I may need to add them back if I need to use them in app module later though.
src/app/app.module.ts
import { BrowserModule } from '@angular/platform-browser';
import { BrowserAnimationsModule } from '@angular/platform-browser/animations';
import { NgModule } from '@angular/core';
import { FormsModule } from '@angular/forms';
import { AppRoutingModule } from './app-routing.module';
import { ListModule } from './list/list.module';
import { AppComponent } from './app.component';
import {
  IgxNavbarModule, IgxIconModule, NavigationDrawerModule } from 'igniteui-angular/main';
import "hammerjs";
import { UserService } from './user/user.service';

@NgModule({
  declarations: [
    AppComponent
  ],
  imports: [
    BrowserModule,
    BrowserAnimationsModule,
    AppRoutingModule,
    FormsModule,
    ListModule,
    IgxNavbarModule,
    IgxIconModule,
    NavigationDrawerModule
  ],
  providers: [UserService],
  bootstrap: [AppComponent]
})
export class AppModule { }
4. As folder structure changes, update import path of affected files
src/app/list/new/new.component.ts
import { Component, OnInit, ViewChild } from '@angular/core';
import { FormsModule } from '@angular/forms';
import { User, Gender } from '../../models/user';
import { UserService } from '../../user/user.service';
import { IgxLabel, IgxInput, IgxAvatar, IgxToast, IgxDialog, IgxCheckbox, IgxSwitch, IgxSlider, IgxRadio } from 'igniteui-angular/main';
import { Router } from '@angular/router';
import { ActivatedRoute } from '@angular/router';

@Component({
  selector: 'app-new',
  templateUrl: './new.component.html',
  styleUrls: ['./new.component.css']
})
export class NewComponent implements OnInit {

  constructor(private userService: UserService, private router: Router) {
  }

  @ViewChild('toast') toast: IgxToast;
  public user: User;
  public gender: string[];

  ngOnInit() {
    this.user = new User("", "", 0, null, Gender.Other, 0, true);
    let genderValues = Object.keys(Gender);
    this.gender = genderValues.slice(genderValues.length / 2);
  }

  public loadImage(input: HTMLInputElement): void {
    if (!input.value) {
      return;
    }

    let reader = new FileReader();
    // Callback when file read.
    reader.onload = () => {
      input.value = "";
      this.user.image = reader.result;
    }

    reader.readAsDataURL(input.files[0]);
  }

  public create() {
    this.userService.add(this.user).subscribe(() => {
      this.toast.show();
      this.router.navigate([`/`]);
    });
  }
}
src/app/list/detail/detail.component.ts
import { Component, OnInit, ViewChild } from '@angular/core';
import { FormsModule } from '@angular/forms';
import { ActivatedRoute } from '@angular/router';
import { IgxLabel, IgxInput, IgxAvatar, IgxToast, IgxDialog } from 'igniteui-angular/main';
import { UserService } from '../../user/user.service';
import { User } from '../../models/user';
import { Router } from '@angular/router';

@Component({
  selector: 'app-detail',
  templateUrl: './detail.component.html',
  styleUrls: ['./detail.component.css']
})

export class DetailComponent implements OnInit {

  @ViewChild('toast') toast: IgxToast;
  public user: User;
  constructor( private route: ActivatedRoute, private router: Router,private userService: UserService ) {
  }

  ngOnInit() {
    this.route.params.subscribe(params => {
      this.userService.getUser(params.id).subscribe(
        (user) => {this.user = user;}
      );
    });
  }

  public save(){
    this.userService.save(this.user).subscribe(()=>{
      this.toast.show();
    });
  }

  public delete(){
    this.userService.delete(this.user).subscribe(()=>{
      this.toast.message = "deleted";
      this.toast.show();
      this.router.navigate([`/`]);
    })
  }
}
5. Also, the routing has been changed for new and detail page, update affected files.
src/app/list/list.component.ts
import { Component, OnInit, EventEmitter } from '@angular/core';
import { IgxScroll, IgxScrollEvent, IgxAvatar } from "igniteui-angular/main";
import { User } from '../models/user';
import { UserService } from '../user/user.service';
import { Router } from '@angular/router';

@Component({
  selector: 'app-list',
  templateUrl: './list.component.html',
  styleUrls: ['./list.component.css']
})
export class ListComponent implements OnInit {

  constructor(private userService: UserService, private router: Router) {
    this.load();
  }

  public users: User[] = new Array<User>();
  public visibleUsers: User[];
  public visibleUsersCount: number = 8;

  ngOnInit() {
    this.userService.userUpdateSource$.subscribe(
      (user)=>{this.load();}
    )
  }

  public load():void{
    this.userService.getUsers().subscribe(
      (users) => {
        this.users = users;
        this.visibleUsers = this.users.slice(0, this.visibleUsersCount);
      }
    );
  }

  private onItemSelect(user: User): void {
    this.router.navigate([`/list/detail/${user.id}`]);
  }

  private updateList($event: IgxScrollEvent): void {
    this.visibleUsers = this.users.slice($event.currentTop, $event.currentTop + this.visibleUsersCount);
  }
}
src/app/app.component.ts
import { Component, ViewChild, ElementRef } from '@angular/core';
import { User } from './models/user';
import { Router } from '@angular/router';
import { IgxNavbar, IgxIcon, NavigationDrawer } from 'igniteui-angular/main';

@Component({
  selector: 'app-root',
  templateUrl: './app.component.html',
  styleUrls: ['./app.component.css']
})

export class AppComponent {

  selectedUser: User;

  title = 'Ignite Ui App';

  constructor(private router: Router) {
  }

  onClickAdd(){
    this.router.navigate(['/list/new']);
  }
}
6. Add router-outlet for list.component.html. Also update css to accomodate the change.
src/app/list/list.component.html
<igx-scroll #scroll (onScroll)="updateList($event)"
    [visibleItemsCount]="visibleUsersCount"
    [itemHeight]="70"
    [totalItemsCount]="users.length">
    <ul class="list">
        <li class="list-item" *ngFor="let user of visibleUsers" (click)="onItemSelect(user)">
            <igx-avatar class="list-item-image" roundShape="true" src="{{user.image}}"></igx-avatar>
            <h5 class="list-item-value">{{user.name}}</h5>
        </li>
    </ul>
</igx-scroll>

<router-outlet></router-outlet>
src/app/list/list.component.css
.list {
    width: 250px;
}

.list-item {
    list-style: none;
    height: 64px;
    display: flex;
    flex-direction: row;
    justify-content: flex-start;
    align-items: center;
}

.list-item-image, .list-item-value {
    flex-grow: 1;
    flex-shrink: 1;
    flex-basis: auto;
}

igx-scroll, router-outlet {
    float: left;
}
7. Lastly, update app routing.
src/app/app-routing.module.ts
import { NgModule } from '@angular/core';
import { Routes, RouterModule } from '@angular/router';
import { ListComponent } from './list/list.component';

const routes: Routes = [
  // Display List by default.
  { path: '', component: ListComponent }
];

@NgModule({
  imports: [RouterModule.forRoot(routes)],
  exports: [RouterModule]
})
export class AppRoutingModule { }
8. Save them all and confirm it works as expected. Well, it took some time to make module but worth doing it :)
Data Grid control
Ignite UI provides Data Grid control, which has many features to handle tabular format of data. Let's try it out.
1. Unlike the list module I just created, I add grid as component this time. Run the following command to generate grid component.
ng generate component grid
2. Add Ignite UI Grid module. It is slightly different than other modules that I need to call .forRoot function. This maybe changed in the future though.
src/app/app.module.ts
import { BrowserModule } from '@angular/platform-browser';
import { BrowserAnimationsModule } from '@angular/platform-browser/animations';
import { NgModule } from '@angular/core';
import { FormsModule } from '@angular/forms';
import { AppRoutingModule } from './app-routing.module';
import { ListModule } from './list/list.module';
import { AppComponent } from './app.component';
import { GridComponent } from './grid/grid.component';
import { UserService } from './user/user.service';
import {
  IgxNavbarModule, IgxIconModule, NavigationDrawerModule,
  IgxGridModule, } from 'igniteui-angular/main';
import "hammerjs";

@NgModule({
  declarations: [
    AppComponent,
    GridComponent
  ],
  imports: [
    BrowserModule,
    BrowserAnimationsModule,
    AppRoutingModule,
    FormsModule,
    ListModule,
    IgxNavbarModule,
    IgxIconModule,
    NavigationDrawerModule,
    IgxGridModule.forRoot(),
  ],
  providers: [UserService],
  bootstrap: [AppComponent]
})
export class AppModule { }
3. Add the grid control to grid component. Firstly, I try [autoGenerate] feature.
src/app/grid/gird.component.html
<igx-grid [data]="users" [autoGenerate]="true" [paging]="true" [perPage]="8">
</igx-grid>
src/app/grid/grid.component.ts
import { Component, OnInit } from '@angular/core';
import { User } from '../models/user';
import { UserService } from '../user/user.service';

@Component({
  selector: 'app-grid',
  templateUrl: './grid.component.html',
  styleUrls: ['./grid.component.css']
})

export class GridComponent implements OnInit {

  private users: User[] = new Array<User>();
  constructor(private userService: UserService) { }

  ngOnInit() {
    this.userService.getUsers().subscribe((users) => this.users = users);
  }
}
4. Add routing so that I can reach out to the grid component.
src/app/app-routing.module.ts
import { NgModule } from '@angular/core';
import { Routes, RouterModule } from '@angular/router';
import { ListComponent } from './list/list.component';
import { GridComponent } from './grid/grid.component';

const routes: Routes = [
  { path: '', component: ListComponent },
  { path: 'grid', component: GridComponent }
];

@NgModule({
  imports: [RouterModule.forRoot(routes)],
  exports: [RouterModule]
})
export class AppRoutingModule { }
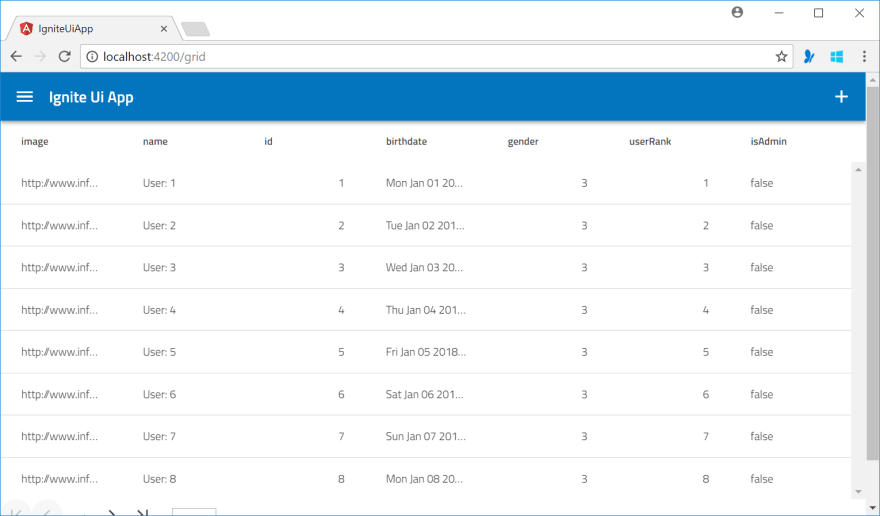
5. Save them all and go to http://localhost:4200/grid. All the fields are automatically added. Nice :)
6. Well, auto generate feature is nice, but I want to control which columns to be
shown. Next, add each individual columns and also use template to display the value by using other controls such as Avatar. Add necessary modules first.
src/app/app.module.ts
import { BrowserModule } from '@angular/platform-browser';
import { BrowserAnimationsModule } from '@angular/platform-browser/animations';
import { NgModule } from '@angular/core';
import { FormsModule } from '@angular/forms';
import { AppRoutingModule } from './app-routing.module';
import { ListModule } from './list/list.module';
import { AppComponent } from './app.component';
import { GridComponent } from './grid/grid.component';
import { UserService } from './user/user.service';
import {
  IgxNavbarModule, IgxIconModule, NavigationDrawerModule,
  IgxGridModule, IgxAvatarModule } from 'igniteui-angular/main';
import "hammerjs";

@NgModule({
  declarations: [
    AppComponent,
    GridComponent
  ],
  imports: [
    BrowserModule,
    BrowserAnimationsModule,
    AppRoutingModule,
    FormsModule,
    ListModule,
    IgxNavbarModule,
    IgxIconModule,
    NavigationDrawerModule,
    IgxGridModule.forRoot(),
    IgxAvatarModule,
  ],
  providers: [UserService],
  bootstrap: [AppComponent]
})
export class AppModule { }
7. Update Grid component. Use igx-column and ng-template to display columns. let-* is ng-template feature to convert property into variable. let-col creates col variable and you can use it to display the actual value.
src/app/grid/grid.component.ts
import { Component, OnInit } from '@angular/core';
import { User } from '../models/user';
import { UserService } from '../user/user.service';
import { IgxIcon, IgxAvatar } from 'igniteui-angular/main';

@Component({
  selector: 'app-grid',
  templateUrl: './grid.component.html',
  styleUrls: ['./grid.component.css']
})

export class GridComponent implements OnInit {

  private users: User[] = new Array<User>();
  constructor(private userService: UserService) { }

  ngOnInit() {
    this.userService.getUsers().subscribe((users) => this.users = users);
  }
}
src/app/grid/grid.component.html
<igx-grid #grid [data]="users" [autoGenerate]="false" [paging]="true" [perPage]="6">
  <igx-column width="80px" field="userRank" header="Rank" dataType="number" sortable="true"></igx-column>
  <igx-column width="120px" field="image">
    <ng-template igxCell let-col>
      <igx-avatar size="medium" roundShape="true" src="{{col}}"></igx-avatar>
    </ng-template>
  </igx-column>
  <igx-column field="name" header="User Name" dataType="string" editable="true"></igx-column>
  <igx-column field="birthdate" header="BirthDate" dataType="Date">
    <ng-template igxCell let-col>
      {{col.toDateString()}}
    </ng-template>
  </igx-column>
  <igx-column width="120px" field="gender" header="Gender" dataType="Gender"></igx-column>
  <igx-column width="120px" field="isAdmin" header="Is Admin" dataType="boolean">
    <ng-template igxCell let-col>
      <igx-icon *ngIf="col" fontSet="material" name="star" color="red"></igx-icon>
      <igx-icon *ngIf="!col" fontSet="material" name="star_border"></igx-icon>
    </ng-template>
  </igx-column>
</igx-grid>
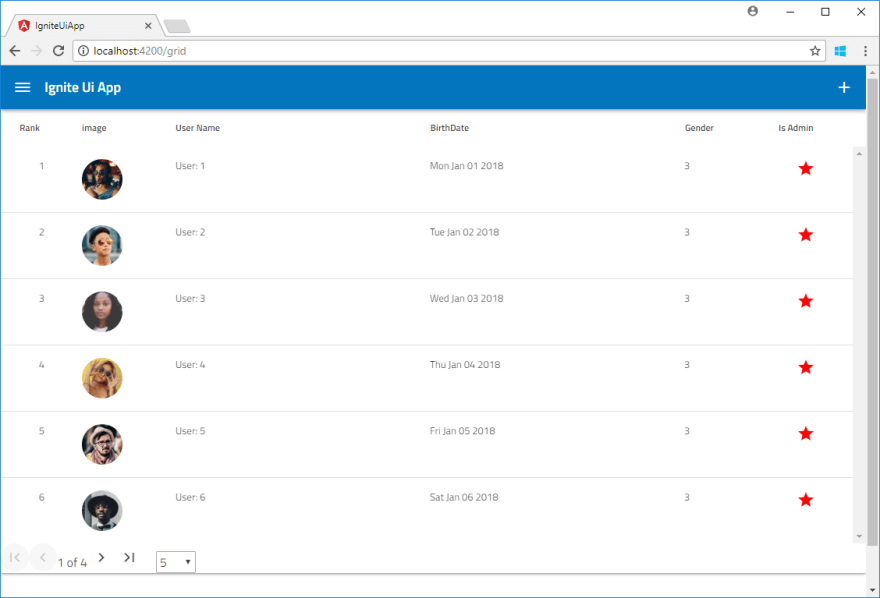
8. Save them all and check if the grid displays data as expected.
9. If you click Rank header, it changes the order as it is specified as sortable. If you double-click the name of each row, you can edit it as it is specified as editable, though I didn't implement any method to accept the change.
Data Grid also provides search feature, but I didn't implement it here.
Create Tile page by using Card
Data Grid shows data in tabular format. If you want data to be displayed as tile format, then you can use Ignite UI Card control.
1. Add component for card.
ng generate component card
2. Then add Ignite UI card module.
src/app/app.module.ts
import { BrowserModule } from '@angular/platform-browser';
import { BrowserAnimationsModule } from '@angular/platform-browser/animations';
import { NgModule } from '@angular/core';
import { FormsModule } from '@angular/forms';
import { AppRoutingModule } from './app-routing.module';
import { ListModule } from './list/list.module';
import { AppComponent } from './app.component';
import { GridComponent } from './grid/grid.component';
import { CardComponent } from './card/card.component';
import { UserService } from './user/user.service';
import {
  IgxNavbarModule, IgxIconModule, NavigationDrawerModule,
  IgxGridModule, IgxAvatarModule, IgxCardModule
} from 'igniteui-angular/main';
import "hammerjs";

@NgModule({
  declarations: [
    AppComponent,
    GridComponent,
    CardComponent
  ],
  imports: [
    BrowserModule,
    BrowserAnimationsModule,
    AppRoutingModule,
    FormsModule,
    ListModule,
    IgxNavbarModule,
    IgxIconModule,
    NavigationDrawerModule,
    IgxGridModule.forRoot(),
    IgxAvatarModule,
    IgxCardModule,
  ],
  providers: [UserService],
  bootstrap: [AppComponent]
})
export class AppModule { }
3. Update routing so that I can access to the card page. I also added explicit route for list page.
src/app/app-routing.module.ts
import { NgModule } from '@angular/core';
import { Routes, RouterModule } from '@angular/router';
import { ListComponent } from './list/list.component';
import { GridComponent } from './grid/grid.component';
import { CardComponent } from './card/card.component';

const routes: Routes = [
  { path: '', component: ListComponent },
  { path: 'list', component: ListComponent },
  { path: 'grid', component: GridComponent },
  { path: 'card', component: CardComponent }
];

@NgModule({
  imports: [RouterModule.forRoot(routes)],
  exports: [RouterModule]
})
export class AppRoutingModule { }
4. Then expand the user model so that it has property to store background image url. Also update the user service to store image url for each user. I borrow the image url from Infragistics demo page, again :D
src/modes/user.ts
export class User {
    public image: string
    public name: string
    public id: number
    public birthdate: Date
    public gender: Gender
    public userRank: number
    public isAdmin: boolean
    public backgroundImage: string

    constructor(image: string, name: string, id: number, birthdate: Date,
    gender: Gender, userRank: number, isAdmin: boolean, backgroundImage: string ) {
        this.image = image;
        this.name = name;
        this.id = id;
        this.birthdate = birthdate;
        this.gender = gender;
        this.userRank = userRank;
        this.isAdmin = isAdmin;
        this.backgroundImage = backgroundImage;
    }
}

export enum Gender {
    Male = 1,
    Female,
    Other,
}
src/user/user.service.ts
import { Injectable } from '@angular/core';
import { Observable } from 'rxjs/Observable';
import { of } from 'rxjs/observable/of';
import { User, Gender } from '../models/user'
import { Subject } from 'rxjs/Subject';

@Injectable()
export class UserService {

  private users: Array<User>;
  private userUpdate = new Subject<string>()
  public userUpdateSource$ = this.userUpdate.asObservable();

  constructor() {
    this.users = new Array<User>();
    for (let i = 1; i <= 22; i++) {
      let birthdate = new Date(2018, 0, i);
      let backgrounImage = "http://www.infragistics.com/angular-demos/assets/images/card/media/ny.jpg";
      if( i % 4 == 1){
        backgrounImage = "http://www.infragistics.com/angular-demos/assets/images/card/media/yosemite.jpg";
      }
      else if (i%4 == 2){
        backgrounImage = "http://www.infragistics.com/angular-demos/assets/images/card/media/monuments.jpg";
      }
      else if (i%4 == 3){
        backgrounImage = "http://www.infragistics.com/angular-demos/assets/images/card/media/the_red_ice_forest.jpg";
      }
      this.users.push(new User(
        `http://www.infragistics.com/angular-demos/assets/images/avatar/${i}.jpg`,
        "User: " + i,
        i,
        birthdate,
        Gender.Other,
        i,
        true,
        backgrounImage
      ));
    }
  }

  getUsers(): Observable<User[]> {
    return of(this.users)
  }

  getUser(id: number): Observable<User> {
    return of(this.users.find(x => x.id === +id));
  }

  add(user: User): Observable<boolean> {
    this.users.push(user);
    this.userUpdate.next("updated");
    return of(true);
  }

  save(user: User): Observable<boolean> {
    let index = this.users.indexOf(user);
    if (index !== -1) {
      this.users[index] = user;
      return of(true);
    }
    else {
      return of(false);
    }
  }

  delete(user: User): Observable<boolean> {
    let index = this.users.indexOf(user);
    if (index !== -1) {
      this.users.splice(index, 1);
      this.userUpdate.next("updated");
      return of(true);
    }
    else {
      return of(false);
    }
  }
}
5. Update card component to display card control. I also update css to change how
it looks.
src/app/card/card.component.ts
import { Component, OnInit } from '@angular/core';
import { User } from '../models/user';
import { UserService } from '../user/user.service';
import { IgxAvatar } from 'igniteui-angular/main';
@Component({
  selector: 'app-card',
  templateUrl: './card.component.html',
  styleUrls: ['./card.component.css']
})
export class CardComponent implements OnInit {

  private users: User[] = new Array<User>();
  constructor(private userService: UserService) { }

  ngOnInit() {
    this.userService.getUsers().subscribe((users) => this.users = users);
  }
  private openUrl(url: string): void {
    window.location.href = url;
  }
}
src/app/card/card.component.html
<div class="card">
  <div class="card-item" *ngFor="let user of users">
    <igx-card>
      <div style="overflow: hidden">
        <img width="100%" height="100%" src="{{user.backgroundImage}}">
      </div>
      <igx-card-header>
        <igx-avatar class="list-item-image" roundShape="true" src="{{user.image}}"></igx-avatar>
        <h2 class="list-item-value">{{user.name}}</h2>
      </igx-card-header>
      <igx-card-content>
        Rank:{{user.userRank}}
        <br/> Birthday: {{user.birthdate.toDateString()}}

      </igx-card-content>
      <igx-card-actions>
        <button igxButton igxRipple>Like</button>
        <button igxButton igxRipple>Share</button>
      </igx-card-actions>
    </igx-card>
  </div>
</div>
src/app/card/card.component.css
.card {
    display: flex;
    flex-flow: row wrap;
}

.card-item{
    max-width:400px;
    padding:10px;
}

igx-card-header {
    background: #f8f8ff;
}

igx-card-content {
    background: gray;
    color:white;
}
6. Lastly, update the menu to have card link. I also updated it so that it closes when clicking menu item.
src/app/app.component.html
<igx-navbar [title]="title" actionButtonIcon="menu" (onAction)="drawer.toggle()">
  <igx-icon name="add" (click)="onClickAdd()"></igx-icon>
</igx-navbar>
<igx-nav-drawer #drawer [pinThreshold]="false" width="280px">
  <div class="ig-drawer-content">
    <nav class="nav">
      <span class="nav-item header">menus</span>
      <span class="nav-item" [routerLinkActive]="'active'" routerLink="list" (click)="drawer.close();">
        <igx-icon fontSet="material" name="list"></igx-icon>
        <span>List</span>
      </span>
      <span class="nav-item" [routerLinkActive]="'active'" routerLink="grid" (click)="drawer.close();">
        <igx-icon fontSet="material" name="grid_on"></igx-icon>
        <span>Grid</span>
      </span>
      <span class="nav-item" [routerLinkActive]="'active'" routerLink="card" (click)="drawer.close();">
        <igx-icon fontSet="material" name="view_module"></igx-icon>
        <span>Card</span>
      </span>
    </nav>
  </div>
</igx-nav-drawer>

<router-outlet></router-outlet>
7. Save them all and go to http://localhost:4200/card, or use menu to access Card page.
View the application via mobile device
Ignite UI controls are responsive enough so that the application can be consumed nicely via smaller screen size. There are controls suit for mobile such as Tab Bar, too.
If I develop native applications, I may use Ignite UI with Ionic, but I will try this sometime later.
Summary
So far, I like Ignite UI a lot. Infragistics also offers UI component for JavaScript, Xamarin, MVC, WPF, iOS, Android, etc. I will try them to see how I can re-use my skill in different platform.
Reference
Infragistics Ultimate: Overview of all toolkit
Infragistics Events in Japan
Infragistics Events


Top comments (0)