Hello, how are you doing? Today, I am going to teach us how to do user authentication in Laravel 8. As you all know, the Laravel team released the latest version last week which is Laravel 8, and as expected, there is some difference between the previous Laravel 7 and this present version. Some of the difference is highlighted in my previous post on how to create a CRUD application with, Laravel 8, it is a step by step guide in creating a CRUD Project Management app.
Previously, in Laravel 7 and Laravel 6 in other to do user authentication, we use an artisan command composer require laravel/ui while from Laravel 5.9 downwards uses php artisan make:auth
In Laravel 8, there is a major change in that area in the sense that many things are introduced and a lot of configurations have been done to get you started and not minding the boilerplate of your application, one of those changes is the introduction of Jetstream, Laravel Jetstream is a beautifully designed application scaffolding for Laravel. A major shift from the legacy authentication UI of Laravel.
Click on my profile to follow me to get more updates.
Without saying much, let’s dive into the new features of Laravel 8.
Step 1: Install a new Laravel app
composer create-project laravel/laravel projectapp --prefer-dist
The command above only install Laravel, however, if you want to install Jetstream together then either
Laravel new projectapp --jet
or
composer require laravel/jetstream
we are going with the first of only installing Laravel, I want to explain other things in the process.
I highlighted some changes noticed in the installation of Laravel 8 from the previous Laravel versions, you can check them out in my previous post Laravel 8 CRUD.
Step 2: Database Setup
Open the .env file on your IDE or text editor
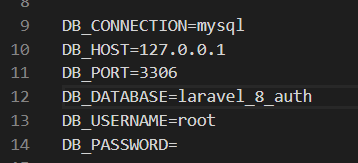
Change the DB_DATABASE to the name of your database and if you have set a Username and password for your phpmyadmin, specify it, otherwise, leave the username as root and password blank.
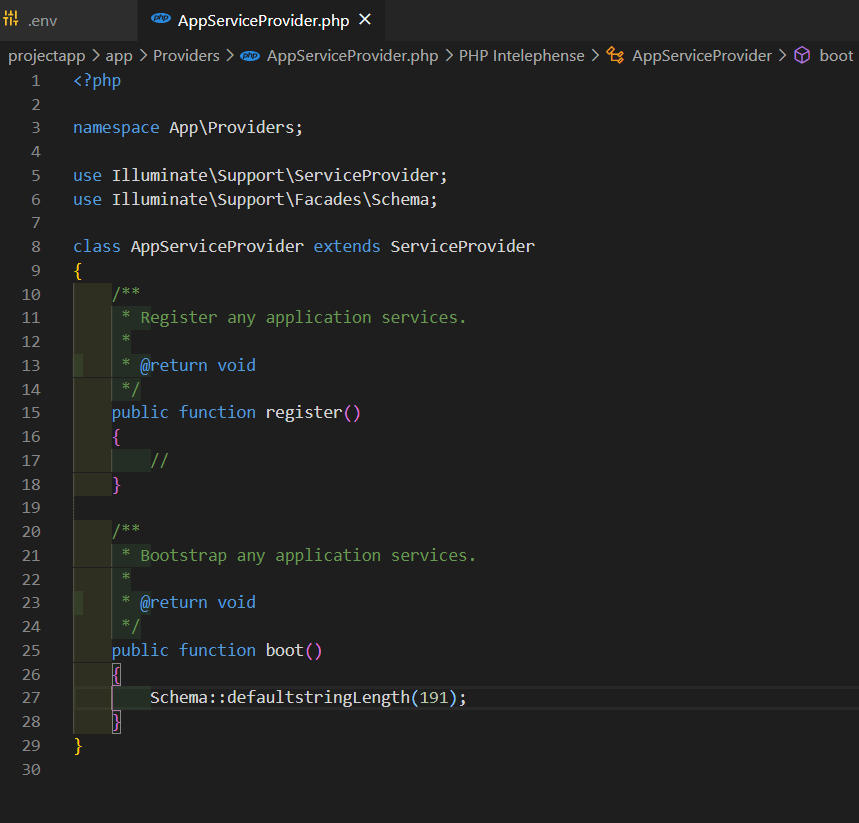
Before we migrate, let’s catch one bug before it throws an error, go to App/Providers/AppServiceProvider.php
and add
Schema::defaultstringLength(191);
to the boot function, also add
use Illuminate\Support\Facades\Schema;
Step 3: Migration
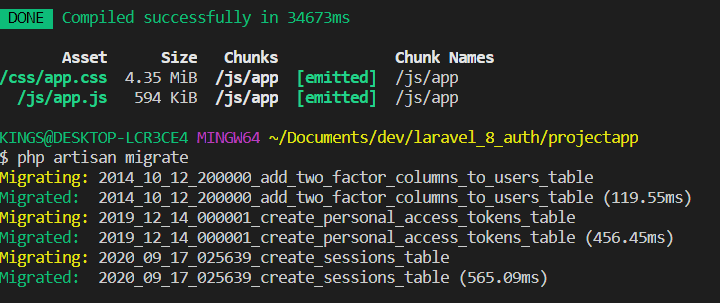
php artisan migrate
Step 4: install Jetstream
composer require laravel/jetstream
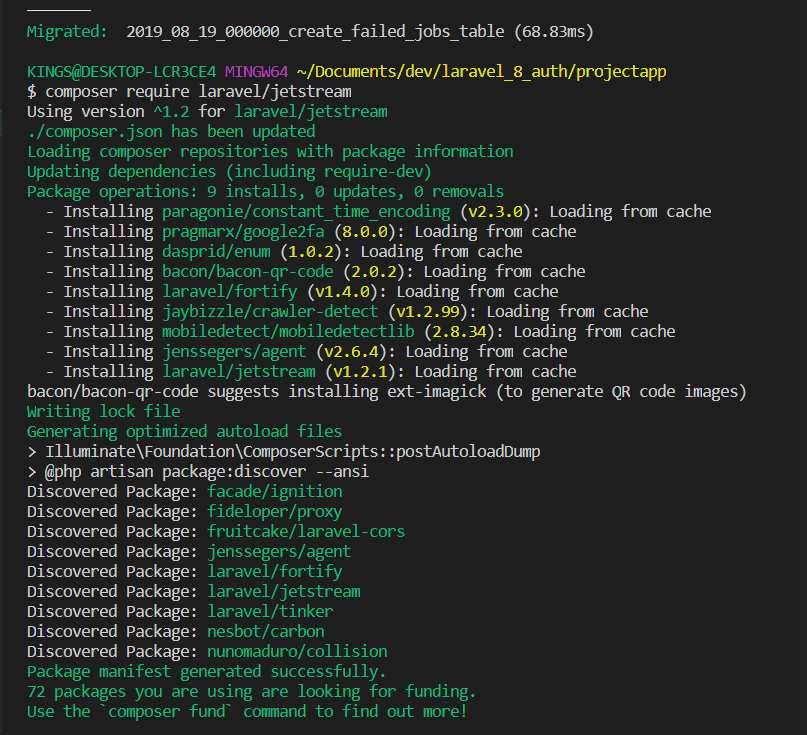
Laravel advises that Jetstream and its stacks (livewire or inertia) should be done on a fresh application because it will install a layout view, registration, and login views, as well as routes for all authentication end-points. A dashboard route will also be generated for post-login requests. So an application that has some of those, might throw some conflicts.
Step 5: Install livewire or inertia
We need to install one of the stacks, either a livewire or an inertia stack, in this tutorial, I will only be using livewire because it set up everything I need for the app
php artisan jetstream:install livewire
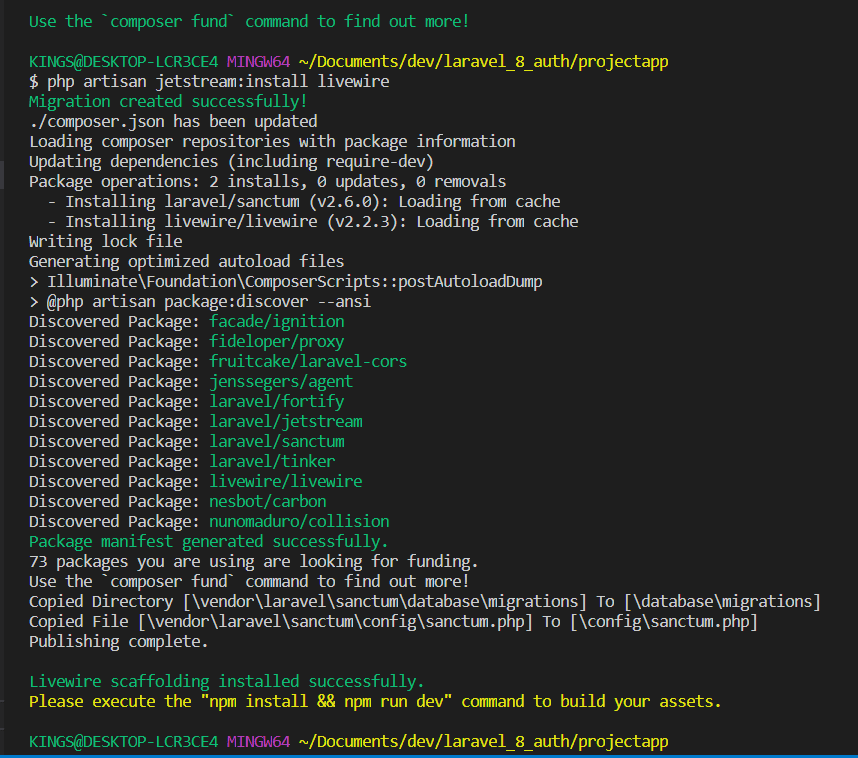
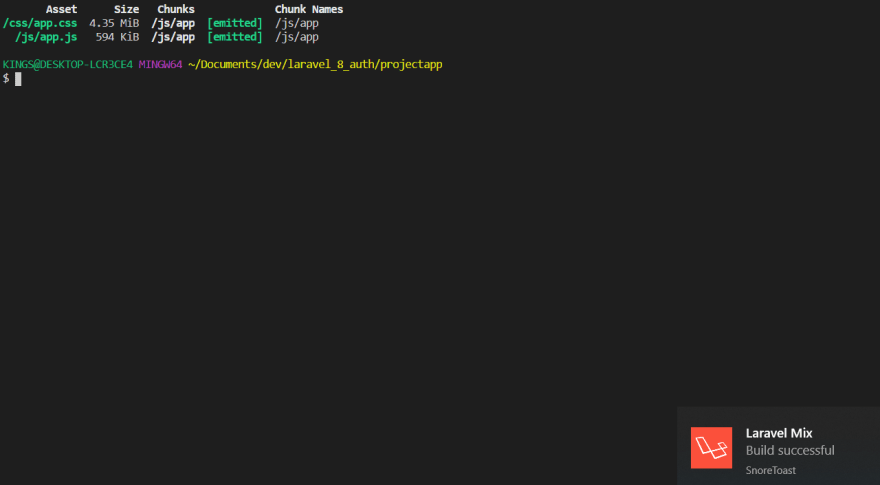
As suggested, run npm install && npm run dev to build all the javaScript files and CSS we need for our app. On successful build, Laravel will send a notification at the bottom left.
Step 5: Migrate the new table that is created
php artisan migrate
php artisan serve

Holding down the Ctrl button and Clicking the localhost http://127.0.0.1:8000/ will serve our app in our default browser

Then click on register by the top-right to register an account,

will give us this page, filling your name, email address and password and submitting will take us to the our dashboard

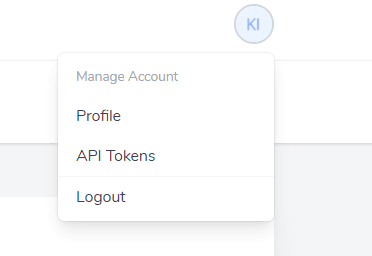
Clicking on the image by the top-right, pulls down a tray that contains our profile, link to logout, and API tokens,
Clicking on the logout, will log you out of the app and return the page to the localhost http://127.0.0.1:8000/ , where we have the options of either to login or register another account,
Let's login back

Login will take us to the dashboard, pulling down the image at the top-right and clicking on Profile, will give us options to do the following
- Add a profile picture (max: 1024KB)
- Edit our name
- Edit our email address
- Change our password
- Enable two-factor Authentication
- Browse sessions
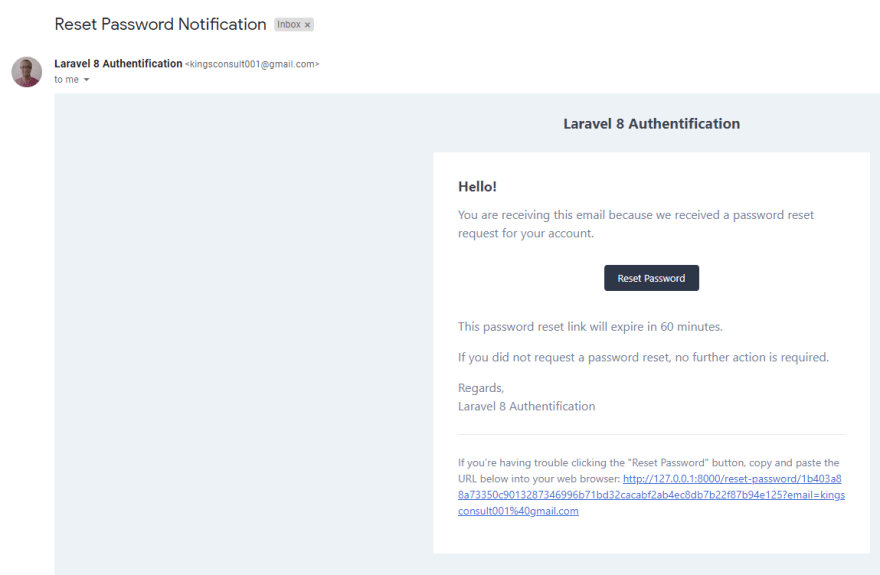
- Delete account With this, we have our authentication setup, A user can receive email notification in the case where the user forgets his/her password, an email to reset the password within 60 minutes of request,
But before requesting, lets setup our mail comfig
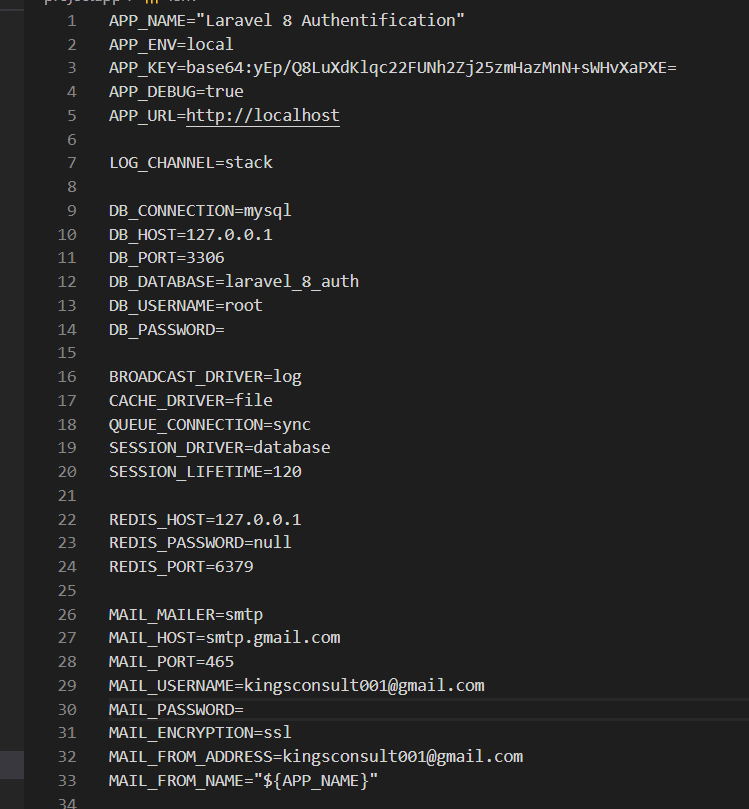
Check my mail settings in line 26 to 33, also checkout line 1 for my app name, then click on email password reset link

then check your mail
Finally, we are done, hope this explains it very well, in case you miss anything or you did not follow all through, here is the code on my Github
You can leave a comment, suggestion for improvement or corrections, don’t forget to follow me.




Latest comments (58)
How to customize the dashboard with your own styling ?
i am getting the error in command prompt when i run npm install command error is "'npm' is not recognized as an internal or external command,
operable program or batch file"
even I have installed node.js in my system. please help me sir
sorry i solved this issue but in my application there is no image upload and other options
Greate!
It works!
thanks alot
Change our password and Enable two-factor Authentication
is not working without php artisan serve
Hello Mr Kingsley. Thanks so much i was really helped by this guide. I just have a question i followed through your steps but had a different output when i ran "npm install && npm run dev" does this mean the build was not done properly? i uploaded a screenshot of the output. Thanks again
When trying to reset password, google is blocking access to the emails. so no email is sent. Is there a way around this. This is the error:
Failed to authenticate on SMTP server with username "afafnoreply@gmail.com" using 3 possible authenticators. Authenticator LOGIN returned Expected response code 235 but got code "535", with message "535-5.7.8 Username and Password not accepted. Learn more at 535 5.7.8 support.google.com/mail/?p=BadCred... w25sm13431323wmc.42 - gsmtp ". Authenticator PLAIN returned Expected response code 235 but got code "535", with message "535-5.7.8 Username and Password not accepted. Learn more at 535 5.7.8 support.google.com/mail/?p=BadCred... w25sm13431323wmc.42 - gsmtp ". Authenticator XOAUTH2 returned Expected response code 250 but got code "535", with message "535-5.7.8 Username and Password not accepted. Learn more at 535 5.7.8
support.google.com/mail/?p=BadCred... w25sm13431323wmc.42 - gsmtp
hi, did you get a solution for this
Exception
The Mix manifest does not exist. (View: C:\xampp\htdocs\loginapp\resources\views\layouts\guest.blade.php)
I can't run (npm install && npm run dev) it gives me an error
At line:1 char:13
I have not seen this type of error before, try running them one after the other, that is running the commands separately
npm install
and
npm run dev
Got it! I thought I was going to run both commands at the same time LOL my bad thaaank you kingsley!
Dude, finally. Thank you so much, I always got stuck in error after error with jetstream.
Nice Tutorial. I am trying to authenticate admin and users with the same login page and redirect to the admin or user landing page. How do I achieve this using Laravel 8 jetstream authentication?
Hi dear, many thanks for you nice teach...
when I register a user and log out that , I can't login again , why?
Thank you for the encouragement.
Check how you store (register) the password and also how you want to retrieve (login) the password, did you hash it the same way?
That might be a cause
Thanks for your post. I would love to have actual code snippets instead of pictures of code next time. That would be awesome.
I've followed all steps and ended up with something very different. The compiled Laravel app only comes with a
Profilesection, noAPI Tokenssection. Also, there is no way for me to upload a profile picture. Could you link a GitHub repo with your code so we can reproduce exactly what you did in your tutorial with the correct dependencies?Also, please update the guide by either saying explicitly which dependency versions you used or by updating to the current state of affairs. Cheers.
Thank you Zenahr for your feedback, maybe you miss it, the repository for the code is in the write-up. However, in case you miss it, this is it github.com/Kingsconsult/laravel_8_..., I used Laravel 8.0, livewire 2.0, Jetstream 1.2.
If you still needs clarification, you are free to reach out, thanks
Hi. A really nice post, thank you. I have a question: how can I customize profile adding billing and shipping addresses, for example? It's not just about customizing views but even the controllers. I could't find the Jetstream controllers nor a way to customize registration and/or profile as I told so I gave up and came back to the old Auth system which fortunately still works. But I'd like to know if there is a way to do what I said: maybe an idea for a future post? 😏
this video can help
youtube.com/watch?v=O36PNJr8UJg
Thank you for this, I will try to write about how to customize the Jetstream, follow on dev.to/kingsconsult , so you will not miss it out, but for the time being, the controllers for Jetstream can be found in app/Actions/ ,
I forgot to reply, have written the material long ago, Customize Laravel Jetstream (Registration and Login)
Thank you so much. I'll follow you for sure
Some comments may only be visible to logged-in visitors. Sign in to view all comments.