In the previous post I went through adding a Cloudflare worker via the Cloudflare console. This is a great way to get started by we want to scale it up to something that can be a bit more repeatable. For this we need to move to a config as code style solution.
In this post I'll go through deploying the same worker code first from my local machine. Once that's working I'll move on to a what I really want, Continuous Integration and Continuous Deployment via Github Actions.
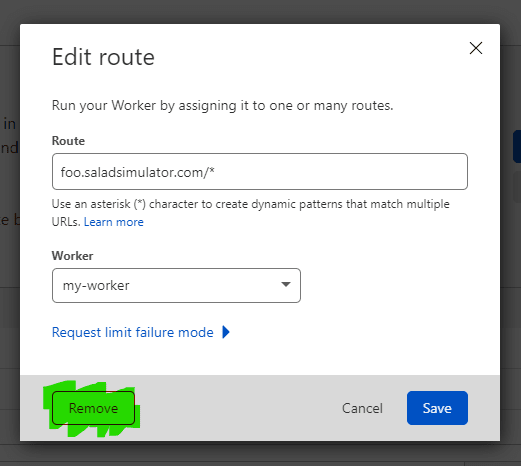
The first thing to do is to make sure Cloudflare is in a clean state after what I did in the previous post. This means I can avoid issues with overwriting existing rules.
Cloudflare provides a great tool [wrangler](https://www.npmjs.com/package/@cloudflare/wrangler) to help with managing workers using a config as code approach. This is installed as a global npm module.
Start by installing wrangler globally:
npm i @cloudflare/wrangler -g
Generate a project
Once wrangler is installed it can be used to scaffold out a sample project by running:
npx @cloudflare/wrangler generate deploy-sample [https://github.com/cloudflare/worker-template](https://github.com/cloudflare/worker-template)
There are a range of sample projects available at https://developers.cloudflare.com/workers/examples for when you want to try your hand at something more complex than this example.
Adding the code
The template comes with some sample code in the index.js file. I'm going to copy in the sample code I used in the previous post. That code can be found in this Github Gist.
Configure wrangler
Before wrangler can interact with https://saladsimulator.com on my behalf I need to provide some configuration so that it knows what it's meant to be working against. This configuration is almost entirely in the wrangler.toml file. The API Key is stored elsewhere, I'll cover that in a bit.
The generated config file will look like this:
name = "helloworld"
type = "javascript"

account_id = ""
zone_id = ""

route = ""
I've renamed mine to foo-stage-auth and left the type as javascript.
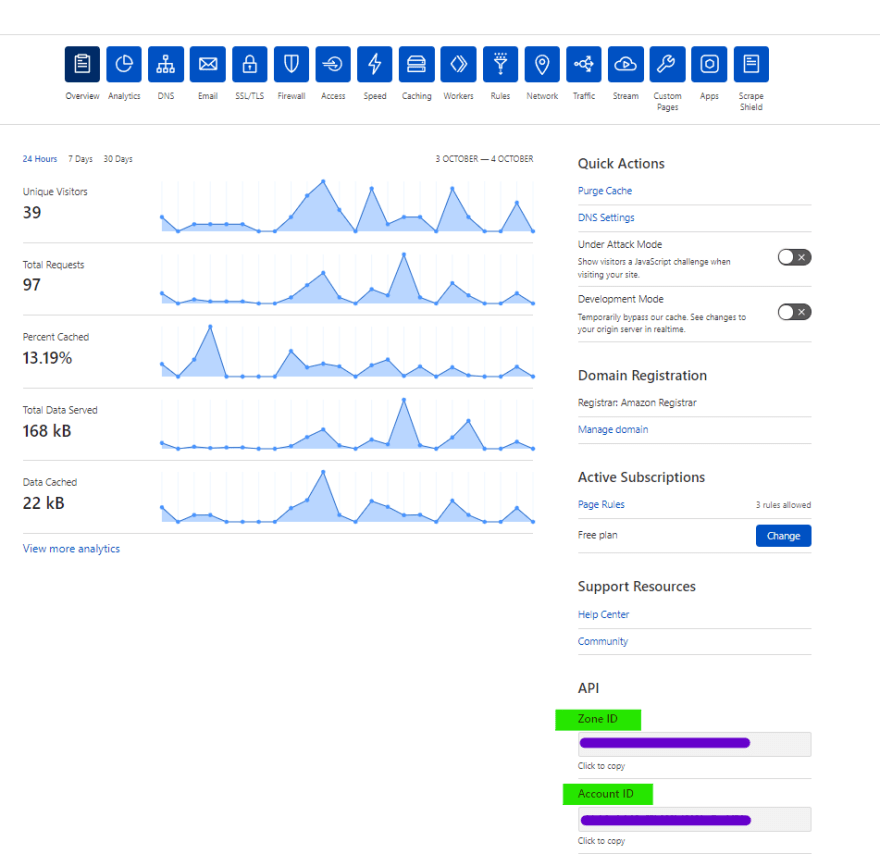
The account_id and zone_id need to be retrieved from the Cloudflare console. They can be found on the right hand side of the account overview page, towards the bottom.
The route is where you want this worker to run on your site. For my case I've set it to "foo.saladsimulator.com/*". Now my config looks like this:
name = "foo-stage-auth"
type = "javascript"

zone_id = "not really a secret but still obsfucated"
account_id = "not a secret but sill obsfucated"
route = "foo.saladsimulator.com/*"
Authorising the local machine
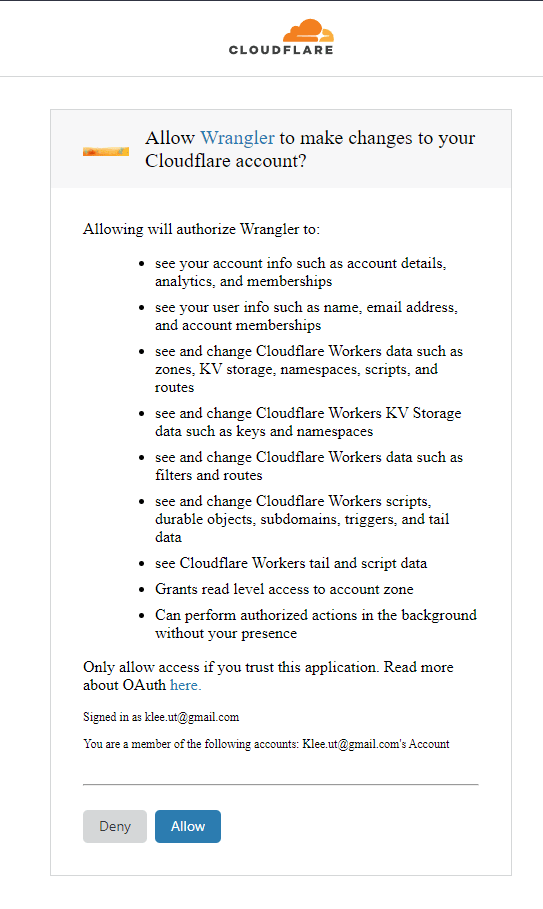
The command to set up authorisation for wrangler is wrangler login. It will open a browser and ask you to authorise wrangler to act on your behalf. If it's unable to open a browser it will give you a link you can go to instead. The output will look like this:
$ wrangler login
Allow Wrangler to open a page in your browser? [y/n]
y
💁  Opened a link in your default browser: https://dash.cloudflare.com/oauth2/auth?response_type=code&client_id=0000000-0000-0000-0000-0000000000&state=RjWxeAjyeX1alZ7bE2JSHA&code_challenge=000000000000000000000_000000000000000000000&code_challenge_method=S256&redirect_uri=http%3A%2F%2Flocalhost%3A8976%2Foauth%2Fcallback&scope=account%3Aread+user%3Aread+workers%3Awrite+workers_kv%3Awrite+workers_routes%3Awrite+workers_scripts%3Awrite+workers_tail%3Aread+zone%3Aread+offline_access
The request window will look like this

Deploying from the local machine
With the local wrangler instance now the worker can be deployed. The command to deploy is: wrangler publish. The output will look like this:
> wrangler publish

✨  No build command specified, skipping build.
✨  Successfully published your script to
 foo.saladsimulator.com/* => created
 https://foo-stage-auth.kleeut.workers.dev
With this the worker is deployed and it can be seen in the Cloudflare console.

Using config as code is a big step up from deploying through the console, but it's not really good enough. In the next post I'll go through moving from deploying manually from one machine to deploying via continuous deployment with Github actions.
The code for this can be found on Github at this tag

Top comments (0)