
The Gist
If you've ever taken a second to visit the React website, you've read their tagline...
A JavaScript library for building user interfaces
UI & state management are the main problems that React seeks to solve for front-end developers. This is the purpose of react.
When interviewing for a front-end role or brushing up on concepts, we often scramble and open up over 100 tabs on our browser. I wanted to coalesce the main points that you would want to cover when talking about React to your peers.
The following overview seeks to cover React's main concepts, which are important to understand in order to work efficiently.
This is admittedly a long post, BUT it's meant to be more of a reference to get the most out of your reading time. I hope you enjoy it.
Let's dive in! 🏊🏽♂️
When building a JavaScript application, we expect to be working with data.
Data in JS is usually built of primitive values, which include:
- numbers
- strings
- boolean
- null
- undefined
- bigint
- symbols
As developer's we use these values at the lowest level of our app. These primitive values in JS are immutable, meaning they can't be changed. The variables holding them on the other hand can be reassigned new values.
What does this mean to us as engineers, and foremost, as curious lovers of all things web?
🤔
We need a way to manage our application's data, information that we gather and give to users, in a way that gives us the least amount of headache. As an engineer you are constantly weighing the pros and cons of solutions, do their efficiencies outweigh the readability and easy of use? You'll find that the answer to that question is constantly in flux.
For the following explanations, I'll be moving in the same order that React's own developers laid out concepts, with additional examples and break downs(🤘🏽) along the way.

Main Concepts
- JSX
- Rendering Elements
- Components & Props
- State & Lifecycle methods
- Handling Events
- Conditional Rendering
- Lists & Keys
- Forms
- Lifting State Up
- Composition VS Inheritance
1.J-ava-S-cript-X-ml
We should always strive to understand the basics. Though I personally understand most of the JavaScript aspect of JSX, I haven't particularly had to interact with XML too much. So my interest is peaked, what is XML?
XML stands for Extensible Markup Language. And if you're thinking to yourself, "Kurt, X-M-L sounds a lot like H-T-M-L", well you're onto something. They're closely related!
The "extensible" piece is due to XML allowing you, as the developer, to define your own tags that can fit your own very specific needs.
This aspect is super empowering and the developer's at Facebook who built React realized this as well.
Okay, that was a lot of words but you're more of a visual learner. Let's look at some JSX code! 🔥⋔

What are we looking at above?
Here we have what's known as a functional component, or "dumby component" due to it being best practice not to include much logic in these components.
All we have is an anonymous arrow function assigned to our constant App, which is then exported as a module by our export default App statement.
We'll get further into the App.js file in React, but for now understand that it's responsible for being the main source of truth along with our Index.js file that' located at the top level of our application's directory.
Within our anonymous arrow function, we're returning a div element. Okay, so far so good, we've all handled div's before. But what's inside of our div?
<PostList /> 👀
At the top of our app file, we're importing PostList from a PostList.js file, where our component lives. Thanks to the power of ES6 JS, we're able to use module imports to bring in the functionality we defined somewhere else. P Cool!
To gain a more thorough mental image, let's look at the logic that we've abstracted away.
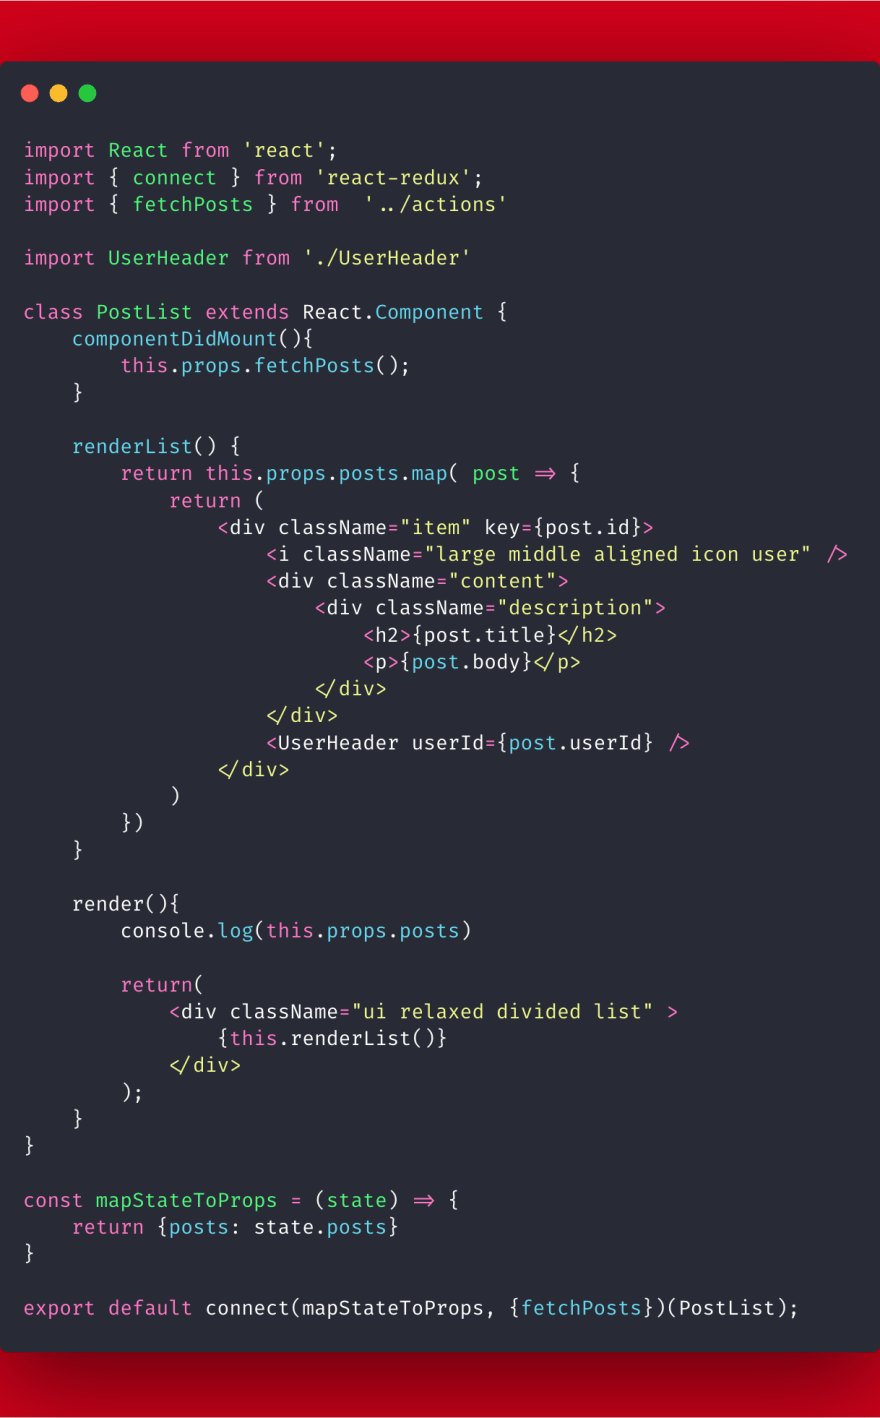
That's 44 lines of code we've abstracted away! Which makes it a lot easier to focus on the important things when working through our applications.
JSX permits us to use XML-like tags, <OurUniqueTag/>, to build the components and elements we use in React.
Wait a second, it seems we haven't gone over components or elements yet.
Let's start with elements, since components are built with elements!
2. const element = Rendering Elements
Similar to how primitive values are at the lowest level of the JavaScript language, "elements are the smallest building blocks of React apps."

Why did I suddenly starting talking about DOM? Building blocks, it's alllll about building blocks.
DOM stands for "DocumentObjectModel", and like a graphical user interface, it's a programing interface for HTML and XML.
It isn't the web page, but instead it's a representation of it, to allow you to magically wave your developer wand 🧙🏽♂️ and change document structure, style, and content.
The data structs that the DOM uses to allow programming languages to connect to the page, are nodes and objects.
import ReactDOM from 'react-dom'
ReactDOM.render(
        <App/>,
    document.querySelector('#root')
)
If you've developed with react you've had to wrap your <App /> with ReactDOM's render method.
To show our users of the web cool sites that do something, we have to constantly be updating our DOM. These dynamic updates can have their own buggy behavior though.
On an update, your browser has to refresh CSS, refresh the DOM node tree and ultimately refreshes the screen that's being displayed. Before React, we'd write a lot of JavaScript code to do this heavy lifting, and if you weren't too careful, it'd start to get noticeable.

Our JSX elements represent DOM elements, and upon being rendered by ReactDOM.render(), are parsed into those elements on a webpage.
When React is initially rendering elements, it also is building a 'tree' that represents the DOM, or current tree.
Reconciliation is actually an advanced React concept we've managed to stick in here. You can find more in React's docs, though we'll talk about it a bit here.
When diffing two trees, React first compares the two root elements. The behavior is different depending on the types of the root elements.
As updates are made that tell React to re-render, or refresh, a second workInProgress tree is created, to represent what the DOM will be. After processing the workInProgress updates for the DOM, the currentTree will reconcile any differences.
And here is the advantage to using React, performance optimization.
The performance of your app on the web is optimized by two key aspects of this process
- Grouping DOM Updates
- React waits until all updates are processed before placing them in the workInProgress tree.
- Selective Updates
- React has the ability to apply a diffing algorithm to rapidly select what data needs updating.
Now, let's pivot back over to components 🏃🏽♂️
3. Components & Props
In our above code snippet, was a component that we imported, composed of JSX elements.
We saw the 44 lines of code that were able to be abstracted away from our App file. Components like this allow us to split up the user interface in reusable building blocks.
"Conceptually, components are like JavaScript functions. They accept arbitrary inputs (called “props”) and return React elements describing what should appear on the screen." -React Docs
const Comment = (props) =>  {
  return (
    <div className="Comment">
      <UserInfo user={props.author} />
      <div className="Comment-text">
        {props.text}
      </div>
      <div className="Comment-date">
        {formatDate(props.date)}
      </div>
    </div>
  );
}
In this component, we're passing props as an argument to our array function.
Props, or properties, are data objects that traverse the React node tree, in order to provide components with the information they need to repaint the browser DOM.
But where do these props come from? To understand that, we should take a minute to look at state.
4. State and Lifecycle
In our React applications, we will often set initial state in an object.
// PREFERRED & COMMON WAY
state = {
  isClicked: true,
  initialGreeting: "hello, there!"
}

//OR BUILT WITH A CONSTRUCTOR

constructor(props){
  super(props)
  this.state = {
    isClicked: true,
    initialGreeting: "hello, there!"
  }
}
Your state should be sitting within a class component, which typically looks like the code below.
Below is an example of a class react component instance. The difference between a class component and a functional, component which is at it's core purely an arrow function, is that a React Class component comes prepackaged with lifecycle methods.
class Clock extends React.Component {
  render() {
    return (
      <div>
        // Here's some text!
      </div>
    );
  }
}
This is also the reason why developers may choose to call class components, "smart components" and functional components, "dumb components". Our class component is where we will attempt to relay all of our logic, and functional components are more so containers or used for simple building blocks.
But what are lifecycle methods?
When React starts it's work, the first thing it's going to look at is your component's state, when your component is a class component. React won't use up resources looking at dumby components.

You can give your state default values to start the app with, as we've already seen in our examples, or pass in props if you'd like. The preferred approach is to use a simple state object, over using a constructor. Though constructor's can come in handy when creating refs or method binding. But that's a different conversation.
Let's list our the lifecycle methods currently available to us with some brief descriptors.
-
componentDidMount()- after initial render, method is called
- used to load/set data
- makes sure that before we send of an AJAX request, there's actually a component for it to be rendered on
-
shouldComponentUpdate(nextProps, nextState)- only update a component IF the props it needs change
- issues: will not allow your component to update regularly
-
componentDidUpdate(prevProps, prevState, snapshot)- this allows us to work with committed changes to the current DOM tree we reviewed earlier when looking at the DOM
-
componentWillUnmount- according to React docs: "it’s very important to free up resources taken by the components when they are destroyed."
- this method is mostly used for cleaning out leftover behavior that's consuming vital app resources
Oof, that was a lot, and there are other helpful ones like getSnapshotBeforeUpdate, getDerivedStateFromError, componentDidCatch, and getDerivedStateFromProps that you should take some time to look at. But the methods mentioned in our list are the main ones you'll be needed to build a nice application.
Main take away is that these lifecycle methods allow us to update out apps data, or state.
The 3 Main Rules of State
- Do not modify state directly
- this.state.comment = "nopity-nope nope"
- this.setState({words: "better!"})
- State updates can be Asynchronous
- remember to use a form of setState that accepts a function, over an object.
- this.setState((state, props) => ({words: state.words}))
- can also be a regular function
- State Updates are Merged
- your updated state is merged into the current node tree, and then you can setState({}) in as many locations and as many times as you'd like.
Remember: in React, data flows downwards. Think of waterfalls, made up state in parent components that is channeled downwards to their children by props.
5. Handling 🖐🏽 Events
Describing Event Handlers
The nice thing about this section is that there's not a lot of brain stretching needed. Events in react are for the most part handled similarly to regular JS events.
Mainly we should consider the syntactic sugar used to describe our React events. The main thing to remember is that they're camelCased.
- Regular JS event
<button onclick="rainDownMoney()">
- React Event Handler
<button onClick={this.raindDownMoney}>
Synthetic Events
"Your event handlers will be passed instances of SyntheticEvent, a cross-browser wrapper around the browser’s native event. It has the same interface as the browser’s native event, including stopPropagation() and preventDefault(), except the events work identically across all browsers" - React Docs
Event Pooling
- Key Note: you can't access Synthetic events in an async fashion
- due to Event Pooling
- this means that your SyntheticEvent object is reused in order to improve performance.
- the properties attached to your synthetic event become null after your callback function is triggered.
event.persist()- will allow you access to event props in an async way.
Binding JS's THIS in React
In JavaScript, class methods aren't bound to their THIS value. Now, whole days are spent at bootcamps reviewing and drilling down this concept. But let's take a crack at a quick overview.
From MDN on Function.prototype.bind():
The simplest use of bind() is to make a function that, no matter how it is called, is called with a particular this value. A common mistake for new JavaScript programmers is to extract a method from an object, then to later call that function and expect it to use the original object as its this (e.g. by using that method in callback-based code). Without special care, however, the original object is usually lost. Creating a bound function from the function, using the original object, neatly solves this problem:

The above example is from MDN, what we should take away from this is that the global "window" object & scope come into play here.
Our function retrieveX() is being invoked in the global scope, and this deriving it's value for module.getX from this.x = 9 that was defined at the top of the file. Instead of the x inside of our module object.
Solution: retrieveX.bind(module)
Binding this allows us to fix the THIS values to the ones we want.
This is determined by how functions are called during the runtime binding or association of our variables, functions and data. This will always default to the global object, or window in a browser. Which trust me, if you forget to bind, will clearly be seen as an error in the console.
Two ways to bind this
- Public Class Fields syntax (experimental)
class LoggingButton extends React.Component {
handleClick.
  // EXPERIMENTAL
  handleClick = () => {
    console.log('this is:', this);
  }

  render() {
    return (
      <button onClick={this.handleClick}>
        Click me
      </button>
    );
  }
}
- Arrow Functions!
class LoggingButton extends React.Component {
  handleClick() {
    console.log('this is:', this);
  }

  render() {
    return (
      <button onClick={(e) => this.handleClick(e)}>
        Click me
      </button>
    );
  }
}
Events and the binding of this can lead to most of your bugs when you're starting out with React, and even later down the line if you forget to bind. I've mixed up my arrow functions with my public class field syntax before, so best to pick one and stick to it through your app.
6. ✅ Conditional Rendering ❌
Remember how using components allowed us to have less code cluttering up our files? Conditional rendering, or displaying elements based on the state/props of your app, allows us to write less code and make it more clear.
class LoginControl extends React.Component {
  constructor(props) {
    super(props);
    this.handleLoginClick = this.handleLoginClick.bind(this);
    this.handleLogoutClick = this.handleLogoutClick.bind(this);
    this.state = {isLoggedIn: false};
  }

  handleLoginClick() {
    this.setState({isLoggedIn: true});
  }

  handleLogoutClick() {
    this.setState({isLoggedIn: false});
  }

  render() {
    const isLoggedIn = this.state.isLoggedIn;
    let button;

    if (isLoggedIn) {
      button = <LogoutButton onClick={this.handleLogoutClick} />;
    } else {
      button = <LoginButton onClick={this.handleLoginClick} />;
    }

    return (
      <div>
        <Greeting isLoggedIn={isLoggedIn} />
        {button}
      </div>
    );
  }
}

ReactDOM.render(
  <LoginControl />,
  document.getElementById('root')
);
Adding expressions to JSX
There are a couple of cool ways to add logic into your JSX
- Inline IF with logical
&&operator- IF condition
true, element after&&renders - IF condition
false, ignore
- IF condition
return (
    <div>
      <h1>Hello!</h1>
       // start of condition
      {unreadMessages.length > 0

          &&

        <h2>
          You have {unreadMessages.length} unread messages.
        </h2>
      }
      // end of condition
    </div>
  );
- IF-Else ternary(takes 3 operands) operator
- condition ? return if true : return if false
return (
    <div>
    // start of condition
      {
        isLoggedIn ?
(<LogoutButton onClick={this.handleLogoutClick} />)
        :
(<LoginButton onClick={this.handleLoginClick} />)
       }
   // end of condition
    </div>
-
null- If you want nothing to occur if your condition is false, you can also always swap in a
nullprimitive value. - this won't affect lifecycle methods
- If you want nothing to occur if your condition is false, you can also always swap in a
7. Lists 📝 and Keys 🔑
There's two solid points you should understand about building lists.
- Displaying a list of items is usually done with the help of the
map()function. - Elements being mapped over need unique keys, but they don't need to be globally unique.
function NumberList(props) {
  const numbers = props.numbers;
  const listItems = numbers.map((number) =>
    <ListItem key={number.toString()}
              value={number} />
  );
  return (
    <ul>
      // if we watned to make things look messy
      // we could also directly embed
      // our functioninside
      // of the brackets
      {listItems}
    </ul>
  );
}
8. Forms
- Controlled Components
- in regurlar HTML forms
- elements like (input, textArea, select) maintain their own state
- the react way
- mutable state kept in state prop, updated by
setState()
- Issue
- React should be in charge of being our
singl source of truthwhen it comes to data. Above we see that there's two different sets battling it out. Let's combine them with the help of our controlled component.
- React should be in charge of being our
Handler functions
It doesn't affect the function if you name it something else, but it's common practice to name it by what it does, like handleSubmit(). The component is controlled because we set initial state with our constructor, and alter it with our own onChange event handler, that triggers the function we defined to setState() based on a condition we defined. Thus, we have the control.
class NameForm extends React.Component {
  constructor(props) {
    super(props);
    this.state = {value: ''};

    this.handleChange = this.handleChange.bind(this);
    this.handleSubmit = this.handleSubmit.bind(this);
  }

  handleChange(event) {
    this.setState({value: event.target.value});
  }

  handleSubmit(event) {
    alert('A name was submitted: ' + this.state.value);
    event.preventDefault();
  }

  render() {
    return (
      <form onSubmit={this.handleSubmit}>
        <label>
          Name:
          <input type="text" value={this.state.value} onChange={this.handleChange} />
        </label>
        <input type="submit" value="Submit" />
      </form>
    );
  }
}
9. Lifting State Up
This was another area where the learning curve is steep and the trek up the hill is difficult. But eventually things start to add up, especially if you've spent a good amount of time reading over the docs.
Here are the basic steps to follow when dealing with lifting state up from a child component to it's immediate parent.
- Define a function in your parent component
- pass that to your child component as a function
- pass in the changed state from your child component to the prop, which contain's the parent's function, so that data traverses your node tree all the way back up to your one source of truth
10. Composition VS Inheritance 🥊
The react team doesn't say one is better than the other, so to clarify we're not going to say that either. But what is recommended by the team that built react, is to use composition in most cases, and inheritance in rare ones. These are architectural methodologies, relevant to our parent and child components.
- INHERITANCE (extending properties from parent class)
- in Object Oriented languages, this is when the child class obtains properties from it's parent class.
- COMPOSITION (referencing objects in other class instances)
- describes a class that references objects of another class, as instances.
- The Point?
- Code reuse
Let's take a look at some examples from Mosh Hamedani, an awesome React developer and blogger. I highly recommend you take a look at more of his stuff.
//PARENT
export default class Heading extends React.Component {
  render () {
    return (
       <div>
         <h1>{this.props.message}</h1>
       </div>
    )
  }
}
Heading.propTypes = {
  message: PropTypes.string
}
Heading.defaultProps = {
  message: 'Heading One'
}

//CHILD #1
export default class ScreenOne extends React.Component {
  render () {
    return (
     <div>
          <Heading message={'Custom Heading for Screen One'}/>
      </div>
    )
  }
}

// CHILD #2
export default class ScreenTwo extends React.Component {
  render () {
    return (
     <div>
          <Heading message={'Custom Heading for Screen Two'}/>
      </div>
    )
  }
}
What we see here is that we define a parent component, which relies on incoming props to update. This is a customizable value, that can be changed depending on the child that displays it. If the props change, so do the messages that get displayed.
Below is an example of inheritance, without getting too detailed, inheritance extends props from parent components. But things can get complicated and complex.
class CreateUserName extends UserNameForm {
   render() {
      const parent = super.render();
      return (
         <div>
            {parent}
            <button>Create</button>
         </div>
      )
   }
}
Stick with the composition methodology and you should be fine.

Grrrreat, we reached the end! There are other exciting concepts like Context, more on HigherOrderComponents, and Hooks that I'll be covering in different posts. But that doesn't make them any less important. I hope this post was able to demystify a lot of the bugs you've encountered when working with React.

Top comments (0)