
A virtual machine (VM) is a digital version of a physical computer.
Azure VM is a service provided by Microsoft Azure that allows you to create and use a virtualized example of a computer in the cloud. That is, instead of buying a physical computer, you can rent or use these virtual machines hosted on Microsoft's servers.
Just like a regular computer, Azure VMs have their own operating system, storage, memory (RAM), and processing power (CPU). You can install software, run applications, and perform tasks on these virtual machines, connect to networks, do other computing functions, and requires maintenance such as updates and system monitoring. The only thing is that all the computing happens remotely on Microsoft's servers.
Azure VM offers flexibility—you can choose the specifications (like how powerful the virtual machine should be) and easily scale up or down based on your needs without worrying about the physical hardware.
By the end of this article, you will be able to create your own Azure Virtual Machine
Procedure to create Azure Virtual Machine
Step 1: Sign in to Azure Portal
Visit the Azure Portal https://portal.azure.com and sign in using your Azure account credentials.
Azure has two means of achieving:
- Pay-As-You-Go subscription.
- Free subscription.
For the sake of learning, it is advisable to choose Free subscription.
Step 2: Create the Window Virtual Machine
On the Azure web browser, search for Virtual Machine

Click on Virtual Machine:
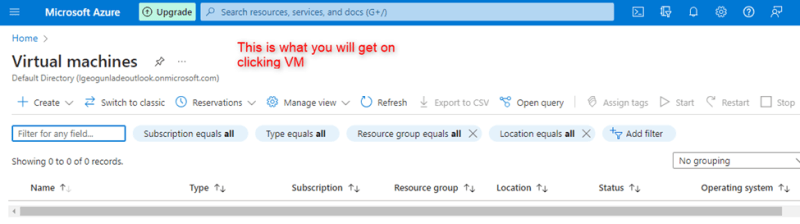
Click on Create and Select Azure Virtual Machine:

This will lead to the template where we create the VM:

*Step 3: You fill the Project Details
*
Project Details is a term that can refer to various pieces of information and settings associated with a specific project or resource within the Azure platform. These details typically include information about the Resource Group, configurations, settings, and metadata related to a particular Azure project.
Under the Project details, we have:
Subscriptions: This determines where the VM's costs will be billed, the scope of resources available, and the management boundary within which the VM will operate.
Resource Group: This allows us to organize and manage the resources that make up your VM. It helps in effectively managing the VM along with other related resources such as storage accounts, networking components, and associated services within the same application or project context. The Resource Group serves as a convenient way to manage, monitor, and control access to the resources that make up your Azure VM.
Note: Allow the default on the project details and name the Resource Group in any name suitable.

Step 4: Fill in the Instance details
Azure instance details include the following:
Virtual Machine Name: This is the name you assign to your VM, which helps you identify it among other resources in your Azure environment.
Region and Availability Options: The Azure region is where your VM will be deployed. It's essential to choose a region closest to your users or other resources for best performance.
Availability options might include options for high availability configurations, such as availability sets or availability zones(more than one).
Image and Operating System: This is the choice of the operating system and image that will serve as the base for your VM.
Size and Configuration: This includes specifications such as the virtual machine size (CPU, RAM, storage) and the series (e.g., general-purpose, memory-optimized, compute-optimized) based on your workload requirements.

*Step 5: Create Administrator Account:
*
Authentication type: Details related to user accounts and passwords or SSH keys used to access and manage the VM.
On the type, select password for now. Choose any user name you deep good and strong password you can easily remember.
Other parameters here should be left default for now.

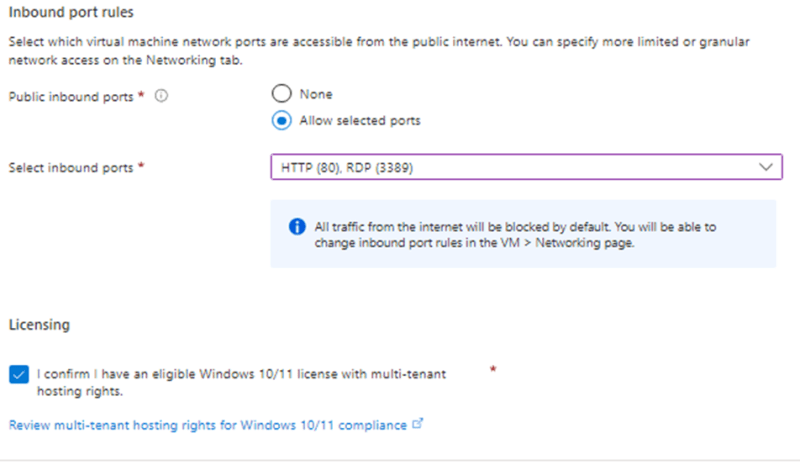
*Step 6: Fill in the Inbound Port rules:
*
This refers to the configurations that control the incoming network traffic to the VM. These rules are part of the networking settings and define which network ports on the VM are open and accessible to incoming connections from the internet or other networks.
Port Allowance: Inbound port rules specify which network ports are allowed to receive incoming traffic on the VM. Each rule defines a specific port or a range of ports (e.g., port 80 for HTTP, port 443 for HTTPS, port 22 for SSH) that can accept incoming connections.
For now, we choose select allow ports and check on the Licensing: HTTP(80) and SSH(22)
On the other Taps: Disks, Networking, Management, Advanced and Tags should be left at default for now but on the Monitoring, Disable should be clicked, this is to enable you manage your activities within your organization and not the public.
Step 7: Review and Create
**
Click on the **Review + Create to validate:

Click on Create:

*Step 8: Wait for Deployment to be completed
*
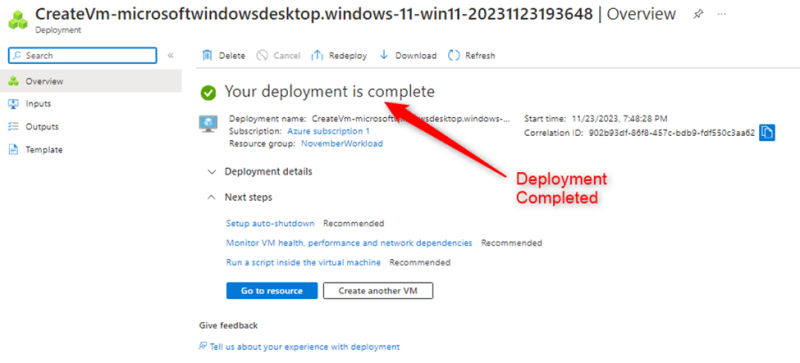
*Step 9: Click on Go to resource
*
This shows the specification of VM created

Step 10: Connect your VM with Public IP Address
**
To connect the VM to IP, click on connect.
Note: To avoid your machine being timed out, click on the Public IP address, and change the time from 4mins to 30mins and save.
After this, click on **Select on the Native RDP


Step 11: Click on Download RDP file
Allow this to fully download otherwise, it may not run

Open the downloaded file and follow the prompt:


Step 12:Connect and type your username and password created during Administrator Account
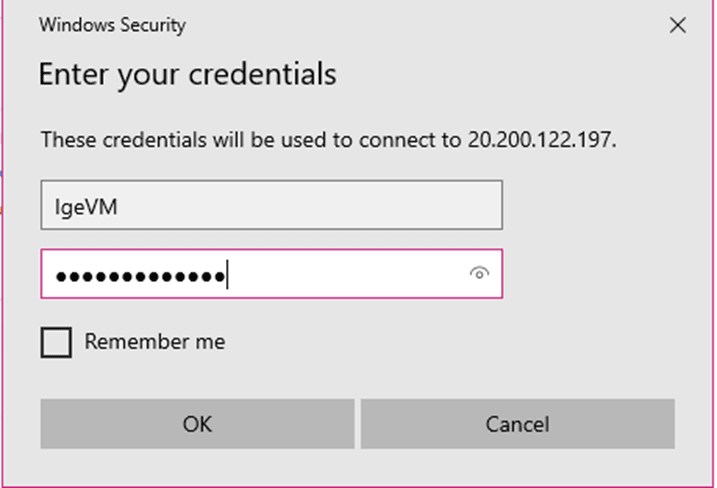


*Step 13: This is active Azure Virtual Machine running
*


Top comments (1)
Windows is a great operating system. I highly recommend it, especially since the price in this store is really good: steemit.com/gaming/@digitaldreamer...