If you're doing any type of security testing involving web applications, becoming familiar with Burp Suite is essential. Today we're going to take a look at how you can inspect, both incoming and outgoing web traffic using Burp Suite Community Edition. If you don't have Burp Suite installed and configured yet, take a look at the previous article in this series, Getting Started with Burp Suite.
Alright, let's get started. If you've followed the instructions in the previous article, you should have Burp Suite set up to proxy all web traffic in or out of your browser. Basically, Burp will function as a man-in-the-middle, stopping any request that your browser makes, before allowing it to continue out to the Internet. Burp has lots of tools that can help with manipulating your requests, but we'll save those for later in the series. Today, we're going to keep it simple, and focus on inspecting the web traffic moving through your proxy.
We'll start out simple. We're going to be using the Try2Hack website. This is an intentionally vulnerable website, that's been set up to help new penetration testers practice their skills. It's important to note at this point that, while it's perfectly fine to inspect the HTTP traffic from any website you visit, modifying the requests in an attempt to "hack" a website is most likely illegal unless you get permission from the site owner. There are numerous projects available that are designed specifically for practicing your skills. Some projects, like WebGoat, bWAPP and Mutilidae are projects that you can download and run locally, while others, like Try2Hack, Defend The Web and HackTheBox are hosted for you. These sites all give you explicit permission to practice hacking. Just make sure that you read the rules, and obey any scope that they've defined.
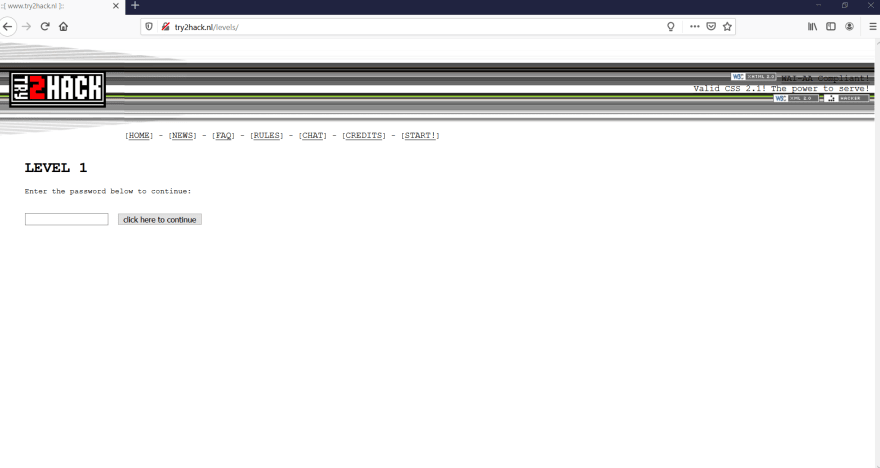
With Burp Suite running and the Interceptor turned on, lets go to the first challenge on the Try2Hack site: http://try2hack.nl/levels/. Your browser won't navigate yet. In fact it may look like it's not doing anything, but jump over to Burp and take a look at the Intercept tab. You'll see that Burp has stopped the outgoing request, and is waiting for your instructions. Looking at the Raw tab, you can see the exact request that's being sent out. The Headers tab allows you to inspect all of the header values that are included in the HTML request. There is also a Hex tab that allows you to view and directly modify the bytes of the request. That's a little too advanced for this article, so we'll just focus on the first two.

The Raw tab holds tons of information. Let's break it down. The first line is the HTTP request line. This line shows the method (GET) along with the path to the requested resource and the HTTP version to use. The second line shows the host (try2hack.nl). The remaining lines show the request headers. If our request sent a body, there would be a blank line below the headers followed by the body content.

The headers tab shows the same information, but broken down into key/value pairs. This makes it a little easier to inspect and manipulate the header information. In this case, we have eight headers in addition to the request and host information. Let's take a look at what each of them does. The User-Agent header is used to tell the server who is making the request. It generally identifies the browser, the operating system, and the JavaScript engine that are being used by the requesting client. The Accept header tells the server which type of data the client is expecting to be returned in the response. The Accept-Language header identifies the language expected by the client. Accept-Encoding informs the server which types of encoding the browser is able to handle. The Referer header tells the server where the request originated from. Yes, it's spelled incorrectly, but the misspelling slipped through in the original specification, so now we're stuck with it. It's an interesting bit of computer history that you can learn more about here. The Connection header tells the server whether the connection should be kept alive or terminated once the response is sent. Upgrade-Insecure-Requests is a header that is automatically added by most current browsers. This header indicates to the server that the browser prefers secure (https) requests. If the server supports secure requests for the resource, it should redirect the client to the secure version. Finally, the Cache-Control header provides instructions for caching the request. In this case, the max-age=0 directive indicates that the cached response needs to be revalidated by the server.
Okay, that's a lot of information for one simple request. Let's go ahead and see what the response is. Click the Forward button to allow the request to proceed to the Internet. Wait, somethings not right... Instead of seeing the response from our request, we immediately intercept another request for inspection. Depending on the browser you're using, you're browser configuration, and the site you're visiting, you may find that there are a lot of HTTP requests being made that you aren't even aware of. Firefox, for example sends telemetry data back to Mozilla quite frequently, if you don't have it disabled. Additionally, some websites make numerous background requests for tracking user behavior. Each time one of these requests is made, Burp will intercept it and wait for instructions. The longer you spend inspecting one request, the more requests you're likely to have lined up in the queue. While it's interesting to see all of the requests going out, when you're conducting a penetration test, you're probably only be interested in the requests for the site you're testing. All of the other requests are just noise, slowing down your testing. Luckily, Burp has a great feature called Target Scope, that allows you to specify exactly which requests will be intercepted.
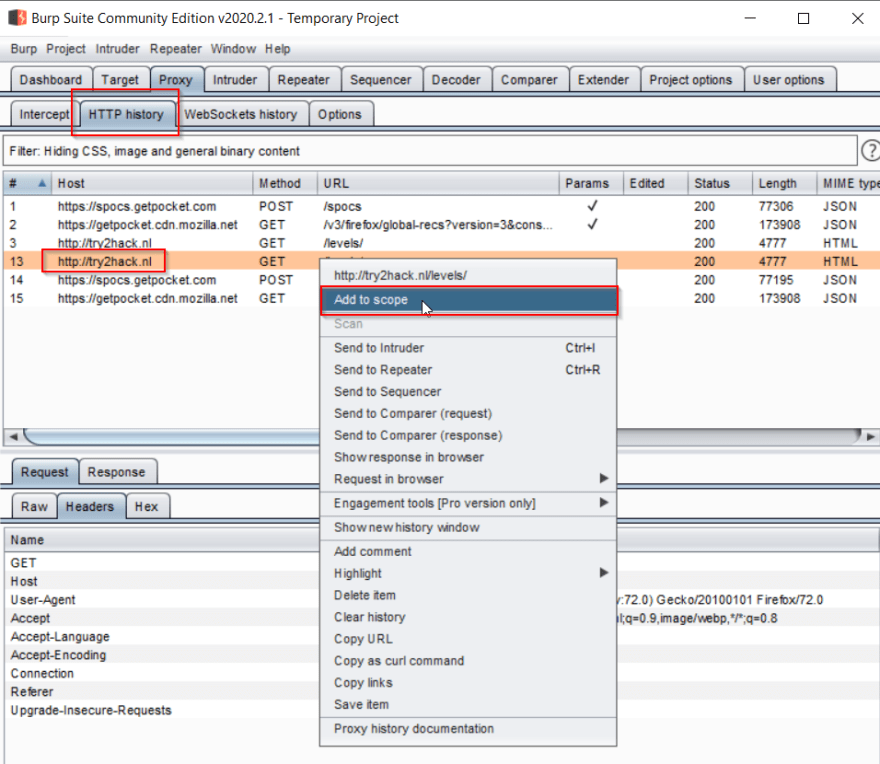
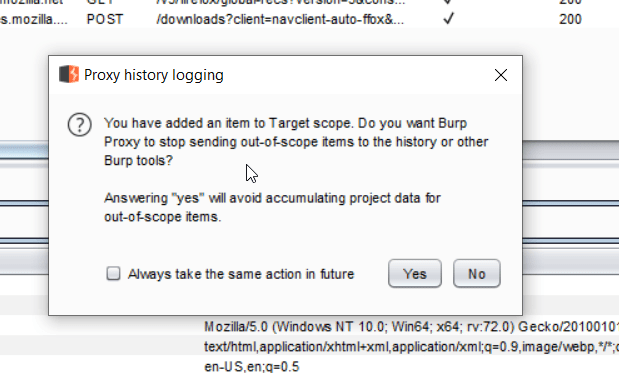
To set the scope to only intercept traffic to our target site, switch over to the HTTP History tab. This tab lists all of the requests that have been made since your Burp session started. Find the request to http://try2hack.nl, right-click on the entry, and click the "Add to scope" option. You'll see a pop-up asking if you want to prevent Burp Proxy from sending out-of-scope items to the history and to other Burp tools. Click Yes.
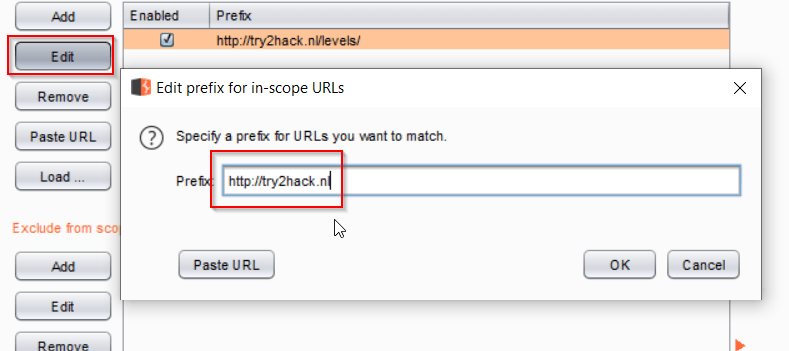
To view your scope, navigate to the Target tab and the Scope sub tab. In the first section, you'll see a list of sites included in your Target Scope. You can see there's one entry here, but we need to make a minor adjustment. When you select a request to add to scope, it will add the exact request. In this case, I clicked on the http://try2hack.nl/levels/ request.
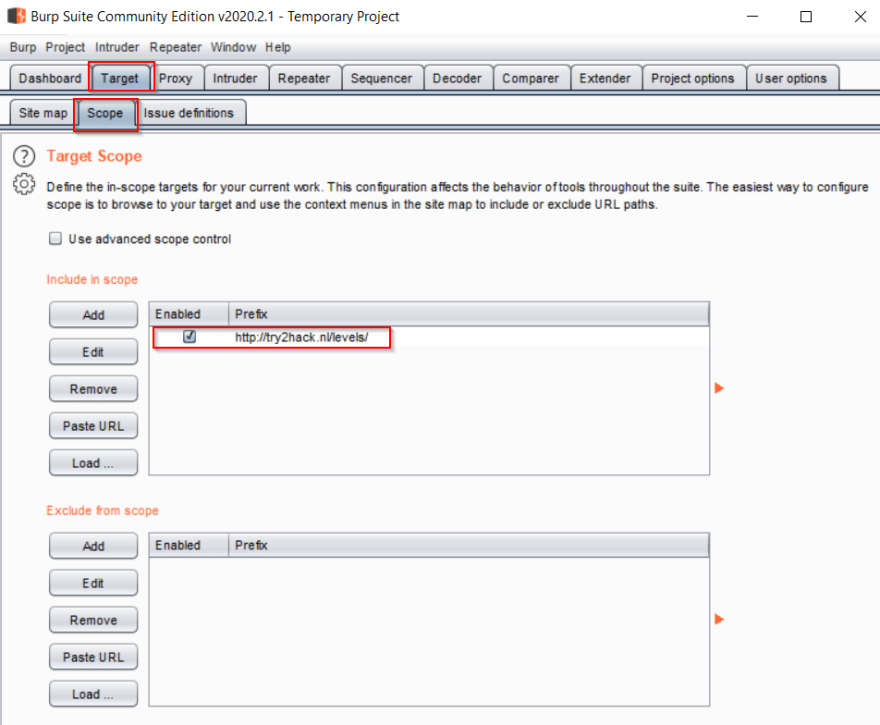
We actually want to intercept all traffic to this host, so click the Edit button next to the list, and remove "/levels/". Click OK.
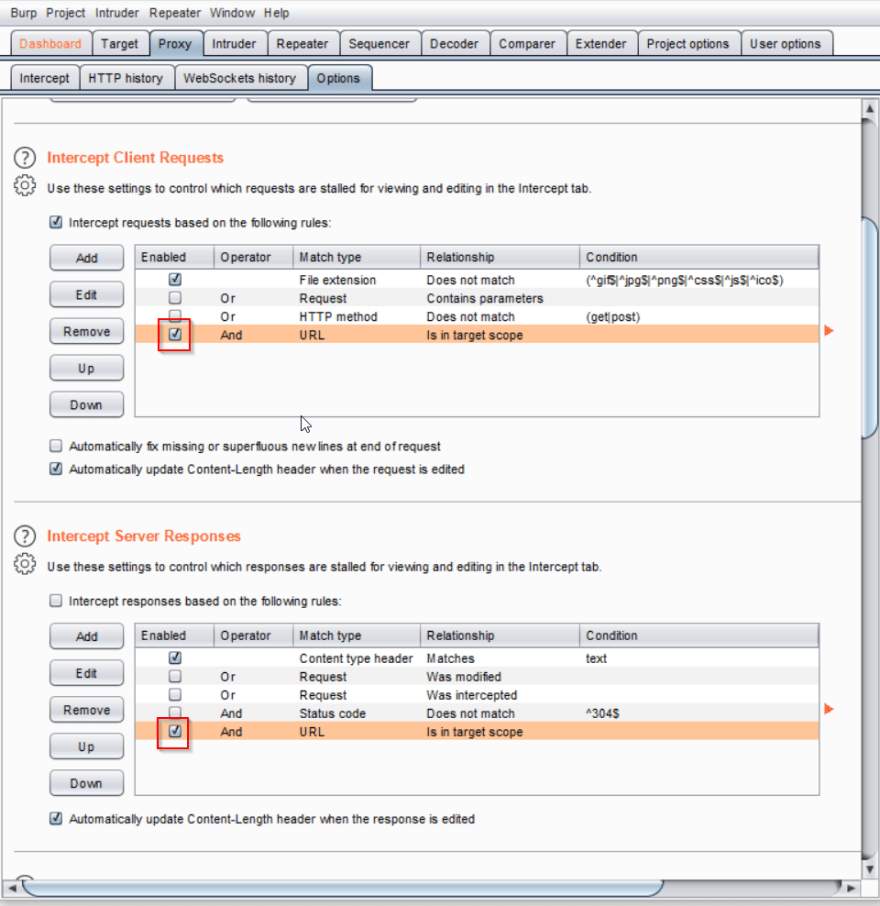
There's just one more thing we need to do to filter our intercepts. In the Proxy tab, go to the Options sub tab. Below the Proxy Listeners section, you'll see two other sections: Intercept Client Requests and Intercept Server Responses. In both sections, make sure the checkbox next to the "And URL Is in target scope" rule is checked.
Now when we navigate around the web, we should only intercept requests to the try2hack.nl host. You can give it a try by navigating to a different site in your browser.
Alright, now that we've got our scope set up, let's go back and take a look at the HTTP response for our request. Switch to the HTTP history tab, and click on the request for http://try2hack.nl/levels. You'll see the same request that we saw before, but you should also see a new Response tab. Click on that tab to have a look at what the server sent back to us.
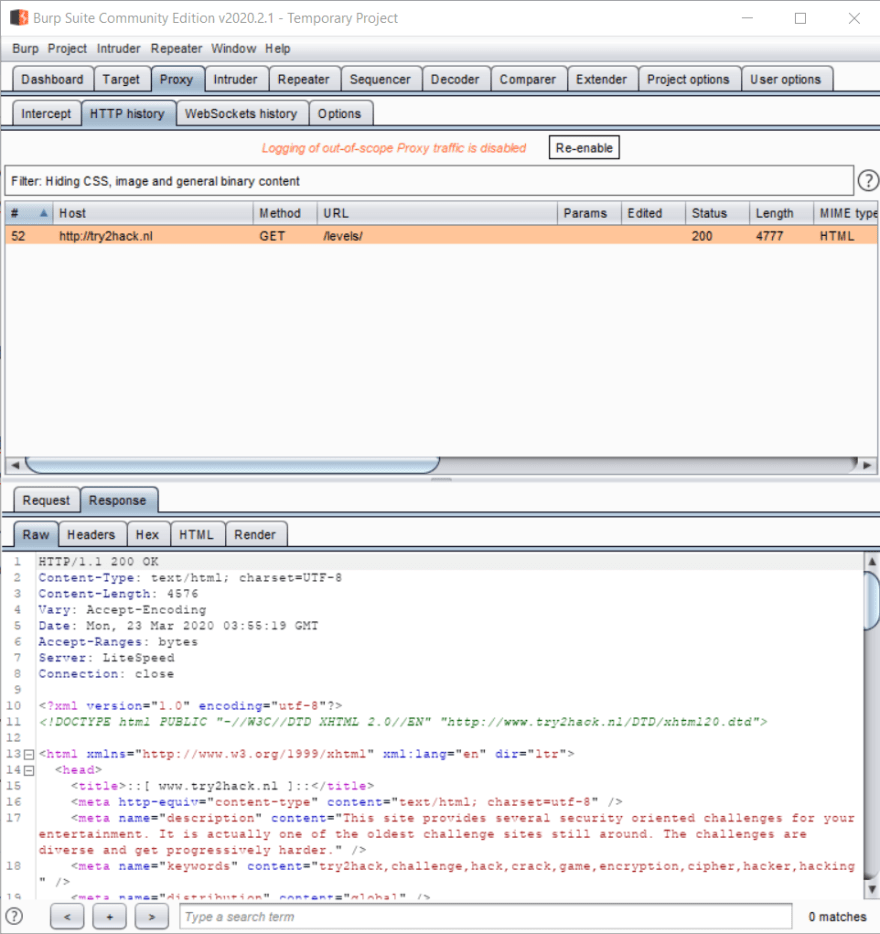
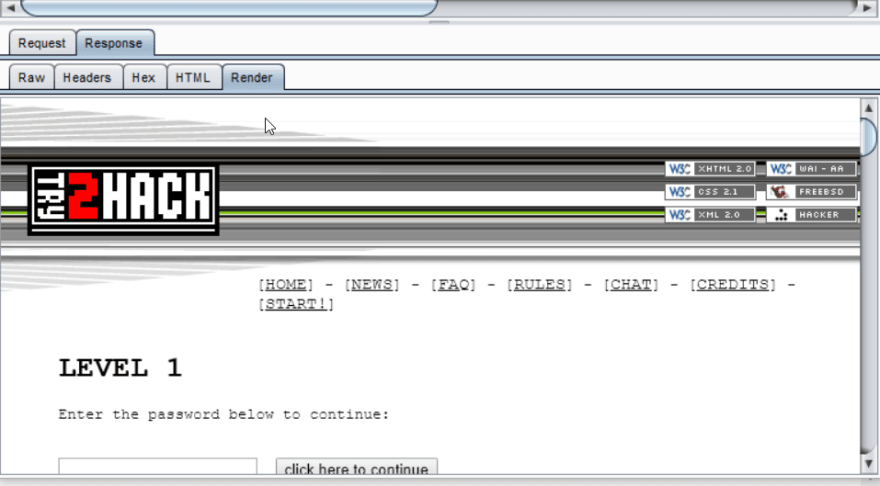
You'll notice that the Response section has the same Raw, Headers and Hex tabs that the request had, but it also includes two new tabs: HTML and Render. The HTML tab shows the response body if it's an HTML file that was returned by the server. The Render tab will show what the site looks like rendered in a browser.
Now that you understand the basics of intercepting and inspecting web traffic, let's take a closer look at this response, and see if we can figure out the first challenge. If you double click on the request in the HTTP History, you'll open the request in a new window. This gives us a little more room to work. Switch over to the HTML tag, and let's see if there's anything interesting in there.

Sure enough, at line 96 we've got a script tag with some very helpful information in it! The password from the text box is being evaluated right in the browser. Let's type that password in and see what we get.

And we're in!
Well, that wasn't too tough was it? I'm sure the challenges get tougher from here, but now that you're familiar with how to inspect web traffic using Burp Suite, there's nothing stopping you from continuing on with the Try2Hack challenges, or one of the other resources mentioned above. These sites are a great way to practice your skills and to continue learning!


Oldest comments (0)