Have you ever encountered the error “Field type is not supported for [whatever you are trying to do with Elasticsearch]”?
The most likely culprit of this error is the mapping of your index!
Mapping is the process of defining how a document and its fields are indexed and stored. It defines the type and format of the fields in the documents. As a result, mapping can significantly affect how Elasticsearch searches and stores data.
Understanding how mapping works will help you define mapping that best serves your use case.
By the end of this blog, you will be able to define what a mapping is and customize your own mapping to make indexing and searching more efficient.
Prerequisite work
Watch this video from time stamp 14:28-19:00. This video will show you how to complete steps 1 and 2.
- Set up Elasticsearch and Kibana*
- Open the Kibana console(AKA Dev Tools)
- Keep two windows open side by side(this blog and the Kibana console)
We will be sending requests from Kibana to Elasticsearch to learn how mapping works!
Note
If you would rather download Elasticsearch and Kibana on your own machine, follow the steps outlined in Downloading Elasticsearch and Kibana(macOS/Linux and Windows).
Additional Resources
Interested in beginner friendly workshops on Elasticsearch and Kibana? Check out my Beginner's Crash Course to Elastic Stack series!
This blog is a complementary blog to Part 5 of the Beginner's Crash Course to Elastic Stack. If you prefer learning by watching videos instead, check out the recording!
2) Beginner's Crash Course to Elastic Stack Table of Contents
This table of contents includes repos from all workshops in the series. Each repo includes resources shared during the workshop including the video recording, presentation slides, related blogs, Elasticsearch requests and more!
What is a Mapping?
Imagine you are building an app that requires you to store and search data. Naturally, you will want to store data using the smallest disk space while maximizing your search performance.
This is where mapping comes into play!
Mapping defines how a document and its fields are indexed and stored.
It does that by defining field types. Depending on its type, the fields are stored and indexed accordingly.
Learning how to define your own mapping will help you:
- optimize the performance of Elasticsearch
- save disk space
Before we delve into mapping, let's review a few concepts!
Review from previous blogs
In the previous blogs, we learned how to query and aggregate data to gain insights.
But before we could run queries or aggregations, we had to first add data to Elasticsearch.
Let’s say we are creating an app for a produce warehouse. You want to store data about produce in Elasticsearch so you can search for it.
In Elasticsearch, data is stored as documents. A document is a JSON object that contains whatever data you want to store in Elasticsearch.
Take a look at the following document about a produce item. In a JSON object, it contains a list of fields such as "name", "botanical_name", "produce_type" and etc.
When you take a closer look at the fields, you will see that each field is of a different JSON data type.
For example, for the field "name", the JSON data type is string. For the field "quantity", the JSON data type is integer. For the field "preferred_vendor", the JSON data type is boolean.
Indexing a Document
Let’s say we want to index the document above. We would send the following request.
For requests we will go over, the syntax is included for you so you can customize this for your own use case.
Syntax:
POST Enter-name-of-the-index/_doc
{
  "field": "value"
}
But for our tutorial, we will use the example instead.
The following example asks Elasticsearch to create a new index called the temp_index, then index the following document into it.
Example:
POST temp_index/_doc
{
  "name": "Pineapple",
  "botanical_name": "Ananas comosus",
  "produce_type": "Fruit",
  "country_of_origin": "New Zealand",
  "date_purchased": "2020-06-02T12:15:35",
  "quantity": 200,
  "unit_price": 3.11,
  "description": "a large juicy tropical fruit consisting of aromatic edible yellow flesh surrounded by a tough segmented skin and topped with a tuft of stiff leaves.These pineapples are sourced from New Zealand.",
  "vendor_details": {
    "vendor": "Tropical Fruit Growers of New Zealand",
    "main_contact": "Hugh Rose",
    "vendor_location": "Whangarei, New Zealand",
    "preferred_vendor": true
  }
}
Copy and paste the example into the console and send the request.
Expected response from Elasticsearch:
Elasticsearch will confirm that this document has been successfully indexed into the temp_index.
What we have covered so far is a review from previous blogs. What we have not gone over is what actually goes on behind the scenes when you index a document.
This is where mapping comes into play!
Mapping Explained
Mapping determines how a document and its fields are indexed and stored by defining the type of each field.
The mapping of an index look something like the following:

It contains a list of the names and types of fields in an index. Depending on its type, each field is indexed and stored differently in Elasticsearch.
Therefore, mapping plays an important role in how Elasticsearch stores and searches for data.
Dynamic Mapping
In the previous request we sent, we had created a new index called the temp_index, then we indexed a document into it.
Mapping determines how a document and its fields should be indexed and stored. But we did not define the mapping ahead of time.
So how did this document get indexed?
When a user does not define the mapping in advance, Elasticsearch creates or updates the mapping as needed by default. This is known as dynamic mapping.
Take a look at the following diagram. It illustrates what happens when a user asks Elasticsearch to create a new index without defining the mapping ahead of time.
When a user does not define the mapping in advance, Elasticsearch creates or updates the mapping as needed by default. This is known as dynamic mapping.
With dynamic mapping, Elasticsearch looks at each field and tries to infer the data type from the field content. Then, it assigns a type to each field and creates a list of field names and types known as mapping.
Depending on the assigned field type, each field is indexed and primed for different types of requests(full text search, aggregations, sorting). This is why mapping plays an important role in how Elasticsearch stores and searches for data.
View the Mapping
Now that we have indexed a document without defining the mapping in advance, let's take a look at the dyanmic mapping that Elasticsearch has created for us.
To view the mapping of an index, you send the following request.
Syntax:
GET Enter_name_of_the_index_here/_mapping
The following example asks Elasticsearch to retrieve the mapping of the temp_index.
Example:
GET temp_index/_mapping
Copy and paste the example into the Kibana console and send the request.
Expected response from Elasticsearch:
Elasticsearch returns the mapping of the temp_index.
It lists all the fields of the document in an alphabetical order and lists the type of each field(text, keyword, long, float, date, boolean and etc). These are a few of many field types that are recognized by Elasticsearch. For the list of all field types, click here!
At a first glance, this mapping may look really complicated. Rest assured. We are going to break this down into bite sized pieces!
Depending on what your use case is, the mapping can be customized to make storage and indexing more efficient.
The rest of the blog will cover what type of mapping is best for different types of requests. Then, we will learn how to define our own mapping!
Indexing Strings
Let's take a look at our document again.
Many of these fields such as "botanical_name", "produce_type", and "country_of_origin"(teal box) contain strings.
Let's examine the mapping of the string fields "botanical_name","country_of_origin", and "description" below.
You will see that these string fields(orange lines) have been mapped as both text and keyword(green lines) by default.
There are two kinds of string data types:
- Text
- Keyword
By default, every string gets mapped twice as a text field and as a keyword multi-field. Each field type is primed for different types of requests.
Text field type is designed for full-text searches. One of the benefits of full text search is that you can search for individual terms in a non-case sensitive manner.
Keyword field type is designed for exact searches, aggregations, and sorting. This field type becomes handy when you are searching for original strings.
Depending on what type of request you want to run on each field, you can assign the field type as either text or keyword or both!
Let's delve into text field type first.
Text Field Type
Text Analysis
Ever notice that when you search in Elasticsearch, it is not case sensitive or the punctuation does not seem to matter? This is because text analysis occurs when your fields are indexed.
The diagram below illustrates how the string "These pineapples are sourced from New Zealand." would be analyzed in Elasticsearch.
By default, strings are analyzed when it is indexed. When the string is analyzed, the string is broken up into individual words also known as tokens. The analyzer further lowercases each token and removes punctuations.
Inverted Index
Take a look at the following request shown in the diagram. It asks Elasticsearch to index a document with the field "description" and assign the document an id of 1.
When this request is sent, Elasticsearch will look at the field "description" and see that this field contains a string. Therefore, it will map the field "description" as both text and keyword by default.
When a field is mapped as type text, the content of the field passes through an analyzer.
Once the string is analyzed, the individual tokens are stored in a sorted list known as the inverted index(see table above). Each unique token is stored in an inverted index with its associated ID(red numbers in the table above).
The same process occurs every time you index a new document.
Let's say we indexed a new document with identical content as document 1. But we gave this document an id of 2(pink box).
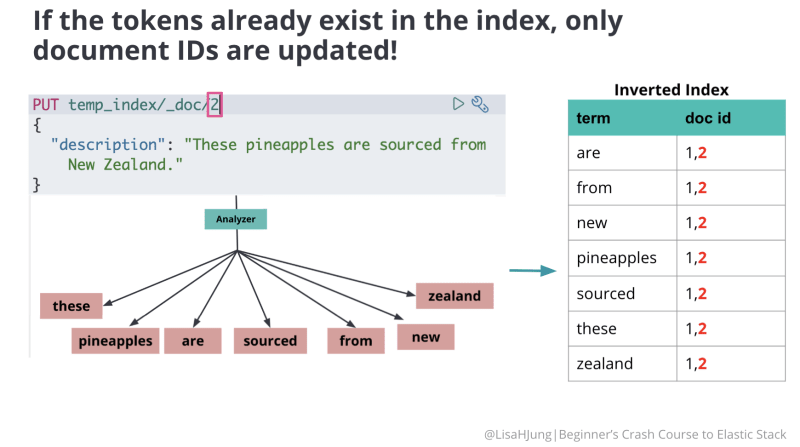
The content of the field "description" will go through the same process where it is split into individual tokens. However, if these tokens already exist in the inverted index, only the document IDs are updated(red numbers in the table above).
Look at the diagram below. If we add another document with an id of 3(pink box) with one new token(red box), then the new token(caledonia)is added to the inverted index. Also, the doc ids are updated for existing tokens(red numbers in the table below).
This is what happens in the background when you index fields that are typed as text.
Fields that are assigned the type text are optimal for full text search.
Take a look at this diagram below. The client is asking to fetch all documents containing the terms "new" or "zealand".
When this request is sent, Elasticsearch does not read through every document for the search terms. It goes straight to the inverted index to look up the search terms, finds the matching document ids and sends the ids back to the user.
The inverted index is the reason Elasticsearch is able to search with speed.
Moreover, since all the terms in the inverted index are lowercase and your search queries are also analyzed, you can search for things in a non-case sensitive manner, and still get the same results.
Let's do another review.
Take a look at the diagram below. We send three requests to index three documents.
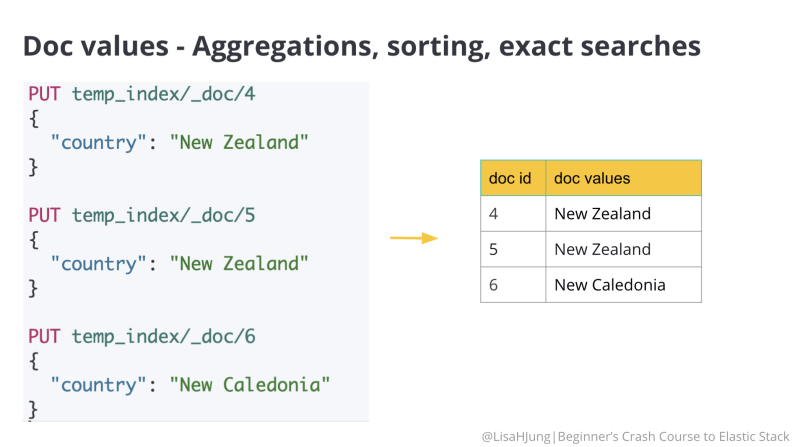
Each document has a field called "country" with a string value. By default, the field "country" is mapped twice as text(teal arrow) and keyword(yellow arrow).
Text fields(teal arrow) are analyzed and the tokens are stored in an inverted index(teal table). This is great for full text search but it is not optimized for performing aggregations, sorting or exact searches.
For the types of actions mentioned above, Elasticsearch depends on the keyword field(yellow arrow).
When a keyword field(yellow arrow) is created, the content of the field is not analyzed and is not stored in an inverted index.
Instead, keyword field uses a data structure called doc values(yellow table) to store data.
Keyword Field Type
Keyword field type is used for aggregations, sorting, and exact searches. These actions look up the document ID to find the values it has in its fields.
Keyword field is suited to perform these actions because it uses a data structure called doc values to store data.
Take a look at the diagram below that illustrates doc values.
For each document, the document id along with the field value(the original string) are added to a table. This data structure(doc values) is designed for actions that require looking up the document ID to find the values it has in its fields. Therefore, the fields that are typed as keyword are best suited for actions such as aggregations, sorting, and exact searches.
When Elasticsearch dynamically creates a mapping for you, it does not know what you want to use a string for. As a result, Elasticsearch maps all strings to both field types(text and keyword).
In cases where you do not need both field types, the default setting is wasteful. Since both field types require creating either an inverted index or doc values, creating both field types for unnecessary fields will slow down indexing and take up more disk space.
This is why we define our own mapping as it helps us store and search data more efficiently.
Doing so takes more planning because we need to decide what type of requests we want to run on these fields. The decisions we make will allow us to designate which string fields will:
- only be full text searchable or
- only be used in aggregation or
- be able to support both options
Mapping Exercise
Now that we understand the field types text and keyword, let’s go over how we can optimize our mapping.
To do so, we are going to do an exercise!
Project: Build an app for a client who manages a produce warehouse
This app must enable users to:
- search for produce name, country of origin and description
- identify top countries of origin with the most frequent purchase history
- sort produce by produce type(fruit or vegetable)
- get the summary of monthly expense
Goals
- Figure out the optimal
mappingfor desired features - Create an index with the optimal
mappingand index documents into it - Learn how you should approach a situation that requires changing the
mappingof an existing field - Learn how to use the
runtime field
The following is a sample document we will be working with for this exercise. Pay attention to the field names as these field names will come up frequently during this exercise!
Sample data
{
  "name": "Pineapple",
  "botanical_name": "Ananas comosus",
  "produce_type": "Fruit",
  "country_of_origin": "New Zealand",
  "date_purchased": "2020-06-02T12:15:35",
  "quantity": 200,
  "unit_price": 3.11,
  "description": "a large juicy tropical fruit consisting of aromatic edible yellow flesh surrounded by a tough segmented skin and topped with a tuft of stiff leaves.These pineapples are sourced from New Zealand.",
  "vendor_details": {
    "vendor": "Tropical Fruit Growers of New Zealand",
    "main_contact": "Hugh Rose",
    "vendor_location": "Whangarei, New Zealand",
    "preferred_vendor": true
  }
}
Plan of Action
The figures below outline the plan of action for each feature requested by the client. Explanations regarding each bullet point are provided in the blog.
The first feature allows the user to search for produce name, country of origin and description.
Let's take a look at the sample document shared with you earlier.
Sample data
{
  "name": "Pineapple",
  "botanical_name": "Ananas comosus",
  "produce_type": "Fruit",
  "country_of_origin": "New Zealand",
  "date_purchased": "2020-06-02T12:15:35",
  "quantity": 200,
  "unit_price": 3.11,
  "description": "a large juicy tropical fruit consisting of aromatic edible yellow flesh surrounded by a tough segmented skin and topped with a tuft of stiff leaves.These pineapples are sourced from New Zealand.",
  "vendor_details": {
    "vendor": "Tropical Fruit Growers of New Zealand",
    "main_contact": "Hugh Rose",
    "vendor_location": "Whangarei, New Zealand",
    "preferred_vendor": true
  }
}
The first feature involves working with the fields "name", "country_of_origin", and "description"(first bullet point in the figure below).
All of these fields contain strings. By default, these fields will get mapped twice as text and keyword.
Let’s see if we need both field types.
Our client wants to search on these fields. But it is unlikely that the user will send search terms that are exactly the way it is written in our documents.
So the user should be able to run a search for individual terms in a non-case sensitive manner. Therefore, the fields "name", "country_of_origin" and "description" should be full text searchable(second bullet point in the figure below).
Let’s say our client does not want to run aggregation, sorting, or exact searches on the fields "name" and "description"(third bullet point in the figure above).
For these fields, we do not need the keyword type. To avoid mapping these fields twice, we will specify that we only want the text type for these fields(blue bullet point in the figure above).
At this point, we know that the field "country_of_origin" should be full text searchable(text). But it is unclear whether we will need aggregation, sorting, or exact searches to be performed on this field(fourth bullet point in the figure above).
Let’s leave that for now.
If you look at the second feature, the user should be able to identify top countries of origin with the most frequent purchase history.
This feature involves the field "country_of_origin"(first bullet point in the figure above).
For this type of request, we need to run the terms aggregations on this field(second bullet point in the figure above), which means that we need a keyword field.
Since we need to perform full text search(first feature) and aggregations(second feature) on this field, we will map this field twice as text and keyword(third bullet point in the figure above).
The third feature allows the user to sort by produce type. This feature involves the field "produce_type" which contains a string(first bullet point in the figure above).
Since this feature requires sorting(second bullet point in the figure above), we need a keyword type for this field.
Let’s say the client does not want to run a full text search for this field.
As a result, we will need to map this field as keyword type only(third bullet point in the figure above).
The fourth feature allows the user to get the summary of monthly expense.
This feature involves the fields "date_purchased", "quantity", and "unit_price"(first bullet point in the figure above).
So let’s break this down.
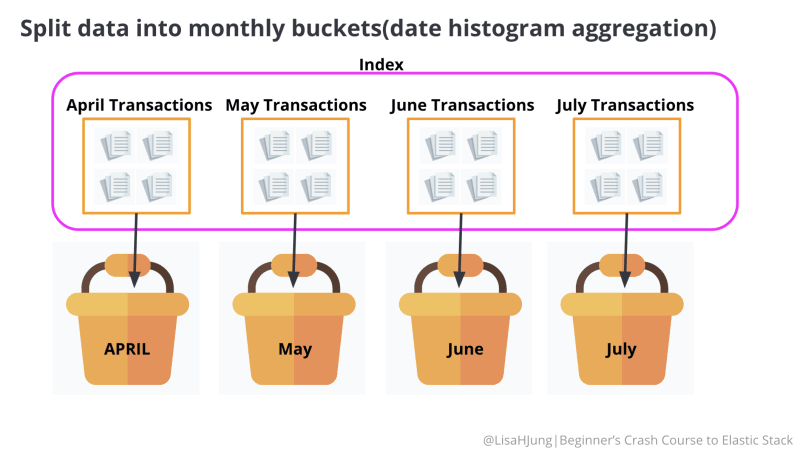
This feature requires splitting the data into monthly buckets.
Then, calculating the monthly revenue for each bucket by adding up the total of each document in the bucket.

The next diagram shows you the April bucket. The documents of all produce purchased during April are included in this bucket.
Let's zoom in on one of the documents to look at its fields(json object highlighted with pink lines).
You will notice that our documents do not have a field called "total".
However, we do have fields called "quantity" and "unit_price"(pink box).
In order to get the total for each document, we need to multiply the values of the fields "quantity" by "unit_price". Then, add up the total of all documents in each bucket. This will yield the monthly expense.
The following figure shows the summary of optimal mapping for all string fields that we have just discussed.
Take a look at the first bullet point in the figure above. It states that for the fourth feature, we need to calculate the total for each produce so it can be used to calculate the monthly expense.
The second bullet point in the figure outlines the additional step we are going to take to make our mapping more efficient.
The following is the reason why we are disabling the field "botanical_name" and the object "vendor_details"(second bullet point).
Our document contains multiple fields.
Sample data
{
  "name": "Pineapple",
  "botanical_name": "Ananas comosus",
  "produce_type": "Fruit",
  "country_of_origin": "New Zealand",
  "date_purchased": "2020-06-02T12:15:35",
  "quantity": 200,
  "unit_price": 3.11,
  "description": "a large juicy tropical fruit consisting of aromatic edible yellow flesh surrounded by a tough segmented skin and topped with a tuft of stiff leaves.These pineapples are sourced from New Zealand.",
  "vendor_details": {
    "vendor": "Tropical Fruit Growers of New Zealand",
    "main_contact": "Hugh Rose",
    "vendor_location": "Whangarei, New Zealand",
    "preferred_vendor": true
  }
}
After going through each feature, we know that the string field "botanical_name" and the object "vendor_details" will not be used.
Since we do not need the inverted index or the doc values of these fields, we are going to disable these fields. This in turn prevents the inverted index and the doc values of these fields from being created.
Disabling these fields will help us save disk space and minimize the number of fields in the mapping.
Defining your own mapping
Now that we have thought through the optimal mapping, let’s define our own!
Before we get to that, there are a few rules about mapping you need to know.
Rules
- If you do not define a
mappingahead of time, Elasticsearch dynamically creates amappingfor you. - If you do decide to define your own
mapping, you can do so at index creation. - ONE
mappingis defined per index. Once the index has been created, we can only add new fields to amapping. We CANNOT change themappingof an existing field. - If you must change the type of an existing field, you must create a new index with the desired
mapping, then reindex all documents into the new index.
We will go over how these rules work as we go over the steps of defining our own mapping!
Step 1: Index a sample document into a test index.
Syntax:
POST Name-of-test-index/_doc
{
  "field": "value"
}
The first thing we are going to do is to create a new index called test_index and index a sample document.
The document in the following example is the same sample document we have seen earlier. The sample document must contain the fields that you want to define. These fields must also contain values that map closely to the field types you want.
Copy and paste the following example into the Kibana console and send the request.
Example:
POST test_index/_doc
{
  "name": "Pineapple",
  "botanical_name": "Ananas comosus",
  "produce_type": "Fruit",
  "country_of_origin": "New Zealand",
  "date_purchased": "2020-06-02T12:15:35",
  "quantity": 200,
  "unit_price": 3.11,
  "description": "a large juicy tropical fruit consisting of aromatic edible yellow flesh surrounded by a tough segmented skin and topped with a tuft of stiff leaves.These pineapples are sourced from New Zealand.",
  "vendor_details": {
    "vendor": "Tropical Fruit Growers of New Zealand",
    "main_contact": "Hugh Rose",
    "vendor_location": "Whangarei, New Zealand",
    "preferred_vendor": true
  }
}
Expected response from Elasticsearch:
The test_index is successfully created.

By default, Elasticsearch will create a dynamic mapping based on the sample document.
What is the point of step 1?
Earlier in the blog, we have indexed the sample document and viewed the dynamic mapping. If you remember, the mapping for our sample document was pretty lengthy.
Since we do not want to write our optimized mapping from scratch, we are indexing a sample document so that Elasticsearch will create the dynamic mapping.
We will use the dynamic mapping as a template and make changes to it to avoid writing out the whole mapping for our index!
Step 2: View the dynamic mapping
Syntax:
GET Name-the-index-whose-mapping-you-want-to-view/_mapping
Let's view the mapping of the test_index by sending the following request.
Example:
GET test_index/_mapping
Expected response from Elasticsearch:
Elasticsearch will display the dynamic mapping it has created. It lists the fields in an alphabetical order. The sample document is identical to the one we previously indexed into thetemp_index.
Step 3: Edit the mapping
Copy and paste the entire mapping from step 2 into the Kibana console. Then, make the changes specified below.
From the pasted results, remove the "test_index" along with its opening and closing brackets. Then, edit the mapping to satisfy the requirements outlined in the diagram below.
Your optimized mapping should look like the following:

You will see that the field "country_of_origin"(2) has been typed as both text and keyword.
The fields "description"(3) and "name"(4) have been typed as text only.
The field field "produce_type"(5) has been typed as keyword only.
In the field "botanical_name"(1), a parameter called "enabled" was added and was set to "false". This prevents the inverted index and doc values from being created for this field.
The same has been done for the object "vendor_details"(6).
The mapping above defines the optimal mapping for all of our desired features except for the one marked a red x in the figure below.
Don't worry about the unaddressed feature yet as we are saving this for later!
Step 4: Create a new index with the optimized mapping from step 3.
Syntax:
PUT Name-of-your-final-index
{
  copy and paste your optimized mapping here
}
Next, we will create a new index called produce_index with the optimized mapping we just worked on.
If you still have the mapping from step 3 in the Kibana console, delete the mapping from the Kibana console.
Then, copy and paste the following example into the Kibana console and send the request!
Example:
PUT produce_index
{
  "mappings": {
    "properties": {
      "botanical_name": {
        "enabled": false
      },
      "country_of_origin": {
        "type": "text",
        "fields": {
          "keyword": {
            "type": "keyword"
          }
        }
      },
      "date_purchased": {
        "type": "date"
      },
      "description": {
        "type": "text"
      },
      "name": {
        "type": "text"
      },
      "produce_type": {
        "type": "keyword"
      },
      "quantity": {
        "type": "long"
      },
      "unit_price": {
        "type": "float"
      },
      "vendor_details": {
        "enabled": false
      }
    }
  }
}
Expected response from Elasticsearch:
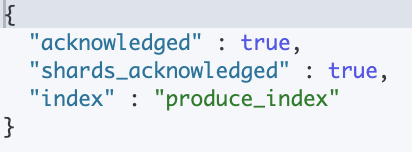
Elasticsearch creates the produce_index with the optimized mapping we defined above!
Step 5: Check the mapping of the new index to make sure the all the fields have been mapped correctly
Syntax:
GET Name-of-test-index/_mapping
Let's check the mapping of the produce_index to make sure that all the fields have been mapped correctly.
Copy and paste the following example into the Kibana console and send the request!
Example:
GET produce_index/_mapping
Expected response from Elasticsearch:
Compared to the dynamic mapping, our optimized mapping looks more simple and concise!
The current mapping satisfies the requirements that are marked with green check marks in the figure below.

Just by defining our own mapping, we prevented unnecessary inverted index and doc values from being created which saved a lot of disk space.
The type of each field has been customized to serve specific client requests. As a result, we also optimized the performance of Elasticsearch as well!
Step 6: Index your dataset into the new index
Now that we have created a new index(produce_index) with the optimal mapping, it is time to add data to the produce_index.
For simplicity's sake, we will index two documents by sending the following requests.
Index the first document
POST produce_index/_doc
{
  "name": "Pineapple",
  "botanical_name": "Ananas comosus",
  "produce_type": "Fruit",
  "country_of_origin": "New Zealand",
  "date_purchased": "2020-06-02T12:15:35",
  "quantity": 200,
  "unit_price": 3.11,
  "description": "a large juicy tropical fruit consisting of aromatic edible yellow flesh surrounded by a tough segmented skin and topped with a tuft of stiff leaves.These pineapples are sourced from New Zealand.",
  "vendor_details": {
    "vendor": "Tropical Fruit Growers of New Zealand",
    "main_contact": "Hugh Rose",
    "vendor_location": "Whangarei, New Zealand",
    "preferred_vendor": true
  }
}
Copy and paste the example into the Kibana console and send the request!
Expected response from Elasticsearch:
Elasticsearch successfully indexes the first document.
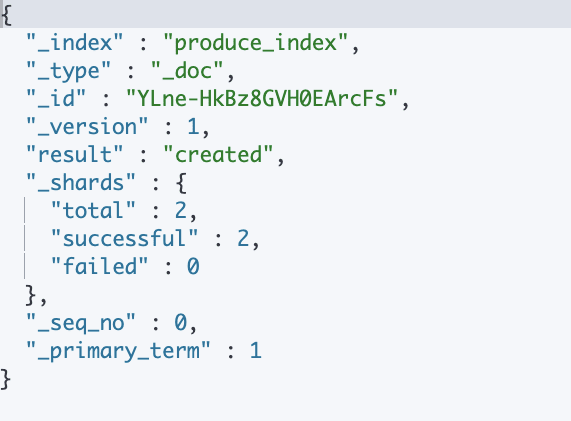
Index the second document
The second document has almost identical fields as the first document except that it has an extra field called "organic" set to true!
POST produce_index/_doc
{
  "name": "Mango",
  "botanical_name": "Harum Manis",
  "produce_type": "Fruit",
  "country_of_origin": "Indonesia",
  "organic": true,
  "date_purchased": "2020-05-02T07:15:35",
  "quantity": 500,
  "unit_price": 1.5,
  "description": "Mango Arumanis or Harum Manis is originated from East Java. Arumanis means harum dan manis or fragrant and sweet just like its taste. The ripe Mango Arumanis has dark green skin coated with thin grayish natural wax. The flesh is deep yellow, thick, and soft with little to no fiber. Mango Arumanis is best eaten when ripe.",
  "vendor_details": {
    "vendor": "Ayra Shezan Trading",
    "main_contact": "Suharto",
    "vendor_location": "Binjai, Indonesia",
    "preferred_vendor": true
  }
}
Copy and paste the example into the Kibana console and send the request!
Expected response from Elasticsearch:
Elasticsearch successfully indexes the second document.
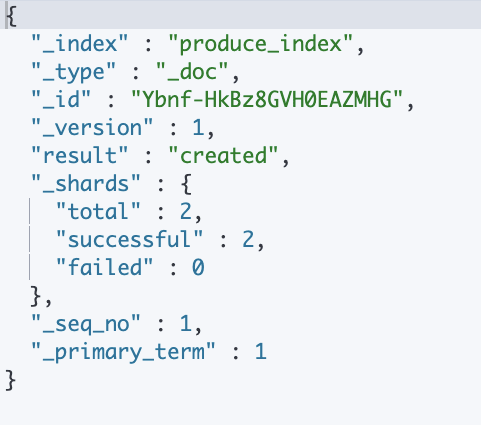
Let's see what happens to the mapping by sending this request below:
GET produce_index/_mapping
Expected response from Elasticsearch:
The new field("organic") and its field type(boolean) have been added to the mapping(orange box). This is in line with the rules of mapping we discussed earlier since you can add new fields to the mapping. We just cannot change the mapping of an existing field!
What if you do need to make changes to the existing field type?
Let's say you have added a huge produce dataset to the produce_index.
Then, your client asks for an additional feature where the user can run a full text search on the field "botanical_name".
This is a dilemma since we disabled the field "botanical_name" when we created the produce_index.
What are we to do?
Remember, you CANNOT change the mapping of an existing field. If you do need to make changes to the existing field, you must create a new index with the desired mapping, then reindex all documents into the new index.
STEP 1: Create a new index(produce_v2) with the latest mapping.
This step is very similar to what we just did with the test_index and the produce_index.
We are just creating a new index(produce_v2) with a new mapping where we remove the "enabled" parameter from the field "botanical_name" and change its type to "text".
Example:
PUT produce_v2
{
  "mappings": {
    "properties": {
      "botanical_name": {
        "type": "text"
      },
      "country_of_origin": {
        "type": "text",
        "fields": {
          "keyword": {
            "type": "keyword",
            "ignore_above": 256
          }
        }
      },
      "date_purchased": {
        "type": "date"
      },
      "description": {
        "type": "text"
      },
      "name": {
        "type": "text"
      },
      "organic": {
        "type": "boolean"
      },
      "produce_type": {
        "type": "keyword"
      },
      "quantity": {
        "type": "long"
      },
      "unit_price": {
        "type": "float"
      },
      "vendor_details": {
        "type": "object",
        "enabled": false
      }
    }
  }
}
Copy and paste the example into the Kibana console and send the request!
Expected response from Elasticsearch:
Elasticsearch creates a new index(produce_v2) with the latest mapping.

Check the mapping of the produce_v2 index by sending the following request.
View the mapping of produce_v2:
GET produce_v2/_mapping
Expected response from Elasticsearch:
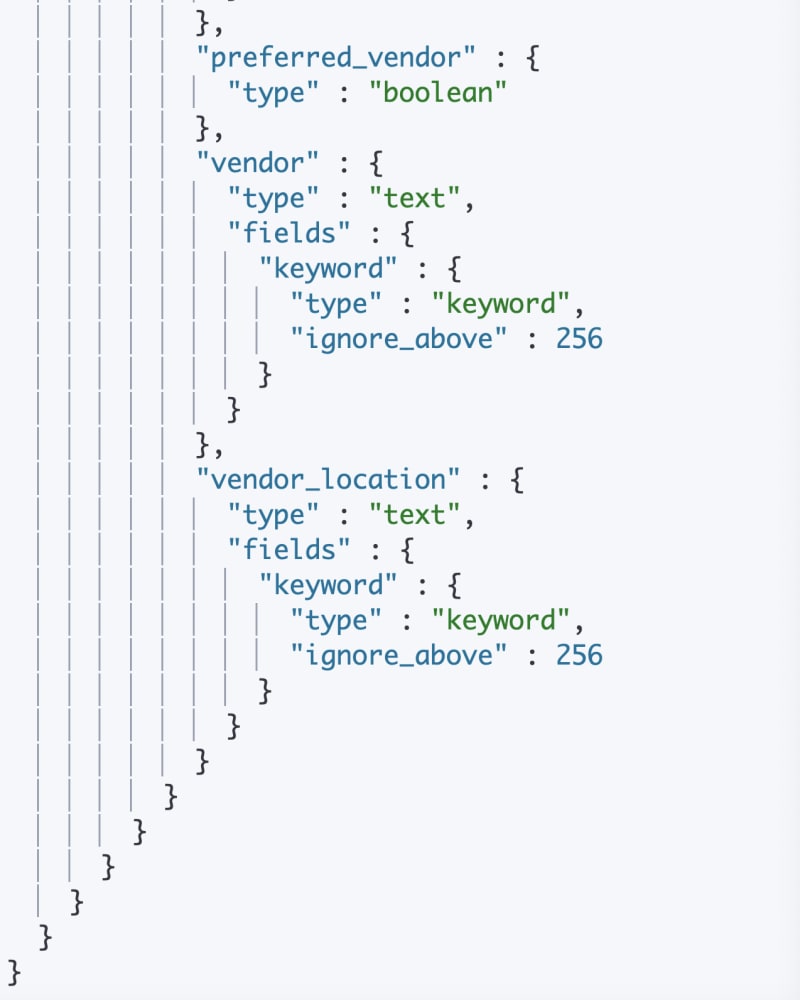
You will see that the field "botanical_name" has been typed as text(orange box).

STEP 2: Reindex the data from the original index(produce_index) to the one you just created(produce_v2).
We just created a new index(produce_v2) with the desired mapping. The next step is to reindex the data from the produce_index to the produce_v2 index.
To do so, we send the following request:
POST _reindex
{
  "source": {
    "index": "produce_index"
  },
  "dest": {
    "index": "produce_v2"
  }
}
The field "source" refers to the original index that contains the dataset we want to reindex. The field "dest"(destination) refers to the new index with the optimized mapping. The example requests for the data to be reindexed to the new index.
Copy and paste the request above into the Kibana console and send the request!
Expected response form Elasticsearch:
This request reindexes data from the produce_index to the produce_v2 index. The produce_v2 index can now be used to run the requests that the client has specified.
Runtime Field
We have one last feature to work on!
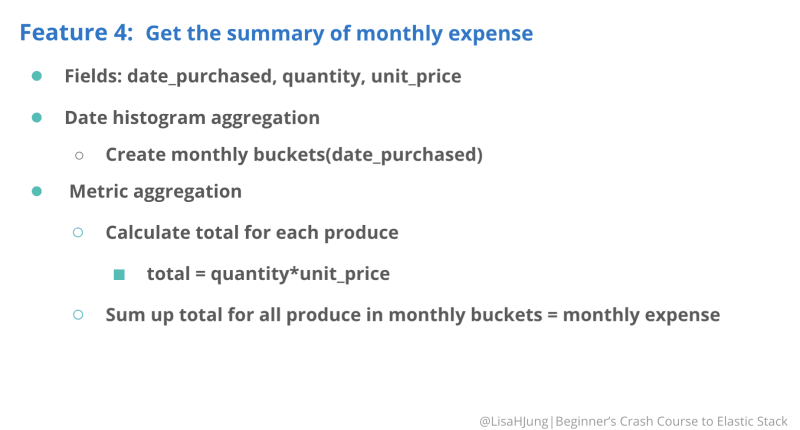
Our client wants to be able to get the summary of monthly expense.
This feature requires splitting the data into monthly buckets.
Then, calculating the monthly revenue for each bucket by adding up the total of each document in the bucket.

The problem is that our documents do not have a field called "total". However, we do have fields called "quantity" and "unit_price".
In order to get the total for each document, we need to multiply the values of the field "quantity" by "unit_price". Then, add up the total of all documents in each bucket. This will yield the monthly expense.
At this point, you might be thinking we will have to calculate the total and store this in a new field called "total". Then, add the field "total" to the existing documents and run the sum aggregation on this field.
This can get kinda hairy because it involves adding a new field to the existing documents in your index. This requires reindexing your data and starting all over again.
But there is a new feature that helps you get around this issue. It is called the runtime field!
What is runtime?
A runtime is that moment in time when Elasticsearch is executing your requests. During runtime, you can actually create a temporary field and calculate a value within it. This field then can be used to run whatever request that was sent during runtime.
This may sound very abstract to you at this point so let’s break this down.
For our last feature, the missing ingredient is the field "total". We must calculate the total by multiplying the values of the fields "quantity" and "unit_price".
Right now the field "total" does not exist in our dataset so we cannot aggregate on this field.
What we are going to do is to create a runtime field called "total" and add it to the mapping of the existing index.
Step 1: Create a runtime field and add it to the mapping of the existing index.
Syntax:
PUT Enter-name-of-index/_mapping
{
  "runtime": {
    "Name-your-runtime-field-here": {
      "type": "Specify-field-type-here",
      "script": {
        "source": "Specify the formula you want executed"
      }
    }
  }
}
The following request asks Elasticsearch to create a runtime field called "total" and add it to the mapping of produce_v2 index.
The runtime field(1) is created only when a user runs a request against this field.
We know that the field "total"(2) will contain decimal points so we will set the field "type" to "double"(3).
In the "script"(4), we write out the formula to calculate the value for the field "total". The "script" instructs Elasticsearch to do the following(5): For each document, multiply the value of the field "unit_price" by the value of the field "quantity".
Copy and paste the following example into the Kibana console and send the request!
Example:
PUT produce_v2/_mapping
{
  "runtime": {
    "total": {
      "type": "double",
      "script": {
        "source": "emit(doc['unit_price'].value* doc['quantity'].value)"
      }
    }
  }
}
Expected response from Elasticsearch:
Elasticsearch successfully adds the runtime field to the mapping.

Step 2: Check the mapping:
Let's check the mapping of the produce_v2 index by sending the following request.
GET produce_v2/_mapping
Expected response from Elasticsearch:
Elasticsearch adds a runtime field to the mapping(red box).
Note that the runtime field is not listed under "properties" object which includes the fields in our documents. This is because the runtime field "total" is not indexed!
The runtime field is only created and calculated at runtime as you execute your request!
Remember, our indexed documents do not have a field "total". But by adding a runtime field to our mapping, we are leaving some instructions for Elasticsearch.
The mapping tells Elasticsearch that if it were to receive a request on the field "total", it should create a temporary field called "total" for each document and calculate its value by running the "script". Then, run the request on the field "total" and send the results to the user.
Step 3: Run a request on the runtime field to see it perform its magic!
Let's put runtime field to the test.
We are going to send the following request to perform a sum aggregation on the runtime field "total".
Note that the following request does not aggregate the monthly expense here. We are running a simple aggregation request to demonstrate how the runtime field works!
Syntax:
GET Enter_name_of_the_index_here/_search
{
  "size": 0,
  "aggs": {
    "Name your aggregations here": {
      "Specify the aggregation type here": {
        "field": "Name the field you want to aggregate on here"
      }
    }
  }
}
The following request runs a sum aggregation against the runtime field "total" over all documents in our index.
Example:
GET produce_v2/_search
{
  "size": 0,
  "aggs": {
    "total_expense": {
      "sum": {
        "field": "total"
      }
    }
  }
}
Copy and paste the example into the Kibana console and send the request!
Expected response from Elasticsearch:
When this request is sent, a runtime field called "total" is created and calculated for documents within the scope of our request(entire index). Then, the sum aggregation is ran on the field "total" over all documents in our index.
What are some of the benefits of using the runtime field?
The runtime field is only created and calculated when a request made on the runtime field is being executed. Runtime fields are not indexed so these do not take up disk space.
We also did not have to reindex in order to add a new field to existing documents. For more information on runtime fields, check out this blog!
There you have it. You have now mastered the basics of mapping!
Play around with mapping on your own and come up with the optimal mapping for your use case!










Oldest comments (3)
Great article! One thing I've missing here are arrays - in EleasticSearch it's something for me problematic right now :)
Great article, I can't help to register an account and come here to say thank you!
Oh wow @chaoxing! I am so glad you found the article helpful. Thank you so much for your kind message!