Hello everyone! In this article, we will learn step-by-step how to publish a React component as a npm package then set up a pipeline to automate testing and future publishes.
Before we start...
- Make sure you have an npm account. If not, create one here.
- Make sure you have Node and npm installed on your machine. If not, get it here.
- Basic understanding of React will be needed.
Our simple package
For this tutorial, we are making a simple React component that can immediately draw a specified polygon in any specified color.
We will then publish this component as a npm package for anyone to install and use. Let's get started!
Step 1: Create React App
First, let's create a new React app with the command:
npx create-react-app polygon-maker
Step 2: Polygon.js
Next, create a Polygon.js file which will be the component we will publish as a package.
The component will accept props with properties such as color and shape to determine the type of polygon and its color.
In this example, I have created a simple square, which will be the returned <div> style attribute if props.shape is square.
function Polygon(props) {
    const square = {
      background: props.color,
      width: "100px",
      height: "100px"
    };

   return (
      <div style={eval(props.shape)}>
      </div>
    );
}
Step 3: App.js
In App.js, we can import Polygon at the top like so:
import Polygon from "./Polygon";
And in the return function, simply add the Polygon component. Pass in shape and color as props.
<div style={{display:"flex", backgroundColor:"black"}}>
      <Polygon shape="square" color="red"/>
<div>
And the square is rendered on the browser!

Step 4: Add more shapes
You can add more shapes in Polygon.js so you can easily draw these shapes using this component. I made more such as rectangle, triangles, trapezoids, etc. Now I can pass them as shape in the Polygon component in App.js.
In App.js:
<div style={{display:"flex", backgroundColor:"black"}}>
      <Polygon shape="square" color = "red"/>
      <Polygon shape="rectangle" color = "coral"/>
      <Polygon shape="oval" color = "yellow"/>
      <Polygon shape="triangleUp" color = "green"/>
      <Polygon shape="triangleDown" color = "blue"/>
      <Polygon shape="trapezoid" color = "purple"/>
      <Polygon shape="parallelogram" color = "pink"/>
 </div>
In the browser:

Step 5: Preparing to Publish
We've finished making this simple component. Let's now publish it to npm!
- Install babel to help transpile ES6 JavaScript.
npm install --save-dev @babel/cli @babel/preset-react
Delete the
publicfolder.Go to
package.jsonfile. Underscripts, add the line:
"publish": "rm -rf dist && mkdir dist && babel src/Polygon.js -d dist --copy-files"
This script will make a directory called dist and copy the compiled Polygon file inside it.
- Still in
package.json, set theprivateproperty to false and add the following:
"babel": {
    "presets": [
      "@babel/preset-react"
    ]
 }
Great! Now we are ready to publish this as a npm package.
Step 6: Publish to npm
In your command prompt/terminal, login to your npm account with:
npm login
Then, run our publish script with:
npm run publish
You should see a dist directory appear in your root folder with Polygon.js inside it. Rename that file to index.js.
Finally, run:
npm publish
And our Polygon maker package should be live on npm!

Next Steps: Automating Tests and Updates
After publishing your npm package, it is a good idea to set up a pipeline to automate future tests and version updates. Buddy CI/CD is an intuitive tool that we can use to achieve this easily.
Step 1: Add a Pipeline
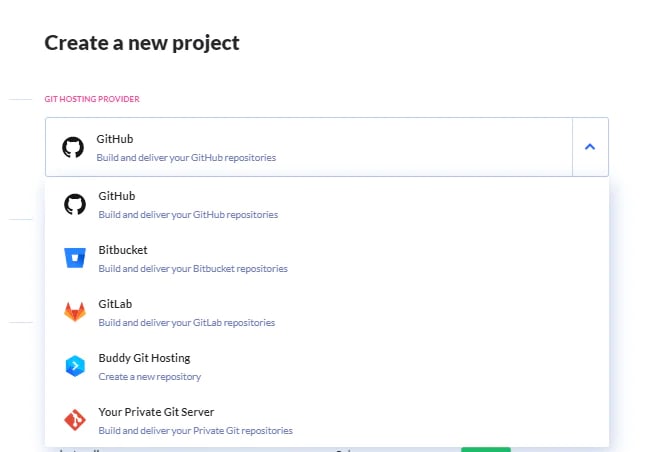
To get started, simply create an account at buddy.works, and add your project by choosing the git provider you use.
After adding your project to Buddy, you can click 'Add a new pipeline' to set up a pipeline. Set Trigger mode to On Push and the branch as master to ensure that the pipeline will automatically run when we made changes to our project.

Step 2: Build and run tests
Next, add a Node action into the pipeline. In the terminal, the following commands will build and run tests to make sure your npm package is error-free.

Step 3: Authenticate and publish
After we test our package, we can publish it to npm. To do that, we will need to login to our npm account.
Add a Node action with the following commands in the terminal:

This command will allow us to authenticate ourselves using the npm-cli-login package and environment variables such as NPM_USER, NPM_PASSWORD and NPM_EMAIL.
To install npm-cli-login and then run npm publish, click on the Environment tab and add this line in the terminal as shown in the image below:

Now we need to specify our environment variables by heading over to the Variables tab and add the 3 variables as appropriate.

Step 4: Add Email Notification
Last but not least, we add an Email action into our pipeline to notify us when the package is successfully tested and published to npm.

Run Pipeline!
Let's try a test run. As seen in the image below, the execution was successful and we have created an automated pipeline to test and publish any updates to our npm package.

Conclusion
And that is how you can build and publish a simple React component to npm. After that, you can simply automate testing and future updates using a CI/CD tool like Buddy (you can even configure a pipeline to deploy React with zero-downtime!).
Thanks for reading. I hope this article has been helpful. Please like and share it around if it is. Feel free to share any thoughts in the comments below. Till next time, cheers!

Top comments (1)
Thanks for the post Victoria, it's very well done. I like how your mind works. The coding is intuitive and clean.
This is something I have been wondering on how to do since a couples of months now, but hadn't find a tutorial about it. Luckily I found this one.