
Written by Zafar Saleem✏️
When building a DApp, both you and your users will need a third-party, browser-specific plugin or extension for users to interact with your smart contracts. At the time of writing, no major browsers have the built-in ability to interact with smart contracts on blockchain nodes.
What if instead of relying on your users to install the required extensions, they could use your DApp to interact with smart contracts immediately? In this article, we’ll build a Node.js API that will use Web3.js to interact with and retrieve data from the blockchain network, then send it back to the user on the browser app using React.
To follow along with this article, you can access the full code at this GitHub repository. But before we jump into our project, let’s consider some fundamentals of blockchain technology.

Fundamentals of blockchain technology
Blockchain technology is based on a decentralized system. To understand decentralized systems, we first need to understand centralized systems. The majority of online services like Facebook, Google, Twitter, Instagram, and WhatsApp all use centralized systems, meaning user data is stored in their servers, and the organization has full access to it in a centralized server or database.
In a decentralized system, user data is distributed among several nodes in a blockchain network, and every node contains a full copy of that data. These nodes aren’t owned by a single entity, but instead are owned by individuals all around the world
To understand the blockchain, you’ll need to understand three important concepts, blocks, miners, and nodes.
A blockchain network consists of chains, and every chain consists of blocks. Blocks have three elements: the data in a block, a nonce, which is a 32-bit whole number, and a hash, a 256-bit number.
Using the process of mining, miners create new blocks in the chain. Mining a block is a pretty difficult process because every block has a reference to a previous block’s hash in a chain.
Nodes refer to computers or any other electronic device in a blockchain. Decentralization is at the core of blockchain technology. No one computer or organization can own the chain; instead, it is distributed via the nodes connected to the chain.
Getting started
To begin our project, we need to set up Ganache and Truffle, which allow us to work with smart contracts.
Setting up tools
First, download Truffle from its official website, then install it with the command below:
npm i truffle -g
To install Ganache, you can follow along with the official documentation. Upon opening it, you'll see a screen like the one below:

Setting up Metamask
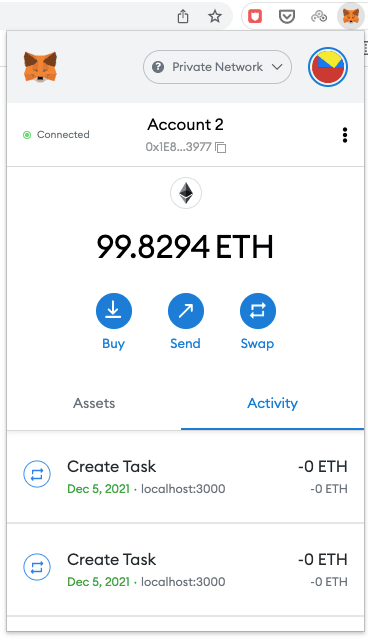
Go ahead and add the Metamask extension to Google Chrome. Once Metamask is added to your Chrome browser, click on the extension icon, and you should see a screen similar to the one below. Keep in mind that you might not see any networks in the list if this is your first time opening Metamask:
Now, click on Private Network. You should see the screen below, which lists all the different networks.
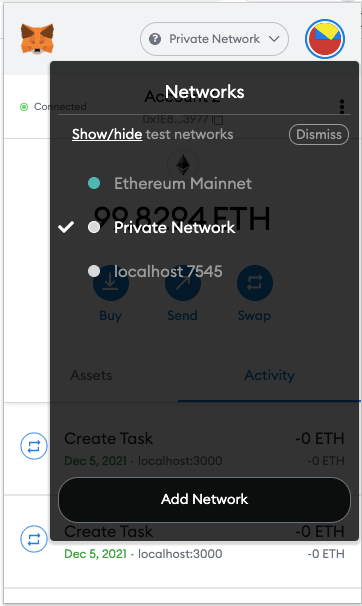
Click on Add Network, and you should be redirected to a different page that looks something like the image below.
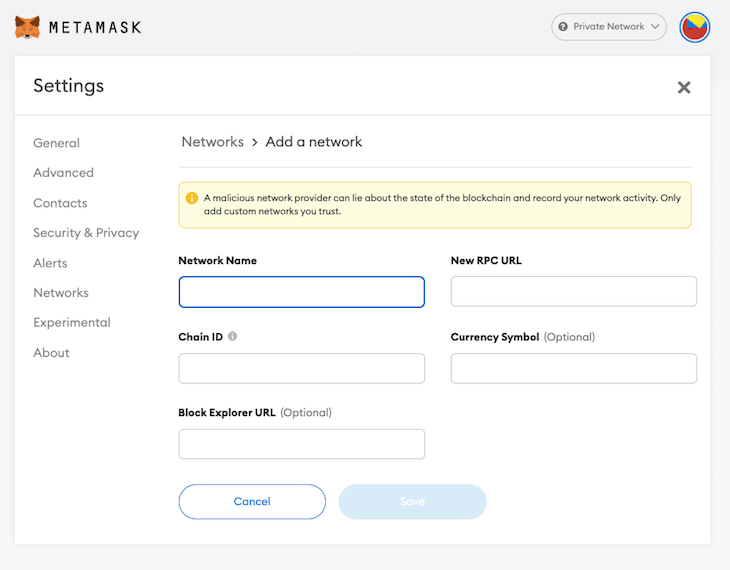
Fill in the form with the following details:

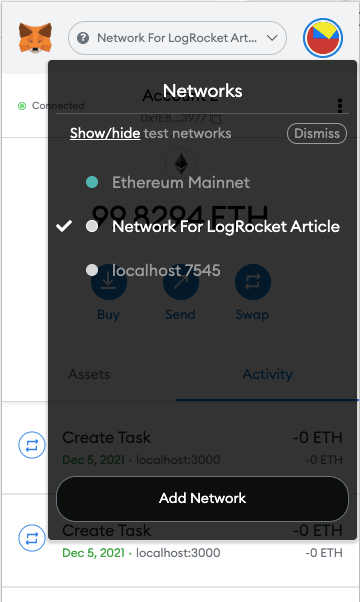
Please ignore the error for Chain ID. Metamask will accept that as is. Now, you can click save, and when you click on the Metamask extension in Chrome, you should see your newly created network in the list like below:
Setting up the backend
To begin building our backend, first, make sure that you already have pnpm installed globally on your machine. We’ll use pnpm instead of npm or Yarn. If you don’t already have pnpm installed, run the command below to install it:
npm install pnpm -g
Next, make sure you’ve installed nodemon globally; if not, run the command below to install it:
npm install nodemon -g
Start Ganache, then open your terminal and follow the commands below:
mkdir blockchain-node
cd blockchain-node
mkdir blockchain-node-api
cd blockchain-node-api
pnpm init -y
Open your project in your favorite code editor, open the package.json file, then add the following code in that file:
{
  "name": "blockchain-node-api",
  "version": "1.0.0",
  "description": "",
  "main": "index.js",
  "scripts": {
    "test": "echo \"Error: no test specified\" && exit 1",
    "start": "nodemon server.js",
    "build": "node server.js"
  },
  "keywords": [],
  "author": "",
  "license": "ISC",
  "dependencies": {
    "@truffle/contract": "^4.4.1",
    "cors": "^2.8.5",
    "express": "^4.17.2",
    "mongodb": "^4.2.2",
    "nodemon": "^2.0.15",
    "web3": "^1.6.1"
  }
}
To install all of the dependencies above, run the following command:
pnpm install
Writing your first smart contract
To initialize your project as a Truffle project, run the command below inside blockchain-node-api:
truffle init
The command above will generate a few folders. Inside the contracts folder, create a new file called Contacts.sol and paste the code below code inside it:
pragma solidity ^0.8.10;

contract Contacts {
  uint public count = 0; // state variable

  struct Contact {
    uint id;
    string name;
    string phone;
  }

  constructor() public {
    createContact('Zafar Saleem', '123123123');
  }

  mapping(uint => Contact) public contacts;

  function createContact(string memory _name, string memory _phone) public {
    count++;
    contacts[count] = Contact(count, _name, _phone);
  }
}
Now, you have your first smart contract that uses Solidity. We created a smart contract using the contract keyword and named it Contacts. Inside Contacts, we create a state public variable called count.
Next, we created a structure using the struct keyword and named it Contact. We added id, name, and phone as properties. Afterward, we made a constructor function. Inside that function, we added one contact to the contract by calling the createContact function, which is declared at the end of this contract class.
We created map to add contacts in our contract. We declared createContact and passed name and phone as parameters. Note that this is a public function. Then, I update the state variable count, which I use as an id in contacts map.
With that, we’ve finished writing our first smart contract. Now, we’ll deploy our smart contract to Truffle. Create a new file in the migrations folder with the name 2_deploy_contacts.js and paste the code below:
const Contacts = artifacts.require("./Contacts.sol");

module.exports = function(deployer) {
  deployer.deploy(Contacts);
};
Next, open your truffle-config.js file and paste the code below in it:
module.exports = {
  networks: {
    development: {
      host: "127.0.0.1",
      port: 7545,
      network_id: "*"
    }
  },
  compilers: {
    solc: {
      version: "0.8.10",
      optimizer: {
        enabled: true,
        runs: 200
      }
    }
  }
}
Make sure all of the above information is aligned with your Ganache network settings, especially host and port. Then, run the following command:
truffle migrate
It may take a few seconds for the command to migrate your smart contract.
Write the Node.js API
With our smart contract written and deployed to Truffle, we can write the API that will serve as a layer between our frontend application and our smart contract. Inside the blockchain-node-api folder, create files called routes.js, server.js, and config.js. Then, open the server.js file and paste the code below:
const express = require('express');
const app = express();
const cors = require('cors');
const routes = require('./routes');
const Web3 = require('web3');
const mongodb = require('mongodb').MongoClient;
const contract = require('@truffle/contract');
const artifacts = require('./build/contracts/Contacts.json');
const CONTACT_ABI = require('./config');
const CONTACT_ADDRESS = require('./config');

app.use(cors());
app.use(express.json());

if (typeof web3 !== 'undefined') {
        var web3 = new Web3(web3.currentProvider);
} else {
        var web3 = new Web3(new Web3.providers.HttpProvider('http://localhost:7545'));
}

mongodb.connect('mongodb://127.0.0.1:27017/blockchain-node-api',
        {
                useUnifiedTopology: true,
        }, async (err, client) => {
        const db =client.db('Cluster0');
        const accounts = await web3.eth.getAccounts();
        const contactList = new web3.eth.Contract(CONTACT_ABI.CONTACT_ABI, CONTACT_ADDRESS.CONTACT_ADDRESS);

        routes(app, db, accounts, contactList);
        app.listen(process.env.PORT || 3001, () => {
                console.log('listening on port '+ (process.env.PORT || 3001));
        });
});
server.js is the main file that runs as a Node.js server. I am requiring all of the dependencies at the beginning of the file. Then, using cors and Express, I check for Web3.js and make it interact with blockchain network by providing a localhost address.
Next, I’m connecting to a MongoDB database. Although we aren’t using any database in this article, it is good to have this prepared for future use. Inside the callback function of the mongodb.connect() function, I’m connecting with Cluster0 and getting accounts from the Ethereum blockchain network.
Using the web3 Contract function, where I pass CONTACT_ABI and CONTACT_ADDRESS, I get connected with the smart contract. We’ll add this information into a config.js file that we created earlier.
Next, we’ll call routes() with all the parameters. I’ll create this routes function in the routes.js file, which we created earlier. You can listen to the app on port 3001. Let’s go to the config.js file, open it, and add the code below:
const CONTACT_ADDRESS = '0xB7fC6C3DFebD24EAe16E307Ea39EdF7c93ff7866';

const CONTACT_ABI = [
        {
    "inputs": [],
    "stateMutability": "nonpayable",
    "type": "constructor"
  },
  {
    "inputs": [
      {
        "internalType": "uint256",
        "name": "",
        "type": "uint256"
      }
    ],
    "name": "contacts",
    "outputs": [
      {
        "internalType": "uint256",
        "name": "id",
        "type": "uint256"
      },
      {
        "internalType": "string",
        "name": "name",
        "type": "string"
      },
      {
        "internalType": "string",
        "name": "phone",
        "type": "string"
      }
    ],
    "stateMutability": "view",
    "type": "function",
    "constant": true
  },
  {
    "inputs": [],
    "name": "count",
    "outputs": [
      {
        "internalType": "uint256",
        "name": "",
        "type": "uint256"
      }
    ],
    "stateMutability": "view",
    "type": "function",
    "constant": true
  },
  {
    "inputs": [
      {
        "internalType": "string",
        "name": "_name",
        "type": "string"
      },
      {
        "internalType": "string",
        "name": "_phone",
        "type": "string"
      }
    ],
    "name": "createContact",
    "outputs": [],
    "stateMutability": "nonpayable",
    "type": "function"
  }
];

module.exports = {
        CONTACT_ABI,
        CONTACT_ADDRESS,
};
We’ll need this information to connect with smart contracts using Web3.js in server.js file, as we did earlier. Next, we’ll add the following code to our routes.js file:
function routes(app, db, accounts, contactList) {
        app.get('/contacts', async (request, response) => {
                let cache = [];
                const COUNTER = await contactList.methods.count().call();

                for (let i = 1; i <= COUNTER; i++) {
      const contact = await contactList.methods.contacts(i).call();
      cache = [...cache, contact];
    }

    response.json(cache);
  });
}

module.exports = routes
In this file, I’m creating a routes function with all the required parameters. Next, I’m using the GET route for the /contacts endpoint. Inside the callback function, I’m creating a cache variable. We then get a COUNTER from the smart contract by calling the count() function, which is automatically created when we create a public state variable with the name of count.
Then, we loop through all the COUNTER and get contacts one-by-one from contactList, which I place in the cache variable and finally send to the front in response.
At the end of the file, we’ll export the routes function so that we can use it in other functions, like server.js, in this case.
Now, run the server with the following command:
nodemon server.js
The command above will run the server, which is now ready to receive requests from our React app.
Building our frontend with React
Now that our smart contract, Node.js server, and API are ready, we can write the frontend React app. CD to the blockchain-node folder, then run the command below to create a React project:
pnpx create-react-app blockchain-node-api-react
Once the new project loads, open your App.js file and replace the existing code with the following code:
import { useEffect, useState } from 'react';
import logo from './logo.svg';
import './App.css';

function App() {
        const [contacts, setContacts] = useState([]);

        useEffect(() => {
                async function fetcher() {
                        const response = await fetch('http://localhost:3001/contacts');
                        const contacts = await response.json();

                        setContacts(contacts);
                }

                fetcher();
        }, []);

  return (
    <div>
            <ul>
      {
              contacts.map(contact => (
                      <li key={contact.id}>
                              <p>Name: {contact.name}</p>
                              <span>Phone: {contact.phone}</span>
                      </li>
              ))
      }
      </ul>
    </div>
  );
}

export default App;
The code above generates a simple React functional component in which I am declaring the local state variable contacts.
Inside the useEffect Hook, we make a request to the Node.js server we just created. Our server uses Web3.js to get all the contacts from the blockchain network, then sends the contacts to our React app. We put those contacts from the server into a contacts variable and set it in the local state variable contacts. Inside jsx, we loop through all the contacts and render them on the screen.
Run your React app using the command below:
yarn start
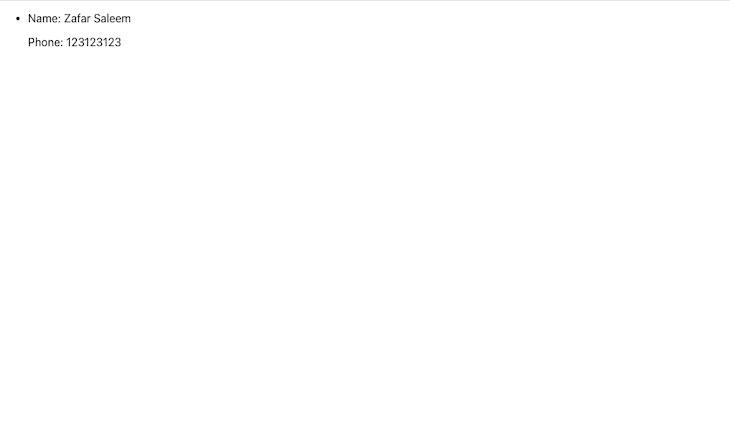
The command above will open your browser, and you’ll see an output like the one below:
Conclusion
In this article, we created a Node.js API that allows your users to interact with smart contracts without installing a third-party extension. We covered some fundamentals for understanding blockchain technology, building our backend with Node.js, writing a smart contract, and finally, building our frontend with React.
I hope you enjoyed this tutorial, and be sure to leave a comment if you have any questions. Also, don’t forget to follow and connect with me on the social media accounts linked in my bio.
Full visibility into production React apps
Debugging React applications can be difficult, especially when users experience issues that are hard to reproduce. If you’re interested in monitoring and tracking Redux state, automatically surfacing JavaScript errors, and tracking slow network requests and component load time, try LogRocket.

LogRocket is like a DVR for web and mobile apps, recording literally everything that happens on your React app. Instead of guessing why problems happen, you can aggregate and report on what state your application was in when an issue occurred. LogRocket also monitors your app's performance, reporting with metrics like client CPU load, client memory usage, and more.
The LogRocket Redux middleware package adds an extra layer of visibility into your user sessions. LogRocket logs all actions and state from your Redux stores.
Modernize how you debug your React apps — start monitoring for free.

Top comments (0)