
Next.js is a React framework for JavaScript created by Zeit which allows you to build server-side rendered single-page web applications. We're going to be using Next.js to create a Pokedex application. All you need to get started making an application with Next.js is npm version 5.2 or higher, and you can simply run the create next app command in the cli, passing the name of your app as the second parameter.
npx create-next-app pokedex
You should see this message Installing react, react-dom, and next using npm..., and then a success message. Your newly created app now has everything necessary to start. Entering npm run dev in the console will get your development page up and running on http://localhost:3000/, and upon visiting the site you will see this Next.js welcome screen -

Back inside your code editor, you will see a pages folder that was automatically generated for you when the application was created. This is where the top-level React components will be. Inside this folder is the index.js file, which is currently being rendered on localhost:3000. For our Pokedex application we won't need anything below the closing </Head> tag, nor will we need to import the Nav component. It should now look like this -

Now, to get our pokemon we'll be using the pokemon api found here - https://pokeapi.co/. Next.js has a unique lifecycle hook, getInitialProps that allows us to access route related data such as request and response and use that data in our app as props. Like all lifecycle hooks, we just need to tell it what we need it to do; in this case, catch us some pokemon! Start by importing axios and then below the Home functional component in index.js craft your getInitialProps method to reach out to the pokemon api and give you back all 964 of the critters. You can now pass the retrieved data to the Home component as props and, using regular JavaScript, map the captured pokemon to your site.

Resulting in -

--missing section--
Sweet! Next you're going to want to display the individual pokemon and their information on their own page. Inside the pages folder, create a new folder named pokemon. In your new pokemon folder, make a file called [number].js. This odd looking naming convention is unique to Next.js. It signifies to Next.js that you will be creating dynamic routes for each of your pokemon. Craft your getInitialProps here with query being passed as the parameter. The query will contain the number in the url for the corresponding pokemon you wish to display. You can then use that number to make your axios call to the pokeapi for the specific critter you need and display their data. I've chosen to display the name, default image, and shiny image for each pokemon.

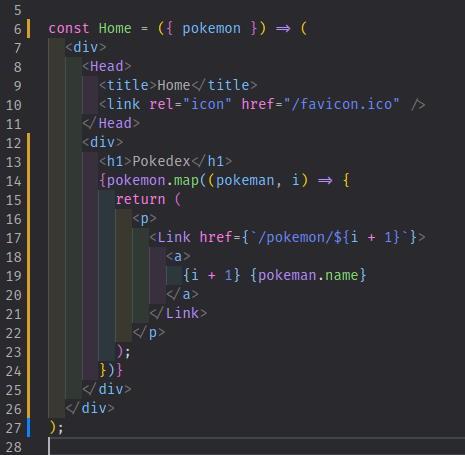
Almost done! Back in index.js there's just a few changes to make to tie it all together. Once again import Link, this time to link us to the pokemon pages. Add a <Link href={/pokemon/${i + 1}}> tag to the return statement inside your map function which renders the pokemon list. This will tie the corresponding pokemon to the query in [number].js.
That's it! Now head to your browser to catch some pokemon. Clicking on a pokemon will dynamically route you to that pokemon's page and show you their details.

I hope you enjoyed building a Pokedex using Next.js, and if you really liked your app, they also make it very easy to deploy at zeit.co. With a few simple steps you can have your Pokedex on the web for free.

Top comments (0)