Introduction
In this 2-part article series, I'll be creating a UiPath robot that can be used to fill in the hours registration using an excel sheet.
Our company uses a web-based timesheet application. Every week we have to fill in this timesheet, which requires logging into the application, filling in all the fields, adding comments where needed, etc.
To practice my UiPath robot building skills, I've created a small robot that handles this for me. At the start of the week, I generate an Excel sheet in Office 365 by scraping all entries for this week from the web based timesheet application.
At the end of each day, I fill in my Excel, and at the end of the week I run the UiPath robot to fill in the web based timesheet from the excel.
What will we be doing here?
I'll be showing the following activities in this article series:
- Running a local version of the TimeRegistration Angular application by cloning my github repository, installing the dependencies, and serving it locally
- Creating a new blank process in UiPath Studio, and creating our first sequence to open the TimeRegistration application in Chrome Using Visual Studio 2019 Community Edition to create custom activities for our robot
- Using UiPath studio to generate an excel file for the TimeRegistration application based on the current structure
- Filling in the time registration form by reading data from Excel and finding the matching row to fill in the data from Excel for that day
This article will cover points 1 to 3; points 4 and 5 will be covered in the next article.
Applications used
For the time registration application, I've created a simple Angular application that offers the same type of UI that our time registration application does. I'll briefly discuss running this on your own machine later.
I'll be using Google Chrome as my browser. I've installed the UiPath Chrome Extension.
For the UiPath robot, I am going to use UiPath Studio Community edition, version 2020.6.0.
I'll be creating a few custom activities in UiPath to have my robot do what I want; for that I'll be using Visual Studio 2019 Community Edition and the UiPath Custom Activities Extension for Visual Studio 2019
Office 365 is used for Excel handling; I have an Office 365 account that I can use; check my other article for instructions on how to link Office 365 to your UiPath Studio.
All source control and versioning will be handled by Git and Github.
Angular Time registration application
This application is a very flat UI application with no other logic behind it. It will generate an overview of some projects, and use the current week as starting point. Weeks start on Monday, end on Sunday. Goal is to prove that we can find projects in this list, based on an Excel input, then fill in the days for that project with the data in an Excel input.
The Angular application can be found here. To run this, you will need node.js installed on your system, and to clone the repository you will need Git. Node.js can be found here. I used LTS version 12.18.2.
- Clone the repository by opening a command prompt and typing
git clone https://github.com/marcoNewspark/AngularTimeRegistration
- Once cloning has been completed, we need to install the Angular modules and other modules we need. Go to the folder and type
npm install
This will install the necessary components (this might take some time).
To see if the application is working, we can run it on our own machine by typing the following into the command window
ng serveOpen a browser (I use Chrome here), and navigate to
http://localhost:4200/weekDetail
If the application is working correctly, it will show a screen similar to this one
UiPath - robot overview
In UiPath, i'll be starting with a Blank process. In this process, the robot will contain the following parts:
- Opening and closing TimeRegistration web application
- Using TimeRegistration to download an Office 365 Excel for filling in our hours this week
Filling in the TimeRegistration fields based on our Excel sheet
UiPath - opening TimeRegistration
First, we need to create a new project. Start UiPath Studio, and create a new blank process.
The bot will be named TimeRegistrationBot. I've included a small description, and specified what folder the bot will be created in.
Clicking Create will set Studio to work creating the bot for us. After this is completed, we can continue by creating a folder for our TimeRegistration application. Right-click on the TimeRegistrationBot entry in the Project Explorer, and click on Add → Folder. In the Add new folder… window, enter TimeRegistration and click on OK.
Right-click the TimeRegistration folder in the Project tab, and select Add → Sequence.
In the Add sequence… window, enter OpenTimeRegistration and click on Create.
In the Activities tab, search for Open Browser, and drag it into the Designer window for our new OpenTimeRegistration sequence.
In the Open Browser activity, click the Insert url here field and enter the URL for our local time registration application surrounded by double quotes
http://localhost:4200/weekDetail
Select the Open Browser activity, and change the BrowserType property to Chrome (nobody wants to use Internet Explorer…). Now, we can verify if it works from the bot as well, by clicking the Debug arrow in the Ribbon up top.
A new Chrome window should open up, with our time registration application we just installed and which should still be running
Visual Studio 2019 - Creating custom activity project
Now, we will be using Visual Studio 2019 to
- Create a new UiPath Activity Project
- Add a new Activity via the Extension menu
- Create methods to generate the information we need
I'd like to create a custom activity to generate a filename for me that Office 365 will use when creating an Excel file. This filename will have the following pattern:
Time registration <<dd-MMM-yyyy>> wk<<weeknumber>>.xlsx
I'll be using a custom activity that will generate this filename for me, based on the date argument input into the activity. This custom activity will have 1 input parameter inDate that specified the date for Excel file generation. Based on that date, we will calculate the date of Monday for the week in which that date falls, and the ISO week number for that week. There will be 1 output parameter outFileName with the generated filename.
Creating the custom activity
Open Visual Studio, and create a new project.
In the new project window, enter UiPath in the Search for templates textbox, and select the UiPath Standard Activity Project template in the result list, then click on Next
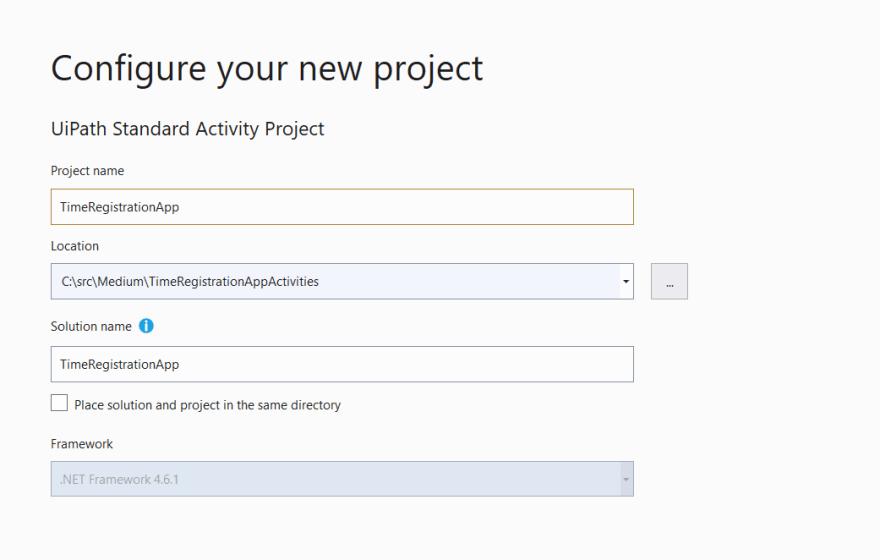
In the Configure your new project screen, enter the name for your library and the location where you want to store the sources on your machine, then click on Create
Once the project has been created, select the Activities folder in the TimeRegistrationApp.Activities project in the Solution Explorer in Visual Studio. Click on Extensions → UiPath → Add Activities
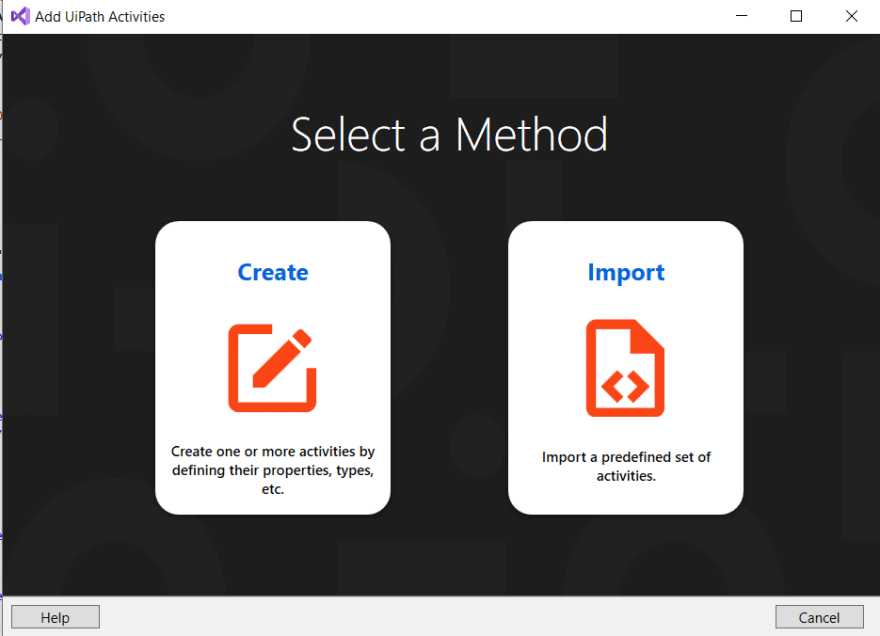
In the Select a Method screen, click on Create.
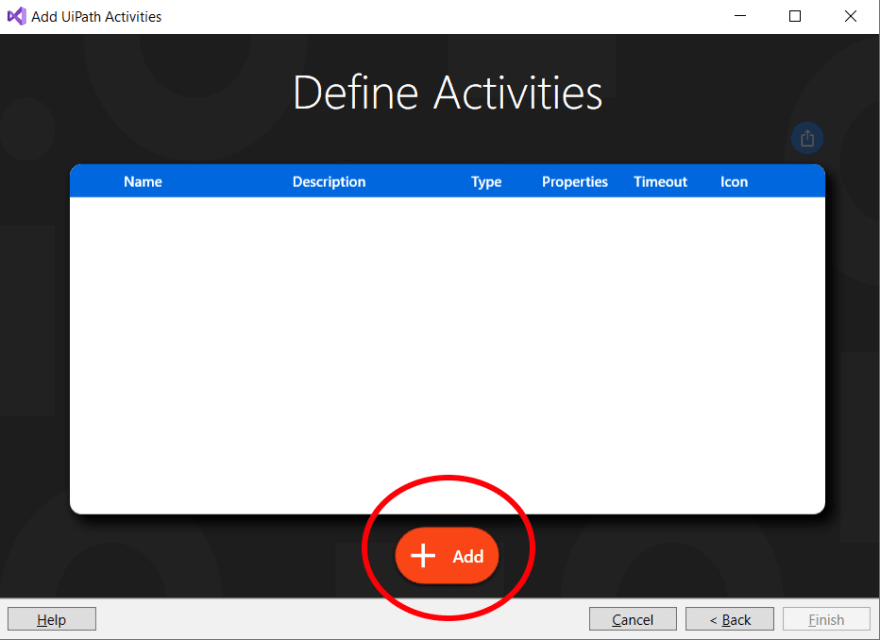
In the Define activities screen, click on Add (+) to create a new Activity.
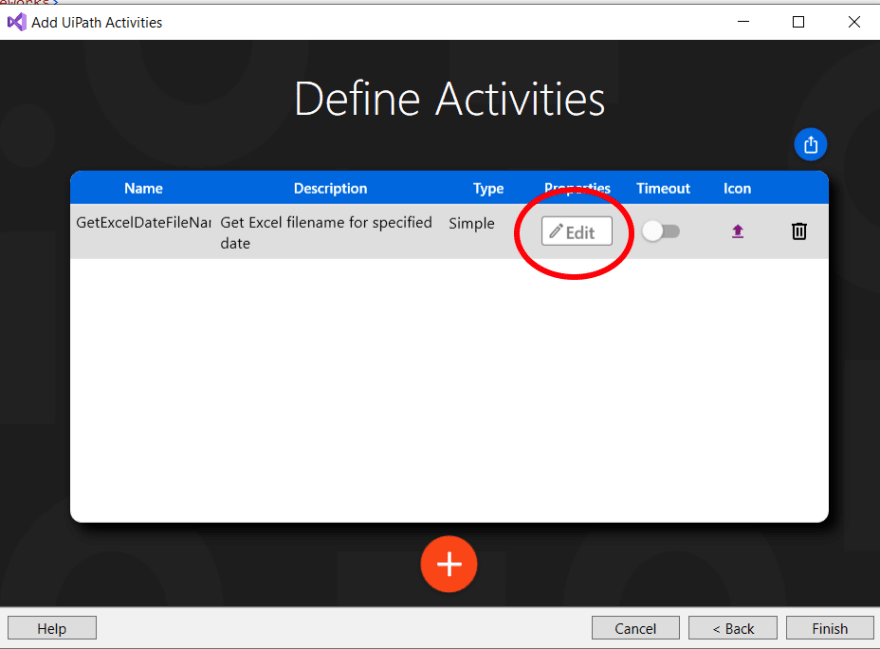
Click on Name field, enter GetExcelDateFileName as the name for our Custom Activity. Click on Description field, and enter a description for our activities. Next, click on the button Edit to edit in- and output parameters.
Creating the in- and output properties
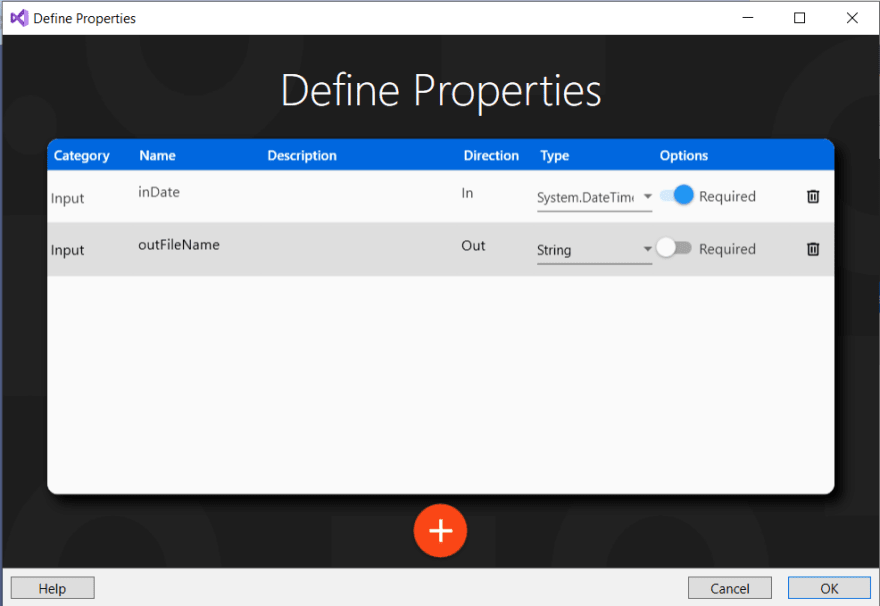
In the Define properties screen, click on Add(+) to add a new property. Name it inDate, set its type to System.DateTime. Set the Required property to True.
In the same screen, click on Add(+) and add a new property. Set its name to outFileName, change its type to String, and set the direction to Out.
Click on OK in the Define Properties screen, then on Finish in the Define Activities screen. Visual Studio will now create the boilerplate code for us to define our activity. To view this code, double-click on the GetExcelDateFileName.cs file in the Solution Explorer.
Adding our own code
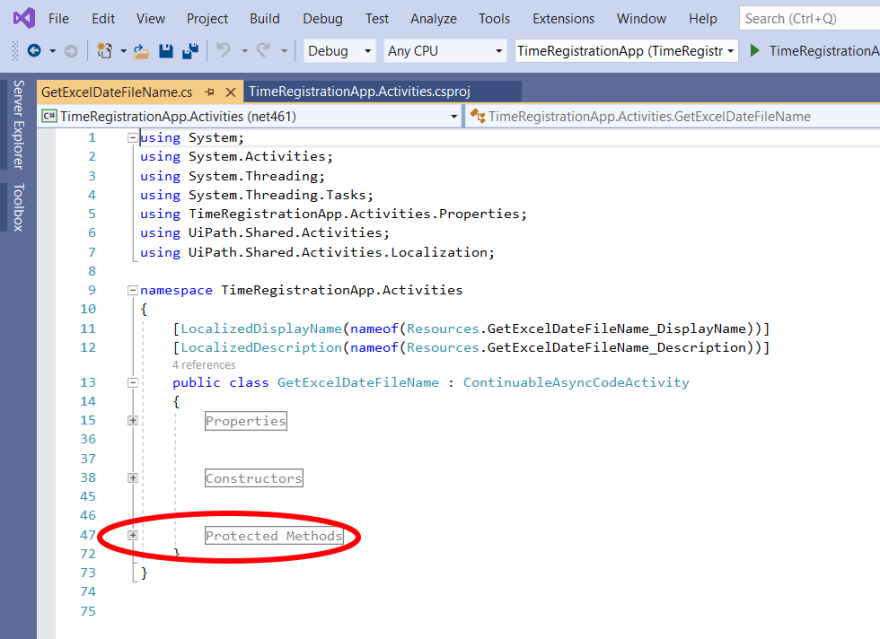
There are a lot of sections in this file, but for now we will concentrate on the Protected Methods section. Click on the + next to Protected Methods to open this section
Find the section with the comment Add execution logic HERE, and replace it with our custom code. Just above it, you can see our input parameter inDate, the date that we will use to start calculating start of the week and the weeknumber for that week.
Algorithm: start of the week for us is Monday, end of the week is Sunday. So for the given date, determine the weekday and subtract a day until we reach Monday. Then use that date to determine the week number, by including a bit of code that calculates the ISO 8601 week number for a given date (google it for definition). We need to add a reference to System.Globalization for this code to work.
End result looks something like this:
protected override async Task<Action<AsyncCodeActivityContext>> ExecuteAsync(AsyncCodeActivityContext context, CancellationToken cancellationToken)
{
// Inputs
var indate = InDate.Get(context);
var workDate = indate;
var myWeekDay = workDate.DayOfWeek;
while(myWeekDay!=DayOfWeek.Monday)
{
workDate = workDate.AddDays(-1);
myWeekDay = workDate.DayOfWeek;
}
var myWeekNumber = GetIso8601WeekOfYear(workDate);
var myFileName = string.Format("TimeRegistration {0} wk{1}", workDate.ToString("dd-MMM-yyyy"), myWeekNumber.ToString());
// Outputs
return (ctx) => {
OutFileName.Set(ctx, myFileName);
};
}
// This presumes that weeks start with Monday.
// Week 1 is the 1st week of the year with a Thursday in it.
private int GetIso8601WeekOfYear(DateTime time)
{
// Seriously cheat.  If its Monday, Tuesday or Wednesday, then it'll
// be the same week# as whatever Thursday, Friday or Saturday are,
// and we always get those right
DayOfWeek day = CultureInfo.InvariantCulture.Calendar.GetDayOfWeek(time);
if (day >= DayOfWeek.Monday && day <= DayOfWeek.Wednesday)
{
time = time.AddDays(3);
}
// Return the week of our adjusted day
return CultureInfo.InvariantCulture.Calendar.GetWeekOfYear(time, CalendarWeekRule.FirstFourDayWeek, DayOfWeek.Monday);
}
Next, build the Custom Activity (CTRL+B), and when successful, publish the Custom Activity package to the local package repository location for UiPath. This path can be found in the UiPath Studio by clicking on Manage Packages in the top ribbon, then clicking on Settings.
Copy this path, then go to Visual Studio and right-click on the TimeRegistrationAppActivities.Activities project. Select Publish…
In the Publish wizard, select Folder and click Next.
In the Folder Location field, paste the value we just copied from UiPath Studio Manage Packages settings and click on Finish. Then click on Publish in the Publish window. Visual Studio will now generate a NuGet package that we can use in UiPath.
Verify the custom activity works
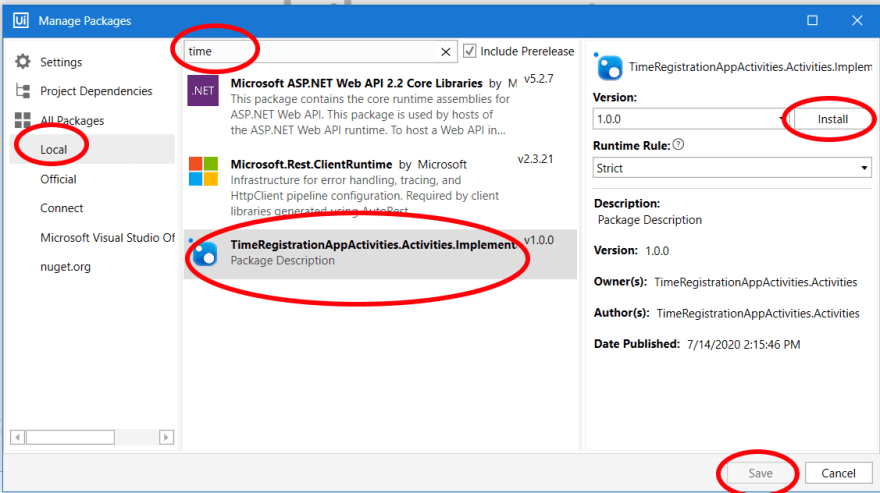
First, we need to add our Custom Activity library to our UiPath project. Click on Manage Packages in the top ribbon, then click on Local. In the Search field, enter TimeReg. Our custom activity package should show up in the list. Click on it, then in the right part of the window, click on Install, then on Save
UiPath will add a dependency to the project, then close and re-open our Project. To verify that we can use the activity, create a new sequence in UIPath Studio. In the Activities tab in the designer, look for TimeRegistrationAppActivities in the list. Open this entry, open the Activities entry, then drag our GetExcelDateFileName activity to our blank sequence.
Create a new string variable outFileName in our new sequence.
Select the GetExcelDateFileName activity in the Sequence designer. In the properties, we can enter our inDate argument. Click on this field, and set it to DateTime.Now. Now click on the outFileName property, and enter outFileName (no quotes).
After this, add a Message Box activity to our sequence. Set the Text property to outFileName.
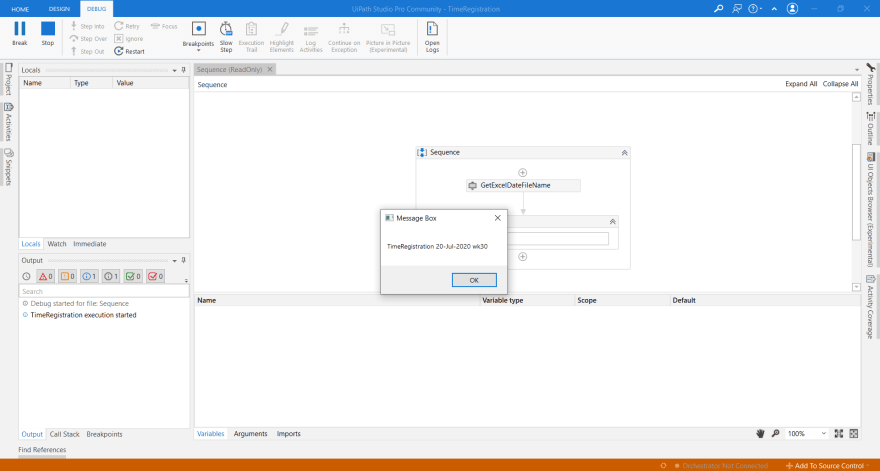
Click on Debug File, and a message box should pop up with the filename that would be generated for today.
Close the sequence we just created; you can delete the sequence in UiPath, we won't need it anymore. We've just proven that our custom activity works!
In the next installment, I'll discuss running our web application, extracting our web application data into an Excel file, and using that Excel file to fill in the web application.









Oldest comments (0)