
First. Go to the StackEdit and click in "Start Writing".

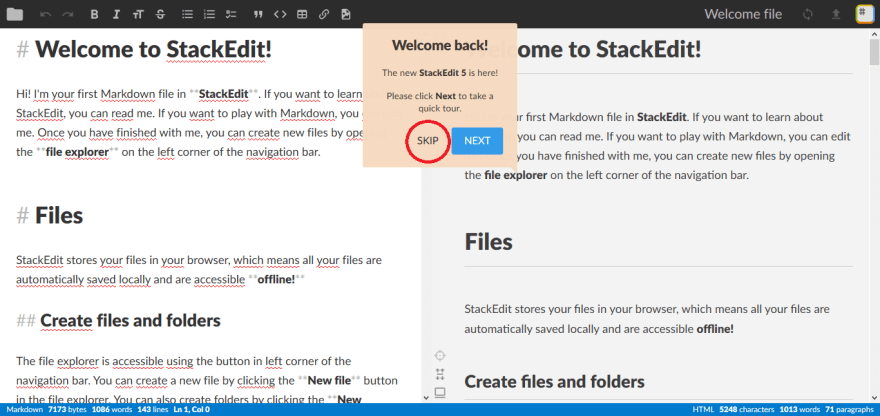
After waiting for StackEdit to load, this should be waiting for you.
Just click "Skip" because we don't need a tutorial on how StackEdit works for now.
Then go to the StackEdit logo located at the top right and click on it.

This should appear to you.
Just click on "Workspaces". We'll talk about "Sign in with Google" later in this post.

Click in "Add a GitLab workspace".

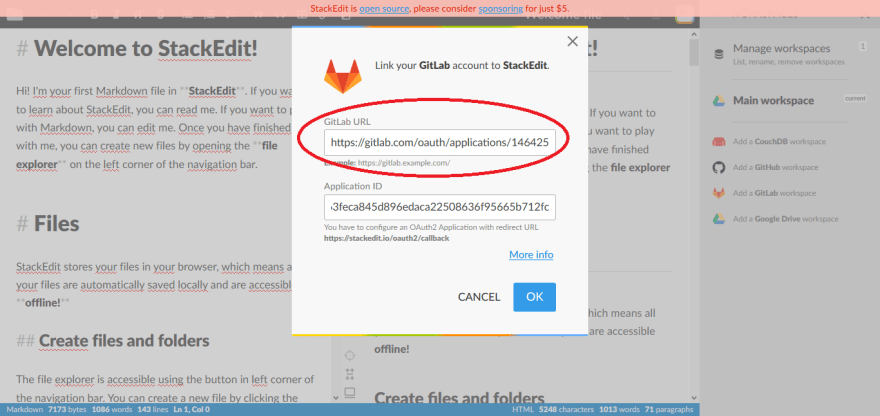
This should appears to you.

Now, you need go to the GitLab. There, click in your profile icon on top right corner.
Top right corner is the latest fashion trend! 😉

This should appears to you.
Just click in "Settings".

This should appears to you.
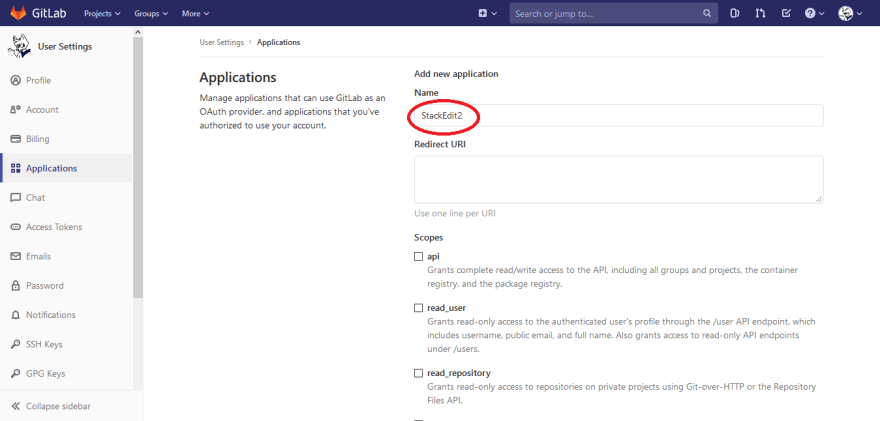
Click in "Applications".

Under "Add new application", in "Name", well, type a name for your application. Something like "StackEdit" (duh) is fine. I will type "StackEdit2" because I already made this.
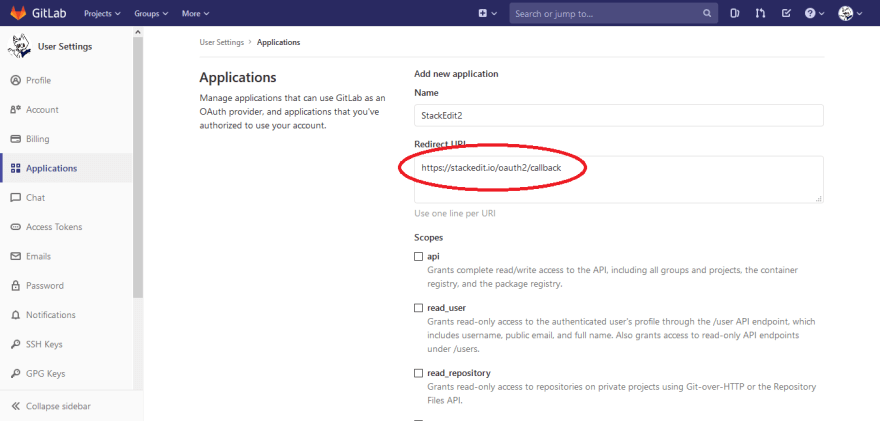
In "Redirect URI", type https://stackedit.io/oauth2/callback.
Why? 🤨
Well, StackEdit said this was your Redirect URI.
Where? 🤨
Here.

Then, check the box "api".
Of course, you can check all the boxes you want.
This is not gonna break StackEdit.
But StackEdit will only need the "api" box.
And checking checkboxes beyond the "api" box is dangerous.
Because that will give more permission than StackEdit needs.
And then, if a bad person ends up having access to your application ID and all, they can do much more than simply commit to one of your repositories.
Like I said, It is recommended that you only check the "api" checkbox.

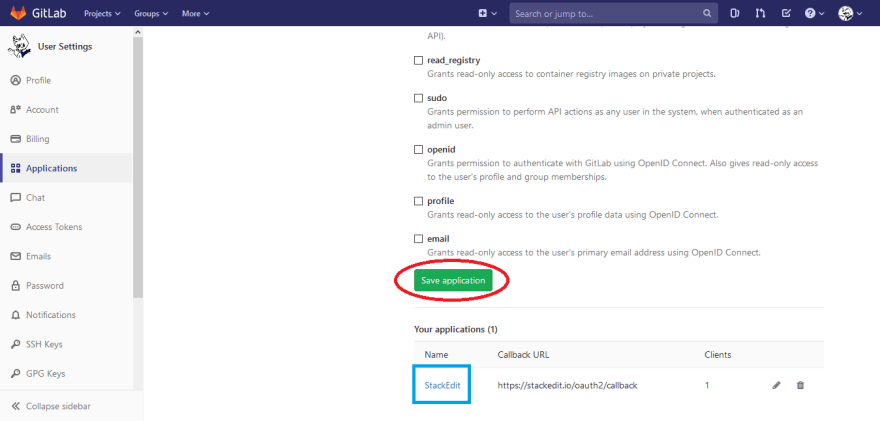
Now, scroll down unitl the "Save application" button, and click on him.
As you see, I already have a application called "StackEdit" so this is why I called this "StackEdit2", like I said before.
This should appears...
Copy the "Application ID" code from GitLab to the "Application ID" field in the StackEdit.


Wait, why don't cover up your code? This is dangerous?
Yes it is. But I will delete the app after doing this tutorial, so I think it's okay as it won't be valid anymore.
If you say 😐
Now you will get the URL of the page where the Application ID was and paste it into the "GitLab URL" field.
I'm not gonna give you guys a screenshot, because my tabs are... A little... Private... 😅
Your dirty furry 😏
It's something like: https://gitlab.com/oauth/applications/146425.
Now click in the "OK" button. When you click the "OK" button, it will open a page like this...

Just click in "Authorize" button.

Ta-dah! Now everything is set up! It will return to StackEdit and ask for a repository name. Now. Every time you edit or create a Markdown file within StackEdit, it will be committed into the repository you have chosen.
Didn't you say you would explain about "Sign in with Google"? 😶
Oh! Yes! Of course! It's simple!
"Signing in with Google" will cause StackEdit to store your credentials and create a workspace for you. That way, you don't have to "do everything you do here" every time you restart StackEdit or delete your cookies. However, the Google workspace cannot be accessed from anywhere other than StackEdit. Unlike GitLab, where you can access your files both from the GitLab repository you choose, as well as from StackEdit.
That's it!
Thanks for reading and a fun fact: You known the red fox likes the white wolf?

Top comments (2)
Hello Max White, could you please produce the tutorial? All images already broken. I tried link gitlab account to stackedit but it failed. Here is error occur
I am not sure it's my fault or gitlab no longer support.
Unfortunately it stopped working currently.