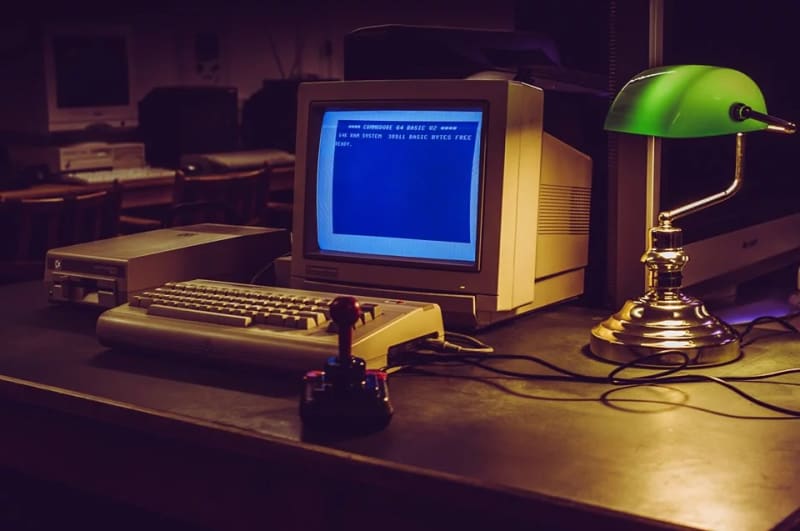
In this article, I continue my journey into the 80s, which I started in the previous article and will further explore the programming tools that the Commodore 64 offered in those years. In this article, I will look at the possibilities of programming on assembly using Turbo Macro Pro.
After experimenting with C, described in the last article, I concluded that there are more convenient tools for c64.
Therefore, the following tool is assembly.
To start programming on assembly, I must understand the MOS 65xx processor instructions, the C64 memory map, and how the peek and poke operators work.

Also, I need a tool to compile assembly code. I used Turbo Macro Pro. Turbo Macro Pro has good documentation and can highlight syntax errors almost immediately.
I can load TMP from the disk with the familiar ‘LOAD’ command. Run the TMP command with ‘sys 32768’; this command transfers control to the code at the specified address.

After starting, I got into the code editor.
The editor is pretty handy.

I will try to write a “hello world” program.
To do this, I need to place a line with text in memory and display it in video memory.
For this, I am using the following code.

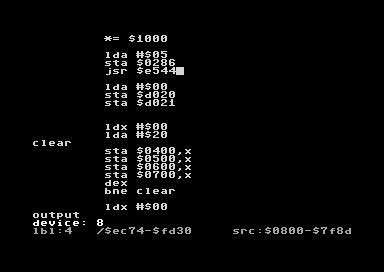
Here I am using 0x01000 as an entry point
I initialize register x to zero.
In the loop, I will perform the following actions:
- I read a character from a string at index x into the accumulator.
- I store the contents of the accumulator at the beginning of the video memory with an offset x.
- I increment x
- Checking if x is not equal to the length of the string If not, the cycle repeats.
After the end of the program, the control goes back to the BASIC, and the program’s results are not visible.
Therefore, after the output of the line, I add an infinite loop.
To start the program, I need to press the back arrow key, which locates in the top left corner. It is a command button. After it, I need to enter the command for the editor.
I enter a “3” after the command button to compile the program. Appears a screen with the results of the compilation. The ‘s’ button runs the code.

My string appeared at the beginning of the screen on top of everything already on screen.

Not very pretty. I need to clear the screen.
To do this, I stop the program with the key combination run/stop + restore and return to BASIC. With the sys 32768 commands, I return to TMP, where my source code persists, which is convenient.

The next step is screen cleaning.
For this, I have added the following code.

This code does the following:
- Writes 0 to register x
- Writes 0x020 ( space code ) to the accumulator
- Then, in a loop:
- Writes the accumulator’s value to a region of video memory that starts at addresses 0x0400 0x0500 0x0600 0x0700 with an x offset.
- Decreases x by one.
- In this case, the ‘bne’ operator will work when x not equals 0. Accordingly, the code will write spaces to all specified areas with an offset from FF to 0. That is the entire visible area of the screen. Now the output looks like this.

It seems better, but I want to display the inscription in the middle of the screen. Everything is simple here. I change the starting address of the output to ‘0x054e’, in which the text will be approximately in the centre.
Here is a new output.

I also wanted to make the output green like in classic terminals.
After studying the documentation, I realized I needed to write the code for the colour, 5 for green, into memory at 0x0286.
And also, call the system program to update the screen.
Here is the relevant code.
Execution result.

Everything is beautiful now. I decided to compile an independent program and run it from BASIC. According to the documentation, I again enter the command mode to do this. Only instead of 3 I need to press 5.
TMP prompts me to enter the name of the executable file. Also, I saved the source for this. I used the s command. To run the finished program, I load it and run it with the sys command 4096 (0x0100 ). This address that I set as the entry point.

Something went wrong.

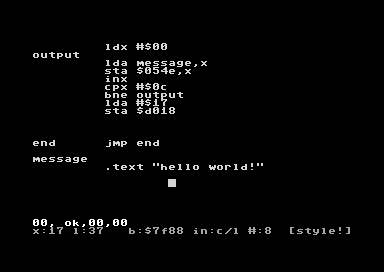
As I understand from the documentation, after the output, I need to restore the screen mode to LOWER / UPPER CASE
to do this, I need to write value 0x017 at the address 0x0d018 analogue
poke 53272,23

It looks better, but I want a strict black background. To do this, according to the documentation, I need to write 0 (black code) into memory at addresses 0x0d020 (for the border) and 0x0d021 (for the background)
lda #$00
sta $d020
sta $d021
Now It looks as I wish.
Yeah, now I have prepared the workbench for assembly programming.
What can be the conclusion?
On the one hand, programming on assembly requires a lot of immersion in the architecture of mos 65xx processors, understanding the C64 memory map and knowledge of its system routines.
It is easier than it looks at the first time.
On the other hand, I get faster and more convenient compilation instead of constant disk juggling, as in Power C.
It is clear why the programmers of the 80s on the Commodore 64 preferred assembly.
I’m still in no hurry to return from the 80s.

Thank you for being a part of this journey.
I hope it was at least fun.
Warm regards.
Stay tuned for my next posts.

Top comments (0)