
This post is originally posted on Getform Blog.
Wix is one of the best website builders and hosting platforms with distinctive features, thousands of ready-to-use templates and plugins. Wix's drag and drop editor allows you to create professional websites in a matter of minutes. It also comes with Wix ADI which is the first artificial design intelligence that can design and build a website for you according to your preferences.
Wix offers Wix Forms to add and set up a form to collect information from your website visitors. Even though it is very useful with readymade form templates, Wix free doesn't allow users to fully customize their forms, and it limits the number and type of form fields such as adding a file upload field. At that point, users need a third-party service like Getform to get a taste of freedom to fully customise, design and manage their forms.
In this blog post, we will explain how to create a contact form by using Wix templates and then show you how to add a contact form with a file upload field and full customization by using HTML and Getform.
How to Create a Contact Form in Wix
As we stated earlier, Wix offers 2 options for you to create a website; one is the Wix Editor with its default templates and the other one is Wix ADI. We will be using the Wix Editor to go step by step to build a Wix contact form.
- After choosing one of the Wix website templates, firstly you need to click on "Add" *section on the left side of the editor and then choose the "Contact & Forms"* section.
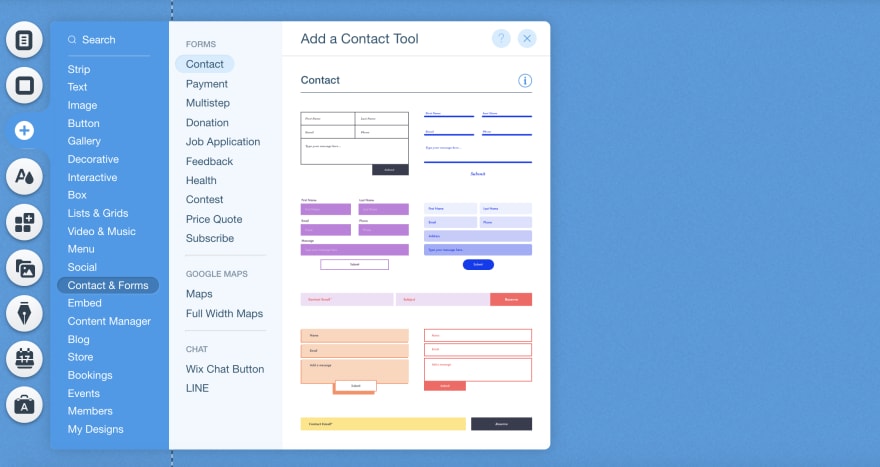
As you can see, Wix offers different types of forms such as Payment, Donation, Contest, etc. You can choose whichever form type you need and the design according to that. We will continue with the Contact form type. Just drag and drop the one you want to your Wix website.
2. Now let's take a look at what we can change on our selected form template. Click on the form and then go to "Form Settings".

Wix Forms allows you to set up email notifications to be alerted when someone submits your form, customize the submit message and create automated responses for your form submissions. It also offers to condition field types to have better form validation.
3. If you want to change or add fields to your form, click on the "Add New Field" button below your form.
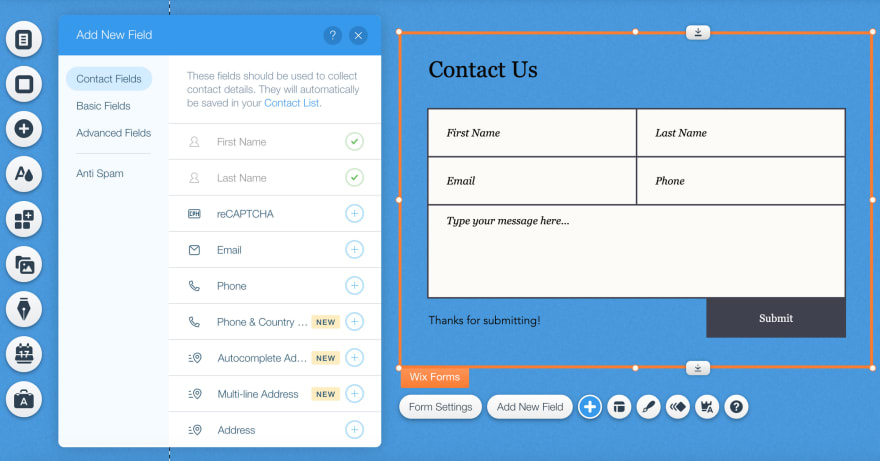
Wix allows you to add different kinds of form fields such as Radio buttons, multi checkboxes, dropdowns, and more. However, if you want to add more than 10 fields, remove the limitations on multistep field types or add a file upload field then you need to pay to upgrade your Wix plan.
After making arrangements on your form, here's a basic example of how it might look like:
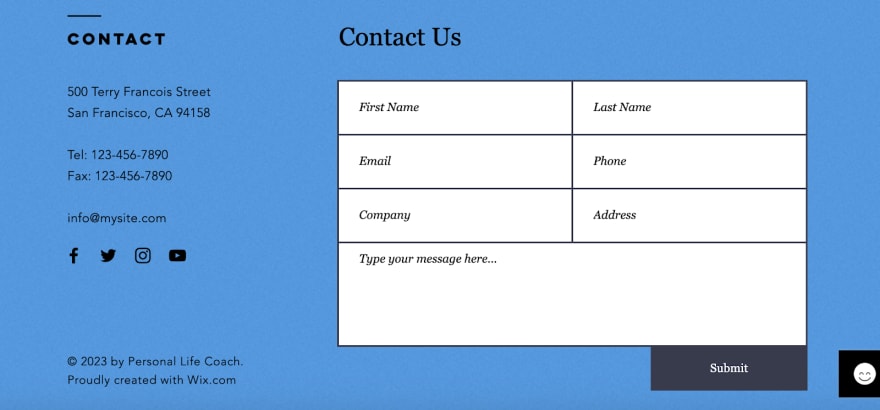
We managed to create a contact form by using the Wix Forms editor with ease.
If you want more customization, adding a file upload field or more without paying for an upgraded Wix plan, you can also add your contact form by embedding HTML codes to your Wix website and using a third-party service like Getform to handle your form backend and form submissions.
How to Add File Upload Forms to Wix by Using HTML and Getform
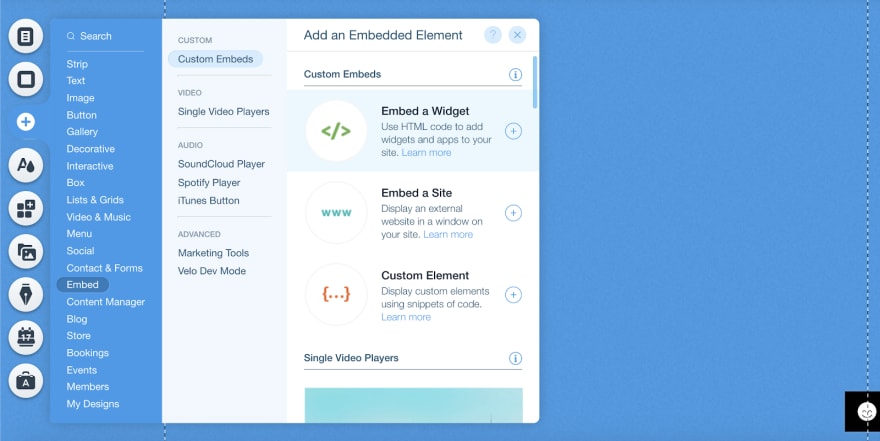
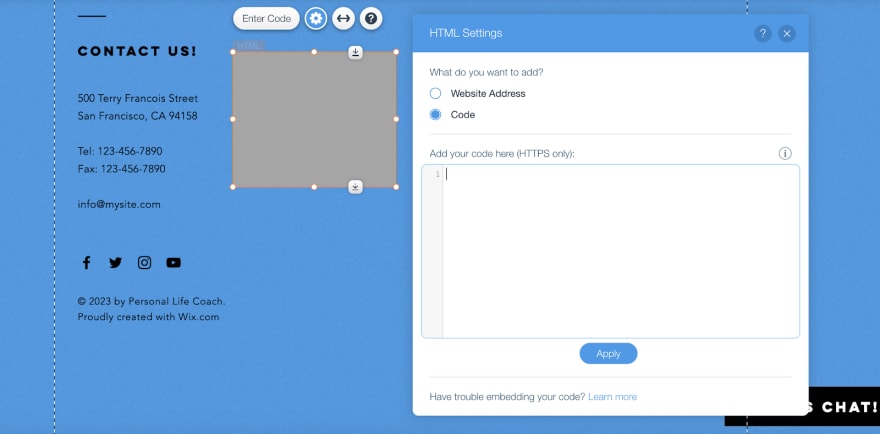
- In order to add your HTML contact form to your Wix website, you need to click the "Add" Section on the left side of the editor and find the "Embed" section. Then, go to "Custom Embeds" and choose the "Embed a Widget" option to add an embedded HTML element.
2. After that you just need to paste your HTML code in the blank space below:
You can use the following HTML code block for a detailed contact form with a file upload field;
<div class="form-container">
  <div class="title">Contact Us!</div>
  <form accept-charset="UTF-8" action="https://getform.io/f/{your-form-endpoint}" method="POST" target="_blank" enctype="multipart/form-data">

    <div class='form-field'><label class='form-label'>Name</label>
      <div class="form-input-container">
        <input class="form-input" type="text" name="name" placeholder="John Doe">
      </div>
    </div>
    <div class='form-field'><label class='form-label'>Email</label>
      <div class="form-input-container">
        <input class="form-input" type="email" name="email" placeholder="john@doe.com">
      </div>
    </div>
       <div class='form-field'><label class='form-label'>Phone Number</label>
      <div class="form-input-container">
        <input class="form-input" type="number" name="phone" placeholder="xxx-xxx-xxxx">
      </div>
    </div>
    <div class='form-field'><label class='form-label'>Company Url</label>
      <div class="form-input-container">
        <input class="form-input" type="url" name="url" placeholder="https://example.com">
      </div>
    </div>
   <div class='form-field'><label class='form-label'>Message</label>
      <div class="form-input-container">
        <input class="form-input" type="text" name="message" placeholder="Your Message">
      </div>
    </div>
    <div class='form-field'><label class='form-label'>Upload a file</label>
      <div class="form-input-container">
        <input class="form-input" type="file" name="file" placeholder="Upload your resume" >
      </div>
    </div>
    <button class="form-button" type="submit">SUBMIT</button>
  </form>
</div>

<style>
  .form-container {
    border-radius: 5px;
    background-color: #ffffff00;
    padding: 20px;
    width: 95%;
  }

  .title {
    font-family: "Celias", "Helvetica Neue", Helvetica, Arial, sans-serif;
    text-align: center;
    text-transform: uppercase;
    font-size: 2em;
    font-weight: bold;
    letter-spacing: .05em;
    padding-bottom: 1em;
  }

  .form-label {
    font-family: "Celias", "Helvetica Neue", Helvetica, Arial, sans-serif;
    font-size: 15px;
    line-height: 1.42857143;
    color: #000000;
    box-sizing: border-box;
    display: inline-block;
    max-width: 100%;
    margin-top: 5px;
    margin-bottom: 5px;
    font-weight: bold;
  }

  .form-input {
    box-sizing: border-box;
    font: inherit;
    font-family: "Celias", "Helvetica Neue", Helvetica, Arial, sans-serif;
    width: 100%;
    height: 45px;
    padding: 10px 15px;
    font-size: 15px;
    color: #000000;
    background-color: #ffffff;
    border: 1px solid #000000
;
    border-radius: 4px;
    border-width: 2px;
  }

  .form-button {
    border: solid #000000;
    font-size: 16px;
    margin-top: 15px;
    font-weight: 800;
    line-height: 1.5;
    border-radius: 3px;
    padding: 16px;
    background-color: #ffffff;
    width: 100%;
    text-align: center;
    cursor: pointer;
    -webkit-transition: all .15s ease;
    transition: all .15s ease;
  }
</style>
Don't forget to change the action attribute to a form endpoint URL that you can get on Getform. If you haven't received your first submission yet, check out the "Basic Installation" section on our docs or watch our helper video here to get started.
Here's how our embedded contact form looks like;
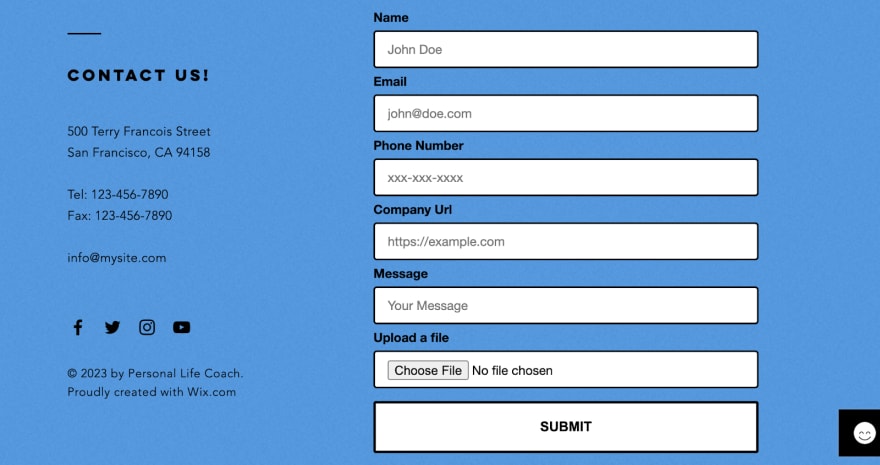
You just managed to add a contact form with a file upload field that you can fully customize and design for your needs by just editing HTML codes!
However, your form submissions still need a hand to be managed, stored, and automated properly. That's where Getform comes into the stage.
Let's submit and see how form submissions are sent to Getform:
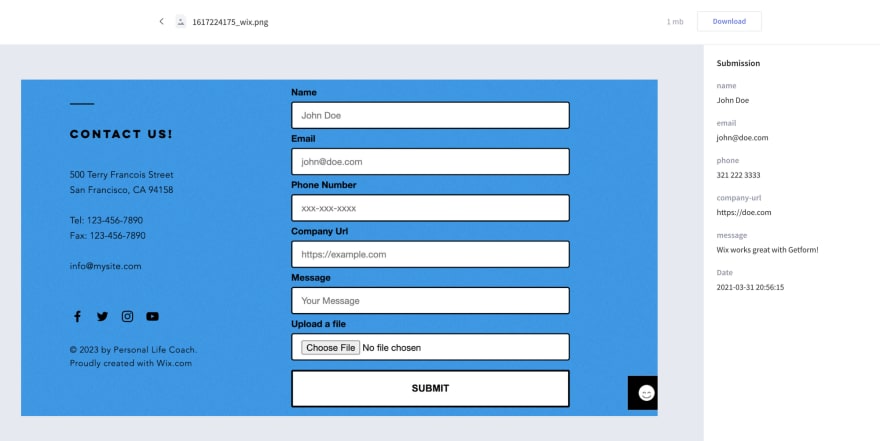
That's it! All the form data along with uploaded file's preview is seen on Getform's dashboard.
By having a Getform account, creating your form, and adding your form endpoint URL to the top of your HTML form code block as we did in the example above, you will have the advantages of;
- Receiving email notifications when someone submits to your form,
- Sending customized email autoresponses to your form submitters
- Allowing you to preview and download the uploaded files.
- Catching and removing any spam submissions by setting up a reCaptcha integration.
- Connecting to Google Sheets, Dropbox, Google Drive, Pipedrive, Slack, and many more.
P.S. If you are willing to go for more advanced integrations, you can also use Getform Submission API to integrate your form to any custom app or website you are building.
We wanted to offer you different options to create your forms for your Wix website. You can directly use Wix Forms to create your form with default templates or if you need more customization without the cost of upgrading your Wix account, then you can use your own HTML contact form code and trust Getform to handle your form backend and form submissions.
Thank you for reading! You can find more information and code samples for different use cases from the resources provided below.

Top comments (1)
formify.pro
This helps to get rid from every hassel.
Just create endpoint and attach with action url.
Boom.... you are good to receive form updates from the user with a dedicated admin panel.