
Today we will show how to create a simple HTML form in PicoLisp.
User Interaction in HTML
If a website purely works in HTML, the user interface can only be realized using <form> and <input> elements. The <form> tag accepts several attributes, of which the most important ones are action and method:
-
actionspecifies to which URL the form-data should be sent to, -
methodspecifies whether the data should be sent viaGETorPOST.
Excursion: GET vs. POST
What's the difference between GET and POST? The GET data is simply added to the URL as name/value pair (which implies it cannot be used for sensitive data!). Like for example the query string in Google: If you search for "PicoLisp", the URL will start with something like www.google.com/q=picolisp.
Form data that is sent via POST is appended to the body of the HTTP request and not visible in the URL. <form> is submitted using a form element of type submit , which is typically rendered as a button.
Example in PHP:
<form action="/action_page.php" method="post">
  <label for="fname">First name:</label>
  <input type="text" id="fname" name="fname"><br><br>
  <label for="lname">Last name:</label>
  <input type="text" id="lname" name="lname"><br><br>
  <input type="submit" value="Submit">
</form>
Rendered to:
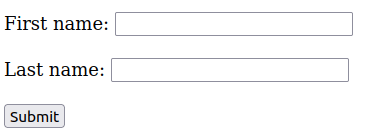
By the end of this post, we will have re-created this form in PicoLisp.
Interactive Forms with PicoLisp
There are two ways to realize interactive forms in PicoLisp. The first way is by using Global Variables, the second one by using sessions and the PicoLisp GUI framework.
Global variables are a little bit more straightforward, but have limitations that we will highlight in the end of this post. Therefore we will only quickly introduce it, but we will focus on the more flexible approaches in the next posts.
But first we need to take a look at a few functions from the xhtml.l library: <post>, <label>, <field>, <submit>.
The post method
The library @lib/xhtml.l defines a function called <post>. Let's take a look at the source code by typing
$ pil @lib/xhtml.l +
: (vi '<post>)
This is what we see:
(de <post> (Attr Url . Prg)
   (prin
      "<form enctype=\"multipart/form-data\" action=\""
      ...
To exit the vip editor, press :q.
The <post> function takes three arguments: an attribute Attr, an url Url and a program Prg.
Let's test it in the REPL by creatinga simple input form with a textfield, a submit button and an action-url test.l.
: (load "@lib/xhtml.l" "@lib/http.l"

: (<post> NIL "test.l"
     (<field> 10 '*Text)
     (<submit> "Save") )
The interpreter expands these three lines to quite a lot of text - this is what we get:
<form enctype="multipart/form-data" action="test.l" method="post">
   <noscript>
      <input type="hidden" name="*JS" value=""/>
   </noscript>
   <fieldset>
      <input type="text" name="*Text" value="" size="10" class="field"/>
      <input type="submit" value="Save" class="submit"/>
   </fieldset>
</form>
This is already a full form sheet. Now let's have a closer look how to define the content of this form sheet using the <label>, <field> and <submit> functions.
The <label> function
vi '<label> reveals that <label> only takes two arguments: Attr and Prg.
(de <label> (Attr . Prg)
   (tag "label" Attr 2 Prg) )
Let's test it in the REPL:
: (<label> '(for . "fname") "First Name")
<label for="fname">First Name</label>
The <field> function
The other function we will need is the function <field> which specifies a text input field. It takes four arguments: N, "Var", Max, Flg. They represent the following values:
-
N: size of text input field -
"Var": a global Variable -
Max: maximum length -
Flg:Tfor disabled fields.
Let's test it in the REPL:
: (setq *Text "new Text")
: (<field> 10 "*Text" 20 T)
<input type="text" name="*Text" value="*Text" size="10" maxlength="20" onchange="return fldChg(this)" class="field" disabled="disabled"/>
As you can see, the fields name and value are auto-created and set to the global variable *Text.
The <submit> function
The <submit> function also takes four arguments: S, "Var", Flg and JS and renders a simple button.
-
Sstands for the text on the button. -
"Var"specifies thename-field. -
Flg:Tfor disabled fields. -
JS: specifies the behaviour if JavaScript is used. We will come to that point later - let's leave it at NIL for now.
For our little example we only need the first field which describes the button text. Let's test it in the REPL:
: (<submit> "Send data")
<input type="submit" value="Send data" onmousedown="inBtn(this,1)" onblur="inBtn(this,0)" class="submit"/>
Creating a Simple POST Form
Now let's re-create the little PHP example from the beginning. We create a file simple-post.l and define labels, fields and the submit button:
(<label> NIL "First Name: ")
(<field> 30 '*FirstName)
(<br>)
(<label> NIL "Last Name: ")
(<field> 30 '*LastName)
(<submit> "Send")
We wrap it inside the post function and send it to our current page simple-post.l (this means that the page will reload when the submit-button is clicked).
(<post> NIL "simple-post.l"
   (<label> "mx-2" "First Name: ")
   ... )
And this again we wrap in a html function:
(html 0 "Simple Post" *Css NIL
   (<post> NIL "simple-post.l"
      ... ) )
Additionally, in order to test if our post worked, let's print a line "Hello <FirstName> <LastName>" only if the first name is defined.
 (if *FirstName
   (prinl "Hello, " *FirstName " " *LastName "!")
And finally, let's give it some CSS styling, for example using the bootstrap-classes from the last example. This is the final result:
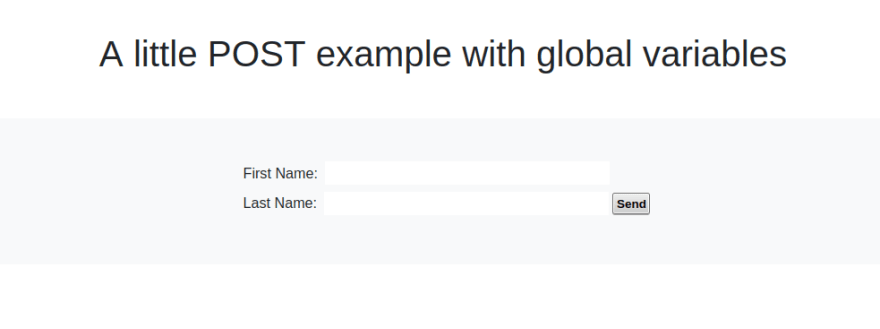
Click here to visit the hosted version.
Test it!
Now let's test our little post function. If we fill in the first name and last name and push "Send", we can see our greeting string:
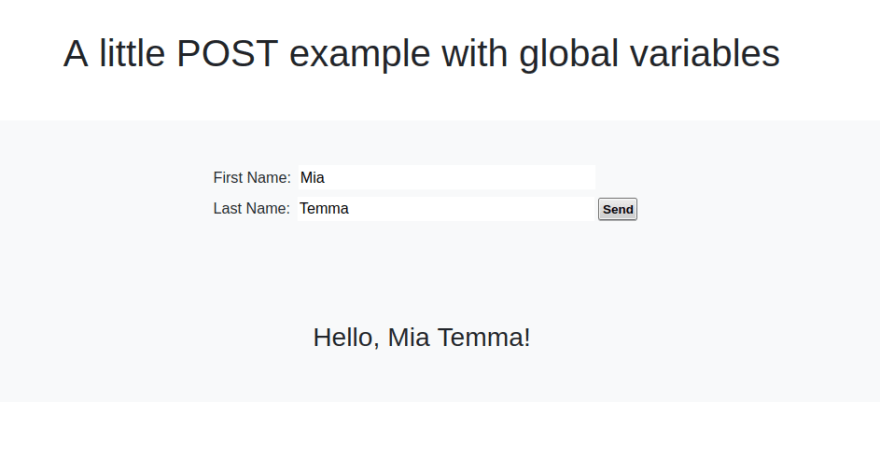
This shows that the values in *FirstName and *LastName have been overwritten by our new input.
What actually happened?
It's nice to see that it works, but maybe you are not fully clear what exactly is happening. In this case, the Developer Tools in the browser can help you (<F12> in Firefox). Go to the "Network Analysis" tab and submit the form again.
You will see a new line with method "POST" popping up:
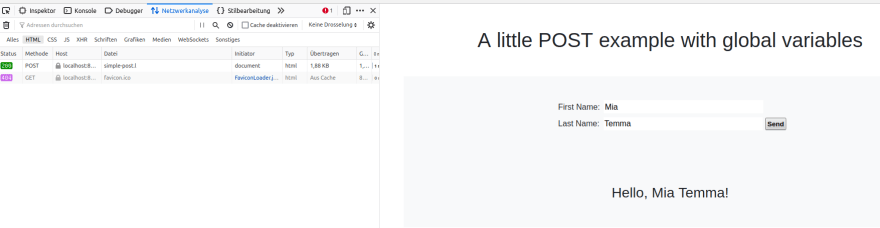
By clicking on the line, you can inspect the headers, cookies, request and response. Let's check the request, which should reveal to us what has been sent to the server:
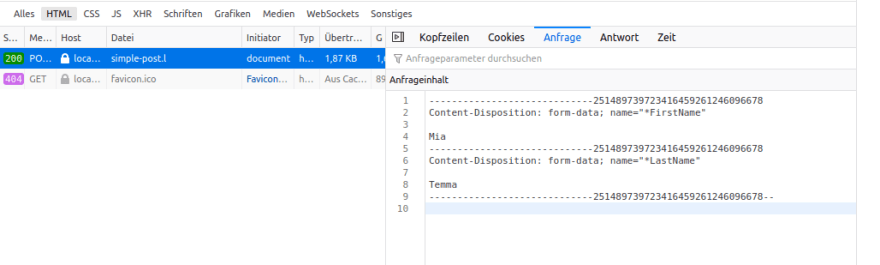
The details are not so relevant now, but notice that 10 lines of text have been sent to the server. The name for each global variable has been specified by "name=...", followed by the value on a new line.
Source code can be found here.
Why did we call this "Quick & Dirty"-Solution?
There are several problems with this kind of approach.
- They require the application programmer to take care of maintaining lots of global variables. Each input field on the page needs an associated variable for the round trip between server and client.
- They do not preserve an application's internal state. Each POST request spawns an individual process on the server, which sets the global variables to their new values, generates the HTML page, and terminates thereafter. The application state has to be passed along explicitly, e.g. using tags.
- They are not very interactive. There is typically only a single submit button. The user fills out a possibly large number of input fields, but changes will take effect only when the submit button is pressed.
In the next posts, we will see a better way to handle form data using sessions, and also a better way to create the GUI using the PicoLisp GUI Framework.

Top comments (0)