Use ML.Net to build a Sentiment Analysis API
Goal
This post will show you how easy it is to build a Sentiment Analysis Prediction Model with ML.NET and Model Builder in Visual Studio.
We will then deploy that prediction model as an API and consume it as AI from a web application.
If you have all the requirements already, this should take about 30 minutes and be completely free.
ML to AI
What's the difference between Machine Learning (ML) and AI? My perspective is that AI is applied ML. When you build applications that use ML to improve the user experience and to make the applications feel more natural and intuitive, that is AI.
We will see this transformation from ML to AI as we go through this post.
Steps
- We will build a Machine Learning model using an existing ML.Net tutorial.
- We will add a Web API to the project and update the code to wire it all together.
- We will deploy the Web API to the cloud.
- We will use a simple web-app to demonstrate making the call to the API.
By the end of this post, you'll have a working Sentiment Analysis API and an AI-infused app that you can show to your friends and coworkers!
Build the ML Model
Tutorial
Follow the instructions for this tutorial to get started. Note that you will need Visual Studio installed (the tutorial provides the link) to complete this exercise. You do NOT need Visual Studio to use ML.Net generally, but Visual Studio comes with a feature called Model Builder which provides a nice UI and writes a lot of the code for you.
When you finish the tutorial, you should be able to run the project and see predictions. Congratulations, you're ready for the next step!
Add An API
OK, you built an ML Model and have a way to consume it. But, it is not very usable right now. Your users or customers are not going to want to use the Command Line and these predictions are not very helpful outside the context of an actual application. Let's fix that.
Update Some Code
To make this work, we'll need to change some of the code that Model Builder generated for us. In Visual Studio find the file called ConsumeModel.cs and open it. Around line 30 you should see a line that looks like this:
string modelPath = @"C:\Users\mrichter\AppData\Local\Temp\MLVSTools\BaruchMLDemo11ML\BaruchMLDemo11ML.Model\MLModel.zip"
The directory for the ML Model (MLModel.zip) we produced is hard-coded. This is bad because when we deploy this API, we won't actually know what the directory structure will be. Also, the API will be hosted on a Linux server, so this Windows directory won't make any sense.
We need to update the modelPath variable from a hard-coded directory to a 'relative' directory. Update that line with this code:
string modelPath = System.IO.Path.Combine(System.IO.Path.GetDirectoryName(System.Reflection.Assembly.GetExecutingAssembly().Location), "MLModel.zip");
Now the code will look for the model (MLModel.zip) in the same directory that the application is executing.
Rebuild the solution again (Build --> Rebuild Solution). You should see a message in the output that "3 succeeded". That's because we have 3 projects in the solution.
Add the API Project
In the Visual Studio solution explorer, right-click and choose Add a New Project. See the screen shot below.

Search for API and choose the C# ASP.NET Core Web API project. Click Next.

Name the project something like MLDemo.Web. Leave all the other defaults and click Create.
Prepare the API Project
This API Project comes with some demo classes that we don't need, so let's remove them. In the root directory, remove WeatherForecaster.cs. Just click it and hit the delete button. In the Controllers folder, delete WeatherForecastController.cs.
Under Properties, you'll find launchSettings.json. You'll see 2 entries that look like this.
"launchUrl":"weatherforecast"
change them so they look like this:
"launchUrl":"score"
Now let's build the Score URL endpoint which is how our API will be called!
Build the API
Right-click on the **Controller **folder and choose Add --> Controller

Choose "API Controller - Empty".

Save the name of the file as ScoreController.cs.

Replace the content of the generate filed with the below. It's not 100% necessary but you may want to update your namespace name to match the name of your project.
using Microsoft.AspNetCore.Mvc;
using System.Text.Json;

namespace UPDATEMEIFYOUWANT.Web.Controllers
{
    //This tells the dotnet framework that we are building a web api
    [ApiController]

    //This attribute tells dotnet that we want the URL route for the api to be
    //based on the controller's name.
    //In this case, the controller's name is "ScoreController" so the route will be /score
    [Route("[controller]")]
    public class ScoreController : Controller
    {
        public IActionResult Index()
        {
            return View();
        }

        //This tells dotnet that our API will resond to HTTP GET Verbs
        //the "text" parameter will get passed in from the query string when a request to this API is made.
        //
        [HttpGet]
        public string Get(string text)
        {
            var input = new ModelInput() { Col0 = text };
            //Let's call our ML model predict the sentiment of our text
            ModelOutput result = ConsumeModel.Predict(input);
            //Return the prediction in the response.
            return JsonSerializer.Serialize(result);
        }
    }
}
You will notice that some of the code has red lines beneath it. That's because we want our API to reference the the Model project in our solution, but we haven't yet created that explicit reference between the projects. If you hover over any of those red-underlined words, you should see a little lightbulb pop up which reveals a menu. At the bottom of the menu there's an option to add a reference to our Model project. Click it.

That's it! You've now built an API around the ML Model. Let's try it out!
Test the API
Try rebuilding the entire solution. Go to Build -> Rebuild Solution. After a few seconds the output should tell you "4 succeeded" (because we now have 4 projects).
Right-Click on the Web project and choose Debug --> Start New Instance.

After a few seconds, your browser should start and point to a URL that looks like https://localhost:44380/score and you should see some text in the browser window that looks like this.
{"Prediction":"1","Score":[0.4424079,0.5575921]}
You can pass in text via the URL and the API will use the model to predict the sentiment. Try updating the URL like this:
https://localhost:44380/score?text=this%20is%20amazing!
(note you can write spaces, the Browser will replace them with %20.)
The prediction should be "1". The model correctly predicted this is a positive statement.
Now update the URL to say this:
https://localhost:44380/score?text=I%20think%20this%20is%20horrible
The model should return "0" and predict that this is a negative statement.
Fantastic! Let's review what you've done so far.
- You've built an ML Model.
- Consumed the model from the command line.
- Built a Web API
- Consumed the model from the web api.
But we're still not done. Users aren't going to connect to your computer to talk to this API. You need to deploy it to the cloud!
Deploy the API to the Cloud
To deploy the API you will need some requirements.
Requirements
- A Microsoft Azure Account - If you don't have one, get one for free.
- Azure Command Line (CLI) installed.
- Git client installed.
Add the solution to Git
We need to add the solution to Git because we will be using Git as the deployment vehicle for getting this API into the cloud.
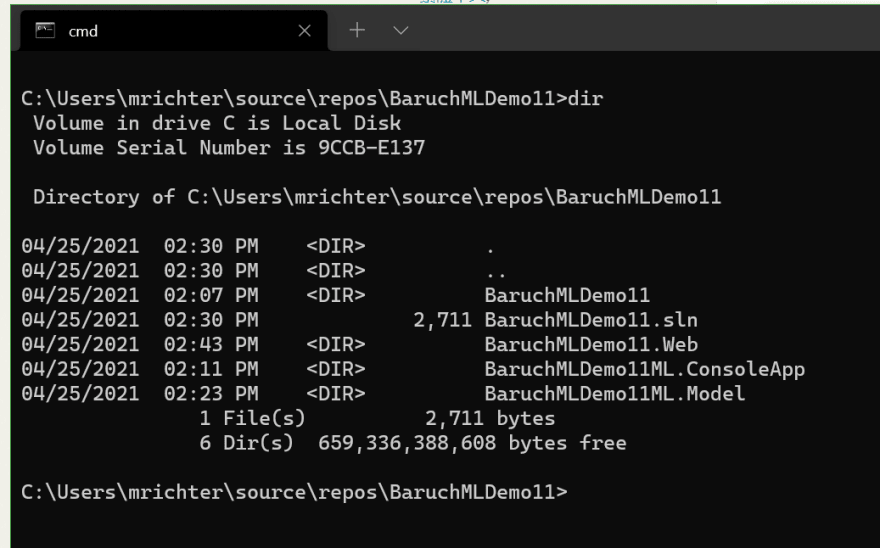
In your command line/terminal, go to the root directory for your solution. You should see four sub directories at this level (one for each project that was created).
Run these commands:
git init
git add -A
git commit -m "Initial Commit"
Log into Azure from the Command Line
Now log into Azure with these commands:
az login
az account set -s "your subscription name"
Build a web app to host our API
You're going to set some default values for Azure resources here (note these commands are for setting environment variables in Windows. Here's a post for setting them on other operating systems. )
The APP name needs to be globally unique and should only contain letters and numbers. Try using your name to make sure it is unique.
setx RG "baruchmldemo11rg"
setx PLAN "baruchmldemo11plan"
setx APP "baruchmldemo11api"
Try running this command to make sure the environment variables were set correctly: echo %RG%. If you don't see the value you set returned, you may need to open a new terminal window.
Once you've verified that the environmental variables were set correctly, We're ready to start deploying Azure resources!
Create a Resource Group where these resources will live:
az group create -n %RG% -l eastus
Create an App Service plan that will host our app. This will create a free plan in the East US.
az appservice plan create -l eastus -g %RG% -n %PLAN% --sku F1 --is-linux
Now we create the actual Web App that lives in the Free App Service plan and that will host our web API.
az webapp create -g %RG% -p %PLAN% -n %APP% --runtime "DOTNETCORE|3.1"
When we add our API to an app, we want it to be reached from a web browser client, so we need to update the CORS setting)
az webapp cors add -a "*" -n %APP% -g %RG%
We will be using Git to deploy our web application, so we need to create credentials for it.
az webapp deployment user set --user-name %APP% --password m@gicDepl0y
You should change the password. Just remember what it is, you will need it later.
Now let's tell the Web App that we will be deploying via Git.
az webapp deployment source config-local-git --name %APP% -g %RG%
That should return a URL that looks like this:
https://baruchmldemo11api@baruchmldemo11api.scm.azurewebsites.net/baruchmldemo11api.git
Remove the part of the URL between the "https://" and including the @ symbol so it looks like this now:
https://baruchmldemo11api.scm.azurewebsites.net/baruchmldemo11api.git
Use that URL as a "remote" for git by running this command:
git remote add azure https://baruchmldemo11api.scm.azurewebsites.net/baruchmldemo11api.git
Deploy the API
If we've done everything right we should be ready to deploy our web API to the cloud. To do it, run the command below. You will be asked for the credentials. Use the app name value for user name (in my case baruchmldemo99api) and the password we defined as the password (m@gicDepl0y).
git push azure master
This command can take a couple of minutes to run.
Test the Web API.
When the command is successfully complete, we can test the API.
Got to the Azure Portal to find the URL for your new Web API.
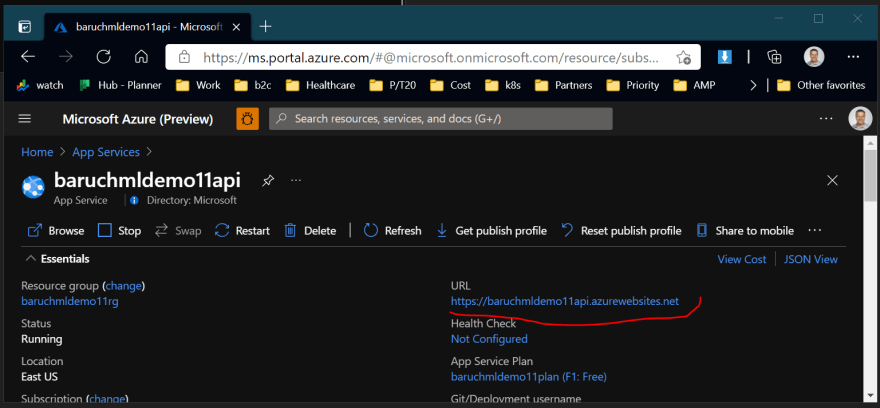
Click on the URL, it may take a minute for it start. Update the URL so it looks something like this:
https://baruchmldemo11api.azurewebsites.net/score?text=azure%20is%20the%20best%20for%20APIs!
That should return a positive sentiment prediction. Congratulations, your API is deployed to the cloud!
Cool, we are almost done! 😄
Add the API to an App
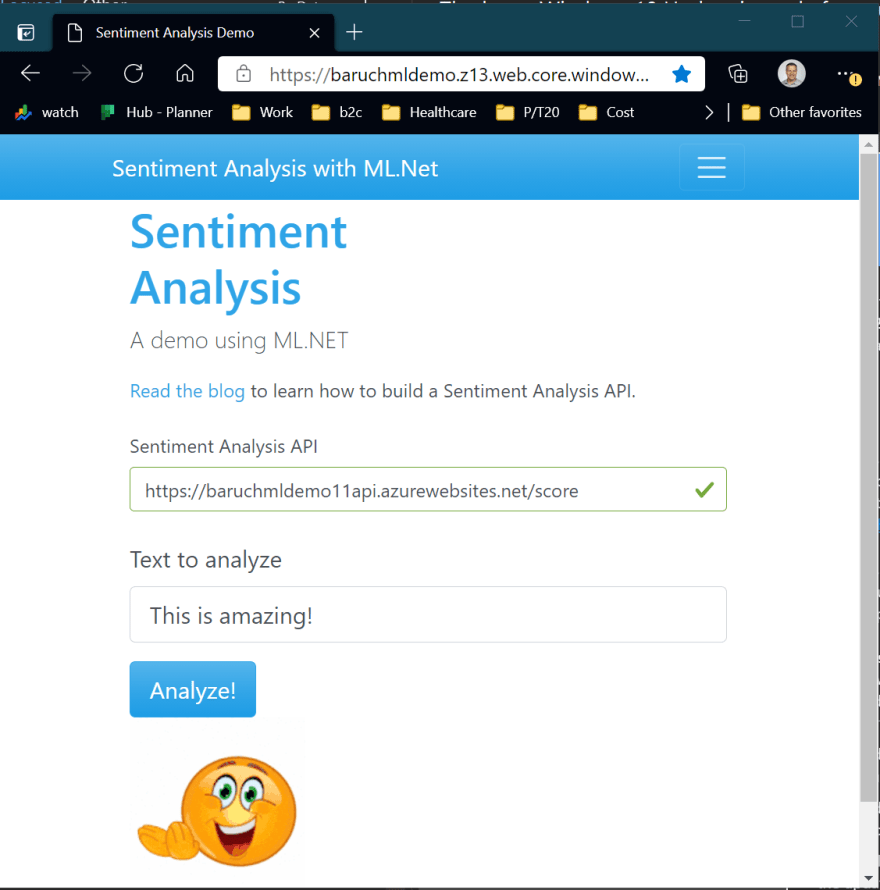
The last step is the easiest and the most fun. Let's see how we can use this API in a web application.
Go to this URL:
https://baruchmldemo.z13.web.core.windows.net/
In the Sentinment Analysis API text box, enter in the URL endpoint for your API. It should be something like this:
https://baruchmldemo11api.azurewebsites.net/score
Now, in Text to analyze, enter in some text and click "Analyze!"
Depending on what text you put in, you should see a smiley face appear that reflects the sentiment of the text you entered.
ML to AI
This is a simple app but it shows how we create AI by invoking these ML Models.
Conclusion
In this blog post, we built an ML Model from scratch and operationalized it with an API. We deployed that API to the cloud and used it inside an application. A decade ago this may have taken months to build and cost a lot of money. We did it today in 30 minutes for free.
What's next?
This model can definitely be improved and all the steps to retrain it, build and deploy it can be automated. We built a model that is about 80% accurate in a few minutes. If we want to improve it we need to train it with more data. We can start with this model, deploy it, learn from it and improve it. All the tools and steps for operationalizing the model are there, we just went through them, but that is just the easy part!

Top comments (0)