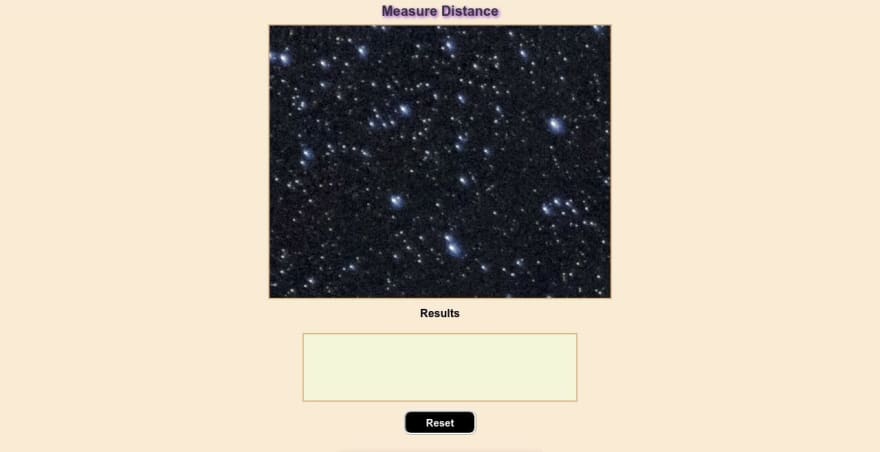
It's not about complex astrophysics but we all love the sky, Right? Also, we like images of stars, nebulae, galaxies, etc.
So that's why I came up with this idea: what if we can measure the distance (only for fun) between two stars that appear in an image?
Well, It might not be about the stars in an image but could be anything such as two cities on the map, whichever we can measure the distance between them with this simple beginner-friendly project.
In my opinion, it is a good idea to use this project to practice basic knowledge of HTML, CSS and, JavaScript. Most importantly, you don't want to use HTML canvas here.
Okay, what does this project do in the first place?
There is an image of the starry night sky on the page, so the user can measure the distance between two or more stars that appear on the image by clicking on them.
So let's break down this project into smaller parts.
1. HTML:
Create div elements for,
- Image container:
<div id="container"> - Result container to display calculated distance:
<div id="results">
<body>
  <h1>Measure Distance</h1>

  <div id="container"></div>

  <h3>Results</h3>

  <div id="results">

    <div id="current-result"></div>

    <div id="total-result"></div>

  </div>

  <input id="reset" type="button" value="Reset" onclick="document.location.reload()">

</body>
2. CSS:
- Set our starry night sky image as
background-imageof the image container.
#container {
 width: 500px;
 height: 400px;
 border: 2px solid BurlyWood;

 background-image: url(https://images.unsplash.com/photo-1629898145005-5f0ff3ee4eed?crop=entropy&cs=srgb&fm=jpg&ixid=MnwxNDU4OXwwfDF8cmFuZG9tfHx8fHx8fHx8MTYzOTk5NzM3MQ&ixlib=rb-1.2.1&q=85);
 background-position: center;
 background-repeat: no-repeat;
 background-size: cover;
}
- Create and style two class selectors
.pointsand.lineswhich we will create later in the JavaScript. - Make the
position: absolute;for the both.pointsand.lines.
.points {
 position: absolute;
 border: 2px solid red;
 border-radius: 50%;
 opacity: 1;
}

.lines {
 position: absolute;
 border: 1px solid white;
 height: 0;
 opacity: 1;
}
- Add additional styling as your taste.
3. JavaScript:
(1) create variables
- select
#containerand#resultsusing DOM. - create an object with two arrays to store X and Y coordinates of the user's click points.
- create two arrays to store created
divelementspointsandlines.
let container = document.querySelector("#container");

let results = document.querySelector("#results");
let currentResult = document.querySelector("#current-result");
let totalResult = document.querySelector("#total-result");

let coordinates = {
  coordX: [],
  coordY: []
};

let points = [];
let lines = [];
(2) addEventListener() to the container
- store X and Y coordinates in the
coordinatesobject. - call the functions
createPoints()thencreateLines()within the callback function.
container.addEventListener("click", (e) => {
  coordinates.coordX.push(e.x);
  coordinates.coordY.push(e.y);

  createPoints(e.x, e.y);

  let prevX = coordinates.coordX[coordinates.coordX.length - 2];

  let prevY = coordinates.coordY[coordinates.coordY.length - 2];

  if (coordinates.coordX.length > 1) {
    createLines(prevX, prevY, e.x, e.y);
  }
});
(3) createPoints() function
- Create a
for-loopthat runs from 0 to the number of clicked points. - Create a
divin each iteration inside the loop. - Set its
classNameaspoints. - Set left and top coordinates of the
div(e.xande.y) - Append it to the
#container
function createPoints(posX, posY) {
  for (let i = 0; i < coordinates.coordX.length; i++) {
    points[i] = document.createElement("div");
    points[i].className = "points";
    points[i].style.left = `${coordinates.coordX[i]}px`;
    points[i].style.top = `${coordinates.coordY[i]}px`;

    container.appendChild(points[i]);
  }
}
(4) createLines() function
Okay, We reach the more important part of this project. Because here we have to use some math! I don't suppose to be your math teacher, but these are the steps we're going to follow.
- Get the distance between the two points.
let distance = Math.sqrt(((x2-x1) * (x2-x1)) + ((y2-y1) * (y2-y1)));
- Find the middle point of the two points.
// X and Y coordinates of the middle point

    let midX = (x1+x2)/2;
    let midY = (y1+y2)/2;
- Draw a horizontal line of that distance across the midpoint.
 lines[i].style.width = `${distance}px`;
 lines[i].style.left = `${(midX - (distance/2))}px`;
 lines[i].style.top = `${midY}px`;
- Calculate the angle to rotate it around the middle point to fit it into the actual two points.
/* get the inclination in radian unit and then convert it into degree */

 let inclinationInRadian = Math.atan2(y1-y2, x1-x2);
 let inclinationInDegree = (inclinationInRadian * 180)/ Math.PI;
- Rotate the line.
lines[i].style.transform = 'rotate('+inclinationInDegree +'deg)';
Here is the complete createLines() function.
function createLines(x1, y1, x2, y2) {
  let distance = Math.sqrt((x2 - x1) * (x2 - x1) + (y2 - y1) * (y2 - y1));

  let midX = (x1 + x2) / 2;
  let midY = (y1 + y2) / 2;

  let inclinationInRadian = Math.atan2(y1 - y2, x1 - x2);
  let inclinationInDegree = (inclinationInRadian * 180) / Math.PI;

  for (let i = 0; i < coordinates.coordX.length; i++) {
    lines[i] = document.createElement("div");
    lines[i].className = "lines";

    lines[i].style.width = `${distance}px`;
    lines[i].style.left = `${midX - distance / 2}px`;
    lines[i].style.top = `${midY}px`;
    lines[i].style.transform = "rotate(" + inclinationInDegree + "deg)";

    container.appendChild(lines[i]);
  }

  currentResult.innerHTML = `<strong>Current Result:-</strong> <br>`;

  totalResult.innerHTML = `<strong>Total Result:-</strong> <br>`;

  getDistance(distance);
}
(5) getDistance() function
Now we have the distance in pixels, so we should convert it to the centimeter.
1 pixels = 0.0264583333cm
Distance in centimeter = distance in pixels × 0.0264583333
function getDistance(distance) {
  let pixelToCm = distance * 0.0264583333;
  pixelToCm = Number(pixelToCm.toFixed(2));

  totalDistance += pixelToCm;
  totalDistance = Number(totalDistance.toFixed(2));

  currentPath += `Line ${++lineCounter}:- ${pixelToCm}cm<br>`;

  totalPath += `${totalDistance}cm<br>`;

  currentResult.innerHTML += currentPath;

  totalResult.innerHTML += totalPath;

  results.scrollTop = results.scrollHeight;
}
Below is the live demo @CodePen.
NOTE:
This project described above only can be used for practicing purposes, so it might not cover all the cases which come with real web projects such as, responsiveness, browser compatibility.
Conclusion
Congrats! we have finished with the project and, now only remains is to measure the distance between your favorite stars!
So count stars, measure distance and have fun.
PS: if you enjoy this article, you can support me at ko-fi. I always appreciate your support and, it encourages me to keep going.
Happy Coding!


Top comments (0)