
Previous Post:

Hey everyone, in a continuation post from my original CI/CD guide/exploration/TIL blog, here's part 2, and as described last time, today is all about GitHub Actions. As always, here is the PR for this week.
What are GitHub actions?
GitHub actions are simply put, a CI/CD pipeline, with some extra spice added in the mix. For today, I'm going to focus specifically on pipeline creation, which is thankfully, incredibly simple.
The process
So, to start off, I browsed through the Build and Test section of the Actions wiki page to get to the Python GitHub actions setup. This page was extremely useful and provided everything I needed to get a basic CI setup.
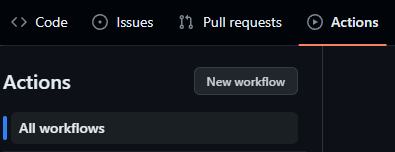
Everything that is required for setup can be done through the action tab, by creating a new workflow
Upon clicking New Workflow, a ton of options are displayed on the screen. 99% of the time, your focus will lie predominately in the Suggested for this repository section.

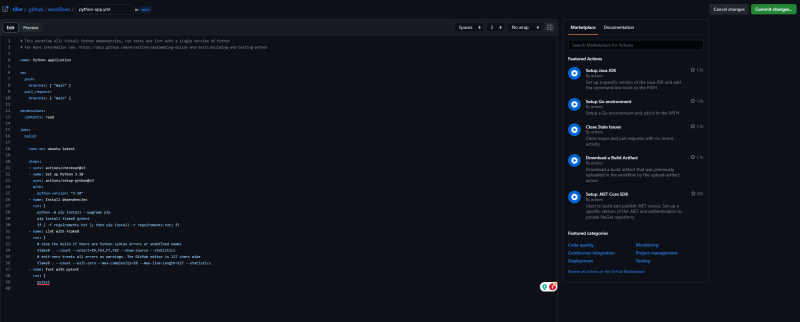
For my app, I went for the Python Application configuration which opened up a yaml file which can be configured however you see fit for automatically testing and linting your commits and PRs.
This file can of course be updated whenever you want, which is crazy useful in the event that the scale of your app increases significantly. In a previous project, I had a CI/CD pipeline yaml file that would automatically deploy my app to a docker daemon while linting and testing all the functionality, which really drives home the concept I learned in my previous post of integrating CI/CD as early as possible to reduce headaches later on.
Anyway, because I did use some different libraries I had to change my file up a bit. Firstly, I'm using Python 3.12.0 instead of 3.10.0. Secondly, I'm using Ruff as my linter of choice as opposed to flake8 and thankfully GitHub has that covered in their documentation. I simply replaced lint with flake8 with the following code and everything worked perfectly:
- name: Lint with Ruff
  run: |
    pip install ruff
    ruff --output-format=github .
My finalized workflow file looked like this:
# This workflow will install Python dependencies, run tests and lint with a single version of Python
# For more information see: https://docs.github.com/en/actions/automating-builds-and-tests/building-and-testing-python

name: Python application

on:
  push:
    branches: [ "main" ]
  pull_request:
    branches: [ "main" ]

permissions:
  contents: read

jobs:
  build:

    runs-on: ubuntu-latest

    steps:
    - uses: actions/checkout@v3
    - name: Set up Python 3.12.0
      uses: actions/setup-python@v3
      with:
        python-version: "3.12.0"
    - name: Install dependencies
      run: |
        python -m pip install --upgrade pip
        if [ -f requirements.txt ]; then pip install -r requirements.txt; fi
    - name: Lint with Ruff
      run: |
        pip install ruff
        ruff --output-format=github .
    - name: Test with pytest
      run: |
        pytest
The on: flag at the top of the file controls when this workflow fires. So pretty much, on a commit to my main branch, or a PR to my main branch, the workflow will trigger, lint my code and ensure there are no errors, and then it will test all the functionality.
So like every great programmer, I had to break my code to ensure this worked. In a series of commits to my repo, I decided to break some linting rules within my test file to see if it would trigger.
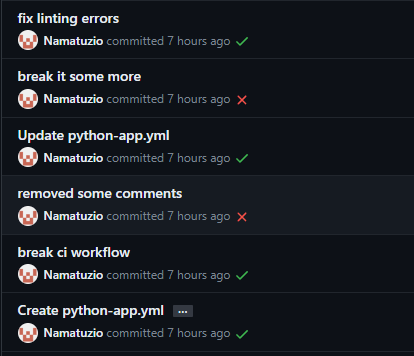
As shown by the red X next to some of the commits, it worked! Clicking on the red X lets us investigate the reason for the failure:

AHA! So the piece of code that breaks the rule is in my test file on line 158, and look at that, it even explains the rule that the line broke. Browsing into the PR gives us an even more useful view of the error:
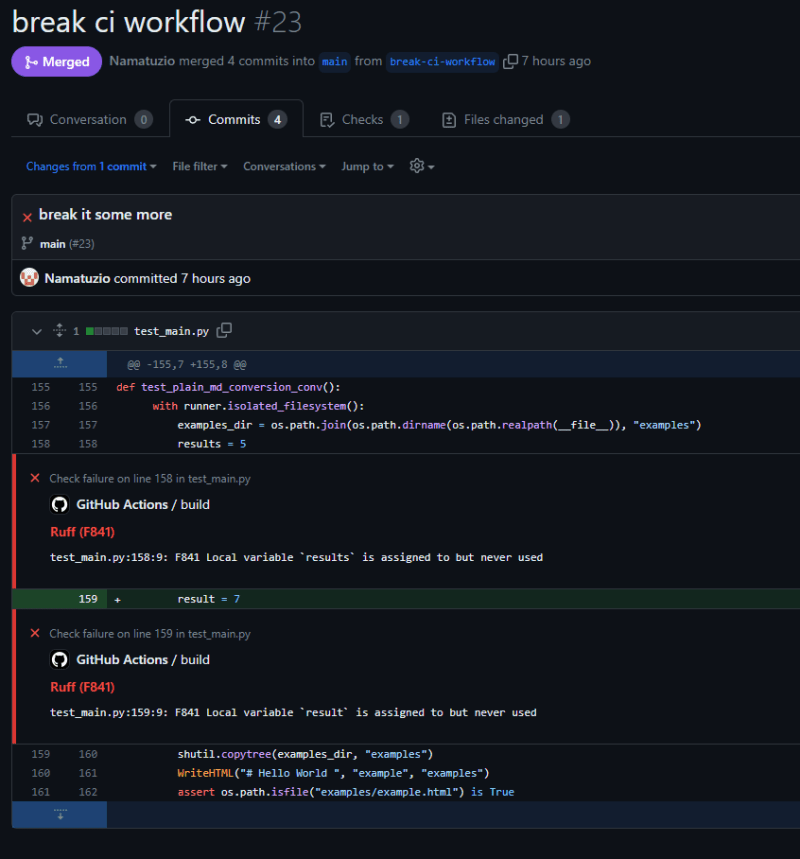
It even outlines each line that features an error too!
So after getting everything all fixed up, I merged my changes and finished adding a basic CI/CD pipeline to my app!
That isn't all for this week though, I decided to take a look at someone else's app and add some more test cases to their workflow. I posted an issue to the repo and added a super simple test case for when a file didn't exist. This repo is made entirely in C# which makes it intuitive to work with and easy to develop for. The final test for that repo looked like this:
[Test]
public void FinalizeOutput_NonExistentFile_ThrowsException()
{
    string nonExistentFile = Path.Combine(TestDirectory, "nonexistent.txt");
    Assert.Throws<FileNotFoundException>(() => Helper.FinalizeOutput(nonExistentFile, OutputDirectory));
}
And the same person who owned this repo also added a super simple case to my repo that I had completely overlooked which was pretty much the same case I did for their app. Their issue can be found here
So that about wraps up this week.
TIL
Today I relearned how GitHub actions work and how to easily develop them for any kind of project. I really did forget just how easy it was to integrate CI/CD pipelines which is why this was a great refresher and an awesome learning experience. I loved how easy some of the Python libraries I used made it for me to test, and I adore how intuitive GitHub Actions was to use.
I hope my posts helped out other newcomers or those just simply looking for a refresher on how to create these powerful pipelines! That's about it for now, thank you to everyone who read the first part and to those who read this part as well, see ya later.

Top comments (0)