
Table of Contents
- What GitHub Pages Lacked
- Enter Netlify
- How I Migrated to Netlify
- Features I Might Add in the Future
- Too Good to be Free?
My blog is now deployed on Netlify ! I spent a little more than an hour the other day migrating it from GitHub Pages to Netlify.
GitHub Pages is a perfect solution for deploying static websites. But, it made it challenging to implement some of the features I wanted on my blog.
So, on impulse and to procrastinate from finishing a blog post, I migrated the site to Netlify!
What GitHub Pages Lacked
GitHub Pages has been my go-to static website deployment solution for the past three years. And it worked like a charm even if it was free.
I have been looking for ways to set up my Hugo website to show draft blog posts. The problem was that I didn't want these drafts to show up on the homepage listing, but I also wanted a sharable link for people to review.
There are ways I can set this up, but even if I do that, there aren't any ways for people/reviewers to leave feedback on my static website.
I also used a lot of client-side redirects, which is not desirable as opposed to server-side redirects. GitHub Pages did not provide a way for you to configure server-side redirects. So I had to use these hacky, Jekyll redirects on a subdomain. It works, but it could be better.
Enter Netlify
Netlify has deploy previews . So, when you make a pull request to your production branch, Netlify will build the site for you and show a preview of what the change will look like.

Deploy preview feature in Netlify
From github.com/navendu-pottekkat
You know what this is best for? Previewing draft blog posts!
Using Netlify, I can open a pull request with my draft post, and Netlify will generate a preview build of the site without affecting my production site. Reviewers can see the preview and suggest edits as comments on GitHub.
Netlify also brings a better continuous integration experience.
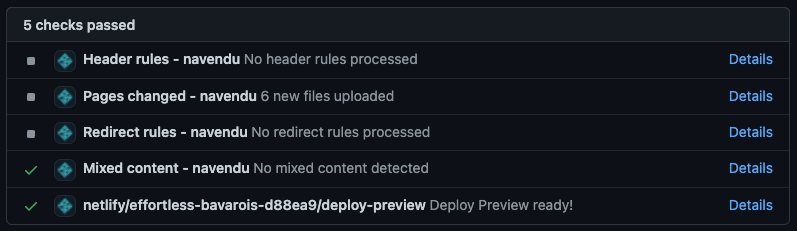
CI checks run by Netlify
From github.com/navendu-pottekkat
Netlify lets you configure the build settings through the Netlify UI or a configuration file (netlify.toml). This gives you a lot more control than the few configuration options GitHub Pages provides.
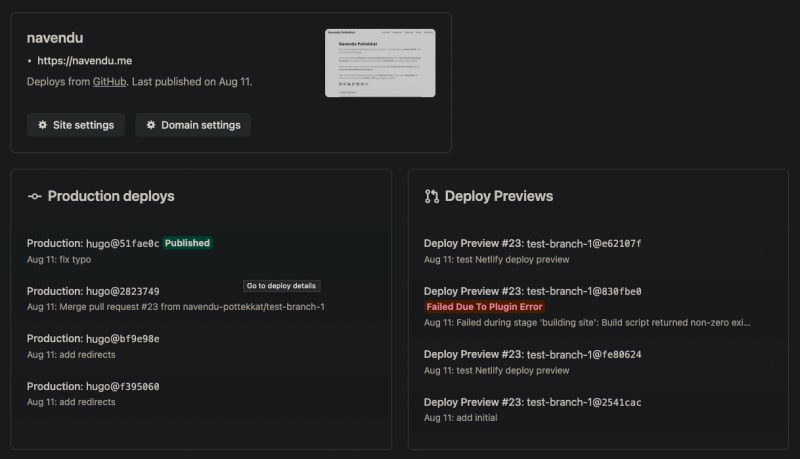
Netlify dashboard for navendu.me
I added a Plugin and to lint links and it broke the CI because there were a lot of broken links. Task for another day.
With Netlify, configuring redirects is as easy as adding two lines to your configuration file. You also have the option to configure the proper status code. Now that's neat.
Netlify also has a DNS service, supports storing large media (Git LFS), has split testing and rollback features, and more . But, these are only "nice to have" features for me now. I will not be using these anytime soon.
I might use these sometime soon.
How I Migrated to Netlify
The process was pretty straightforward. It only took me a little over an hour to set everything up and test.
In the steps below, I have the following setup:
- A Hugo blog published on GitHub Pages.
- A custom domain registered on Hostgator (also my DNS service).
You can always refer to the official Netlify docs if you have a different setup somewhere along this guide.
Create a Netlify Account
First, you must create a Netlify account if you don't have one.

Create your Netlify account
Do you also use GitHub for everything?
Import Your Website
You can now add your website to Netlify. You should have the code for your website on a Git provider. If you don't have one, now is the time to git push your code.
-
Click on "Add new site" and "Import project".

Importing your site
-
Select the Git provider where you have your website code.

Select your provider
-
Pick the repository from the Git provider after granting access to Netlify.

Pick the repository to deploy
-
You can then configure the build settings based on your blog engine. Since I'm using Hugo, I will add the following configurations.
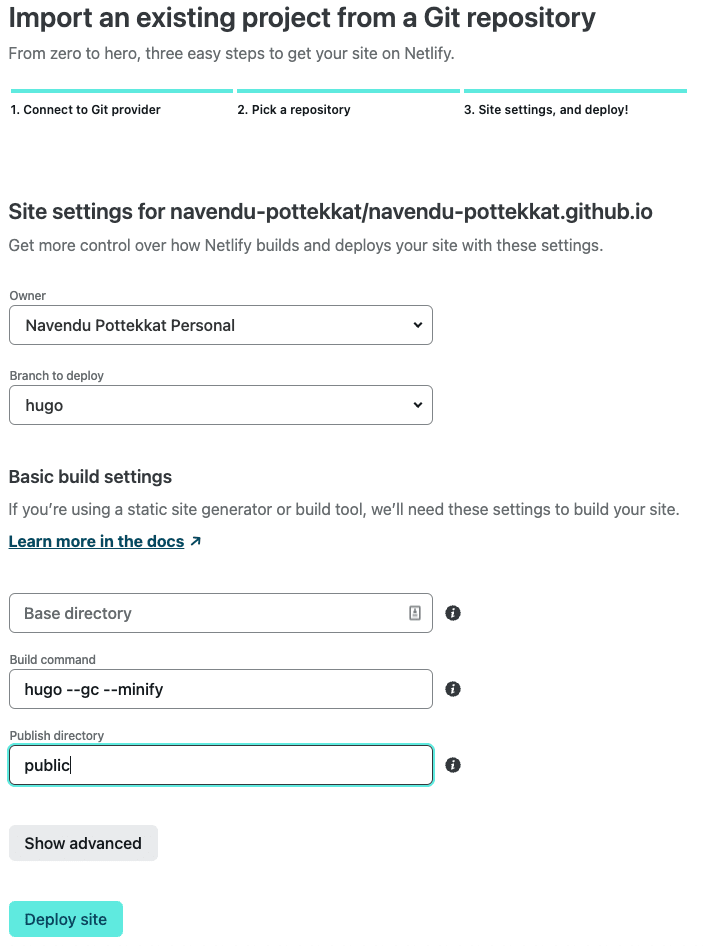
Build settings for my Hugo website
--gccleans up old resources,--minifyreduces the size of the files and thepublicfolder is where Hugo outputs the build
And voila! Netlify will automatically build your first deployment. Now, you will be able to see the production URL for your website.

Production URL of your website
This screenshot is from Netlify's docs
This URL is unique; you can change it to yoursitename.netlify.app or your custom domain.
Changing the Website URL and Custom Domains
You can change your site URL to anything unique. Once changed, this will be your website's address.
From the "Site overview" page, Go to "Domain settings".
-
Click on the "Options" next to the site name and click "Edit site name".

Edit the generated site name
kung-fu-panda-23 is a cool name
Change the site name and save.
Note: If you use this URL, you might need to change the
baseURLin your Hugo configuration file to ensure all the links work.
In my setup, I'm using Hostgator as my DNS service and not the Netlify DNS service.
In "Domain settings", click "Add custom domain".
You can enter the domain you already own or enter something new and purchase the domain. Netlify will set everything up if you are buying a domain.
If you are using a domain you already own with an external DNS provider, you will see a warning. You can ignore that and click on "Add domain".
-
You can also set up an SSL certificate from the HTTPS section.
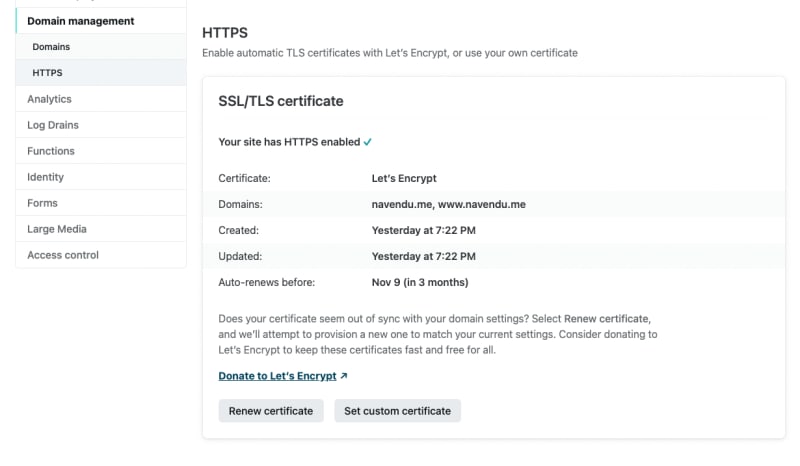
Secure your site with an SSL certificate
If you use a different DNS service, you need to configure it to point your domain to your Netlify website. You can check the Netlify docs if you have a different setup than mine.
- Login to your domain's control panel and open up your DNS configuration. I'm using Hostgator for my domain.
- Create an A Record with your apex domain and point it to Netlify's load balancer IP address
75.2.60.5. - Then, create a CNAME record for the
wwwsubdomain and point it to your website addressyoursitename.netlify.app.
Now, you must wait for the changes to propagate, and you will have your domain configured.
Configuring Deploy Previews
The main reason to migrate was the deploy previews feature. And it is super easy to set up.
- Go to "Site settings".
- Select "Build & deploy" from the side menu and then "Continuous Deployment".
- Scroll down to "Deploy previews" and set it up as desired. I have enabled it for any pull request against my production branch, and I have also enabled the Netlify Drawer.
That is it. You now have deploy previews!
Note: To ensure that the deploy previews show drafts, I updated my Netlify configuration file (
netlify.toml) to change the build command for deploy previews.[context.deploy-preview] command = "hugo --buildFuture --buildDrafts --gc --minify -b $DEPLOY_PRIME_URL"Here
$DEPLOY_PRIME_URLis an environment variable that Netlify sets, used to update the site'sbaseURL.
That brings an end to my current setup. It is much better than my earlier setup with GitHub Pages and was pretty easy to migrate. I would definitely recommend Netlify for your static websites.
Features I Might Add in the Future
This was my first iteration with Netlify. I have a basic setup that more or less does everything I need. But, I might use these other features if they are fruitful.
Form Handling
I use Mailchimp to handle subscriptions to this blog. If I can find a way to send mass emails, I might set up the free form handling offered by Netlify.
Split Testing
A/B test blog posts? Yes!
CDN/git LFS
My blog contains a lot of images. I do my best to compress these images, but I will reach a point where the images are taking too much space, increasing the repo size. If Netlify's solution is better, I might switch to that.
Too Good to be Free?
Netlify seems too good to be free. I'm on the free tier, and it appears to be generous.
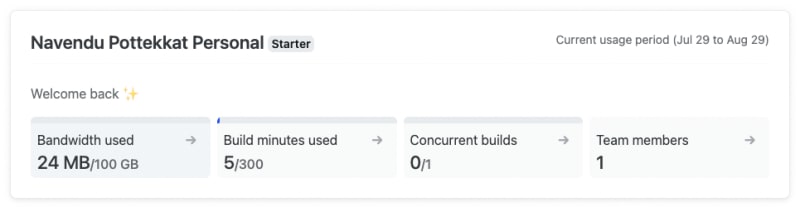
My 24 hour Netlify usage
Petition to add a section that shows the carbon footprint on my blog builds. Take that, people flying on private jets!
But, it will only be some time until I pass these limits and would end up needing to pay for the service. It is not too much money but seeing that the alternative, GitHub Pages, is free, I cannot stop thinking, "maybe I don't need deploy previews".
I hope I don't have to write a post titled "How and Why I Migrated My Blog Back From Netlify to GitHub Pages"!

Top comments (1)
Netlify is incredible. I use them for hosting all my stuff! I am working on a new portfolio site with Remix and will likely host that there as well.
I believe that their serverless functions are also free depending on usage!
They also have a pretty great Git-based lightweight CMS - Netlify CMS. I wrote a book about it once but it's not super popular these days. For small sites it works well!