Hello Friends,
Today we are going to talk about React Portals which helps us render element to another part of the DOM. Now you might be thinking why we want to do that. Well, Lets consider a use case. You are developing a application and you want to show popup or model dialogs. Here you can use React Portals which can help you render these elements outside your component hierarchy. The benefit of using this is , you will get more focused and clean code and this will help on building more managed component. Now let us understand what more about react portals and build a demo together to understand it better.
What is React Portals?
React Portals is a feature in React that allows you to render components outside of the normal React component hierarchy. Normally, when you render a component in React, it is attached to the DOM tree as a child of another component. This is called the parent-child relationship.
With React Portals, you can render a component outside of its parent component, and attach it to a different part of the DOM tree. This is useful when you want to create UI elements that are not constrained by their parent component’s position in the DOM tree.
React Portals Use Cases
1: Modals and Dialogs
Modals and dialogs are common need for web applications and here you can use react portals so that they can be rendered outside of the normal component hierarchy, and ensure it is always displayed on top of other content. This can help you create cleaner and more efficient code, without worrying about complex CSS or layout calculations.
2.Tooltips and Popovers
You can use React Portals to render tooltips and popovers and ensure that it always positions correclty. This helps with clean code.
3.Custom Video and Audio Players
Using React Portals, you can create a custom video or audio player that is rendered outside of the normal component hierarchy, and ensure it is always positioned correctly on the page as these are complex UI elements and require special handling to work correctly.
4.Custom Dropdown Menus
Using React Portals, you can create a custom dropdown menu that is rendered outside of the normal component hierarchy, and ensure it is always positioned correctly relative to the target element.
5.Modifying Third-Party Components
you can use React portals to modify third-party components which does not provide a exposed way to work with their DOM elements.
Let us see first use cases about how to use React Portals for model.
First Let us create new react application and use typescript with it using below command.
npx create-react-app my-app-portals-tutorial --template typescript
Create new folder “components” as below and add the files as shown.

Open the application in vscode and create a new file named “PortalModel.tsx” in components directory and add below code in it.
import React from "react";
import ReactDom from "react-dom";
function PortalModel(props: any) {
if (!props.isOpen) {
return null;
}
return ReactDom.createPortal(
<div className="modal">
<div className="modal-content">
<span className="close" onClick={props.onClose}>
×
</span>
<p>Some text in the Modal..</p>
</div>
</div>,
document.getElementById("modal-root") as HTMLElement
);
}
export default PortalModel;
The above React component renders a modal using React portals. The modal is displayed conditionally based on the value of the isOpen prop, and it can be closed by clicking on the close button, which triggers the onClose function passed as a prop.
Add below code in “OtherComponent.tsx” file under components folder.
import React from "react";
import PortalModel from "./PortalModel";

function OtherComponent(props: any) {
  const [isOpen, setIsOpen] = React.useState(false);

  const onOpen = () => {
    console.log("onOpen");
    setIsOpen(true);
  };
  const onClose = () => setIsOpen(false);
  return (
    <div>
      <button type="button" onClick={() => onOpen()}>
        Launch demo modal
      </button>
      <PortalModel isOpen={isOpen} onOpen={onOpen} onClose={onClose} />
    </div>
  );
}

export default OtherComponent;
This is a React functional component that renders a button and a PortalModel component.
The PortalModel component is a custom component that is imported from a separate file. It is being rendered conditionally based on the state of isOpen. The isOpen state is initially set to false using the useState hook.
The onOpen function is used to update the isOpen state to true and is called when the button is clicked. The onClose function is used to update the isOpen state to false and is passed as a prop to the PortalModel component.
When the PortalModel component is rendered with isOpen set to true, it will display a modal. The onClose function can be called within the PortalModel component to close the modal.
Update “App.tsx” as below.
import React from "react";
import OtherComponent from "./components/OtherComponent";

function App() {
  return <OtherComponent />;
}

export default App;
This is a simple React functional component that renders an OtherComponent component.
The OtherComponent component is imported from a separate file located in the “components” directory. It is being rendered without any props being passed to it.
This App component is the root component of the React application and it will render the OtherComponent component.
Update “index.html” file under public folder and add a div with id “modal-root” at end of body element as below.

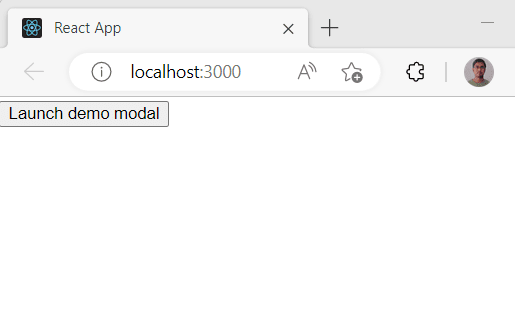
now run the application using “npm start” , you should be getting below output on browser if you followed the above steps.
Click on the button and you should have screen as below (just ignore the css part  ).
).

now let us inspect the html to know how this is generated, you should be seeing below output.

If you notice in above snap, the model element is not generated under component “OtherComponent” DOM tree but it is generated in “model-root” node. This demoed that how React portals are useful for rendering some component outside the regular DOM structure and give us flexibilty for writing more focused code.
Summary
This is detailed tutorial on React Portals and a step-by-step guide on how to implement them. It lists various use cases where React Portals can be used, such as modals, tooltips and popovers, custom video and audio players, custom dropdown menus, and modifying third-party components. It is indeed a useful feature to render components outside of the normal React component hierarchy. It can help developers to create more efficient and cleaner code and provide better control over UI elements like modals, dialogs, and tooltips.
I hope this tutorial would be helpful for React developers who want to use React Portals in their applications. If there’s anything else you’d like to add or any further questions, feel free to ask, you can refer the official side here too.
The post React Portals with use-cases appeared first on CodeLila.

Top comments (0)