
In this post, I'll show you how to use git and Jenkins to set up a continuous integration system for a Github repository.
Ascertaining that all of your installation procedures have been completed.
Step 1
Once Jenkins has been successfully started, we can check to see if the local Jenkins server is running on the machine by going to the following URL in your browser http://localhost:8080/ .
Step 2
Go to your Githubpage and navigate to "Settings".
Click on the "Developer settings" menu and then on
Personal access tokensin the settings screen.On the "Personal access tokens" tab, click the "Generate new token" button, enter the necessary information, and then click the "Generate token" button.
Step 3
Navigate to 'Manage Jenkins' and then to 'Manage Plugins' in Jenkins Dashboard.
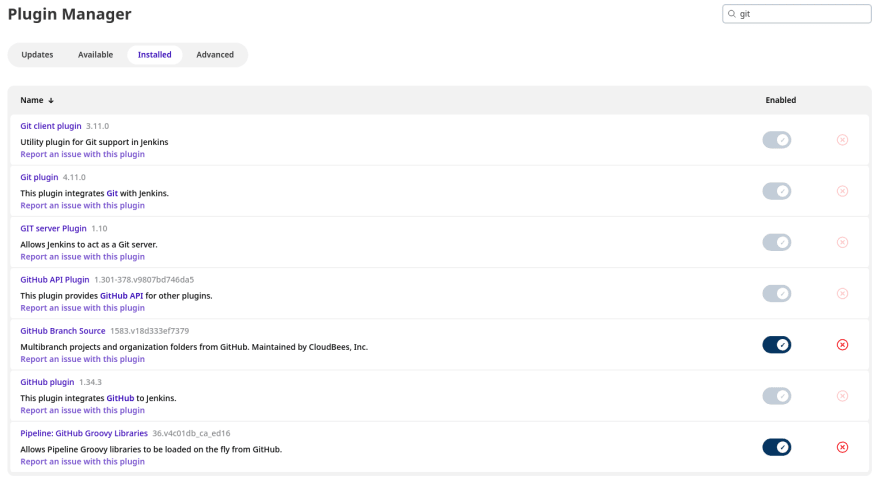
Make sure all these git plugins are installed properly.
Step 4
Select the New Item option in Jenkins Dashboard. Enter a name for the item and select Freestyle project. When you press OK, you will be taken to the configuration page.
Step 5
In General tab click on Github project and enter your github project url.

Step 6
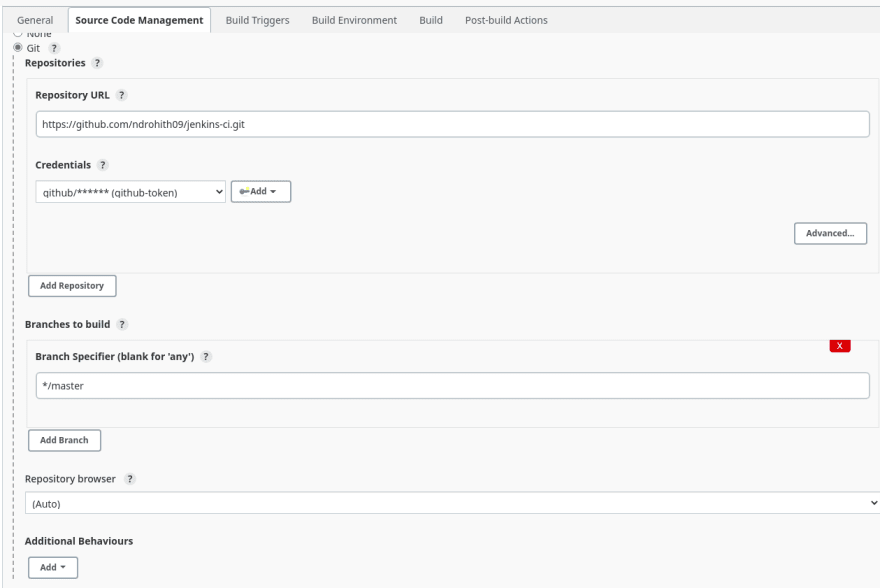
You must now specify the git url of your specified github project in Source Code Management.And in the Credentials field, enter your github's person access token.
Note : Private repositories require an Access token, whereas public repositories do not.
Step 7
Now, in Build triggers, let's specify our trigger so that Jenkins will run a job for each github commit.Select Poll SCM and schedule the time span according to your wish by refering CRON Jobs.

Step 8 [Optional]
In Build Environment tab lets execute shell commands.

Once your configuration is over click on Save button.
After each commit on your github repository, your build will now be triggered automatically.


I hope you find this information useful!

Top comments (0)