Alrighty everyone, its time to put on the adult pants today. We're going to be adding persistence to our blockchain. You may have noticed that we've been generating a new blockchain each time we run the program. As soon as you close your terminal, poof it vanishes. Maybe you're into that, I don't know your life. I however, very much like it when things stick around after I'm done programming them.
For this endeavor I wanted to have something very quick and simple. I wanted to use something unique to the Golang ecosystem. I also hadn't used a key/value database before, and this felt like a wonderful excuse to learn more about it.
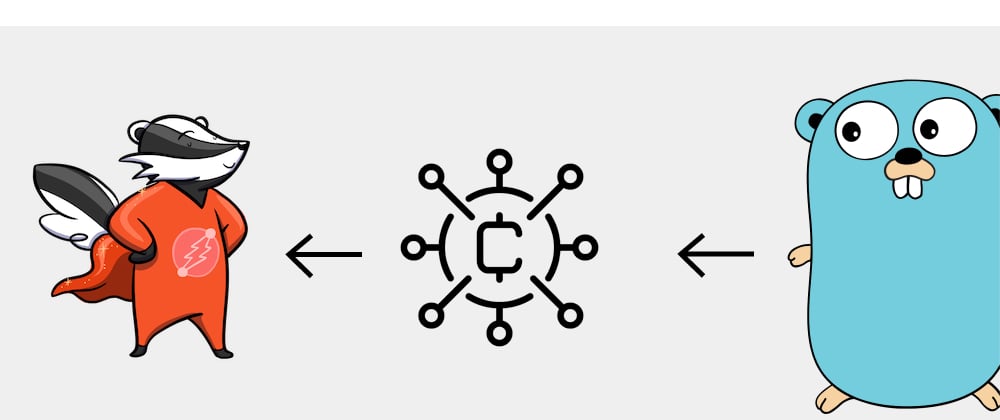
With these criteria it felt like there was an obvious option, as it nailed all three of these requirements. It is easy to setup, unique to go, and is a key/value store. I would like to introduce to you, BadgerDB! We will use V 1.6.2 for this tutorial. This database is the owner of that incredibly cute mascot you see next to our beloved gopher above.
We know we want to add a database, and we also know what tech we're going to use to do it. So, without further ado, let's hop into it!
Refactoring
More refactoring! You thought you were done after part II didn't you? WRONG! This is just as much to show you how a project evolves as you add functionality to it, as it is to show you how to add the functionality itself.
tmp/blocks
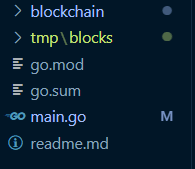
In our root directory, we want to make a tmp folder, and inside that we want to make a blocks folder.
So after you are done with that your directory should look like this 
That's all we need to do for now. We will come back to this later.
block.go
In our block.go file we're going to need to add some utility functions. I'm going to want to Serialize/Deserialize our Blocks. In addition to that we are going to have quite a lot of errors returned, and we will want a way to handle them. All-in-all a total of 3 functions to add; let's get to it.
Handle()
Go handles errors differently than many other languages. many of the functions we are calling will return an error, along with the value. We need to make sure these errors are empty before proceeding.
Error handling in go is a whole topic with different opinions and areas to dive deep in. So keep in mind this function is about as bare-bones as it gets.
//block.go
func Handle(err error) {
    if err != nil {
        log.Panic(err)
    }
}
Alrighty! Moving on.
Serialize()
To convert our Block struct into bytes we are going to use the encoder/gob library.
//block.go
func (b *Block) Serialize() []byte {
    var res bytes.Buffer
    encoder := gob.NewEncoder(&res)

    err := encoder.Encode(b)

    Handle(err)

    return res.Bytes()
}
This will take our Blocks, encode everything down into bytes, handle the error, and then return the bytes.
Deserialize()
So we have a way to go from Blocks to bytes. It would be helpful if I had a way to reverse that process.
//block.go
func Deserialize(data []byte) *Block {
    var block Block

    decoder := gob.NewDecoder(bytes.NewReader(data))

    err := decoder.Decode(&block)

    Handle(err)

    return &block
}
Excellent!
We now have a way to turn our blocks into bytes and vice versa. We can handle any errors that may come along the way as well. However, there is another matter to attend to. There are a few functions in our block.go file that are dealing with BlockChain logic. I would like to move these to a separate blockchain.go file, so that we can expand upon its' functionality.
This means we will be moving the BlockChain struct, InitBlockChain method and AddBlock method to a new file.
blockchain.go
In our blockchain folder, add a blockchain.go file. This is going to house all of our new blockchain logic and how we are going to connect to our database.
As always with a new go file, the first line needs to declare what package it is. After that we need to do some imports, and then we can start coding from there. Here's what we should start out with:
//blockchain.go
package blockchain

import (
    "fmt"

    "github.com/dgraph-io/badger" // This is our database import

)
The next thing we will want to do is decide where we would like to store our new blockchain. Luckily for you, I had you do this already! Our tmp/blocks folder is a wonderful place to store all of your data.
We just need to add a constant to use throughout our code.
const dbPath = "./tmp/blocks"
After this we want our new BlockChain struct. We need to make some changes to it. Before it was just an array of pointers to other Blocks, but now we need to get the database involved. Below is what our new struct will look like.
//blockchain.go
type BlockChain struct {
    LastHash []byte
    Database *badger.DB
}
InitBlockChain()
Now for the InitBlockChain method from earlier. We can scrap the old one entirely. When you create a new blockchain, you will need to do a few things if you want to have the blockchain be persistent. What this means is you need to have some requirements in mind before we start banging it out. Your blockchain needs to do the following:
- Open a connection to the database
- Check if there is already a blockchain
- If there isn't, create one
- If there is, grab it
Now that we have a plan in mind, we can begin executing on it. BadgerDB uses transactions to access the database. You can only access the key/value pairs that exist within the database inside of a transaction. This means every time we are going into the database, we need to open up a transaction. With an opened transaction, we can extract whatever data we were looking for and handle errors.
I think you are properly equipped at this point to start writing out some code! This function is a bit bigger, so we will follow the steps that I outlined above to keep on track.
- Open a connection to the database
//blockchain.go

func InitBlockChain() *BlockChain {
    var lastHash []byte

    opts := badger.DefaultOptions(dbPath)

    db, err := badger.Open(opts)
    Handle(err)
    //part 1 finished
}
There is some configuration that you can do within the badger.Options, but for our purposes the default options will be just fine.
- Check if there is already a blockchain.
checking is just one line, so we will combine checking if it exists, and making a new one if it doesn't.
//blockchain.go
func InitBlockChain() *BlockChain {
    var lastHash []byte

    opts := badger.DefaultOptions(dbPath)

    db, err := badger.Open(opts)
    Handle(err)
    //part 1 finished

    err = db.Update(func(txn *badger.Txn) error {
        // "lh" stand for last hash
        if _, err := txn.Get([]byte("lh")); err == badger.ErrKeyNotFound {
            fmt.Println("No existing blockchain found")
            genesis := Genesis()
            fmt.Println("Genesis proved")
            err = txn.Set(genesis.Hash, genesis.Serialize())
            Handle(err)
            err = txn.Set([]byte("lh"), genesis.Hash)

            lastHash = genesis.Hash

            return err
            //part 2/3 finished
}
Starting at the top we try to get a byte with the "lh" (last hash) key. This will grab the most recently added block in the chain if it exists. However it returns an error that we should check before going further. We can use the badger.ErrKeyNotFound to determine whether or not the "lh" key exists. If that error comes back, we create a new block using our Genesis function. At that point we can Serialize our Block and use txn.Set() to place it in the database.
That was steps 1-3, now we can do the last step:
- If it is there, grab it.
//blockchain.go
func InitBlockChain() *BlockChain {
    var lastHash []byte

    opts := badger.DefaultOptions(dbPath)

    db, err := badger.Open(opts)
    Handle(err)
    //part 1 finished

    err = db.Update(func(txn *badger.Txn) error {
        // "lh" stand for last hash
        if _, err := txn.Get([]byte("lh")); err == badger.ErrKeyNotFound {
            fmt.Println("No existing blockchain found")
            genesis := Genesis()
            fmt.Println("Genesis proved")
            err = txn.Set(genesis.Hash, genesis.Serialize())
            Handle(err)
            err = txn.Set([]byte("lh"), genesis.Hash)

            lastHash = genesis.Hash

            return err
            //part 2/3 finished
        } else {
            item, err := txn.Get([]byte("lh"))
            Handle(err)
            err = item.Value(func(val []byte) error {
                lastHash = val
                return nil
            })
            Handle(err)
            return err
        }
    })
    Handle(err)

    blockchain := BlockChain{lastHash, db}
    return &blockchain
    //that's everything!
}
Awesome! We now have a way to make a new blockchain that will live after we close the terminal.
AddBlock()
With our initialization out of the way, we can loop back around to our AddBlock function that we had previously implemented.
In order to do this, we will need to grab the lastHash of the most recent Block in our BlockChain. Following that, we will use a BadgerDB Transaction to Set our new block. Then we can serialize our data, set the new block hash, and then set the last hash.
Putting together everything we just outlined above, we will end up with a function like this.
//blockchain.go
func (chain *BlockChain) AddBlock(data string) {
    var lastHash []byte

    err := chain.Database.View(func(txn *badger.Txn) error {
        item, err := txn.Get([]byte("lh"))
        Handle(err)
        err = item.Value(func(val []byte) error {
            lastHash = val
            return nil
        })
        Handle(err)
        return err
    })
    Handle(err)

    newBlock := CreateBlock(data, lastHash)

    err = chain.Database.Update(func(transaction *badger.Txn) error {
        err := transaction.Set(newBlock.Hash, newBlock.Serialize())
        Handle(err)
        err = transaction.Set([]byte("lh"), newBlock.Hash)

        chain.LastHash = newBlock.Hash
        return err
    })
    Handle(err)
}
I won't go into as much detail on this implementation. If you are able to understand the logic of the previous function, you will see the similarity. The difference here being we use the CreateBlock method vs the Genesis method that we used previously.
Things are starting to come together! There are only two more functions, and one struct that we need to add to our blockchain.go file.
BlockChainIterator struct
So we have our BlockChain struct, that holds the lastHash, as well as a pointer to our database. I think it would be useful to be able to iterate through our BlockChain. In order to do this I would like this new struct to have the same database pointer, but to point to the current hash instead of the previous hash.
//blockchain.go
type BlockChainIterator struct {
    CurrentHash []byte
    Database    *badger.DB
}
Coolio, new struct accomplished!
Iterator()
So now that we have the new struct, we need to be able to turn our BlockChain into a BlockChainIterator. This is our utility function for doing so:
//blockchain.go
func (chain *BlockChain) Iterator() *BlockChainIterator {
    iterator := BlockChainIterator{chain.LastHash, chain.Database}

    return &iterator
}
Donezo! In-the-bag! Mission accomplished!
Alright that's enough celebrating, onto the next function.
Next()
While BadgerDB does offer a way to iterate through the database, I found building this out to be educational, and I hope you do as well. What we are calling here is the same View function that we used before, and then setting the CurrentHash of our BlockChainIterator to the PrevHash of the Block that we are looking at.
//blockchain.go
func (iterator *BlockChainIterator) Next() *Block {
    var block *Block

    err := iterator.Database.View(func(txn *badger.Txn) error {
        item, err := txn.Get(iterator.CurrentHash)
        Handle(err)

        err = item.Value(func(val []byte) error {
            block = Deserialize(val)
            return nil
        })
        Handle(err)
        return err
    })
    Handle(err)

    iterator.CurrentHash = block.PrevHash

    return block
}
This allows us to pick at all of the info of a block, and then call the Next() method to take a look at the next one in the chain.
That's everything in our blockchain.go file! congrats, we now have database functionality.
Main.go
Here is the contents of the changed main.go file:
package main

import (
    "flag"
    "fmt"
    "os"
    "runtime"
    "strconv"

    "github.com/nheingit/learnGo/blockchain"
)

type CommandLine struct {
    blockchain *blockchain.BlockChain
}

//printUsage will display what options are availble to the user
func (cli *CommandLine) printUsage() {
    fmt.Println("Usage: ")
    fmt.Println(" add -block <BLOCK_DATA> - add a block to the chain")
    fmt.Println(" print - prints the blocks in the chain")
}

//validateArgs ensures the cli was given valid input
func (cli *CommandLine) validateArgs() {
    if len(os.Args) < 2 {
        cli.printUsage()
        //go exit will exit the application by shutting down the goroutine
        // if you were to use os.exit you might corrupt the data
        runtime.Goexit()
    }
}

//addBlock allows users to add blocks to the chain via the cli
func (cli *CommandLine) addBlock(data string) {
    cli.blockchain.AddBlock(data)
    fmt.Println("Added Block!")
}

//printChain will display the entire contents of the blockchain
func (cli *CommandLine) printChain() {
    iterator := cli.blockchain.Iterator()

    for {
        block := iterator.Next()
        fmt.Printf("Previous hash: %x\n", block.PrevHash)
        fmt.Printf("data: %s\n", block.Data)
        fmt.Printf("hash: %x\n", block.Hash)
        pow := blockchain.NewProofOfWork(block)
        fmt.Printf("Pow: %s\n", strconv.FormatBool(pow.Validate()))
        fmt.Println()
        // This works because the Genesis block has no PrevHash to point to.
        if len(block.PrevHash) == 0 {
            break
        }
    }
}

//run will start up the command line
func (cli *CommandLine) run() {
    cli.validateArgs()

    addBlockCmd := flag.NewFlagSet("add", flag.ExitOnError)
    printChainCmd := flag.NewFlagSet("print", flag.ExitOnError)
    addBlockData := addBlockCmd.String("block", "", "Block data")

    switch os.Args[1] {
    case "add":
        err := addBlockCmd.Parse(os.Args[2:])
        blockchain.Handle(err)

    case "print":
        err := printChainCmd.Parse(os.Args[2:])
        blockchain.Handle(err)

    default:
        cli.printUsage()
        runtime.Goexit()
    }
    // Parsed() will return true if the object it was used on has been called
    if addBlockCmd.Parsed() {
        if *addBlockData == "" {
            addBlockCmd.Usage()
            runtime.Goexit()
        }
        cli.addBlock(*addBlockData)
    }
    if printChainCmd.Parsed() {
        cli.printChain()
    }
}

func main() {
    defer os.Exit(0)

    chain := blockchain.InitBlockChain()
    defer chain.Database.Close()

    cli := CommandLine{chain}

    cli.run()

}
I rewrote it to use a cli to add blocks to the chain. Unfortunately this post would go over 3000 words if I were to break all of this down. I will most likely write up a smaller blogpost later this week to explain how it works. What YOU need to know is how to use it!
Previously we would run go run main.go and watch it do its thing. Now you have two options:
go run main.go add -block "YOUR BLOCK DATA HERE"go run main.go print
With these two commands you will be able to add blocks to your chain, and then you can print them out!
You can check out what the finished code should look like here!
As always I hope you learned something, and if you have any questions just leave a comment below, or find me on twitter!
@nheindev


Oldest comments (3)
Give me more... :)
Well if you're only on part 3 It looks like you've still got some work to do!
Glad you're enjoying the content :)
You are really good at writing, man.
Keep up the good work.
100 kudos!