Creating your first game in Unity and C#
This series of articles will guide you through the steps to create your first game using the Unity engine and C#. Throughout the course of this article we will be focusing mainly on the Unity engine. In order to get this thing to work though, we are going to need to write a good deal of C# code. I am approaching this article with the idea that users will have basic programming knowledge but are new to the Unity platform.
Because learning Unity is such a big task, we will not be covering the basic parts of computer programming in this article. I will do my best to provide links to those concepts at a later date! For this tutorial we are going to work with a 2D project to make the early steps of learning the engine a little less complicated.
By the end of this module you will have learned about:
- How to create a 2D project
- The main screens in the Unity editor that you will interface with.
- How to add art / graphics to your game.
- How to parse a sprite <something>
- How to add it to an object that represents a player character in your game.
- how to apply physics to the player object.
- how to add collision the player object.
Get the tools you need and install them
Here are links to all of the software you will need to create this project. I will not be detailing the install process but it is very straight forward.
Download Unity (main download page )
- Direct link to the free Unity Download (if you just want to skip right to the free one)
Download some art to use in your project.
(Here is a direct link to the art that I am using)
Install Unity and Visual studio and unzip / extract the graphics folder that you have chosen for art.
When installing Visual Studio be sure that you install the Unity tools that are part of the installation process.
( if you don't do this then later Visual studio intellisense won't know anything about the Unity package. )

Create a new project
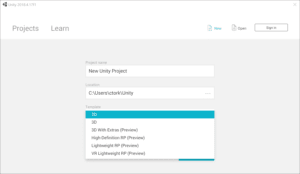
Open Unity and create a new 2D project. (File > new project > )
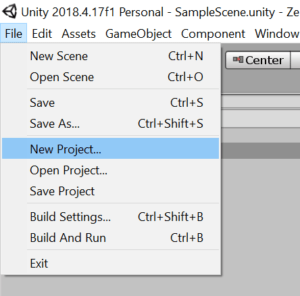
Select the 2D template.
Set the external editor in Unity to Visual Studio. (Edit > Preferences > External Tools > and then set this to Visual Studio 2019 )

Getting to know the Unity Interface
Now that you have a new project created, and are looking at the unity interface I bet you are thinking... "WOW that's a lot of stuff to look at!"
Don't worry that is a perfectly normal reaction! Let's walk through the interface and talk about each piece. There is a ton of information to learn here, so we will just focus on the stuff we need for now.

- The Scene The scene window is a graphical representation of the game and all of the objects that you have set up to interact with. You can think of this kind of like the stage that actors use when performing a play. Everything you create that you want to interact with in your game, will have some sort of representation in the scene. You will eventually be placing everything in this area. Every object that is part of the game from your light source , to audio, all the way to blocks that represent the boundaries and terrain of your game will be represented graphically in the scene.
- Hierarchy
The easiest way to understand the hierarchy is to think of it as a list of all of the things in your scene. While you can point and click to grab and examine items in your scene. At some point in a large game, you will have tons of objects in the scene and having a clean detailed interface to select from will invaluable. This is where the hierarchy comes in.
3. ProjectThe Project window displays all of the files related to your Project. It is the main way you can navigate and find Assets and other Project files in your application. This window is similar to the solution explorer in Visual Studio. I'm making this up off the cuff but essentially you have assets which are things like images, code files, config files and the folders that contain them. Pretty much everything that you build inside of the Unity Environment can be called an Object , and objects are contained in assets.
- Inspector
The inspector allows you to examine and modify individual objects in Unity. It is similar to the properties window in Visual Studio. if we keep to the same logic above , when we modify an object in Unity its really just doing the work of finding the right asset and modifying it for you.
- Console
The Console is where you get information about what is happening in your program. You can use a statement like "Debug.Log("hello world"); to write information directly to the console.
Create folders to store your work
Now that you know a little about the Unity interface and have created a new 2D project. It' time to do a few things that will help us keep the project organized and orderly.
In this step we will create a series of folders that we will use to store assets for the game.
Go to your project window right click on assets > create folder
Create a new folder for:
- Art
- Animations
- Scenes
- Scripts
- TilesMaps
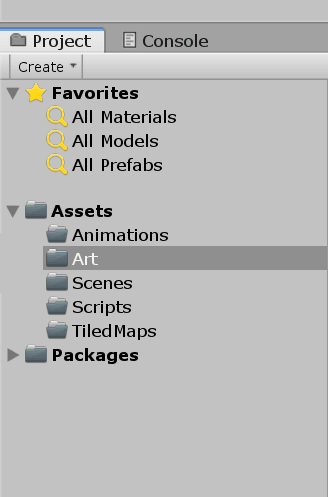
This is what your project (above) should look like now.
Import a sprite set for your character
The first thing we need to do here is find the art set that we downloaded on your computer.
Click on the "Art" folder that we created in the assets window and drag and drop the gfx folder from the art files into that the art folder.
This will add all of the art to your project.
Now that we have the art, we are going to tell the editor about our player character.
In the project window:
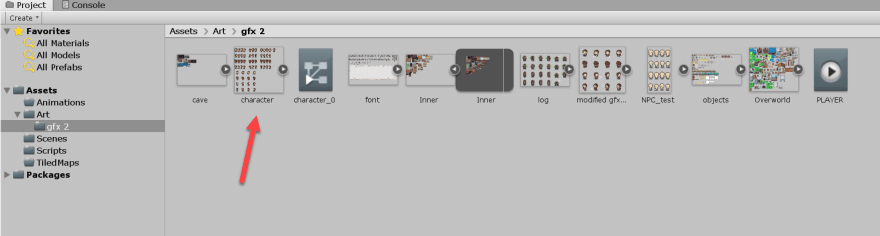
Open "Art" and then open the gfx2 folder.
In the gfx2 folder you will find several image files.
For the most part we will only need to concern ourselves with the one named character. However we do need to make an adjustment to all of the files for this project first.
Select All of the images and then in the "Inspector window"
Find the setting for "Pixels Per Unit" and set it to 16
Then hit the apply button.
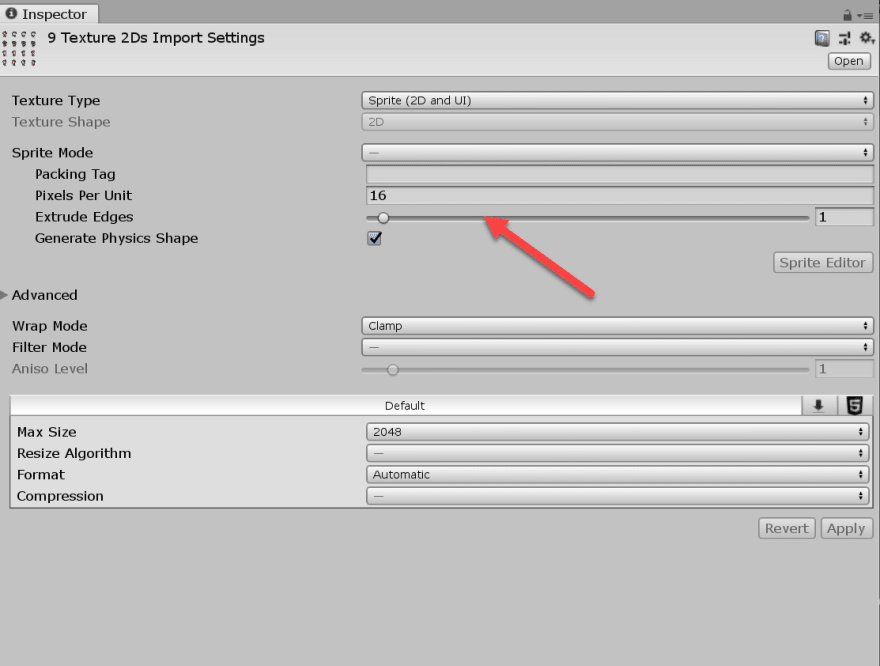
(note that I have some files that aren't images if you have any of these and you select all of the files you will not get the right view in the inspector. it's no big deal you can just select each file one at a time and make this change to each of them.. it will only give you this option for pictures)
Now choose your character image.
(This is actually a set of sprites that Unity can interpret as all of the basic data that we need for animation. I'm not going into detail as to how all of this works at the moment, just follow the steps. )
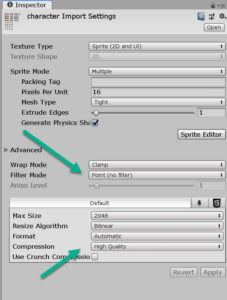
With the character image selected look to your inspector window and :
Change the Sprite Mode to multiple
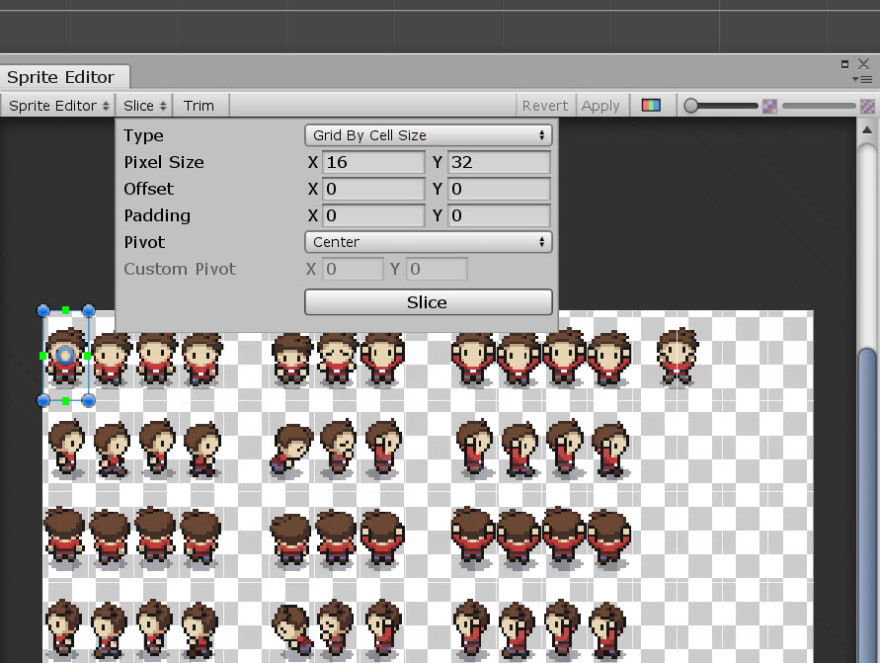
Press the "Sprite Editor" button.

This will open up our sprite editor. Here you will see all of the various facings and animations for the character. Above the pictures you will see that there are a few menus.
Select the one labeled "slice"
Set the Pixel size to x = 16 and Y = 32
Now with your character image selected in the project
Look back to the inspector > Change the "Filter Mode" to point (no filter)
Change the compression to "High Quality"
Hit Apply
Grab your character from the assets window and drag it into the scene.

Then in the hierarchy rename it to "Player" 
Ok. So we learned how to create a new project , set it up , get some free art, import a sprite sheet, set up our environment to use Visual Studio, create a "Object" for use in our game and finally put it on the stage (the scene) . I think that is enough for now! If you are still with me follow me on to my next article in this series:
Handling Player movement. (it will be up shortly)
If any of you have made it this far ... do me a favor and leave a comment or sign up to my mailing list so that I can gauge the interest in this type of content.

Top comments (0)