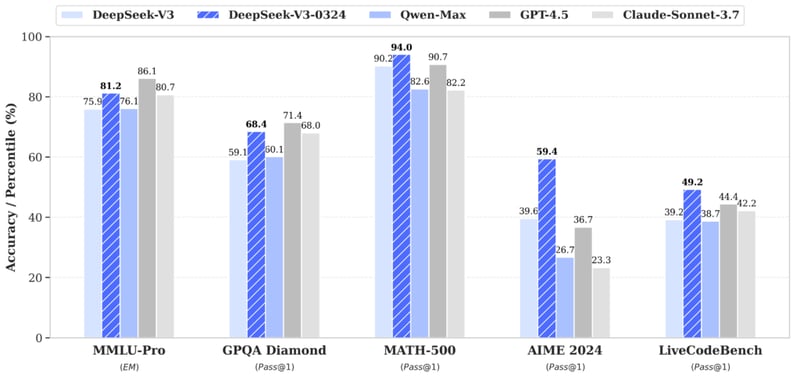
DeepSeek has once again raised the bar in artificial intelligence with the release of DeepSeek-V3-0324, an open-source language model that significantly outperforms its predecessors. The model effortlessly surpasses its top-notch competitors like GPT-4.5 and Claude 3.7 Sonnet. Beyond raw performance metrics, DeepSeek-V3-0324 offers enhanced code executability for front-end web development, helping developers to produce more aesthetically pleasing web pages and game interfaces. Additionally, it demonstrates improved proficiency in Chinese writing, aligning with the R1 style and delivering higher quality in medium-to-long-form content.
Deploying a model of this caliber locally might seem daunting at first due to its substantial 671 billion parameters. However, Unsloth has made it entirely feasible. Unsloth has used selective quantization techniques to reduce the model's size without any significant loss of accuracy by targeting specific layers, such as the Mixture-of-Experts (MoE) layers, while preserving the precision of attention and other critical layers.
In the following guide, we'll walk you through the step-by-step process of installing and running DeepSeek-V3-0324 locally using LLaMA.cpp and Unsloth's dynamic quants, ensuring you can access its full potential efficiently and effectively.
Prerequisites
The system requirements for running DeepSeek-V3-0324 are:
GPU: Multiple H100s or H200s (count may vary across different bits)
Storage: 1TB+ (preferable)
Nvidia Cuda or Jupyter Notebook installed.
Disk Space requirements depending on the type of model are as follows:
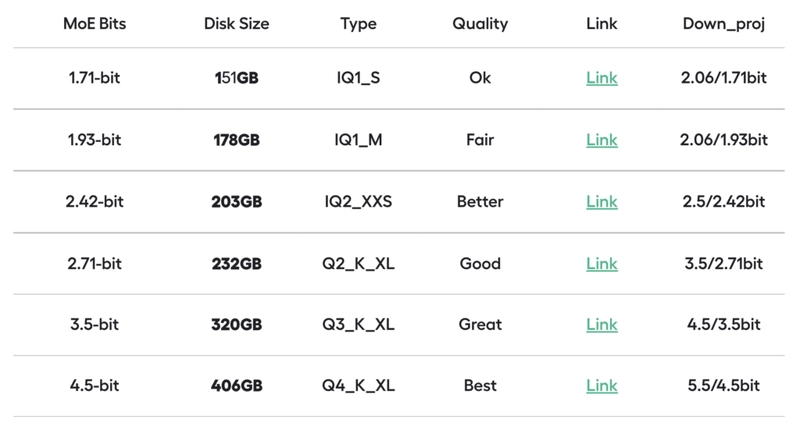
Source: Unsloth
We recommend you to take a screenshot of this chart and save it somewhere to quickly look up to the disk space prerequisites before trying a specific bit quantized version.
For this article, we'll download the 2.71-bit version (recommended).
Step-by-step process to install DeepSeek-V3-0324 locally
For the purpose of this tutorial, we’ll use a GPU-powered Virtual Machine by NodeShift since it provides high compute Virtual Machines at a very affordable cost on a scale that meets GDPR, SOC2, and ISO27001 requirements. Also, it offers an intuitive and user-friendly interface, making it easier for beginners to get started with Cloud deployments. However, feel free to use any cloud provider of your choice and follow the same steps for the rest of the tutorial.
Step 1: Setting up a NodeShift Account
Visit app.nodeshift.com and create an account by filling in basic details, or continue signing up with your Google/GitHub account.
If you already have an account, login straight to your dashboard.

Step 2: Create a GPU Node
After accessing your account, you should see a dashboard (see image), now:
1) Navigate to the menu on the left side.
2) Click on the GPU Nodes option.

3) Click on Start to start creating your very first GPU node.

These GPU nodes are GPU-powered virtual machines by NodeShift. These nodes are highly customizable and let you control different environmental configurations for GPUs ranging from H100s to A100s, CPUs, RAM, and storage, according to your needs.
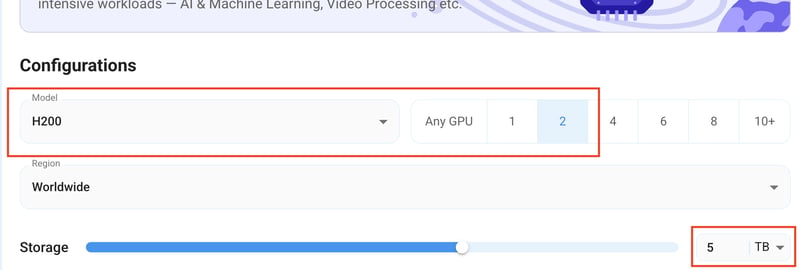
Step 3: Selecting configuration for GPU (model, region, storage)
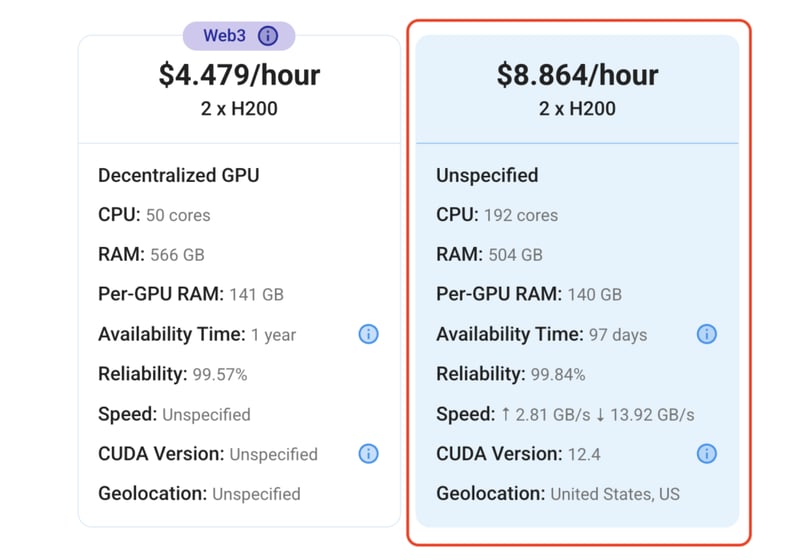
1) For this tutorial, we’ll be using 2x H200 GPU, however, you can choose any GPU as per the prerequisites.
2) Similarly, we’ll opt for 5TB storage by sliding the bar. You can also select the region where you want your GPU to reside from the available ones.
Step 4: Choose GPU Configuration and Authentication method
1) After selecting your required configuration options, you'll see the available GPU nodes in your region and according to (or very close to) your configuration. In our case, we'll choose a 2x H200 140GB GPU node with 192vCPUs/504GB RAM/5TB SSD.
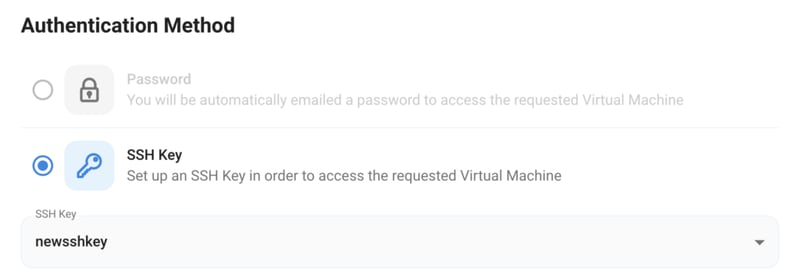
2) Next, you'll need to select an authentication method. Two methods are available: Password and SSH Key. We recommend using SSH keys, as they are a more secure option. To create one, head over to our official documentation.
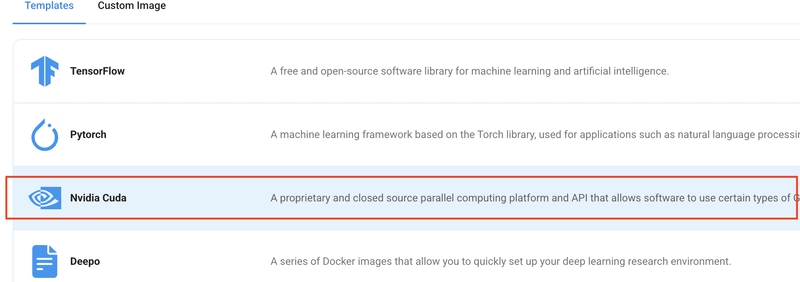
Step 5: Choose an Image
The final step is to choose an image for the VM, which in our case is Nvidia Cuda, where we’ll deploy and run the inference of our model through LLaMA.cpp. If you want a web UI interface to save and run custom files, you may choose the Jupyter Notebook image as well.
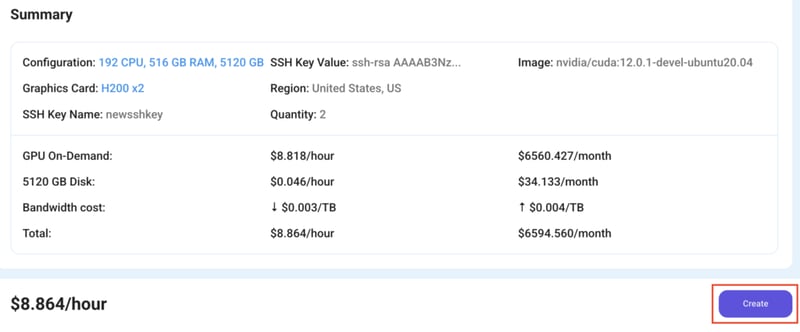
That's it! You are now ready to deploy the node. Finalize the configuration summary, and if it looks good, click Create to deploy the node.

Step 6: Connect to active Compute Node using SSH
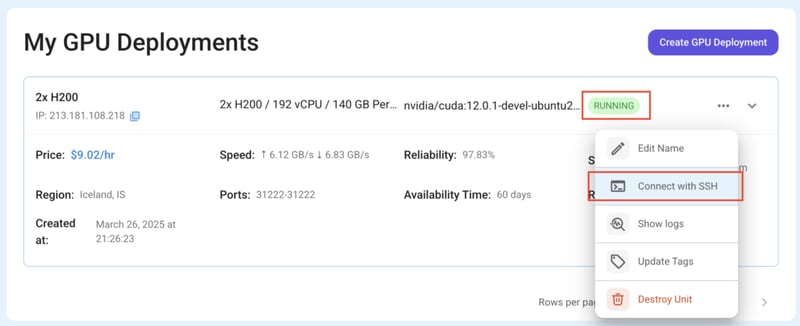
1) As soon as you create the node, it will be deployed in a few seconds or a minute. Once deployed, you will see a status Running in green, meaning that our Compute node is ready to use!
2) Once your GPU shows this status, navigate to the three dots on the right, click on Connect with SSH, and copy the SSH details that appear.
As you copy the details, follow the below steps to connect to the running GPU VM via SSH:
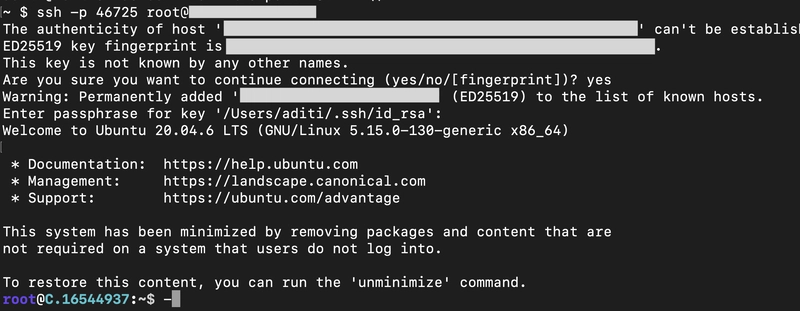
1) Open your terminal, paste the SSH command, and run it.
2) In some cases, your terminal may take your consent before connecting. Enter ‘yes’.
3) A prompt will request a password. Type the SSH password, and you should be connected.
Output:
Step 7: Install and build LLaMA.cpp
llama.cpp is a C++ library for running LLaMA and other large language models efficiently on GPUs, CPUs and edge devices.
We'll first install llama.cpp as we'll use it to install and run DeepSeek-V3-0324.
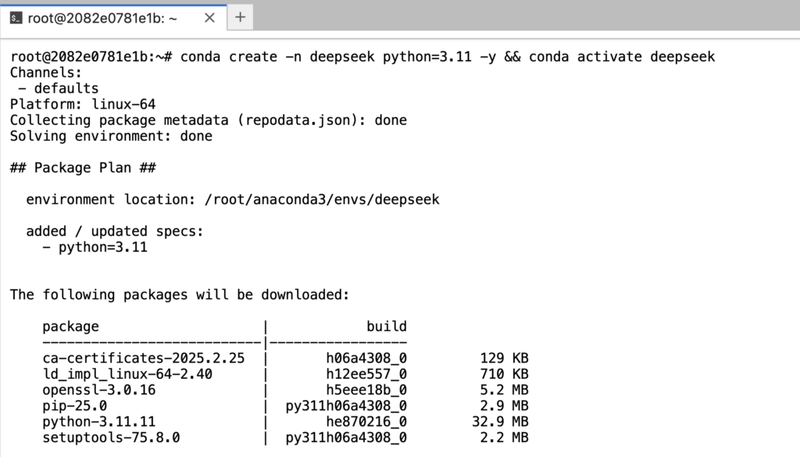
1) Start by creating a virtual environment using Anaconda.
conda create -n deepseek python=3.11 -y && conda activate deepseek
Output:
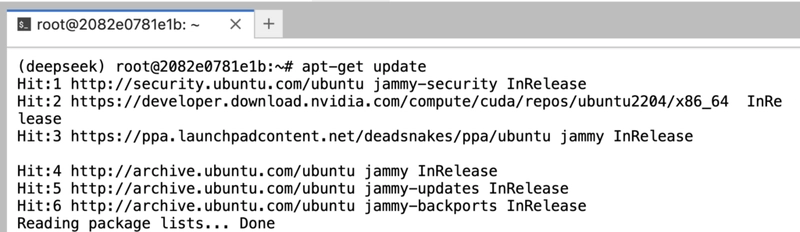
2) Once inside the environment, update the Ubuntu package source-list for fetching the latest repository updates and patches.
apt-get update
Output:
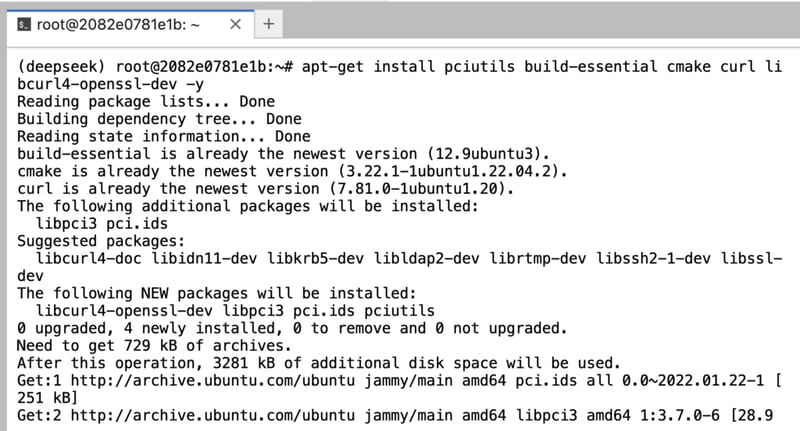
3) Install dependencies for llama.cpp.
apt-get install pciutils build-essential cmake curl libcurl4-openssl-dev -y
Output:
4) Clone the official repository of llama.cpp.
git clone https://github.com/ggml-org/llama.cpp
Output:

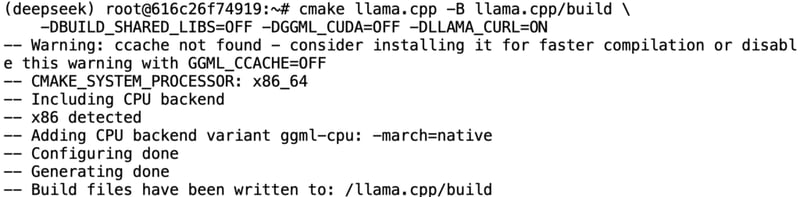
4) Compile llama.cpp's build files.
In the below command, keep -DGGML_CUDA=OFF if you're running it on a non-GPU system. However, it's recommended to keep it OFF, even if you're on a GPU-based system, as it will allow llama.cpp's compilation process to occur through CPU, which is faster in this case as compared to GPU-based compilation. In addition to being slow, compiling llama.cpp through GPU can sometimes throw unwanted errors.
cmake llama.cpp -B llama.cpp/build \
    -DBUILD_SHARED_LIBS=OFF -DGGML_CUDA=OFF -DLLAMA_CURL=ON
Output:
5) Build llama.cpp from the build directory.
cmake --build llama.cpp/build --config Release -j --clean-first --target llama-quantize llama-cli llama-gguf-split
Output:

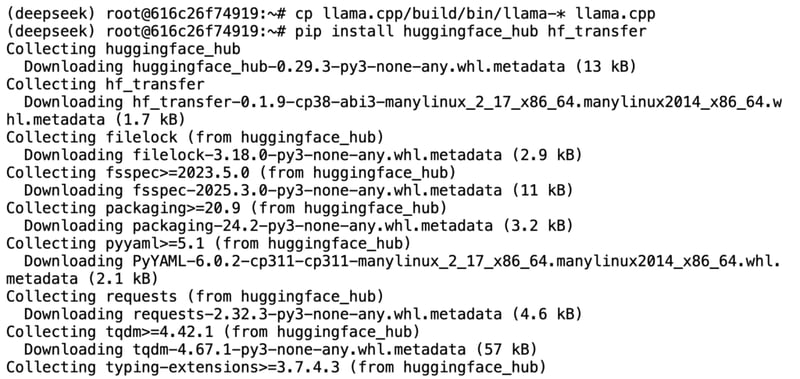
6) Finally, we'll copy all the executables from llama.cpp/build/bin/ that start with llama- into the llama.cpp directory.
cp llama.cpp/build/bin/llama-* llama.cpp
Step 8: Download the Model Files
We'll download the model files from Hugging Face using a Python script.
1) To do that, let's first install the Hugging Face Python packages.
pip install huggingface_hub hf_transfer
huggingface_hub- Provides an interface to interact with the Hugging Face Hub, allowing you to download, upload, and manage models, datasets, and other resources.hf_transfer- A tool optimized for faster uploads and downloads of large files (e.g., LLaMA, DeepSeek models) from the Hugging Face Hub using a more efficient transfer protocol.
Output:
2) Run the model installation script with Python.
The script below will download all the model checkpoints from unsloth/DeepSeek-V3-0324-GGUF.
python -c "import os; os.environ['HF_HUB_ENABLE_HF_TRANSFER'] = '1'; from huggingface_hub import snapshot_download; snapshot_download(repo_id='unsloth/DeepSeek-V3-0324-GGUF', local_dir='unsloth/DeepSeek-V3-0324-GGUF', allow_patterns=['*UD-Q2_K_XL*'])"
Output:
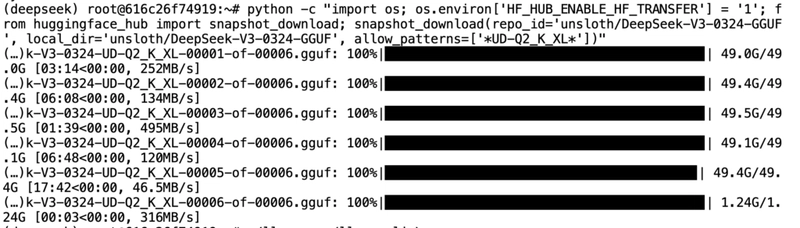
Depending on your GPU configuration, the download process can be slow and take some time. The installation might also seem stuck at some points, which is normal, so do not interrupt or kill the installation in between.
Step 9: Run the Model for Inference
Finally, once all checkpoints are downloaded, we can proceed to the inference part.
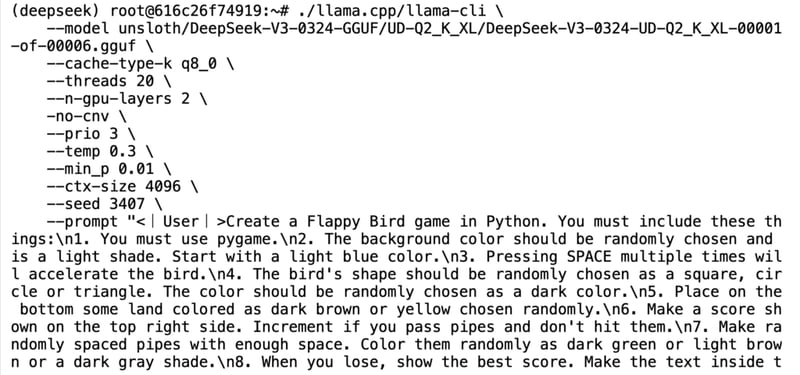
In the below command, we'll run the model with a prompt given inside a formatted template which will be run through LLaMA.cpp's LLaMA-CLI tool. The prompt will ask the model to create a Flappy Bird game in Python with all the interface, logic, and controls.
./llama.cpp/llama-cli \
    --model unsloth/DeepSeek-V3-0324-GGUF/UD-Q2_K_XL/DeepSeek-V3-0324-UD-Q2_K_XL-00001-of-00006.gguf \
    --cache-type-k q8_0 \
    --threads 20 \
    --n-gpu-layers 2 \
    -no-cnv \
    --prio 3 \
    --temp 0.3 \
    --min_p 0.01 \
    --ctx-size 4096 \
    --seed 3407 \
    --prompt "<|User|>Create a Flappy Bird game in Python. You must include these things:\n1. You must use pygame.\n2. The background color should be randomly chosen and is a light shade. Start with a light blue color.\n3. Pressing SPACE multiple times will accelerate the bird.\n4. The bird's shape should be randomly chosen as a square, circle or triangle. The color should be randomly chosen as a dark color.\n5. Place on the bottom some land colored as dark brown or yellow chosen randomly.\n6. Make a score shown on the top right side. Increment if you pass pipes and don't hit them.\n7. Make randomly spaced pipes with enough space. Color them randomly as dark green or light brown or a dark gray shade.\n8. When you lose, show the best score. Make the text inside the screen. Pressing q or Esc will quit the game. Restarting is pressing SPACE again.\nThe final game should be inside a markdown section in Python. Check your code for errors and fix them before the final markdown section.<|Assistant|>"
Output:
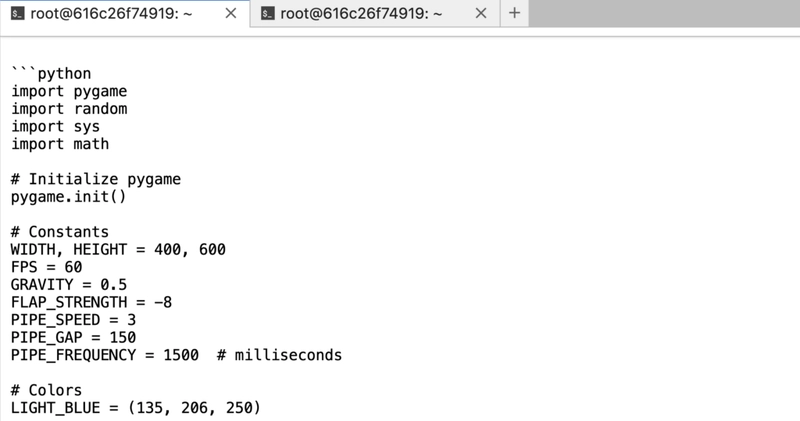
The model has started generating the code as shown below:
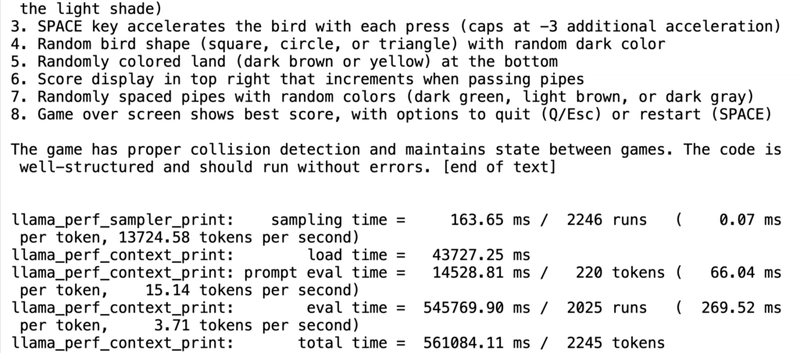
Once the process is complete, it may end the output like this:
As we run the code for the Flappy Bird game generated by DeepSeek-V3-0324 through VSCode Editor, it opens a game panel as shown below (Note: Install pygame in your editor before running the code):

You can see the live demonstration of the game in the video below:
Conclusion
In this guide, we've dived into the detailed process of installing and running DeepSeek-V3-0324 locally, leveraging tools like LLaMA.cpp and Unsloth's dynamic quantization to manage the 671 billion parameters effectively. While local deployment offers control and customization, it can be resource-intensive for such a huge model. This is where NodeShift's cloud platform becomes invaluable, providing affordable and scalable AI cloud resources through an intuitive and easy-to-use interface. By quickly utilizing GPU or compute nodes with NodeShift, developers can effortlessly deploy and scale models like DeepSeek-V3-0324, ensuring robust performance without the complexities of managing local infrastructure.
For more information about NodeShift:

Top comments (0)