
This is the second article in a series of articles that aims to showcase the process of scaffolding and deploying a Micro Frontend Architecture using Nx and Netlify. We will generate the Dashboard application as a host app and walk through the steps of deploying it to Netlify.
Follow us on Twitter or subscribe to the newsletter to get notified when new articles get published.
Scaffold the Dashboard
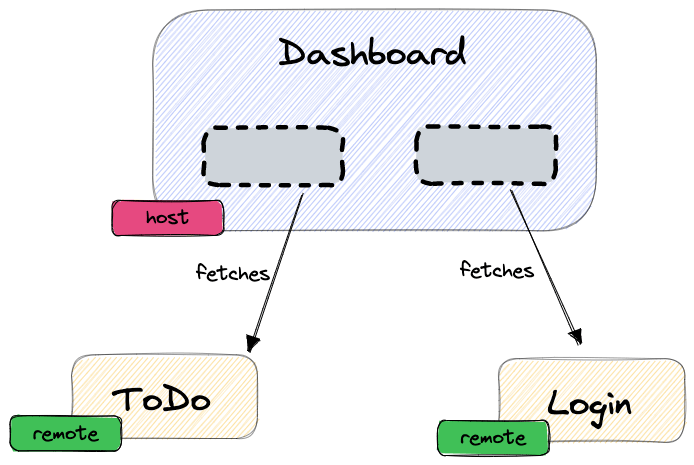
The Dashboard application will be a host MFE app. In the context of Micro Frontends, a host application fetches federated code from a series of remotely deployed applications at runtime. It acts as a container for the remotely deployed applications, hosting them in a specific area within the host app that makes sense for your system. It makes a request to the deployed remote applications to fetch a file that contains the exposed code that can then be consumed by the host application.
Nx ships with generators that allow you to easily generate a new application that will generate the appropriate webpack config to mark it as a host application. To do this, run the following command:
yarn nx g @nrwl/angular:app dashboard --mfe --mfeType=host --routing=true --style=scss
Running this command will do a few things:
- It generates a new Angular app.
- It will change the build and serve executor to one that supports a custom webpack config.
- It will create a custom
webpack.config.jsfile containing the required Module Federation setup. - It will install
@angular-architects/module-federationpackage which contains some useful helpers.
Our Dashboard app is now ready to consume code from remote applications.
If we serve the application locally by running:
yarn nx serve dashboard
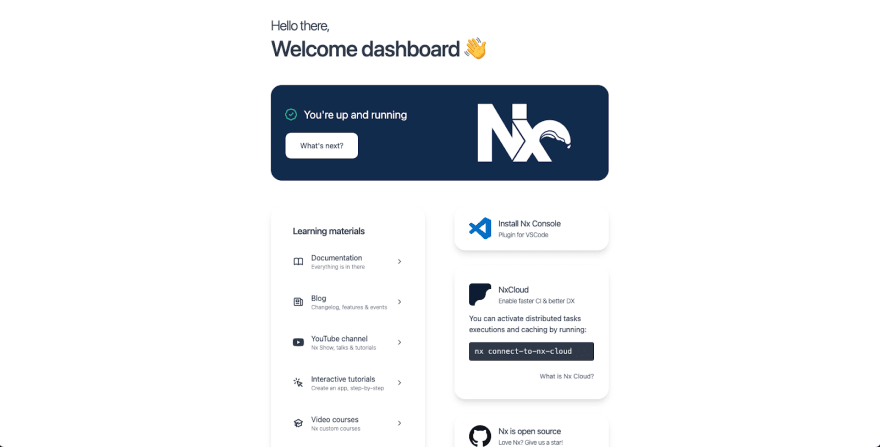
Our application should build and be served correctly. Navigating to http://localhost:4200 should result in the following:
However, it is not yet ready to be deployed.
Prepare the app for Deployment
When we build the dashboard, it builds to static files. An index.html, a bunch of JavaScript files and a CSS file. In a standard Angular app deployment, as with most SPAs, we do not route to other files hosted on the server. The SPA will prevent standard browser routing and, instead, it will load different JavaScript code based on the path in our URL. For this to occur after we deploy an SPA, we need to tell our web server that all routes should resolve to our index.html file, allowing Angular to handle the routing internally. Therefore, we need to tell Netlify how to handle requests to endpoints by routing them through to the index.html file.
Netlify provides a convenient method to configure how your site gets deployed. You can specify a netlify.toml file, which Netlify will automatically pick up and apply during the deployment process. Let’s create this file.
Create the file netlify.toml at the source root of your Dashboard app (apps/dashboard/src) and place the following content in it:
[[redirects]]
  from = "/*"
  to = "/index.html"
  status = 200
We also need to tell our executor to include this file in the build output. Open up the project.json file for your Dashboard app (apps/dashboard/project.json) and find the build option. It should look like this:
    "build": {
      "executor": "@nrwl/angular:webpack-browser",
      "outputs": ["{options.outputPath}"],
      "options": {
        "outputPath": "dist/apps/dashboard",
        "index": "apps/dashboard/src/index.html",
        "main": "apps/dashboard/src/main.ts",
        "polyfills": "apps/dashboard/src/polyfills.ts",
        "tsConfig": "apps/dashboard/tsconfig.app.json",
        "inlineStyleLanguage": "scss",
        "assets": [
          "apps/dashboard/src/favicon.ico",
          "apps/dashboard/src/assets"
        ],
        "styles": ["apps/dashboard/src/styles.scss"],
        "scripts": [],
        "customWebpackConfig": {
          "path": "apps/dashboard/webpack.config.js"
        }
      },
Add the netlify.toml file to the assets array so that it gets copied over in place. Your build config should look like this:
    "build": {
      ...
      "options": {
        ...
        "assets": [
          "apps/dashboard/src/favicon.ico",
          "apps/dashboard/src/assets",
          "apps/dashboard/src/netlify.toml"
        ],
        ...
      },
Let’s commit our changes and push to our remote repo:
git add .
git commit -m “feat: scaffold dashboard application”
git push
Now the application is ready to be deployed to Netlify!
Deploy the Dashboard
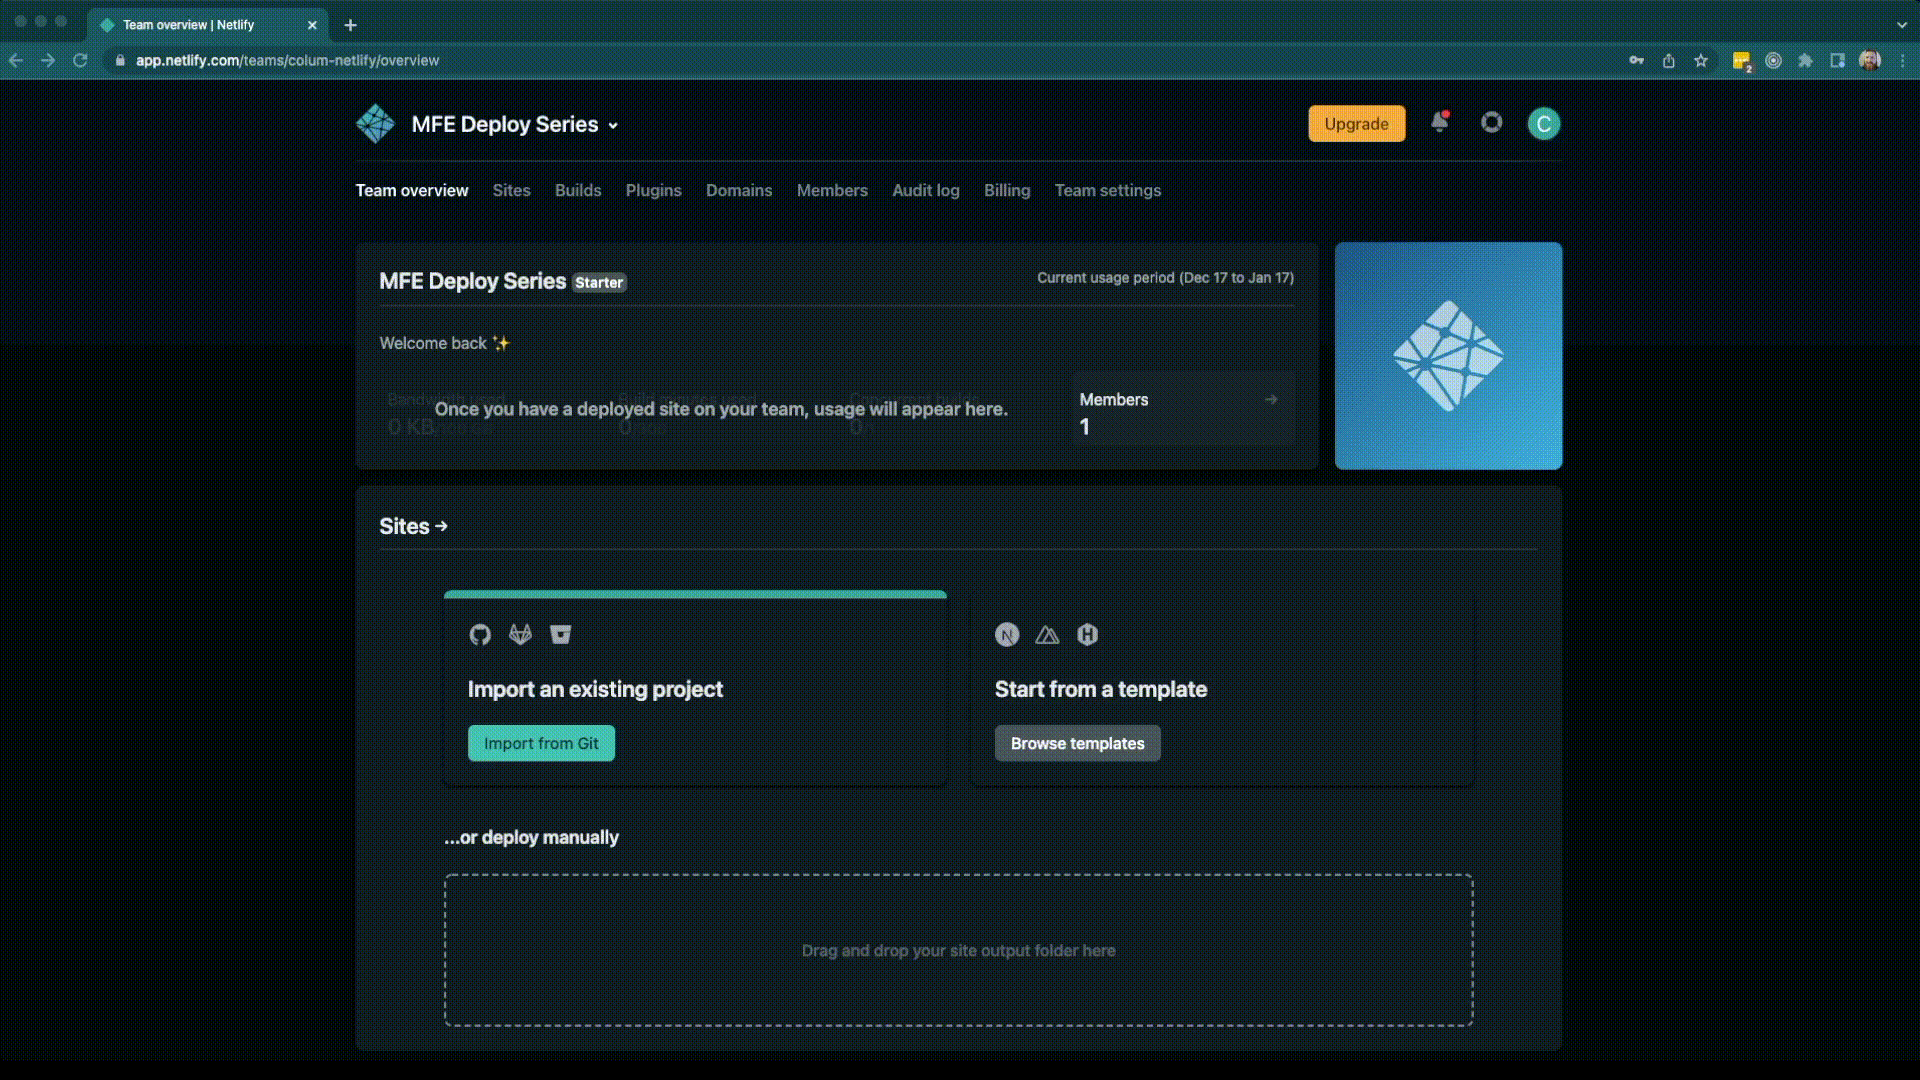
Let’s deploy our site to Netlify. Go to https://app.netlify.com.
To set up our Dashboard site, follow the steps below:
Click here to see a gif of the process
- Click on the Import from Git button.
- Click on GitHub when it prompts to Connect to Git provider.
- Select your repository
- Modify the Build command and Publish directory
a. Build command should be
yarn build dashboardb. Publish directory should bedist/apps/dashboard - Click Deploy site
Netlify will then import your repository and run the build command. After the build completes, Netlify will take the built files and deploy them to a newly generated domain. You can find this domain in the Info card on the Netlify Site:
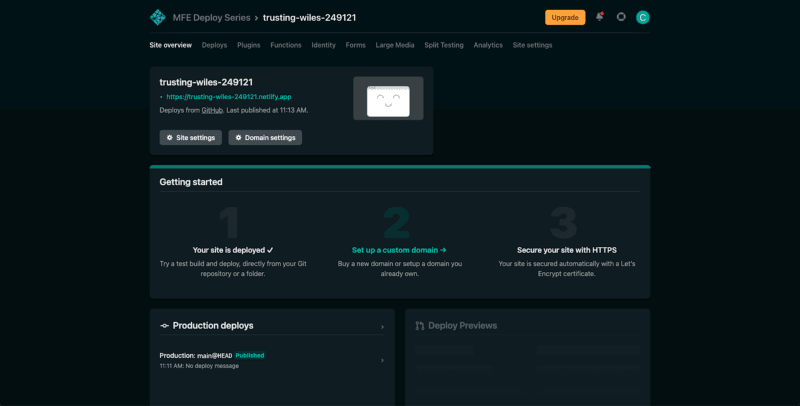
Clicking on the URL will take you to your deployed application. It’s that easy!
Your Dashboard application has been deployed and is ready to be modified to consume the remote applications that we will build in the next article! Keep an eye on our blog and Twitter pages to be notified when it gets released. You can find links to these below.
Blog: https://blog.nrwl.io/
NxDevTools’ Twitter: https://twitter.com/NxDevTools
Nrwl’s Twitter: https://twitter.com/nrwl_io
Colum Ferry’s Twitter: https://twitter.com/FerryColum

Top comments (0)