I write content for AWS, Kubernetes, Python, JavaScript and more. To view all the latest content, be sure to visit my blog and subscribe to my newsletter. Follow me on Twitter.
This is Day 1 of the #100DaysOfPython challenge.
With 2021 now in the latter half, I decided to rekindle my love for Python and do a recap and deep dive into the language as my coding project for the latter half of the year.
The posts will be relatively short, but my aim is to use JupyterLab where possible to help write out easy-to-follow notebooks for myself in the future.
This tutorial will make use of Pipenv to handle package management and we will set up a basic example of a Python 3 notebook that will demonstrate usage of another local package requests that we will install.
Prerequisites
Pipenv is required to be installed locally to work through this tutorial.
If you are not familiar with Pipenv, I have another post "The ABCs of Pipenv and Python Package Management" that may aid in the fundamentals.
Setting up
To setup, run the following from the command-line:
# Make the directory
mkdir hello-jupyterlab
cd hello-jupyterlab
pipenv --three

# Install required packages
pipenv install requests
pipenv install --dev jupyterlab
We are installing requests and jupyterlab locally with the latter being a development dependency that would not be required at runtime.
Adding our first notebook
To start up the notebook, run the following from the command-line:
pipenv run jupyter-lab
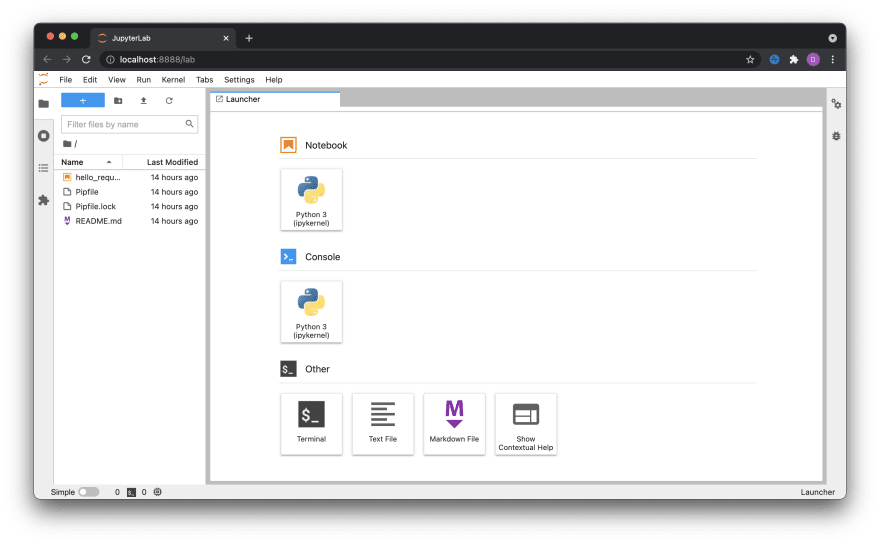
This should setup a server running JupyterLab on http://localhost:8888/lab. From here, we would want to select the Python 3 kernel and then open up the notebook from under the Notebook heading.
Once you are within the untitled notebook, we can add a cell by clicking on the + icon on the top left or filling in the input and pressing "enter".
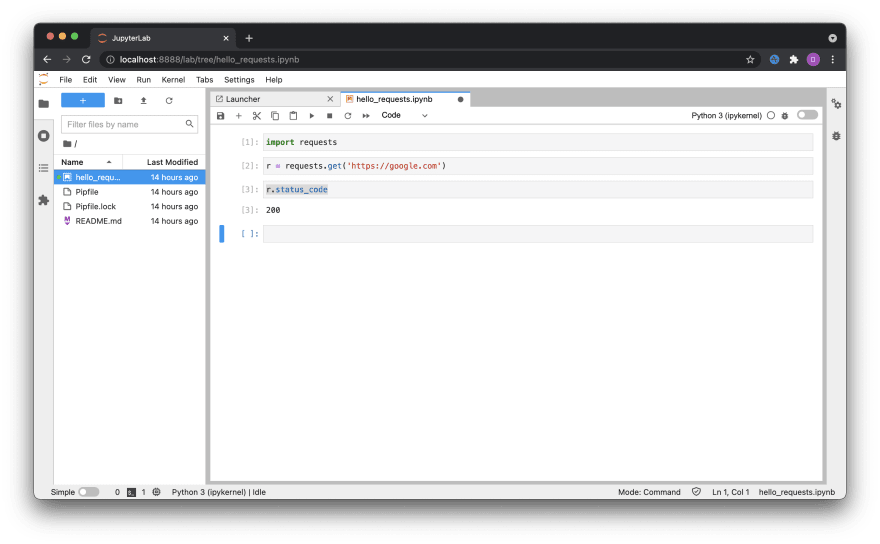
We want to add three cells with the following lines respectively in each cell:
import requests
r = requests.get('https://google.com')
r.status_code
As you execute each line, you should see the output of the cell in the console. You can press "shift + enter" to execute or press the play icon in the top bar.
The results of each line will be displayed in the console like the following:
Most notably, we can now see that r.status_code evaluated to have a result of value 200 which is the status code for a successful request.
Save the notebook under hello_requests.ipynb. Once this is done, you will see that your notebook has been saved locally for future use.
Summary
This short post was a demonstration to get JupyterLab working from a local Pipenv project and to demonstrate how to incorporate other dependencies into a notebook.
While brief, it demonstrates enough required knowledge for you to start to get the hang of JupyterLab and the notebook.
I will continue to use this repositiory to show my progress on the 100 Days of Python challenge and to demonstrate usage of other packages and concepts where applicable.
Resources and further reading
Originally posted on my blog. To see new posts without delay, read the posts there and subscribe to my newsletter.


Oldest comments (1)
Very good good good...
Thank you so much!