
Would you like to see your code going live on the Internet? In this article, you will learn how to deploy your project on Amazon Web Services (AWS) as a developer. Let's get started.
Prerequisites
- Have Front End Libraries Project (at least one)
- Have an AWS account.
Why Deploy Your Project to AWS?
As you work through your Front End Libraries Projects, you submit those projects. But that's all. But beyond that, in the real world when a company finishes a project they don’t just leave it at that – they deploy (hosting) it to the server.
Note: To “deploy" means taking your code from a local environment (your computer, or editors) and putting it on a server. That server, which is just another computer, is networked in such a way that the world to access your site.
So, let’s get started!
If you wanted to, you could set up a PC in your home and do the proper networking for it to serve your project to the world. Or, you could subscribe to a hosting company for them to serve your website for you.
There are a variety of approaches to deploying code, but one very popular method is to use a cloud computing platform like Amazon Web Services (AWS).
Let's dive into the Cloud.
What is AWS?
Amazon Web Services (AWS) offers a “cloud computing platform”.
AWS has services ranging from simply storing files, running servers, converting speech to text or text to speech, machine learning, private cloud networks, and about 200+ other services.
The basic idea behind cloud computing is to gain on-demand IT resources.
There are a number of benefits to using a cloud computing platform, one of the main is cost savings.
Imagine trying to pay for all the physical IT resources that it would take to run the 200+ services AWS offers. That upfront cost is something most companies cannot afford, and fewer could pay for the engineers to configure.
Also, since the resources are on-demand, cloud platforms allow you to launch resources much faster than an IT department could.
In short, with a cloud computing platform like AWS, you save on cost and deployment time, plus many more benefits not the least of which is security. Needless to say, cloud computing is the new approach to IT and AWS is leading in this regard.
Why does this matter to you? If you intend to pursue a career in development, regardless of your focus (backend, frontend, web technologies, mobile apps, gaming, desktop applications, and so on) you will find that many job postings include a reference to cloud computing platform experience.
So the more you can become familiar with one, like AWS, the more you’ll separate yourself from other candidates.
How to Deploy your Code with AWS S3
What is AWS S3?
In this post, we will focus on the AWS service called S3.
S3 stands for Simple Storage Solution. As you might have guessed from that name, the service lets you simply store stuff, more specifically objects.
You can find tutorials and courses on S3 that are hours and days long. On the surface though, it’s just a place where you can store objects. Objects can be things like image files, video files, and even HTML, CSS, and JavaScript files.
As you dive deeper into S3, you’ll learn that S3 allows you to do a lot of things to and with those objects. But for our project, we just want to learn how to store objects and look at a single one of those deeper features – using S3 as a website hosting service.
That's right, AWS S3 is a service we can use to deploy a website.
How to Get Your Project Ready for Deployment
In this article, I’ll deploy a front-end project to AWS using a Random Quote Machine project. You can use your personal projects to learn this tutorial.
We need to take your HTML, CSS, and JS code and put them into their own separate files in a text editor (VS Code).
Open Your IDE (for example, Visual Studio Code)
Make sure your codes are stored in three new files:
- index.html
- styles.css
- main.js
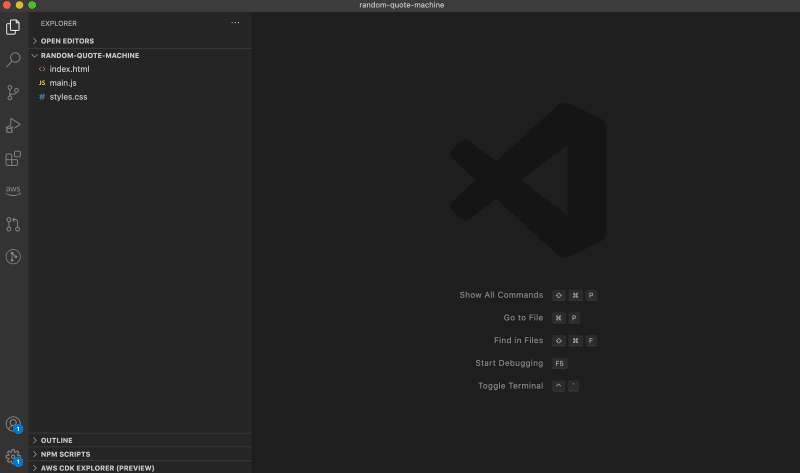
Three empty files: main.js, styles.css, and index.html
Make whatever changes you find necessary to get your project in working order, but remember, the purpose of this exercise is to learn about deploying a website on AWS S3.
Once your site works locally, then let's get into AWS.
Login into your AWS account
How to Work with the S3 Management Console
After logging into AWS, in the top search bar type “S3” and then select the option that says “S3”, not “S3 Glacier”.

Searching for S3 in the AWS Management Console
Alternatively, instead of the search bar you could expand the “Services” dropdown and enjoy looking at all the AWS service offerings. Either way, let’s click on S3.
You should now see the S3 Management Console. Something like this…

S3 Management Console
This is what AWS calls the Management Console. It’s the website interface to interact with AWS and create resources and services.
There is a Management Console for all of the AWS services, but this console is not the only way you can interact with AWS. There is also a CLI (command line interface), which allows you to script to AWS what you would like to do.
Instead of clicking on buttons, in the CLI you type what you would otherwise have clicked on (though less verbosely). We are going to stick with the console for now.
Here you can view all of your S3 buckets. S3 is composed of buckets, and a bucket is basically a big container where we get to put files. Think of a bucket as a drive on your computer (like your C: drive). It technically isn’t – it’s a method for routing in S3 – but for now, it’s fine to see the bucket in this way.
Create Your S3 Bucket
Click on the Create bucket. Then, enter a unique name for your bucket (no spaces allowed).
The name of your buckets must be globally unique. So, if you try to create one named test, there is probably someone in the world who used that already so it won’t be available.
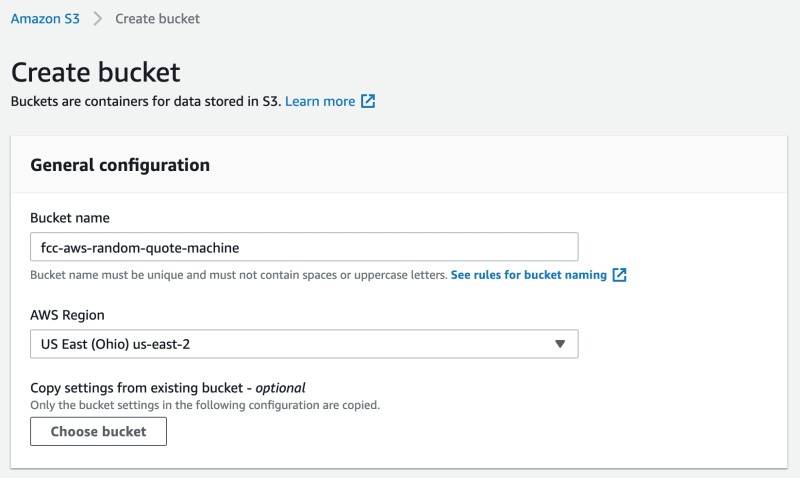
Entering my new S3 bucket name
After inputting your bucket’s name, scroll down to the section called Block Public Access settings for this bucket. We want to uncheck the Block all public access checkbox, and then further down check to acknowledge the warning box that appears.
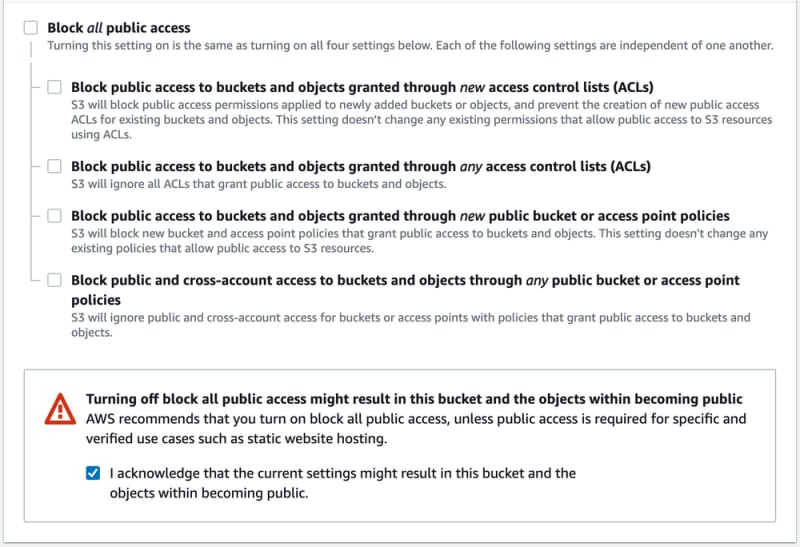
Security and permissions in AWS is a lengthy topic, but, as you can see by the warning, you typically do not want to unblock public access to your files.
In this case, we want our website’s visitors’ web browsers to be able to access our index.html file so that they can see our project.
There are other methods we could use to unblock access to our bucket’s content, but for now, this is sufficient for our goal of deploying a project on AWS with S3.
Scroll down to the bottom of the form. Click the Create bucket button at the bottom. If your name was unique, you just made your first AWS S3 bucket, congrats!
It’s pretty amazing to stop and think that in that short amount of time, AWS just made space available for you in their network to store an unlimited amount of data. That’s right, unlimited!
Although the maximum size for a single object in your bucket is 5 terabytes (good luck hitting that), your new bucket can hold as much as you want in it.
Upload Your Files to Your Bucket
Next, back in the S3 console view, click on the link to your newly created S3 bucket. Once inside, we want to click on the Upload button. Select your three files (index.html, styles.css, and main.js).
After you see their names show up in the list of items about to be uploaded, scroll down to the bottom of the upload form.
Expand the Additional upload options, and then scroll down to the Access control list (ACL). Check the Read boxes for Everyone (public access), and then check the acknowledgment box that appears underneath, just like when we created our bucket.
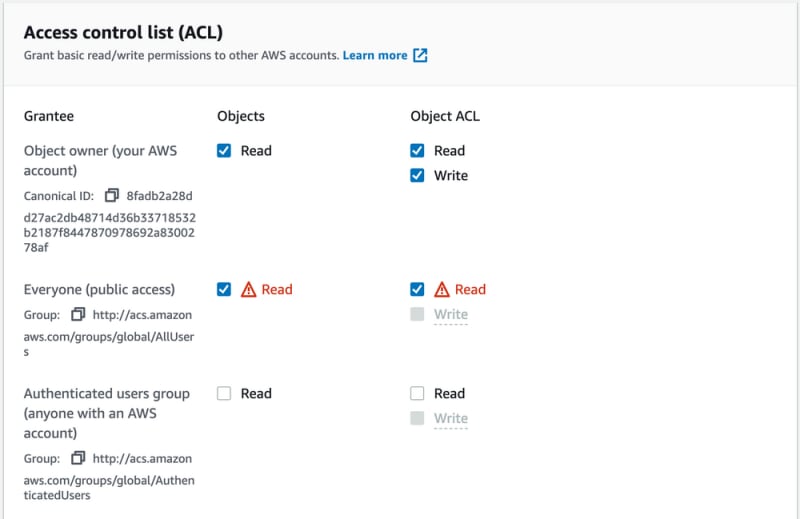
Your selections should look like this
Scroll down the rest of the way and click the Upload button.
Enable Hosting on the S3 Bucket
Now we have our S3 bucket, we have our files, and we have them publicly accessible, but we’re not quite done.
S3 buckets by default are not configured to be treated like web servers. Most of the time companies want the contents of S3 buckets kept private (like hospitals storing medical records, or banks saving financial statements). To make the bucket act like a web server, providing us with a URL to access our files, we need to adjust a setting.
Back at your bucket’s main menu view, click on the Properties tab.

Select the Properties tab
Scroll down to the bottom until you find Static website hosting, and click the Edit button. Set Static website hosting to Enable, and then in the Index document and Error document type index.html. Then click the Save Changes button.
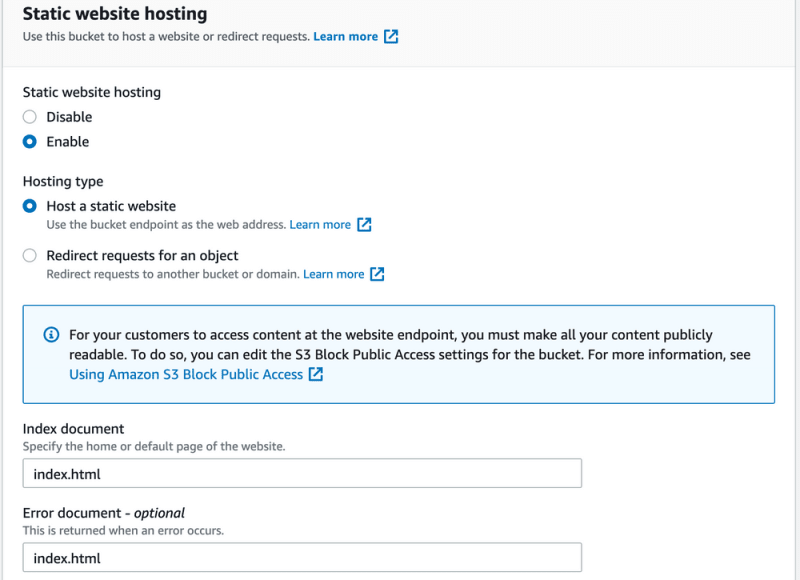
Selection should be like this
You’ll return to the Properties tab of your bucket. Scroll back down to the Static website hosting section, and there you’ll find a link.
Reading that URL you’ll notice the name of your bucket is in it. By typing index.html in the two fields during the configuration, we told AWS that when this bucket’s URL is opened to use the index.html page to load.
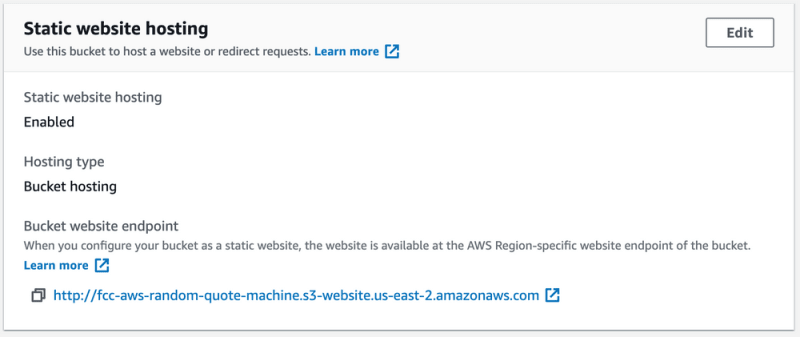
You should see your bucket’s website endpoint now
If you click on that link, your project should now be viewable.
Troubleshooting
If your website worked locally but is not working when you open the S3 website endpoint link, there are a few common problems to try and resolve.
First, make sure you selected the same files that worked locally. Reopen the local files in a web browser to make sure they work. If it works locally but not through S3, try re-uploading them and ensure you select the same files.
Next, go to your bucket’s Permissions tab and make sure you have the Block all public access set to Off.
Lastly, delete the files you uploaded, and re-upload them, ensuring that you select the Read checkboxes described above, as well as the acknowledgment box.
If you are still having problems, feel free to comment with your issue and I’ll be happy to help. Don’t get too discouraged either. AWS can take a while to learn so go easy on yourself if things aren’t falling into place the first time.
Conclusion
Congratulations! You’ve now taken your first steps into cloud computing with the deployment of a website. You should be very proud! Now, instead of sharing your local directory with your friends and family, you have your very own S3 bucket website endpoint to share. Granted, it’s still not your own personalized domain, but it’s still cool to know you just deployed a website the same way thousands of businesses do.

Top comments (0)