Hi👋
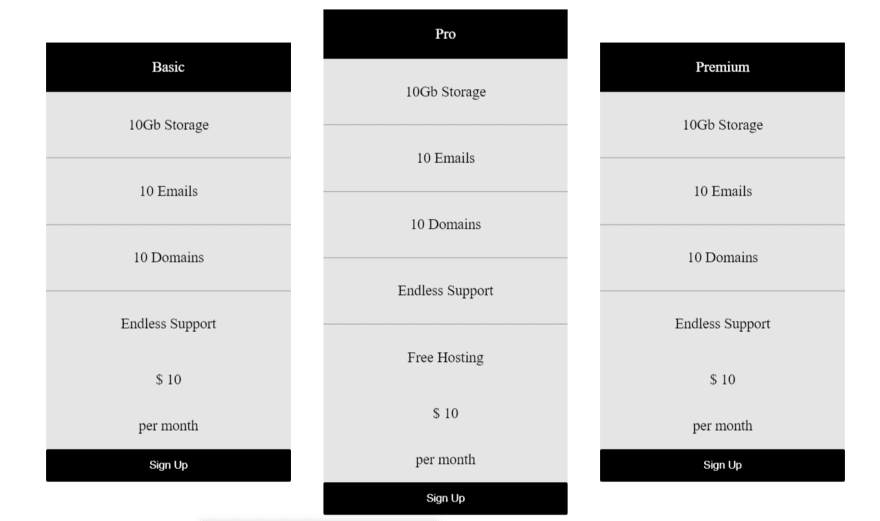
In this post we will see how we can create a Pricing Table of equal height using Flexbox.
Create a div with the class of container
<div class="container">
We will now create 3 div with the same class pricing-grid inside the container
<div class="pricing-grid">
      <ul>
        <li class="header">Basic</li>
        <li>10Gb Storage</li>
        <li>10 Emails</li>
        <li>10 Domains</li>
        <li>Endless Support</li>
      </ul>
      <p class="price">$ 10</p>
      <p class="month">per month</p>
      <button>Sign Up</button>
    </div>
     <div class="pricing-grid">
      <ul>
        <li class="header">Pro</li>
        <li>10Gb Storage</li>
        <li>10 Emails</li>
        <li>10 Domains</li>
        <li>Endless Support</li>
        <li>Free Hosting</li>
      </ul>
      <p class="price">$ 10</p>
      <p class="month">per month</p>
      <button>Sign Up</button>
    </div>
     <div class="pricing-grid">
      <ul>
        <li class="header">Premium</li>
        <li>10Gb Storage</li>
        <li>10 Emails</li>
        <li>10 Domains</li>
        <li>Endless Support</li>
      </ul>
      <p class="price">$ 10</p>
      <p class="month">per month</p>
      <button>Sign Up</button>
    </div>
CSS
.container{
  max-width:1024px;
  margin:0 auto;
  display:flex;
}
li{
  list-style-type:none;
  padding:30px;
  border-bottom:1px solid rgba(0, 0, 0, 0.3);
}
li:last-child{
  border-bottom:0;
}
li.header{
  border-bottom:0;
  background-color:black;
  color:#fff;
  padding:20px;
}
ul{
  margin:0;
  padding:0;
}
button{
  padding:12px 20px;
  border:none;
  background-color:#000;
  color:#fff;
  align-items:flex-end;
}
So far we have created the basic structure of Pricing Table 😲
This will provide the Proper Spacing and Background color
.pricing-grid{
  flex-grow:1;
  background-color:rgba(0, 0, 0, 0.1);
  margin:20px;
  text-align:center;
  border-radius:4px;
}
Expectation 😀
Reality 🤷♀️
This can be achieve by using Nested Flexbox
.pricing-grid{
  display:flex;
  flex-wrap:wrap;
}
.pricing-grid > *{
  flex:1 1 100%;
}
At last align items to the Center
.container{
  align-items:center;
}
I hope this tutorial helped you. 🎉


Top comments (0)