
In the realm of cloud computing, Microsoft Azure stands tall as one of the most powerful and versatile platforms. Azure's vast array of services can transform your business operations and streamline your processes. But where do you start? How do you create and manage resources efficiently?
Enter Azure CLI, a command-line tool that simplifies the management of Azure resources. In this blog, we will walk you through creating a resource group, deploying a virtual machine (VM), and executing additional commands like starting and stopping your VM, all using Azure CLI.
Prerequisites
Before we dive into the nitty-gritty, ensure you have the following prerequisites in place:
Azure CLI Installed: Download and install Azure CLI from here.
Azure Account: You'll need an active Azure account. You can sign up for one here.
Terminal or Command Prompt: You'll be running commands in your terminal or command prompt.
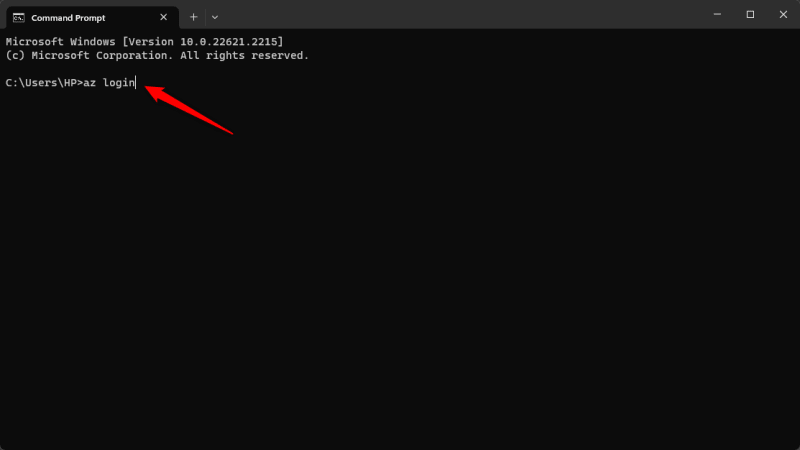
Step 1: Logging In
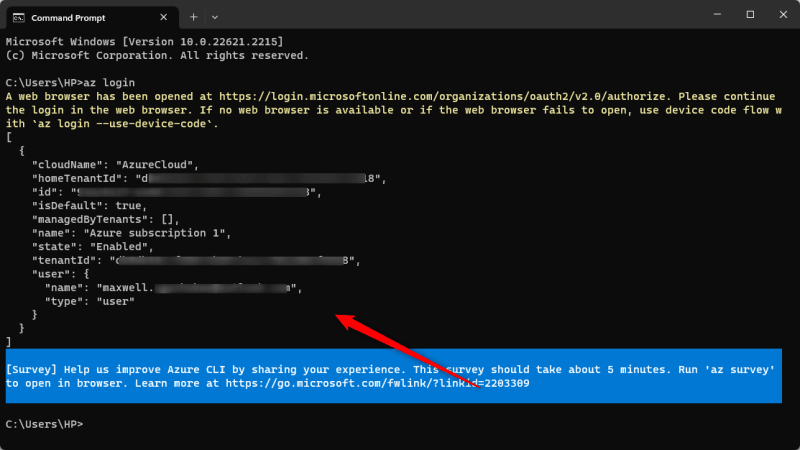
The first step is to log in to your Azure account via Azure CLI. Open your terminal and enter the following command:
az login
This will prompt you to open a URL in your web browser and enter a code. Once you've done that, you'll be logged in to your Azure account.

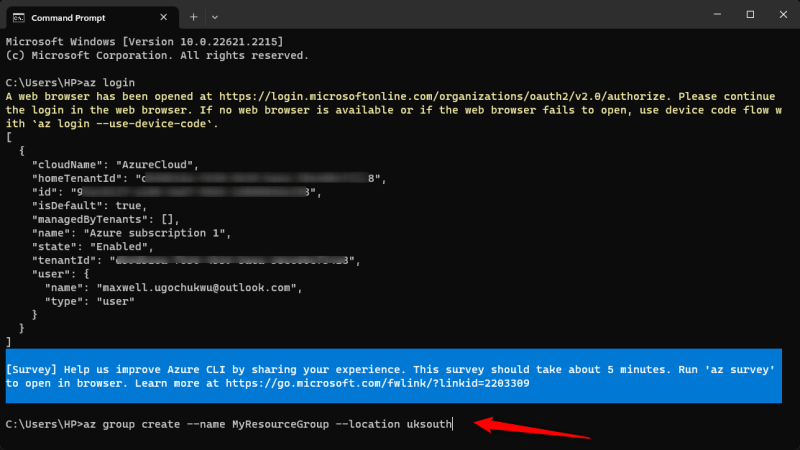
Step 2: Creating a Resource Group
Azure resources are organized into resource groups, which are logical containers for your resources. Let's create one with this command:
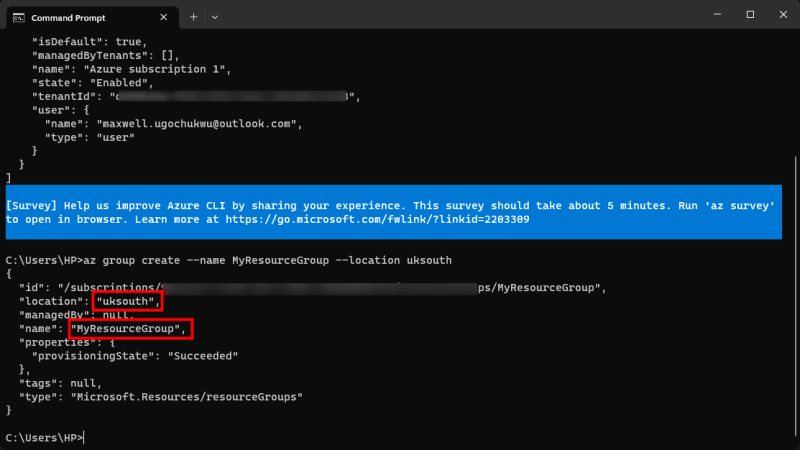
az group create --name MyResourceGroup --location uksouth
'MyResourceGroup' is the name of your resource group. You can choose a different name.
'uksouth' is the Azure region where your resource group will be located. You can choose a different region.
The resource group 'MyResourceGroup' is created successfully in the 'uksouth' region.
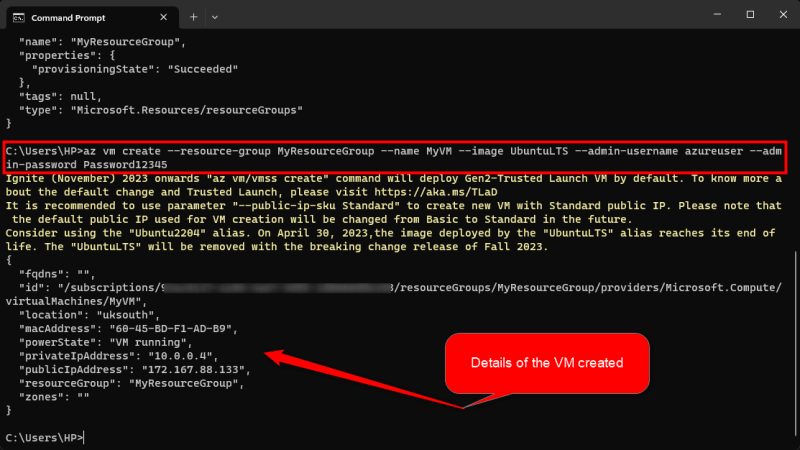
Step 3: Deploying a Virtual Machine
Now, let's deploy a virtual machine. We'll use a simple Ubuntu Server image for this example:
az vm create \
--resource-group MyResourceGroup \
--name MyVM \
--image UbuntuLTS \
--admin-username azureuser \
--admin-password Password12345
'MyVM' is the name of your virtual machine.
'UbuntuLTS' is the image we're using.
'azureuser' is the admin username.
'Password12345' is the admin password. Be sure to use a strong password.
you don't need to include the forward slash in the command prompt, we use it here because the code can't be written in a line, it indicates continuation of the code.

The new VM 'MyVM' is deployed and running. Properties of 'MyVM' is displayed on the command line interface.
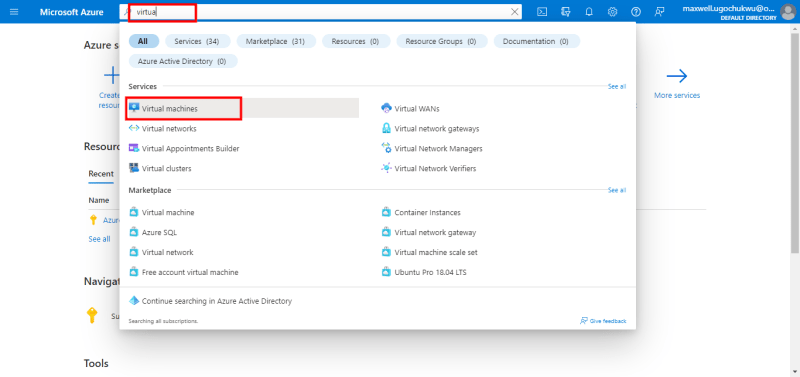
You can confirm your newly deployed VM on the Azure Portal by following this steps;
On the search box type virtual machine. Click on the virtual machine option.
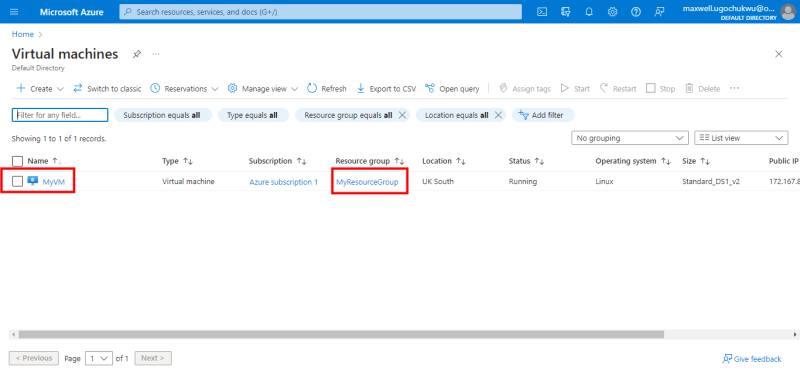
You can see the newly VM 'MyVm' created you can click on it to enter into the VM.
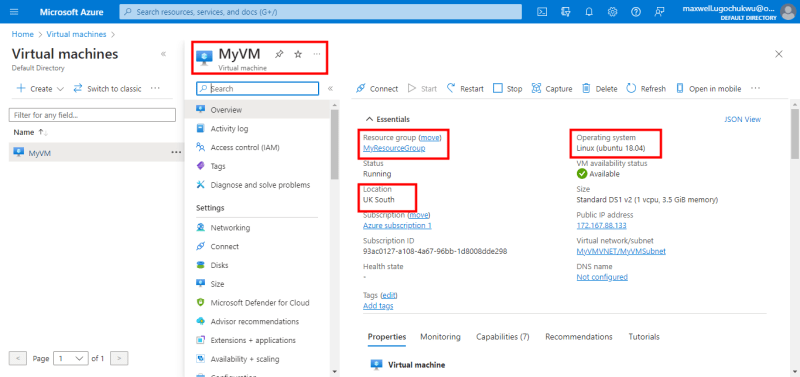
Inside the VM you can take note of the VM name, resource group, region and operating system. They are exactly what we defined in the command.
Step 4: Managing Your VM
You've created a VM, but what if you want to start or stop it or do more? Azure CLI makes it straightforward to manage your VM faster without going to the portal:
Start VM:
az vm start --resource-group MyResourceGroup --name MyVM

Stop VM:
az vm stop --resource-group MyResourceGroup --name MyVM

List IP addresses associated with a VM:
az vm list-ip-addresses --resource-group MyResourceGroup / --name MyVM

Get details of a VM:
az vm show --resource-group MyResourceGroup --name MyVM

List the metric values for a VM:
az vm monitor metrics tail --resource-group MyResourceGroup / --name MyVM

Deallocate a VM:
If your VM is no longer in use, you can deallocate it to optimize cost.
az vm deallocate --resource-group MyResourceGroup --name MyVM

After deallocating you can see from the portal that the VM 'MyVM' is now unavailable.
_The above is just few commands compared to what Azure CLI has in stock, you can get more command on the Microsoft Learn page and use according to your preference.
And there you have it! You've successfully created a resource group, deployed a VM, and learned how to start and stop it using Azure CLI. This is just the tip of the iceberg; Azure CLI offers a vast array of commands to manage various Azure services.
_
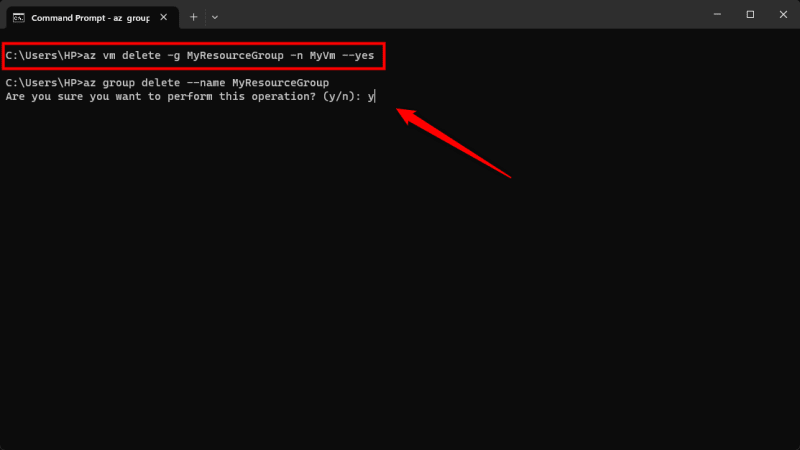
Delete VM:
Finally lets delete this VM 'MyVM' via the CLI command, I created it for the purpose of this publication and do not need it anymore.
az vm delete -g MyResourceGroup -n MyVm --yes

You can confirm from the portal that it has been deleted.

Delete Resource group:
As well you can delete the resource group on the CLI
az group delete --name MyResourceGroup
follow the prompt, type y to signify yes and enter
Our command is running, note most commands invoked take few seconds to execute, will display 'running'.

Resource group deleted successfully

Conclusion
Azure CLI is a powerful tool for Azure resource management, and mastering it can greatly enhance your efficiency and control over your cloud resources.
Remember, this blog post serves as a starting point, and Azure CLI offers a wide array of commands for managing diverse resources. Explore further, experiment, and become a proficient Azure CLI user in your cloud journey.
We hope this guide has provided you with a solid foundation for creating and managing Azure resources using Azure CLI. Happy cloud computing! 🚀

Top comments (0)