11 Days of Salesforce Storefront Reference Architecture (SFRA) — Day 10: Advanced Jobs

Yesterday we created a job that keeps our storefront sitemap updated and fresh, and we did that using the out-of-the-box createSiteMap step. Whenever you can use a premade step like that, that’s awesome! But, there are times that you may want to create a step customized to your own needs. Meet the ExecuteScriptModule step — the ⭐️of today’s post!
The One With the Static Assets
Let’s consider the following situation: you are using a JavaScript library in your storefront, which you download from a third-party CDN, for example: React: <script crossorigin src="https://unpkg.com/react@16/umd/react.production.min.js"></script>
If a visitor with an Ad Blocker configured to block third-party scripts comes to our site, his experience on our site may be ruined because he might not be able to load the React JS library. One possible solution could be to host the React library in the assets folder of our storefront. This approach is awesome, and it will solve the third party issue, however, it will also create a new problem - what happens when the React library gets updated? What will keep our local asset up to date with React’s CDN? 🤔
If at this point you are hearing bells in your head and thinking “this is a repeated task I should automate using SFCC Jobs” then you are absolutely right! Let’s create a job that periodically checks and downloads the React library from its CDN to our local assets folder.
Look Ma, I Can Run My Own Code
If you look at the pre-defined steps an SFCC Job can have — you won’t find anything for saving a file as a local asset. However, you would see a step called ExecuteScriptModule. This step, as its name suggests, allows you to run JavaScript code as a step in your Job. Let’s use this step to point to a new file on our cartridge called a_ssetUpdater.js_, which in turn handles downloading and storing the React library as a local asset of our storefront.
Creating the Job
- Follow the instructions from yesterday’s post to create a new job. Give the new job the ID AssetUpdaterJob.
- Under the Job Steps tab, click on Configure a step.
- Select the ExecuteScriptModule step and provide the following details: * ID : LocalAssetUpdaterStep. * ExecuteScriptModule.Module : magicCartridge/cartridge/scripts/assetUpdater.js * ExecuteScriptModule.FunctionName : execute.
- Click Assign.
Adding the Service
As we learned on day 6, the Services Framework is our way of communicating with the outside world. The assetUpdater.js needs to get the react.production.min.js file from https://unpkg.com/react@16/umd/react.production.min.js and for that, we need to create a service and credentials that the script will use:
- Open your Business Manager and navigate to Administration > Operations > Services.
- Click on the credentials tab, and create a new service credential that will point to
https://unpkg.com/react@16/umd/react.production.min.js(I named mineMagicCartridge.Job.Credentials) - Click on the Services tab, and create a new service that will use the newly created
MagicCartridge.Job.Credentails(I named mineMagicCartridge.Job.Service) - cd to the
servicesfolder of MagicCartridge (cd cartridges/magicCartridge/cartridge/services), and create a new service initialization file calledreactservice.js. - Add the following content to the newly created
reactservice.js:
🐘 If you need a refresher on how to use the Services Framework just head back to Day 6 and Day 7.
Adding assetUpdater.js
With the job in place, its time to add the script that it will call, assetUpdater.js:
- cd to the root folder of MagicCartridge (
cd cartridges/magicCartridge/cartridge), create a new folder calledscriptsand inside of it, create a new file calledassetUpdater.js. - Add the following content to the newly created
assetUpdater.js:
Let’s break down what's happening here:
Lines 1–4 : Imports the needed classes to get the content of the script (line 4) and to write the file back to the shared library (lines 1–2).
Line 9 : Sets the name of the shared library we are going to save the file to. In my case, my site name is Mobile First and my shared library name is MobileFirstSharedLibrary.
🐘 You can find the names of all the shared libraries on your pod under Administration -> Sites -> Content Libraries.
Lines 10–12 : Sets the destination path for the asset file. Notice the use of File.LIBRARIES constant — this constant represents the storefront libraries root directory. From here we add the name of our shared library and append the default folder to it.
Line 13 : Creates a new fileWriter instance based on the destination file we defined earlier. We will use this instance’s writeLine method later in the code to actually write the content to the destination file.
Lines 16–19 : These lines deal with fetching the content of the script using the Services Framework, and then, if successful save the content to the file using the fileWriter instance.
Lines 23–24 : These lines call the flush() method of fileWriter to flush the buffer used for writing the content, and then the close() method to close the writer instance. You must call these methods when working with the fileWriter class in order to properly close the file you are writing.
Line 27 : Tells the Job framework that our module is done and it should move on to the next Pipelet in the chain.
🤖 It is highly recommended that you go over this script more than once as it introduces a number of new concepts.
Deploy MagicCartridge to your instance and let’s take it for a spin!
Go Wild 🌈
With the service, the job script, and the cartridge in place, let’s test our newly developed job. Navigate back to the Jobs section in Business Manager, and click on our newly created AssetUpdaterJob. In the top right corner, click on Run Now, and then head over to the Schedule and History tab. If all went well, you should see the beloved OK badge next to your run!

But this is not all, you may be asking yourself “this is great, but how do I see the actual file?” By using URLUtils of course! On your storefront ‘s scripts.isml file, add the following script element:
<script src=_"${URLUtils.staticURL(URLUtils.CONTEXT\_LIBRARY,'','/react.min.js')}"_ type=_"text/javascript"_ async></script>
URLUtils.CONTEXT_LIBRARY will point to the site’s shared library so appending the react.min.js file name will actually call the file we just got using our job:
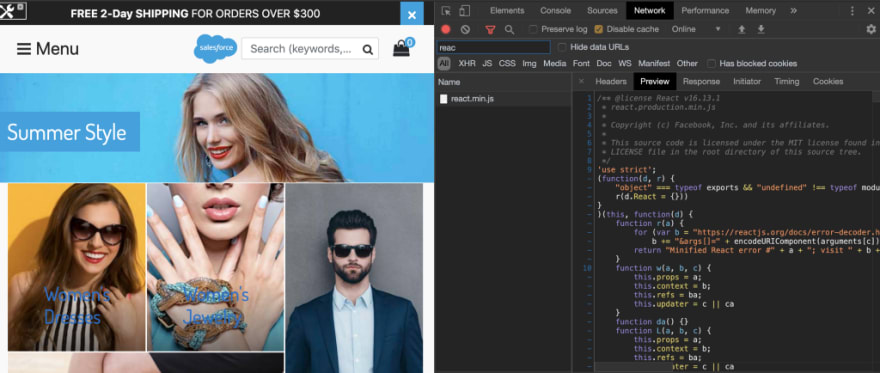
This wraps up today’s post, and I hope that I managed to show you the amazing value a job can add to your site. Another plus of using such an approach of loading static content on your site is that these assets are also browser cached — meaning users will not hit your backend every time they visit your site but will be able to use a cached version of the library.
Tomorrow we will wrap up this post series with a really cool and useful subject — templates.
As always, looking forward to your comments either here or on Twitter 😎

Top comments (0)