

A microSD card dies silently: it works - until suddenly it doesn't, usually without any warning. That's exactly why switching to an NVMe SSD on the Raspberry Pi 5 isn't just faster, but also safer. An NVMe drive reveals its health through SMART - wear, temperature, data written, errors. In this guide I'll show you how to pull those values straight into Home Assistant and get an automatic warning before your SSD gives out. And because there wasn't a simple solution for this yet, I built a small Home Assistant add-on that does exactly that - one click, and the sensors show up on their own.
In short: On your Raspberry Pi 5 running Home Assistant OS you install the free "NVMe SMART Monitor" add-on from the raspberry.tips repository. It reads your NVMe SSD's SMART values (wear, temperature, data written, spare, errors) and adds them automatically as sensors in Home Assistant via MQTT discovery. A single automation then warns you before the SSD fails.
What is SMART on an NVMe SSD?
SMART (Self-Monitoring, Analysis and Reporting Technology) is a self-monitoring system built into modern SSDs. Over the NVMe protocol the drive reports metrics such as wear (percentage_used), the data already written (TBW), the available spare, the temperature and error counters. Unlike a microSD card, which offers practically no readable health data, on an NVMe you can see the wear coming and react in time.
The key points
- SD cards fail without warning, NVMe SSDs don't: via SMART you see wear, spare and TBW - and can swap in time.
- Our Home Assistant add-on reads the SMART values and creates the sensors automatically via MQTT discovery - no YAML fiddling.
- You get a device with ~10 sensors (wear, temperature, TBW, spare, errors ...) plus a problem sensor for automations.
- Requirements: Home Assistant OS with an NVMe SSD and the Mosquitto broker add-on.
Requirements
- Home Assistant OS (HAOS) on a Raspberry Pi 5 with an NVMe SSD (the common case). Our guide Set up the Raspberry Pi 5 without an SD card shows how to get HAOS onto the NVMe. The add-on also runs on x86 HA servers with an NVMe.
- The official "Mosquitto broker" add-on - the sensor data travels over it (MQTT).
💡 No NVMe on your Pi yet?
Then the switch from the SD card pays off twice - more speed and the health monitoring shown here. Which NVMe SSD and which M.2 HAT suit your Pi 5 is covered in our buying guide. And how to flash HAOS onto the NVMe without any SD card at all is laid out step by step in our tutorial.
Step 1: Install the MQTT broker
The add-on reports the SMART values to Home Assistant over MQTT, so you need an MQTT broker. In Home Assistant go to Settings → Add-ons (the add-on store), search for "Mosquitto broker", install it and start it. Home Assistant then sets up the MQTT integration automatically.
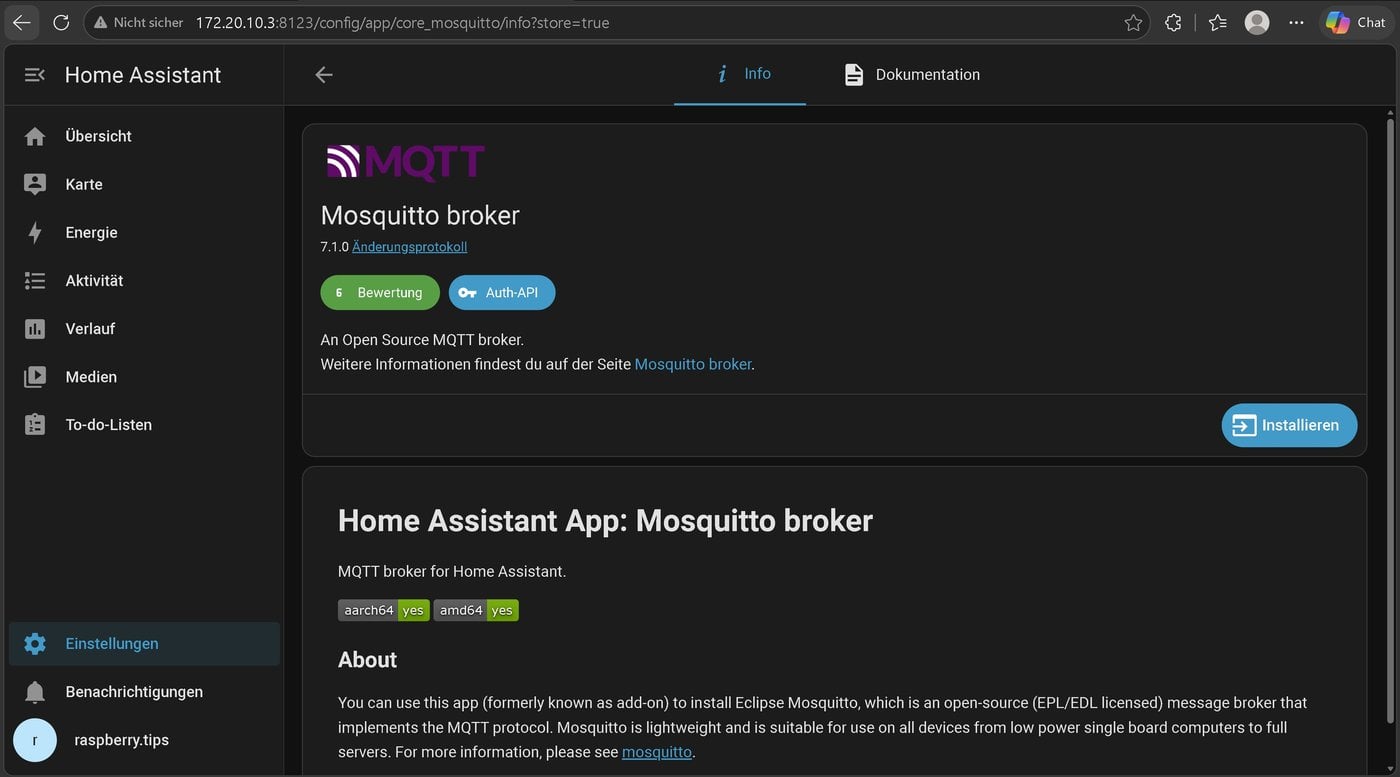
Install and start the official Mosquitto broker add-on.
Step 2: Add the raspberry.tips repository
Now we add the add-on repository. In Settings → Add-ons click the ⋮ → Repositories menu in the top right and enter this URL:
https://github.com/raspberry-tips/ha-addon-nvme-smart
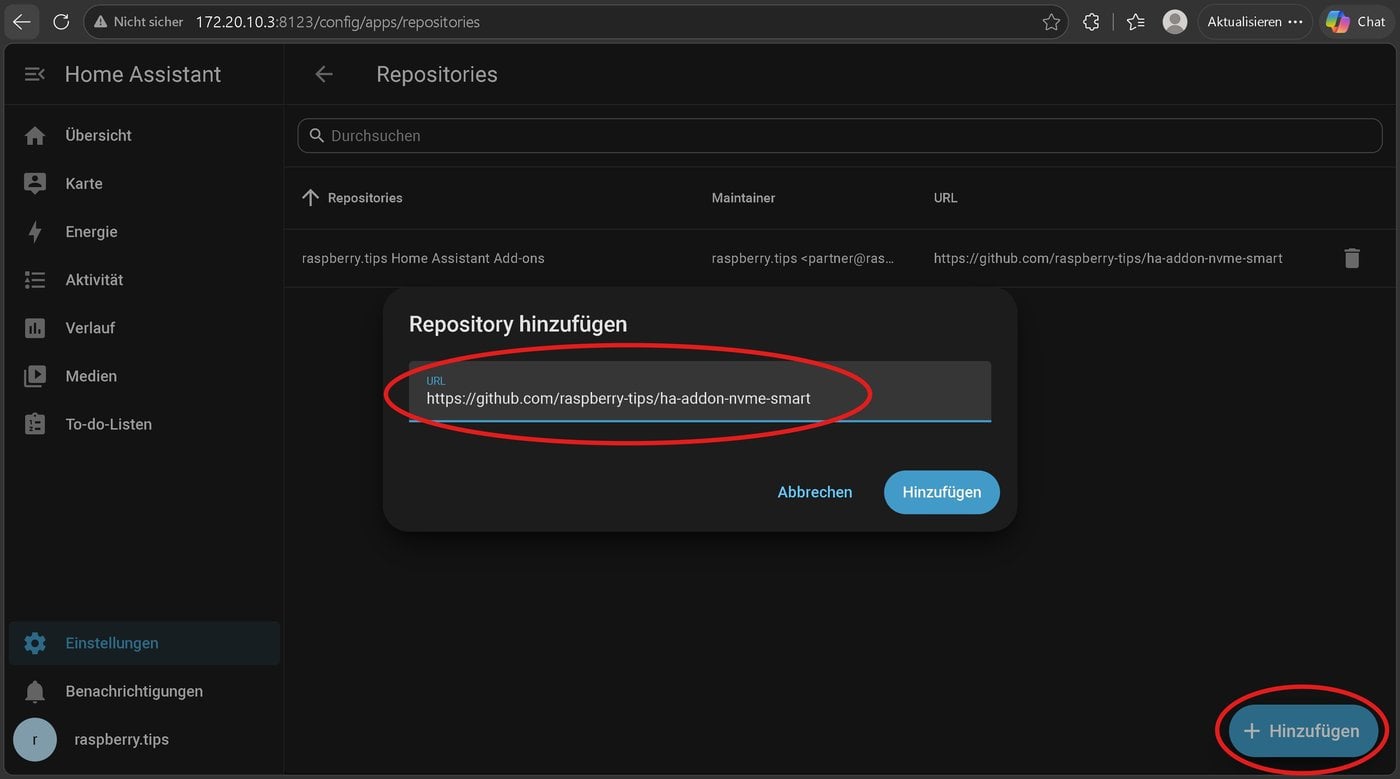
Add the raspberry.tips repository by URL.
After adding it, a new section "raspberry.tips Home Assistant Add-ons" with the NVMe SMART Monitor appears in the store.
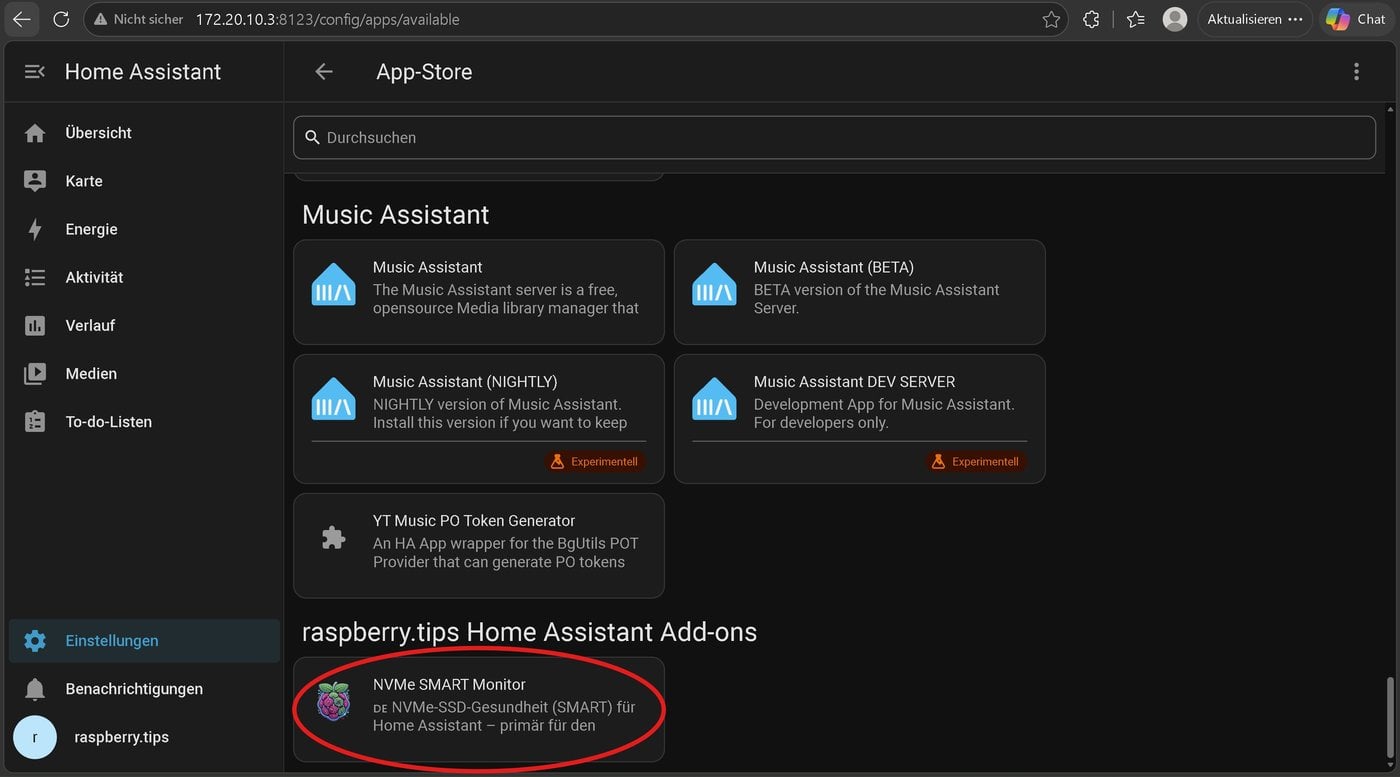
The "NVMe SMART Monitor" shows up in the raspberry.tips section of the store.
Step 3: Install and start the add-on
Open the NVMe SMART Monitor and click Install. The container is built locally (takes 2-4 minutes).
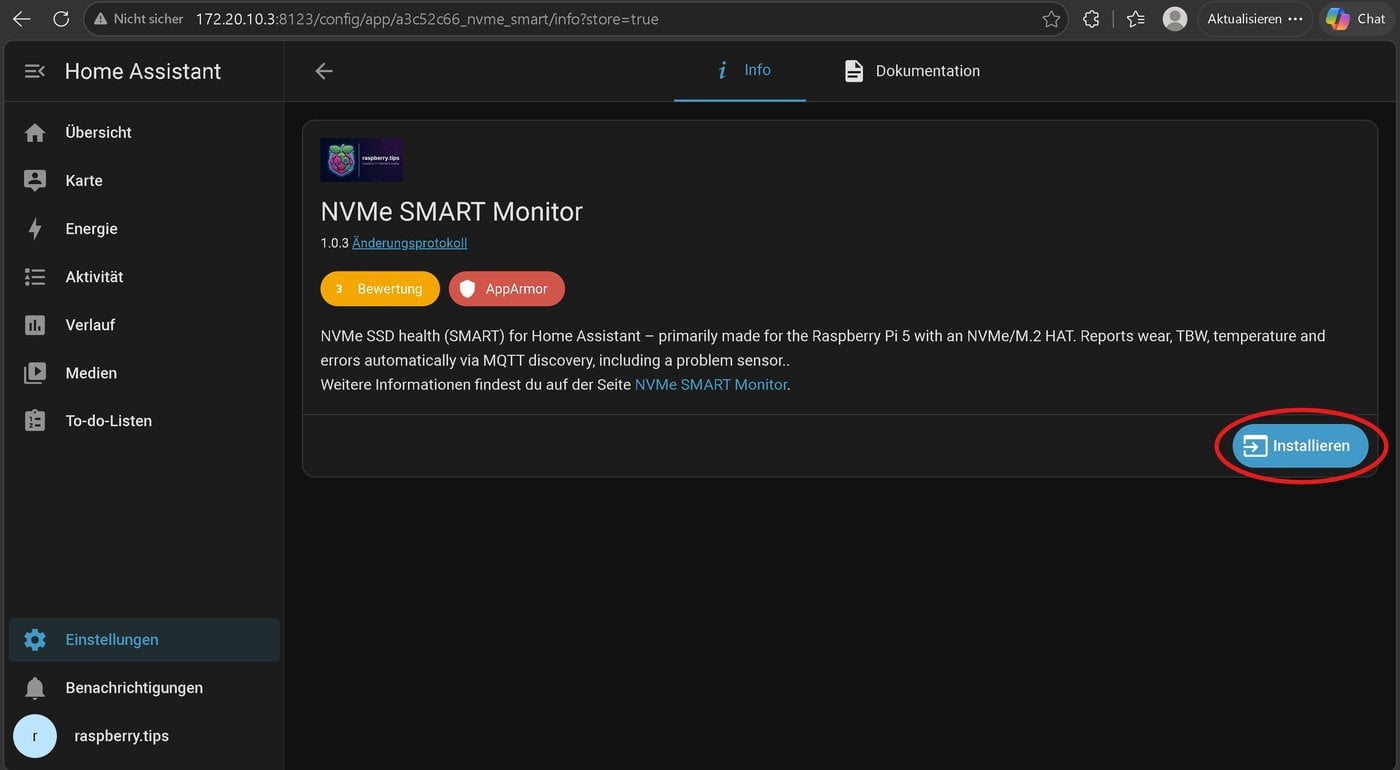
Install the add-on - the container is built locally (2-4 min).
Then start the add-on. I recommend enabling "Start on boot" and "Watchdog" so the monitoring always runs. The default options (device /dev/nvme0, interval 300 s, warning thresholds) work for most people - you'll find them on the Configuration tab.
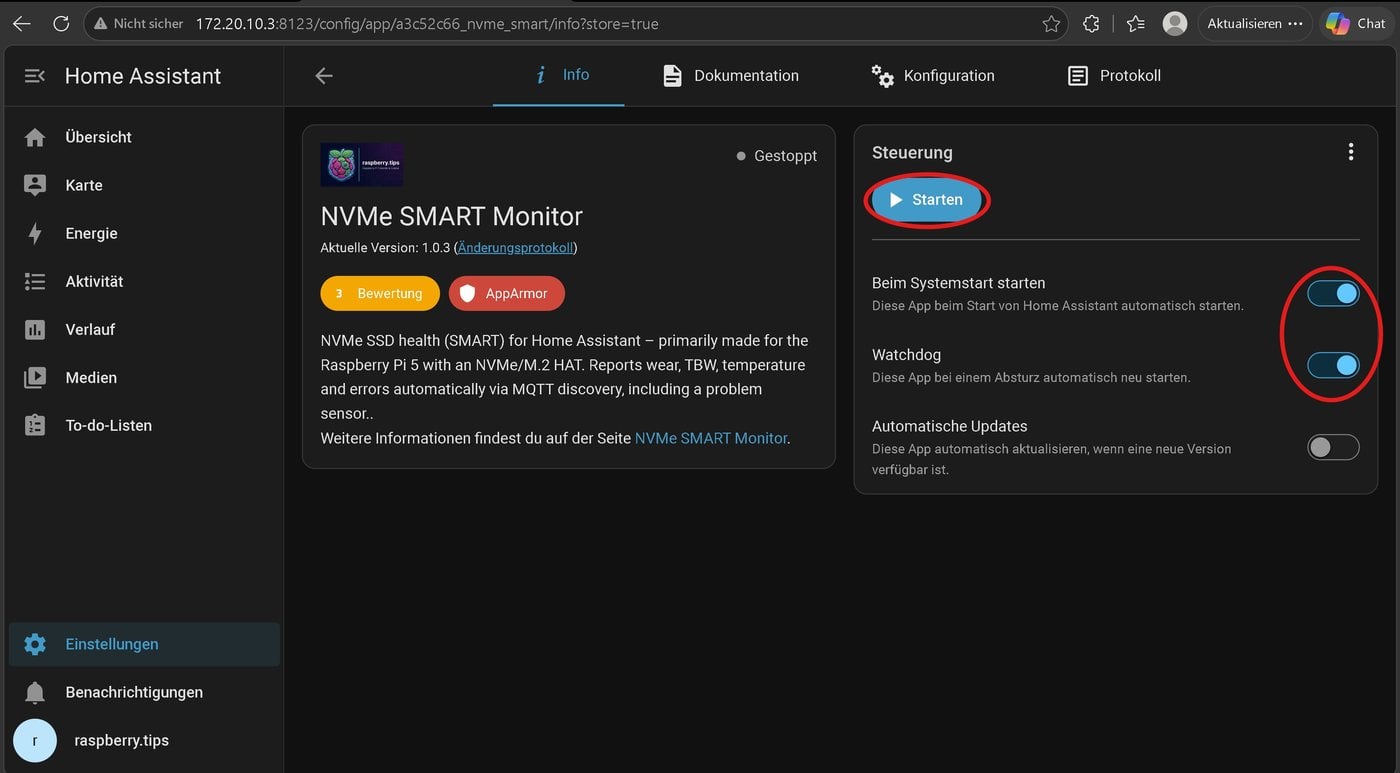
Start the add-on - I recommend enabling "Start on boot" and "Watchdog".
To check that everything runs, look at the Log tab: you should see lines like MQTT broker found, Device detected: ... and State published: ....
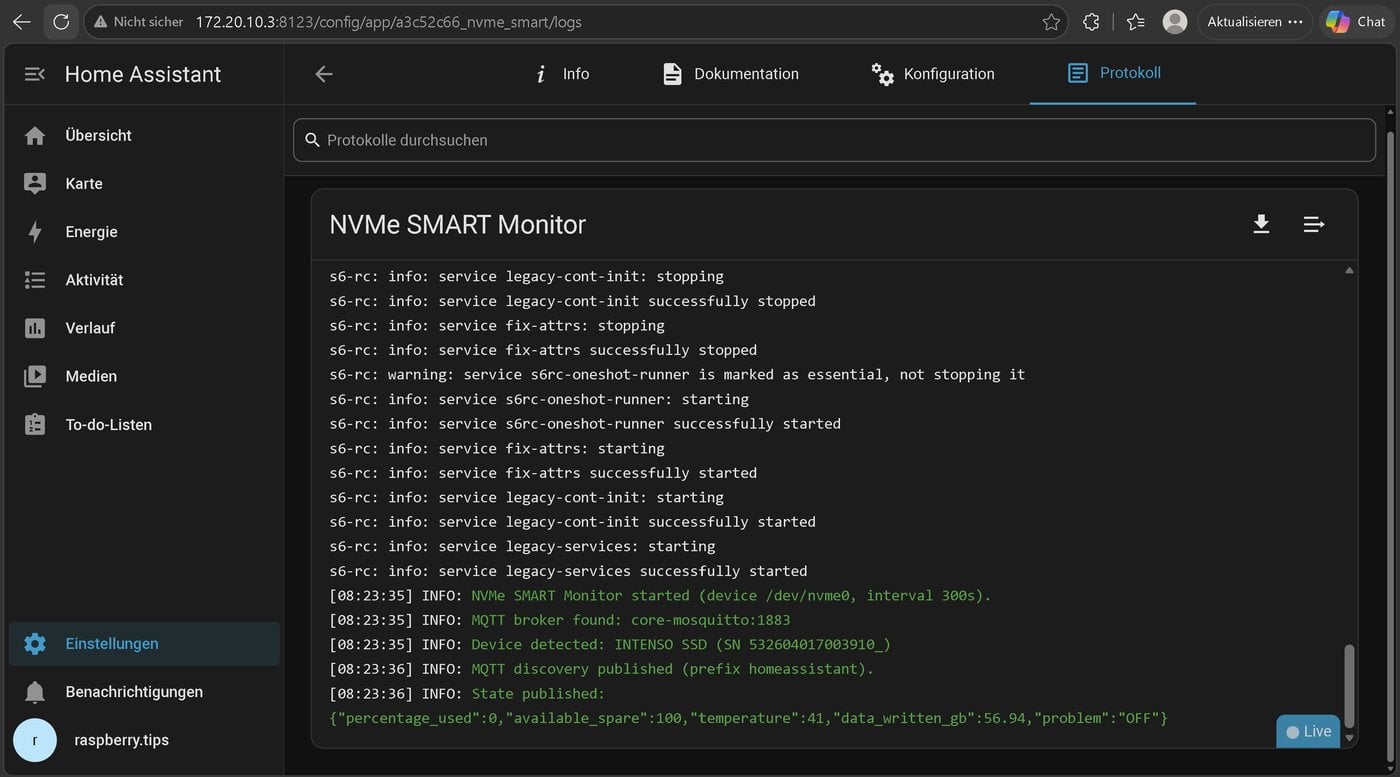
In the log: broker found, device detected, values published.
💡 How it works behind the scenes: The add-on reads your SSD's health values via nvme smart-log, converts them (e.g. temperature to °C, TBW to GB) and publishes them through MQTT discovery. Home Assistant detects the sensors automatically - you don't have to configure anything by hand.
The sensors in Home Assistant
A few seconds after starting, a new device appears under Settings → Devices & Services in the MQTT integration - named after your SSD model (an Intenso in my case). Click it and you'll see all the health sensors at a glance.
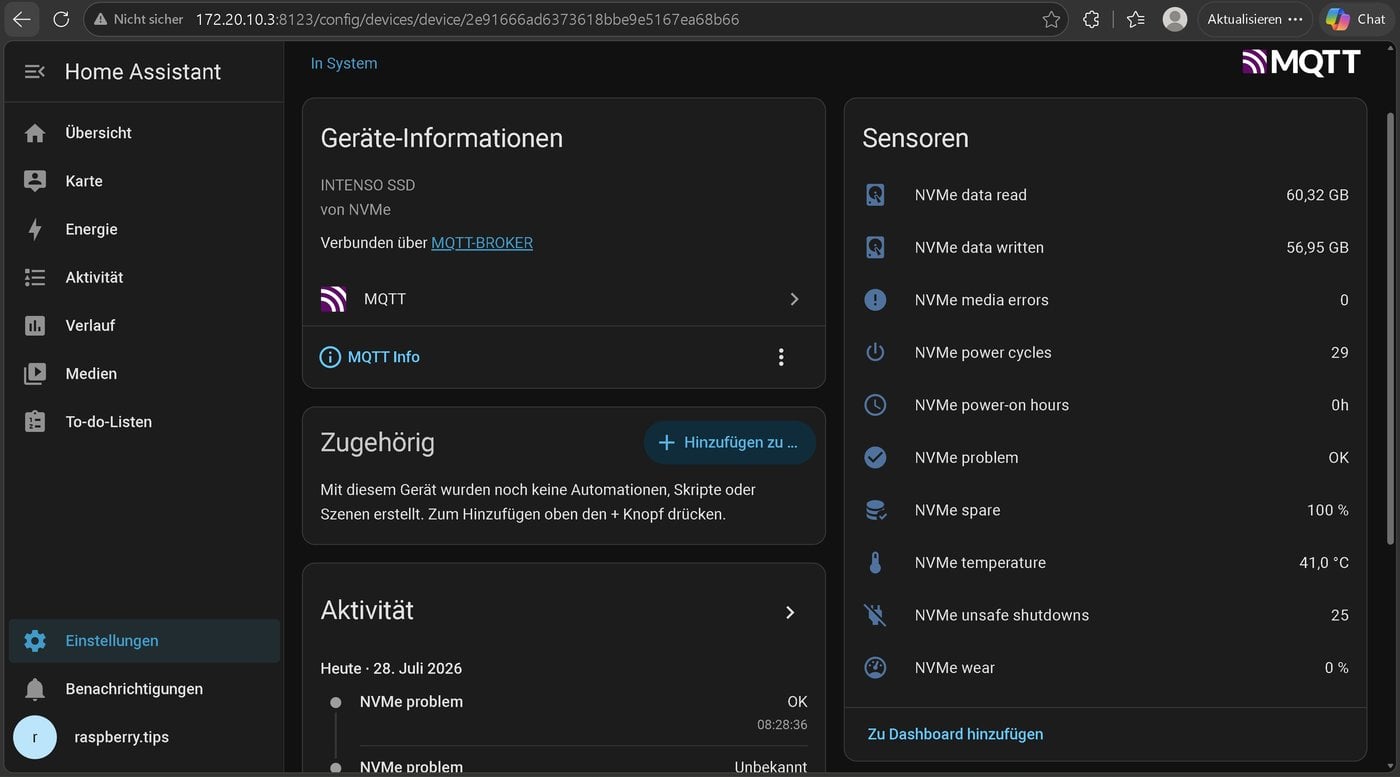
The "NVMe SSD" device with all its health sensors - created automatically.
These are the most important values and how to read them:
| Sensor | Meaning / warning sign |
|---|---|
NVMe wear (percentage_used) |
The lifespan bar. 0% = as new, 100% = calculated end of life. Rises slowly over years. |
NVMe spare (available_spare) |
Spare blocks. If it drops toward the threshold (often 10%), a swap is due. |
| NVMe data written (TBW) | Total data written - comparable to the manufacturer's endurance (TBW rating). |
| NVMe temperature | Operating temperature. If it stays above 70 °C, add cooling. |
| NVMe media errors | Should always be 0. If it rises, that's a serious warning sign. |
| NVMe problem | Binary sensor: "on" as soon as a critical state occurs or a warning threshold is crossed - ideal for automations. |
🌡️ NVMe too hot? A low-profile heatsink helps
If the temperature sensor stays high (rule of thumb: above 70 °C), a small M.2 heatsink is worth it. Important inside a Pi 5 case: keep it as flat as possible, otherwise the lid won't close - measure the free height above the SSD first.
TBW: how long will my SSD last?
The "NVMe data written" sensor shows the amount of data written so far. Compare it with your SSD's TBW rating (Terabytes Written, listed in the datasheet). My Intenso Premium 250 GB, for example, is rated at 150 TBW - and after several weeks of continuous HAOS operation just 56 GB written and 0% wear showed on the clock. Extrapolated, an SSD like that lasts, at 20 GB of writes per day, a calculated 20+ years. Together with the wear percentage you get two independent views of the remaining life - something an SD card simply can't give you.
Step 4: Dashboard with a wear gauge
Now let's make the values visible. Open your dashboard, go to Edit → Add card → Manual and paste this card. The add-on assigns fixed entity IDs (e.g. sensor.nvme_percentage_used), so the YAML works by copy-paste - if you see different IDs, you'll find them on the device page:
type: grid
columns: 2
cards:
  - type: gauge
    entity: sensor.nvme_percentage_used
    name: Wear
    min: 0
    max: 100
    needle: true
    severity: {green: 0, yellow: 70, red: 90}
  - type: gauge
    entity: sensor.nvme_temperature
    name: Temperature
    min: 20
    max: 80
    needle: true
    severity: {green: 0, yellow: 60, red: 70}
  - type: gauge
    entity: sensor.nvme_available_spare
    name: Spare
    min: 0
    max: 100
  - type: entity
    entity: sensor.nvme_data_written
    name: Written (TBW)
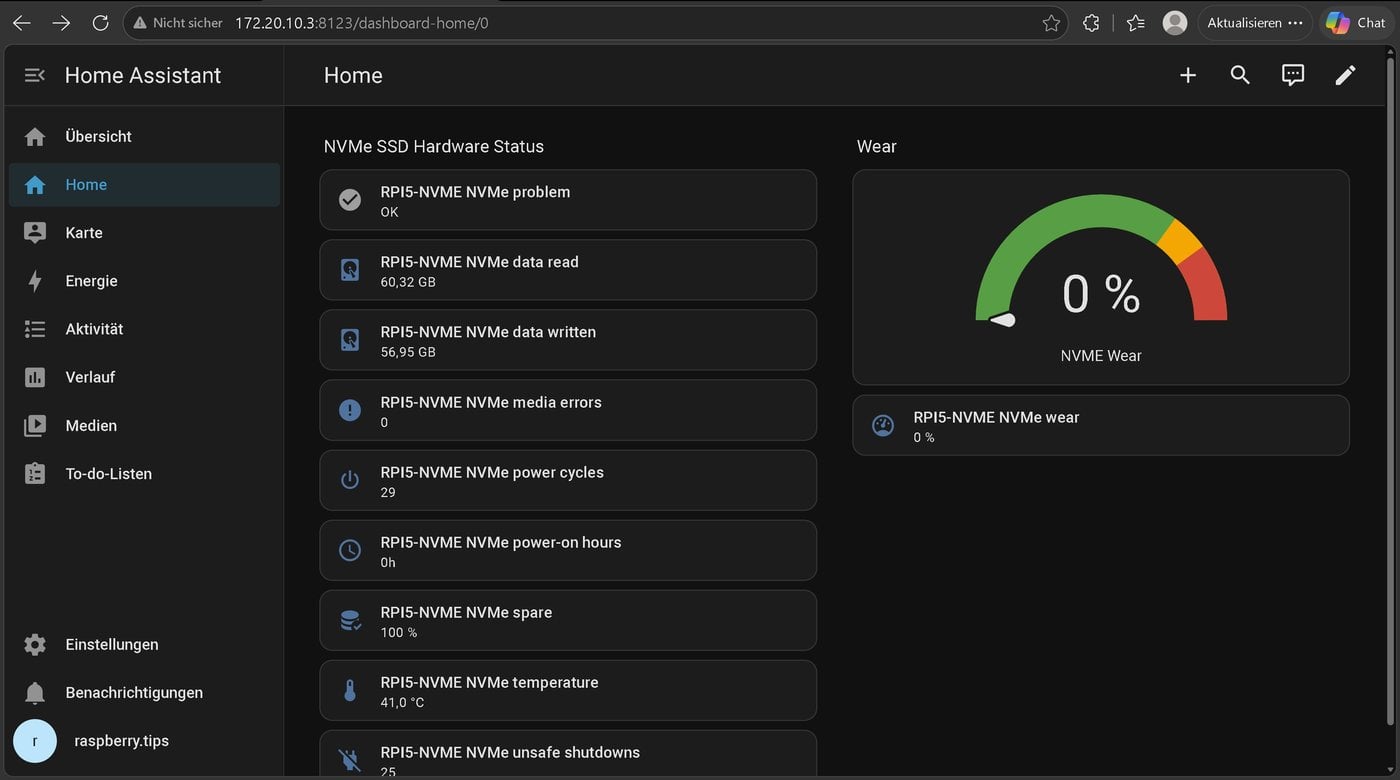
Dashboard with a wear gauge and all the NVMe sensors.
Step 5: Automatic alert
Here's the real payoff: get notified automatically the moment something is wrong. For that we use the problem sensor. Go to Settings → Automations & Scenes → Create automation → Edit in YAML and paste:
alias: NVMe SSD warning
triggers:
  - trigger: state
    entity_id: binary_sensor.nvme_problem
    to: "on"
actions:
  - action: notify.notify
    data:
      title: "⚠️ NVMe SSD warning"
      message: >-
        The NVMe reports a problem - wear {{ states('sensor.nvme_percentage_used') }} %,
        temp {{ states('sensor.nvme_temperature') }} °C, spare {{ states('sensor.nvme_available_spare') }} %.
mode: single
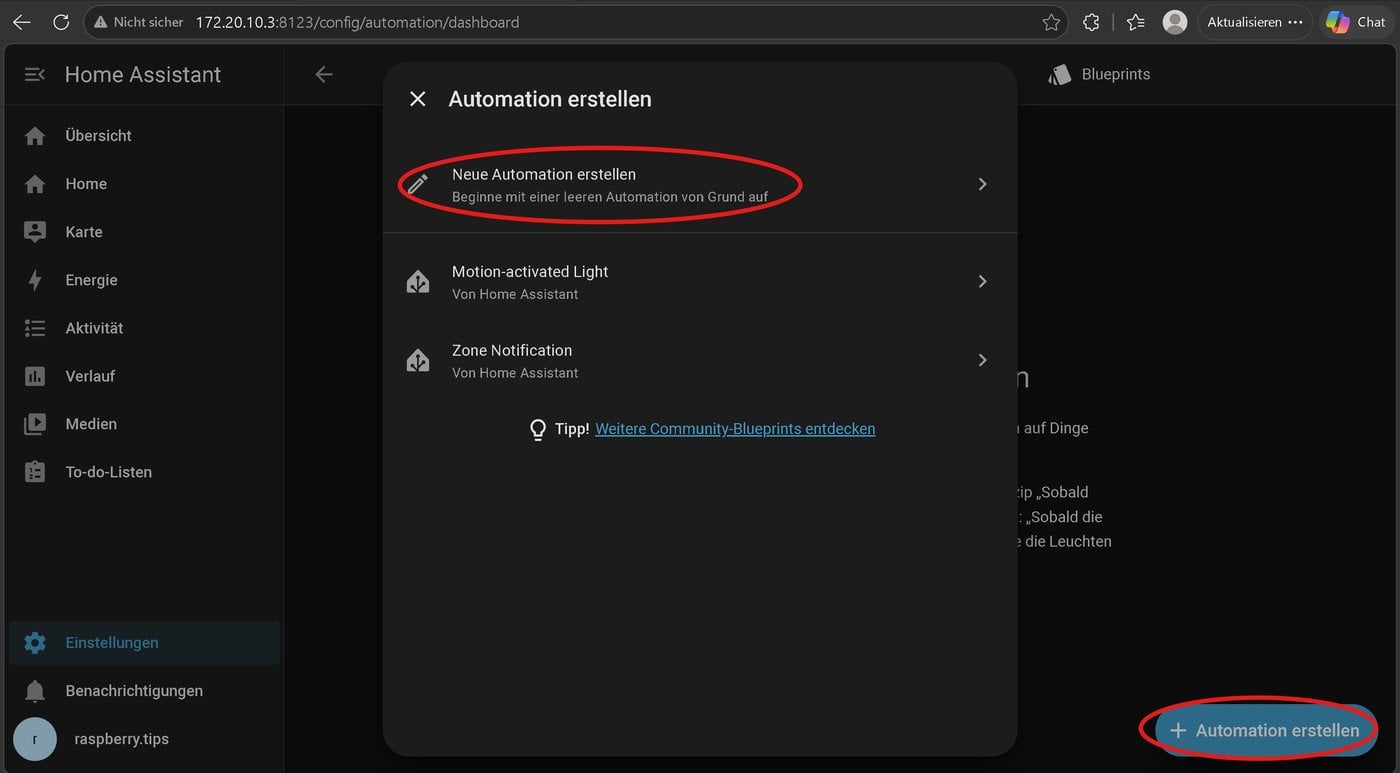
Create a new automation from scratch - the alert uses the problem sensor.
From now on you get a push message on your phone as soon as your SSD turns critical - long before data loss is a risk.
Limits & honest notes
- SMART is not a crystal ball: it mostly sees gradual wear coming (spare, TBW, percentage_used). Sudden total electronic failures can't always be predicted, even by SMART - a backup stays mandatory.
-
Cheap DRAM-less SSDs sometimes don't report every field cleanly (e.g.
power_on_hoursstays at 0). That's normal and not a defect. - microSD cards on consumer models offer practically no readable SMART - which is exactly why the NVMe is so superior here.
Conclusion
With a few clicks you now monitor the health of the SSD your smart home runs on - and get warned before it turns critical. The add-on is open source on GitHub and works with any NVMe SSD. If you're coming from an SD card, you now have a safety net that simply didn't exist before. For matching hardware tips, see our NVMe buying guide.
Further reading
- Set up the Raspberry Pi 5 without an SD card: flash NVMe over USB-C - how to get HAOS onto the NVMe without an SD card.
- Raspberry Pi 5 NVMe SSD setup - guide, benchmarks and use cases
- NVMe SSD and M.2 HATs for the Raspberry Pi 5 - the buying guide
- Raspberry Pi: clone the SD card to an NVMe SSD
Frequently asked questions about NVMe monitoring in Home Assistant
Can you monitor an SSD's health in Home Assistant?
Yes. Through the NVMe SSD's SMART values you can read out wear, temperature, data written and errors. With the raspberry.tips "NVMe SMART Monitor" add-on these values appear automatically as sensors in Home Assistant via MQTT discovery.
Does this work with an SD card too?
Usually not. Consumer microSD cards offer no readable SMART monitoring - they mostly fail without warning. That's a major advantage of an NVMe SSD on the Raspberry Pi 5.
Does the add-on work with any NVMe SSD?
Yes. The add-on reads the model and the SMART values live from the drive - it isn't tied to a specific brand. Cheap DRAM-less SSDs, however, occasionally don't report individual fields.
Do I need an MQTT broker?
Yes, the add-on publishes the values over MQTT. Just install and start the official "Mosquitto broker" add-on; the NVMe SMART Monitor then picks up the credentials automatically.
This article was originally published on raspberry.tips.


Top comments (0)