Summary
In CML (Cisco Modeling Labs), the available platforms can be defined and used by yourself in addition to the standard ones.
This procedure is shown in the user guide.
https://developer.cisco.com/docs/modeling-labs/#!custom-vm-images
Arista EOS also offers vEOS/cEOS available for virtual machines and containers.
At the time of this writing, the software is available for download by anyone with user registration, and examples of its use in various network simulators are introduced.
Setting up EVE-NG, CloudVision Portal and vEOS
https://aristanetworks.force.com/AristaCommunity/s/article/setting-up-eve-ng-cloudvision-portal-and-veos
vEOS/cEOS GNS3 Labs
https://aristanetworks.force.com/AristaCommunity/s/article/veos-ceos-gns3-labs
Running vEOS in GNS3 1.5
https://aristanetworks.force.com/AristaCommunity/s/article/running-veos-in-gns3-1-5
We can also see examples of attempts to use the system in CML.
Using Arista with CML
https://www.youtube.com/watch?v=Bg8aHL48n5g&t=2s
Importing Arista Devices into Cisco CML
https://www.youtube.com/watch?v=LfivGQa03sM&t=1166s
This time, I tried to set up EOS 4.28.1F in CML 2.2.3 environment (installed on the previously built ESXi host), and was able to start using it.
The following is a record of that.
Detail of what I did
Get vEOS
- Obtain from Arista's website
- https://www.arista.com/en/support/software-download
- Download vmdk vEOS file
- Select the non-64-bit one this time
- "vEOS-lab-XXXX.vmdk"
Define node
- Select "Node and Image Definition" from "TOOLS"
- Confirm that the "Node Definition" tab is selected and click the "ADD" button.
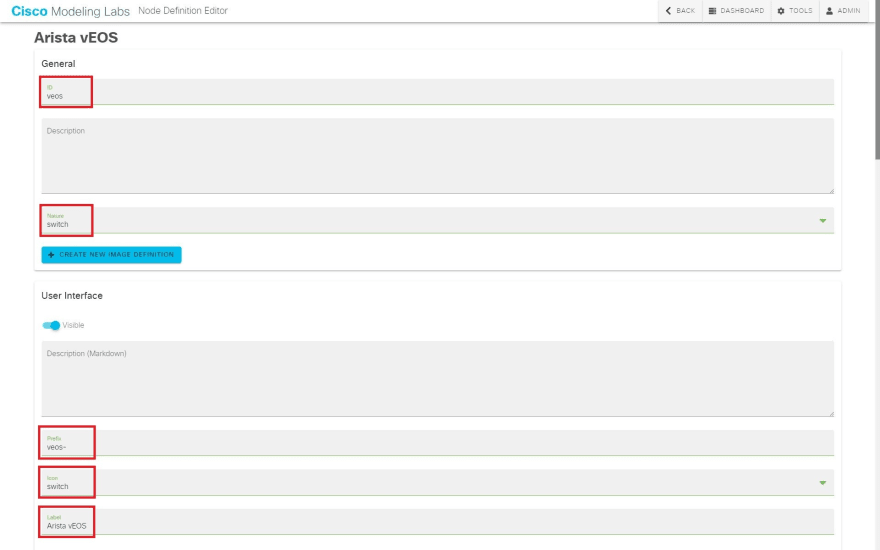
- Select/enter the following information in the "General" field
- ID: "veos"
- Nature: "switch"
- Select/enter the following information in the "User Interface" field
- Prefix: "veos-"
- Icon: "switch"
- Label: "Arista vEOS"
- Select/enter the following information in the "Linux Native Simulation" field
- Domain Driver: "KVM"
- Simulation Driver: "server"
- Disk Driver: "IDE"
- Memory: "2048" in this case
- CPUs: "2" in this case
- CPU Limit: "100"
- Network Driver: "E1000"

-
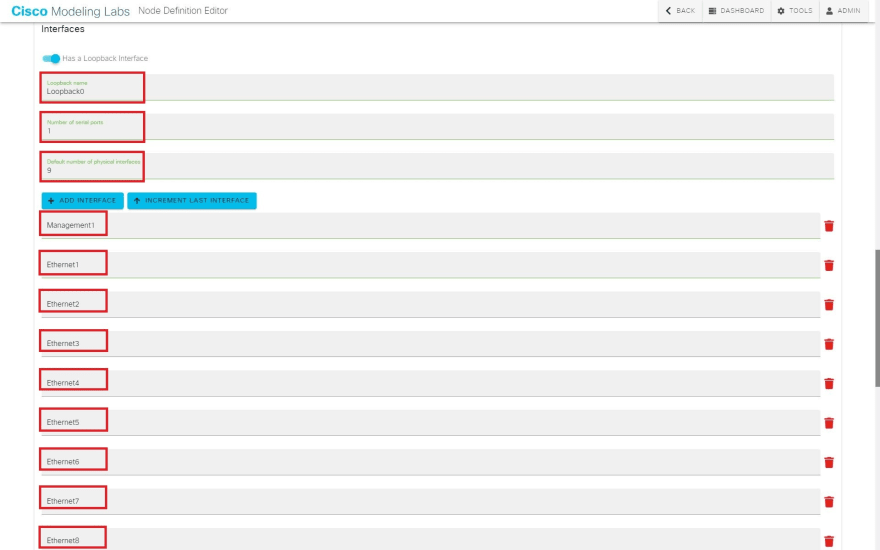
Select/enter the following information in the "Interfaces" field
- Loopback name: "Loopback0"
- Number of serial ports: "1"
- Default number of physical interfaces: "9" in this case
- interface 0:"Management1"
-
In the same field, press the "ADD INTERFACE" button and enter the following information
- interface 1: "Ethernet1"
In the same field, press the "INCREMENT LAST INTERFACE" button until the number specified in the "Default number of physical interfaces" is displayed.
-
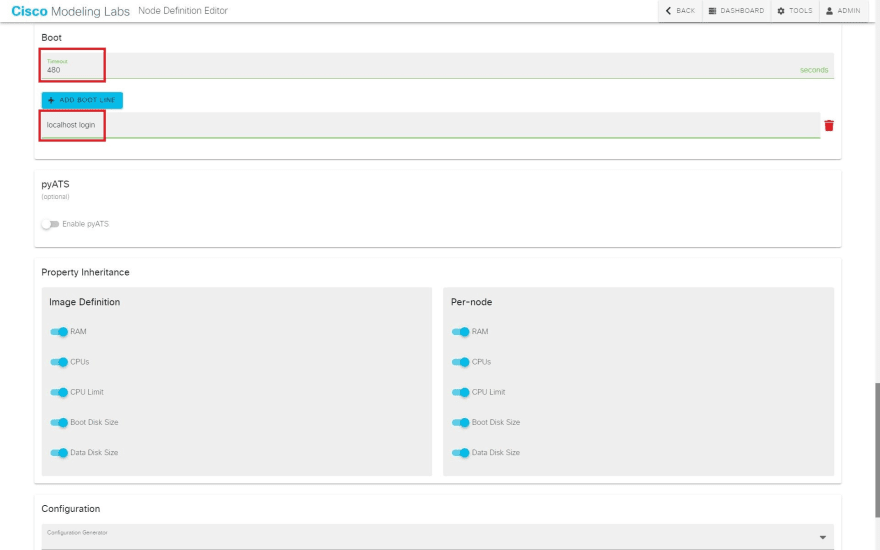
Enter the following information in the "Boot" field
- Timeout: "480" in this case
-
In the same field, click the "ADD BOOT LINE button" and enter the following information
- "localhost login"
Click the CREATE button
Define image
- Select "Node and Image Definition" from "TOOLS"
- Select the "Image Definition" tab
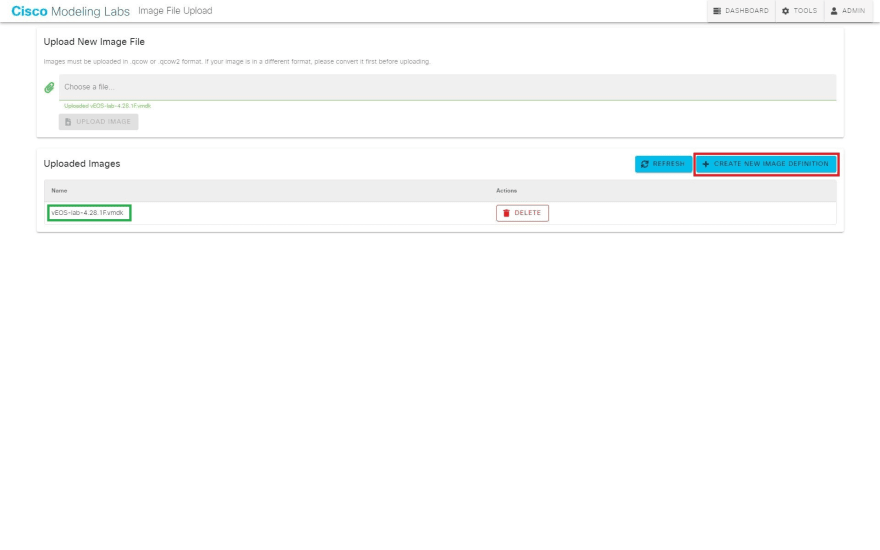
- Click the "MANAGE" button
- Select "Choose a file" in the "Upload New Image File" field and specify the downloaded vEOS file
- Click the "UPLOAD IMAGE" button
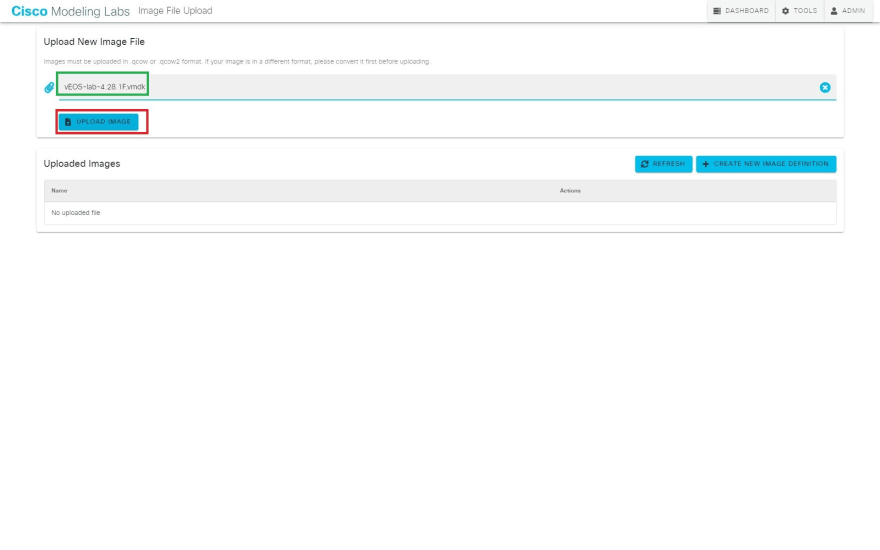
- After confirming the display of the file specified in the "Uploaded Images" field, press the "CREATE NEW IMAGE DEFINITION" button.
-
Select/enter the following information in the "General" field
- ID: "veos-4-28-1f"
- Label: "Arista vEOS 4.28.1F"
- Disk Image: The uploaded vEOS file
- Node Definition: The defined node
Press "CREATE IMAGE DEFINITION" button

Confirmation of operation
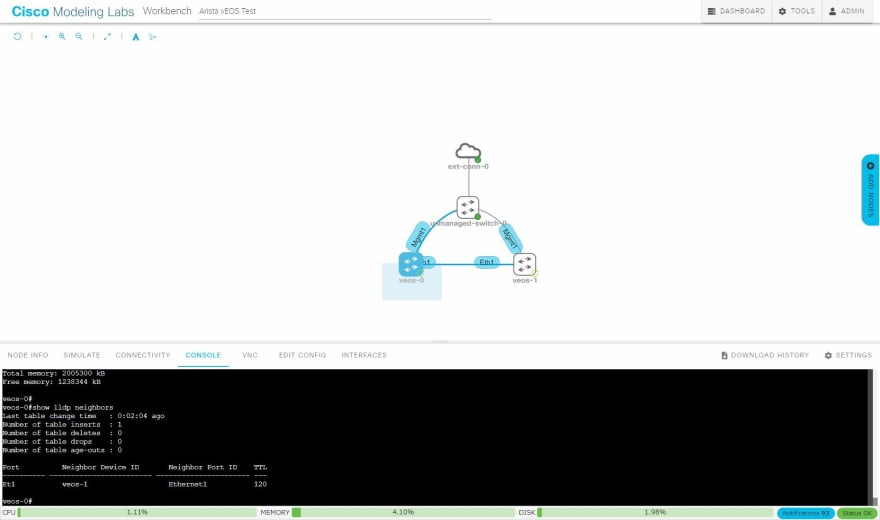
I created a lab using the registered node and it was successfully started.
It was also confirmed that communication with neighboring nodes was possible.
Supplemental information and others
The Aboot file was not used in this work.
Also, the conversion to qcow2 was not performed.

Top comments (0)