
Learn how to deploy an Azure VM with IPv6 support while setting up a Nym node.
A little bit of context
I’m lately looking into cool crypto projects, mainly because most of them make an extensive use of Rust and that’s always and extra motivation for me 😁.
One that has caught my attention is Nym, which promises a huge improvement both in terms of privacy and security while we're using the internet. It has recently raised $6M so this not only shows that the project it's catching the attention of many diverse investors but also speaks of its capability to start growing and increasing its development pace.
Long story short, I was trying to set up a Nym node - as running a node in Milhon (their next version of the Testnet) will only be open to those who have run a node in Finney (their current version of the Testnet) - and thought of doing that in Azure.
I read the Nym docs and all seemed pretty straightforward. What could go wrong? It seems that for the Nym node to work ok, it has to have an IPv6 address and Azure was not going to let me walk away so easily…
TL;DR;
Setting up
IPv6in an Azure VM cannot be done by using thePortal. It’s also impossible to set it up in an already existing VM.
Here you are a link to the official Azure docs.
The steps to create an IPv6 VM
You could do all this via your command line but I will show you how I used the Azure Portal for everything except the VM creation.
These are the different steps:
- Create a couple of public IP addresses
- Create a Virtual Network
- Create a Network Interface
- Create a Network Security Group
- Create the VM
Create a couple of public IP addresses
Let’s create a couple of public IP addresses, IPv4 and IPv6, respectively. We can create them both at the same time, which is cool as it will save us some time.
Let’s select the option in the Azure Portal and just click Create.

Select Both in the first option and just fill in the names of your IPs.
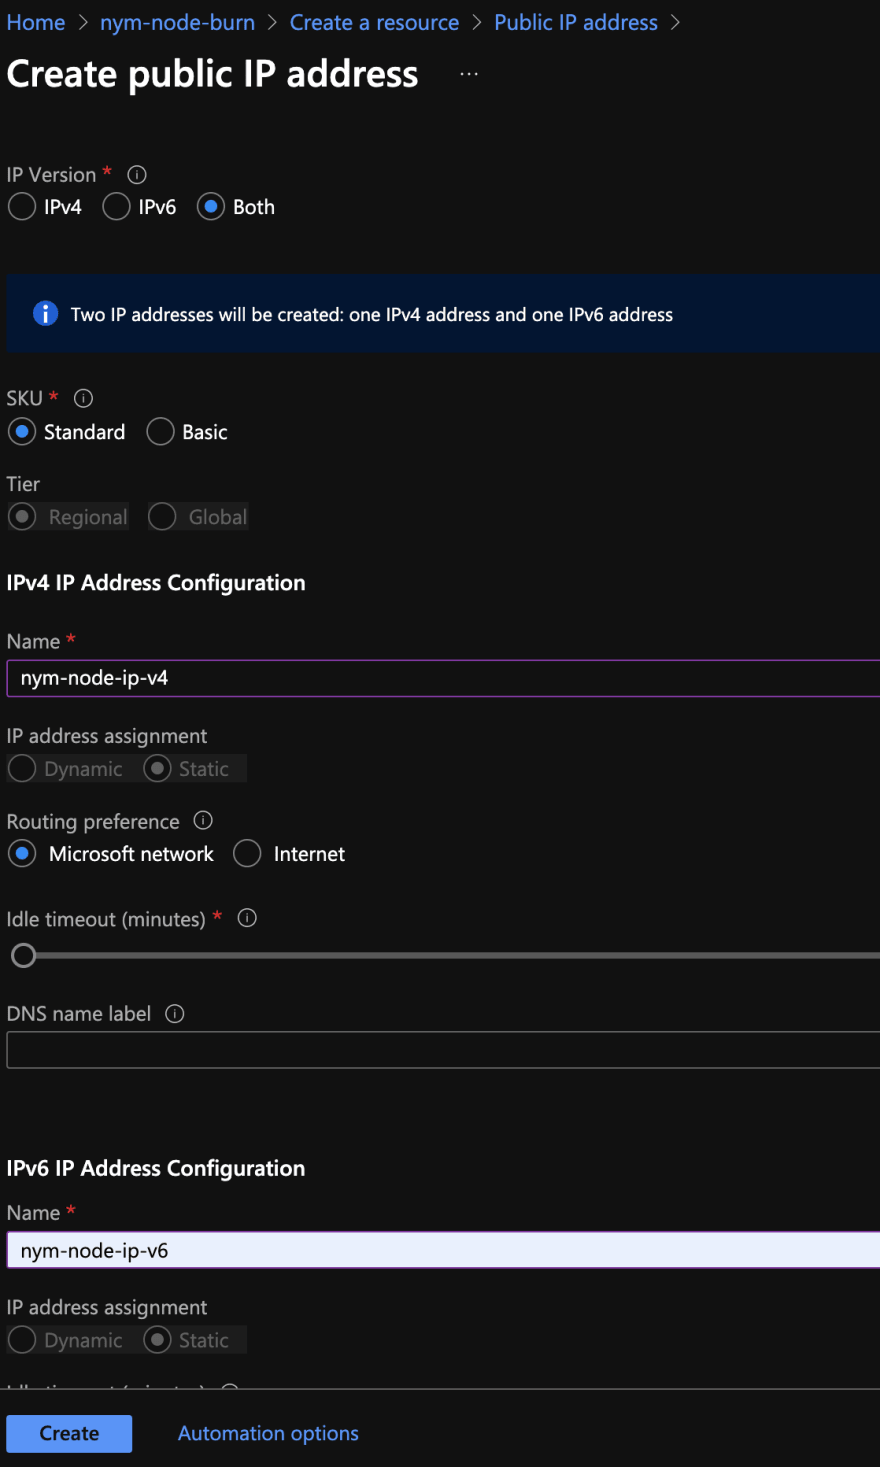
Then, just click Create and in a couple of seconds you’ll have your two new shiny IPs.

Create a Virtual Network
Next, we will create a Virtual Network which is the fundamental building block for your private network in Azure.
Similar to what we did in the previous section, we look for the virtual network option and click over the Create button:

Then, we just have to go through the different tabs, setting the name of the virtual network,

and then configuring the IP addresses in there. Be sure to select the Add IPv6 address space checkbox:

You’ll notice there’s a warning message stating that subnets should have at least one IPv6 address range. Let’s click over the default subnet name and a sidebar will open.

This time, tick the Add IPv6 address space checkbox, fill the IPv6 range, and click the Save button. You’ll notice that the previous warning is gone and you’ll be able to follow the process. Click Next and finally Createthe virtual network.
Create a Network Interface
Now, it’s time for us to create a Network Interface.
As you may probably guess by now, we’re going to look for the network interface option and click over the Create button:

You’ll find a form that you’ll have to fill.
Give a name to the network interface and tick the Private IP address (IPv6) checkbox before creating the resource.

Once you have created it, go the resource and select the IP configurations option in the left side menu. You’ll see a screen similar to the one below:

Let’s configure our IPs. Click over the Primary ip configuration, and make the appropriate selections. Once you select Associate in the Public IP address option you’ll be able to see a list with the IPs we created before. Select the IPv4 one.

Now, we will do the same for the Secondary ip configuration, the IPv6 one.

Finally, let’s select Properties in the left side menu and copy the Resource ID. We’ll need it later in order to create our VM.

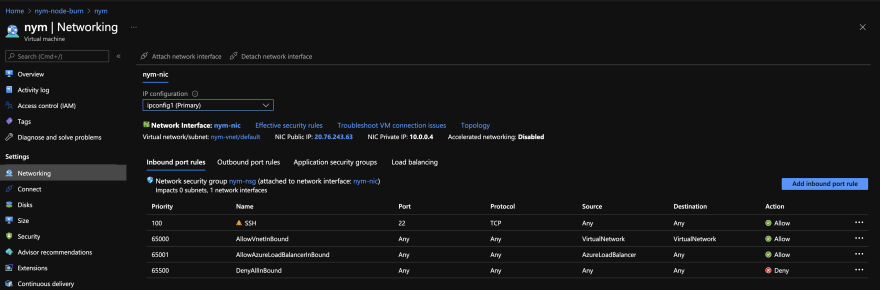
Create a Network Security Group
You can also create a Network Security Group and set it up in the Network Interface so you can filter which ports are opened to the internet.
The process if fairly straightforward.

You just have to give it a name and create it.

Then, go to our Network interface (nym-nic) and select the Network Security Group option in the right side menu.

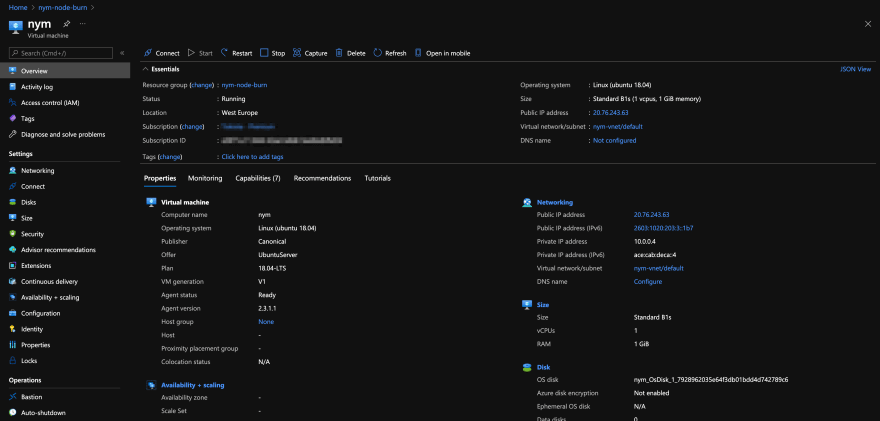
Create the VM
In order to create the VM we will use the Azure CLI.
Go to your command line and type:
az login
Once you are logged in, we’re going to create the VM by using this instruction.
az vm create --resource-group nym-node-burn --name nym --image UbuntuLTS --admin-username robertohuertasm --admin-password hZRAAJpjkwZ4KW --nics "/subscriptions/e3871cc7-3444-42ad-b4b8-5ee6bdbf6d54/resourceGroups/nym-node-burn/providers/Microsoft.Network/networkInterfaces/nym-nic" --location westeurope --size "Standard_B1s"
You can change the settings as you see fit but note that the --nics flag must be informed with the Resource ID we copied in the previous section.
And that’s it! Your VM should be up and running!
Finally, you just have to connect via ssh and run a Nym node 😊, but first, be sure you’ve enabled port 22 access in your Network Security Group:
Have fun!
--
Originally published at robertohuertas.com on Jul 19, 2021.

Top comments (0)