Introduction
DocsGPT is an AI assistant for your technical documentation needs. It serves you with any specific information you may seek from a piece of documentation and eliminates the need for manual searches.
In this tutorial, you will learn to self-host DocsGPT on one of the major cloud providers i.e., Civo. The only objective will be to deploy an instance of DocsGPT on a Civo Compute VM.
Initiating Civo Compute
We will start this tutorial by creating a Civo compute instance first. The steps given below will simply help you create one easily.
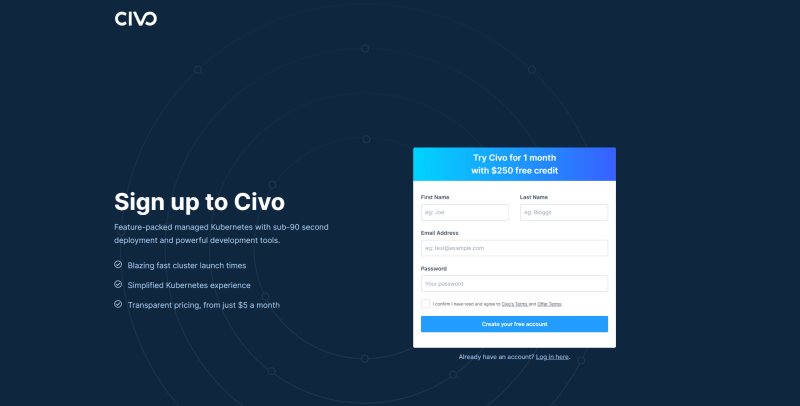
Step 1: Login to your Civo Dashboard. If you don't have an account, then simply Sign Up and claim your free credits worth 250$ valid for 1 month.
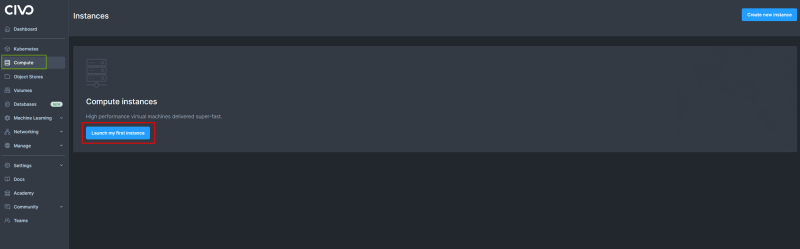
Step 2: Once you're in the Civo Dashboard, click on Compute from the left panel and then click on the Launch my first instance button.
Step 3: Here you need to define the configuration for the compute machine that you want to create. Feel free to customize it as per your demands but for the sake of this tutorial, we will use the configuration given below.
- Hostname: Name the machine as you wish.
- How many instances: Keep it at default 1.
-
Select Size: Select
Small Standardas the size. -
Select image: Choose
Ubuntu 22.04 LTS. -
Initial User: Choose
rootto have all privileges orubuntuto have the standard privileges. -
Network: Keep it at
default. -
Public IP address: You will need a Public IP to be able to use DocsGPT instance from the internet. Select
Create. -
Firewall: Use
default-defaultfrom the dropdown or if you don't have that option, then selectCreate new firewall. It will add a default firewall policy. -
SSH Key: Choose
Random Password. - Initialisation Script: Leave it empty.
- Tags: Leave it empty as well.
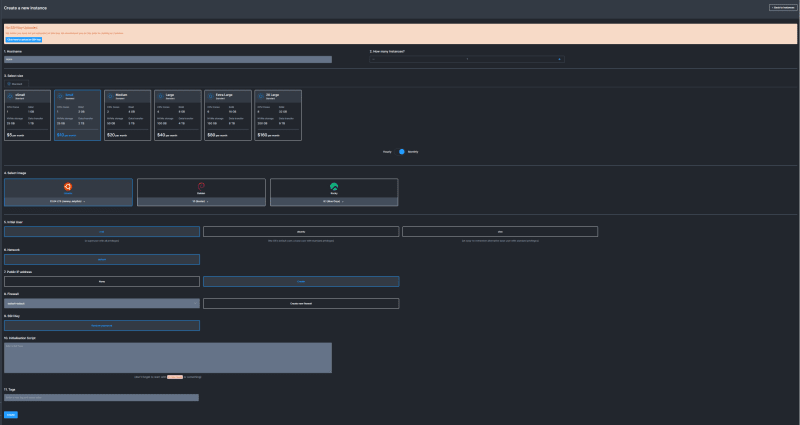
Now click on the Create button. This is going to take a while to boot up your new instance.
Step 4: Wait until you can see the The instance is running. message at the top of the screen. You can now click on the View SSH information to find your username and random password that you can use to log in to your instance through SSH.

You're now ready to move to the next part where you will install DocsGPT in your instance and use it through your Public IP.
Deploying DocsGPT
You can now simply follow the steps below to successfully deploy DocsGPT on your compute instance.
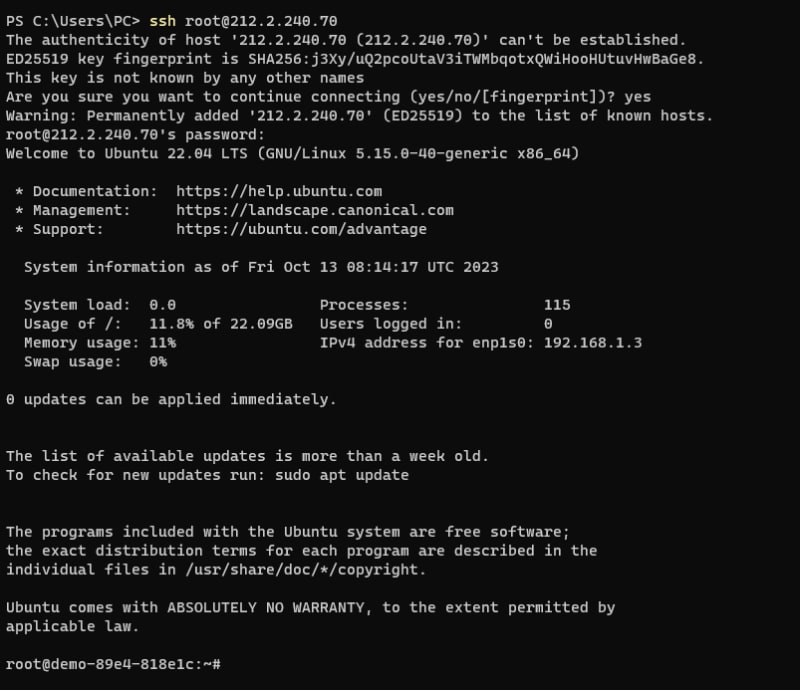
Step 1: Open your terminal and SSH into your compute instance using the command below.
ssh username@<Public IP of the instance>
Type yes when prompted and then enter the random password that you can find in the SSH Information panel on your compute dashboard to log in.
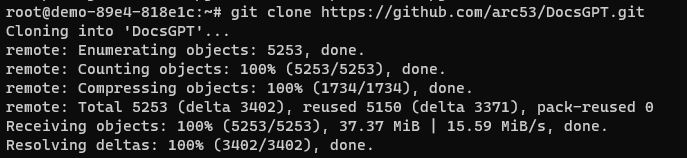
Step 2: Now you can clone the DocsGPT clone repository to your instance with the command given below.
git clone https://github.com/arc53/DocsGPT.git
Now, try running the following to update the package lists.
sudo apt update
Step 3: You will need the docker and docker-compose containerization tools to run DocsGPT easily. You can install these using the following commands.
sudo apt install docker.io

Now install docker-compose. Type Y and hit Enter when prompted.
sudo apt install docker-compose

Step 3: Navigate to the DocsGPT folder now and define the environment variables in a .env file.
cd DocsGPT/

nano .env
Enter the following details in your .env and save it.
API_KEY= <Your OpenAI API key>
VITE_API_STREAMING= true
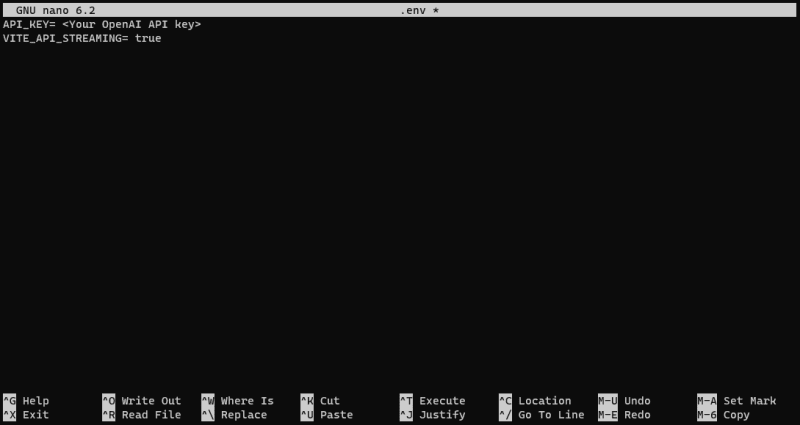
Use Ctrl + X and then type Y and hit Enter to exit the editor.
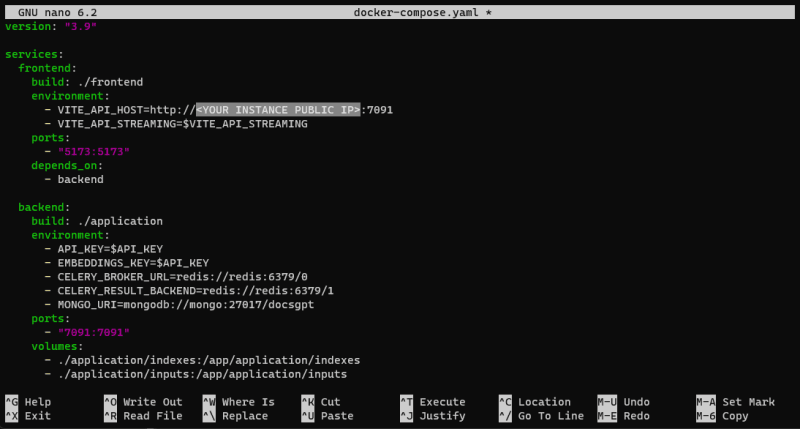
Step 4: You will now need to set the correct IP for the backend so that it can communicate with the frontend properly. Modify the docker-compose.yaml file to do this.
nano docker-compose.yaml
Navigate to Line 7 where the VITE_API_HOST is defined. Modify the host URL as such.
VITE_API_HOST=http://<Compute Instance Public IP>:7091
Step 5: You can now run the DocsGPT app on your instance with the command below. The initial start-up time can be a bit longer as it downloads all the necessary dependencies and builds the app.
sudo docker-compose up -d
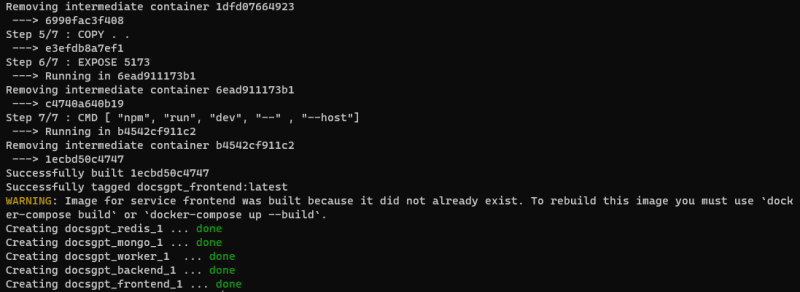
Now you should be able to access your own self-hosted DocsGPT on Civo Compute using the following URL.
http://<Public Compute Instance IP:5173>

Working with DocsGPT
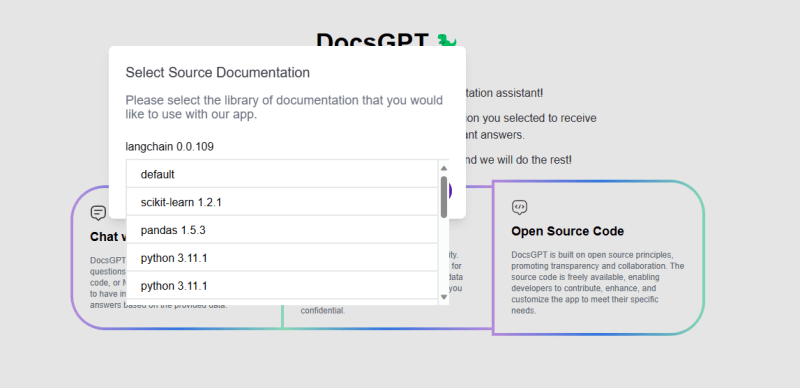
When you open the DocsGPT page for the first time, it is going to ask you to select Source Document. You can choose any one source from the list and then start querying about it using DocsGPT.
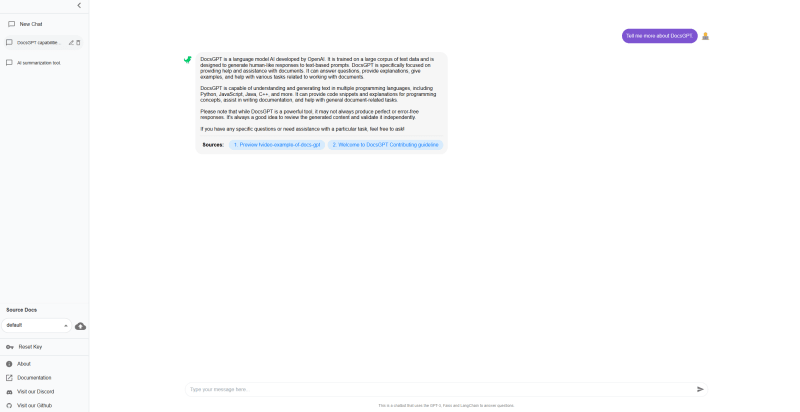
You can now query anything about the Docs.
For e.g., if you selected the source document as default, then you can ask generic queries about it.
You: What is DocsGPT?

DocsGPT: DocsGPT is an AI-powered language model developed using OpenAI's GPT (Generative Pre-trained Transformer) architecture. It is designed specifically to assist users in composing and editing documents. DocsGPT can help generate text in various formats, such as essays, code snippets, technical documentation, and more. It understands natural language commands and provides informative responses to user queries. Through its conversational interface, DocsGPT can assist with a wide range of document-related tasks, including content generation, formatting, organization, and more.
So, now your self-hosted DocsGPT instance is ready to serve all of your documentation needs.
Conclusion
DocsGPT is ever-evolving, and they are striving to add more features and are continuously supporting the community and consumers as much as they can.
Feel free to use it yourself and share your feedback with the team.
We hope you had a great time reading this deployment guide. Don't forget to drop a Like and share it with your peers.


Top comments (0)