2. Run Scripts from Command Line
Recommend: Terminal for Mac Users, Git Bash for Windows Users
When developing within an integrated system, you will have to ditch notebooks and get used to running scripts/ commands from the command line. Mac’s Terminal app is ideal for this because it is Linux based and most apps are deployed to Linux machines in Production due to their cost-effectiveness.
On a Windows, you can get very close to Mac terminal functionality by using the Git Bash terminal that comes with Git for Windows. Key differences in functionality include:
notepad instead of open for opening a file
shift + ins to copy/ paste into/ from the terminal
python -i instead of just python to use an interactive Python shell in the terminal
Format Your Command Line Interface
No matter the command line interface (CLI) you use, it helps to format your CLI to work well with Git so that you know what branch you are working on and don’t accidentally commit code to the wrong branch.
3. Edit and Debug Your Code
Recommend: VS Code
While there are many IDE’s out there, Visual Studio Code (VS Code) is my favorite editor for local code editing (I have also tried Atom, PyCharm, and Spyder). I like VS Code for Python development because of its superior ability to trace function/ class definitions across nested files. In PyCharm, this feature stops working as the trace becomes more complex.
VS Code also has great source control features:
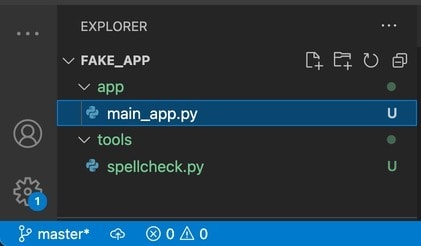
- You can easily see what branch of the repo you are viewing in the bottom left of your screen
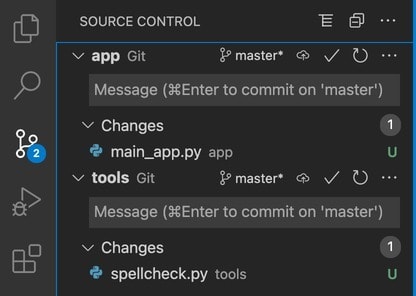
- If you are working across multiple repos (i.e. using one repo as a standard tools library that you import as a locally editable package), you can easily see the changes across repos without having to “cd” and “git status” multiple times. For example, if you add a script in both the app and tools repos below, you can view these changes simultaneously in VS Code’s Source Control tab.
Additionally, VS Code’s Debugging tool is super helpful, as long as you know the following tricks:
- Select your Python Interpreter as your project’s venv (NOTE: we will talk more about venv’s later but it is important that the venv is in the root of your project)
- Select a Python file to run
- Set breakpoints (if desired) by clicking in the left margin
- Navigate to the Debug tab and choose the “Python File — Debug the currently active Python file” for the Debug Configuration
NOTE: For this to work, your VS Code workspace must be open to the directory the script is meant to be run from. Thus, it is easiest to have your scripts built to be run from the root of your project.
- Step through the code and view the variables/ data created along the way.
Lastly, when it is appropriate to use Jupyter notebook files (i.e. for testing code snippets), VS Code has a Jupyter extension to support this. All you need to do is set the kernel to be the venv in the root of your project and install the ipykernel package when prompted.
The VS Code Exception: Remote Code Editing
Despite my love for VS Code when editing local files, I have been disappointed by its remote edit packages. Thus, when working with remote files (i.e. editing code hosted on a Linux machine) I have found Atom to be the most useful due to its “ftp-remote-edit” package.
4. Manage the Python Version You Use to Run Your Code
Recommend: Pyenv
Pyenv is a tool that allows you to seamlessly manage multiple Python versions on your machine at once. While the same task can be accomplished with Anaconda, Anaconda is a heavier install and not free for commercial use.
To get started using pyenv:
Install Pyenv — Mac, Linux, Windows
Reference this list of useful pyenv commands
.bashprofile vs .bashrc
While reviewing the Mac and Linux pyenv install instructions you may notice that they are very similar barring one key difference — the Linux instructions include a .bashrc file.
In Linux, you can use the crontab to schedule jobs. On my current project we use cron to run a script every minute to check if our apps are running and restart them if they aren’t. We use pyenv to control our Python version, and initially installed pyenv on Linux the same way we had on our Macs (only including pyenv in the .bash_profile file). We could not figure out why our cron jobs weren’t running when the same command worked fine when executed from the command line.
That’s when we discovered the importance of the .bashrc file. Cron jobs that execute scripts use a non-interactive shell login that loads startup files from the .bashrc file (not the .bash_profile file). So, it is important to add pyenv to both the .bash_profile and .bashrc files during the Linux pyenv install.
5. Manage the Python Package Versions You Use to Run Your Code
Recommend: Poetry
Creating a Python virtual environment is crucial for dependency management. For more information on what a virtual environment is and why you should always use one.
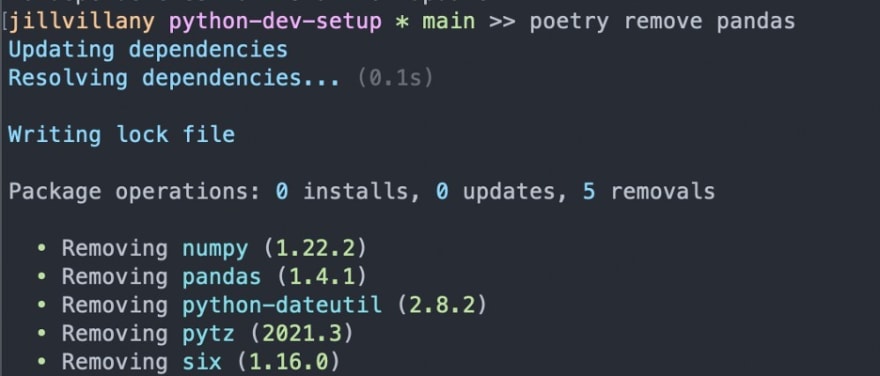
While pip installing from an up-to-date requirements.txt file that specifies hard-coded package versions is better than nothing, this method fails to account for your dependencies’ dependencies. For example, you may think you only installed pandas to run your code, but the pandas library is actually dependent on 5 other packages.
You can easily cause errors when creating a virtual environment from a requirements.txt if, for example:
You specify a numpy version that is incompatible with the pandas version you specified
You specify a package version that has a numpy version that is incompatible with the numpy version needed for your pandas version
Even if there are no errors when creating the virtual environment from the requirements.txt file, team members may wind up with slightly different sub-dependency versions which may cause problems down the line.
Thinking about sub-dependencies can easily make your head spin. Thankfully, poetry accounts for all of these inter-related dependencies and creates a “poetry.lock” file that you can push to your repo. All your teammates need to do to mirror your setup is run the “poetry install” command.
Is there a case where the lock file may actually cause issues among team members?
Yes, but this case is the exception. For example, if your code is loading other repos as locally editable packages, you won’t want your team members to be locked into the absolute path of your space where you may be working on different git branches of the sub-repos.
If you encounter a situation like this, you can always revert to pip installing dependencies from a requirements.txt with hard-coded versions after controlling your Python version with pyenv.
Congratulations, you now have an awesome environment setup!
You have all the tools you need, too effectively:
- Version control your code
- Run scripts from command line
- Edit and debug your code
- Manage the Python version you use to run your code
- Manage the Python package versions you use to run your code
I hope this helps, and you find yourself ready to hit the ground running the next time you start a new project!


Top comments (0)