
Introduction
SignalR is an open-source library that facilitates to add real-time functionality to web applications. Using this, the server application can push real-time data to the client.
Microsoft has provided different ways to connect with the SignalR Server application from a client application using various client libraries. This article explains how to connect with the SignalR Server hub and receive message data from the server to the client application using the SignalR .NET client in ASP.NET Core 6 application. There are different ways to receive data from the SignalR server application to the client utilizing different reference packages. In this article we will explore SignalR .NET client and use it in the .NET 6 application to receive the data from the server hub. In this example, we will focus on a client application. This article explains and provides the code sample for the scenario where we have two different applications for the SignalR server and the client. We need to use the .NET client library for the ASP.NET Core 6 application.
Prerequisites:
- Visual Studio 2022
- Functioning SignalR Server Application If you already have an existing client application in .NET 6.0, you will need only to implement the signalR .NET client in order to receive the real-time data from your server application. Then you can directly jump into Step Two.
Let's get start.
Step 1 - Create an ASP.NET Core 6 project as usual
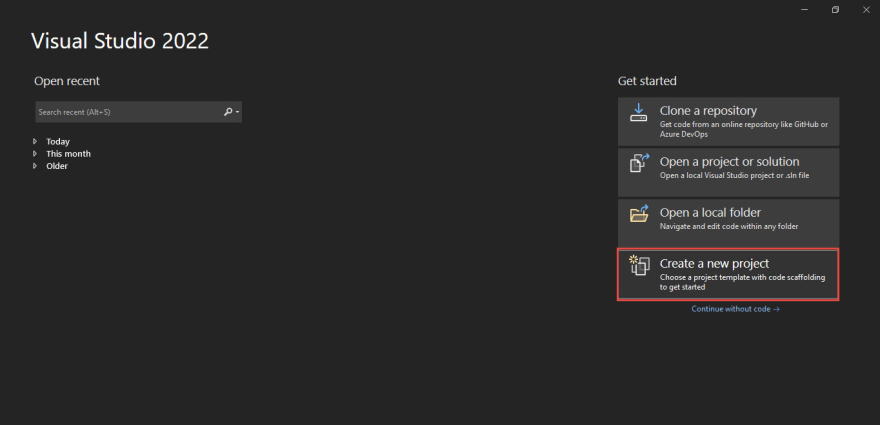
Open Visual Studio and click on Create a new project.
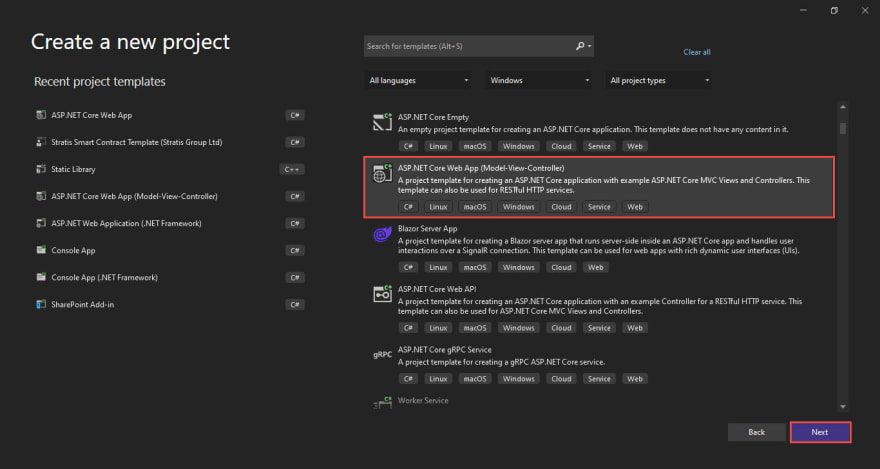
Select ASP.NET Core web app as illustrated below and click on Next.
Give the project name, location of the project, and click Next.

Then select the Framework: .NET 6.0(Long-term support) as shown below and click Create.

Then, your default SignalR client app will be created. You will be able to run it and see the default design in the browser.
Now, let’s move to SignalR client part.
Step 2 - Install SignalR .NET Client
Once the project is created, we can now move to the SignalR .NET client steps.
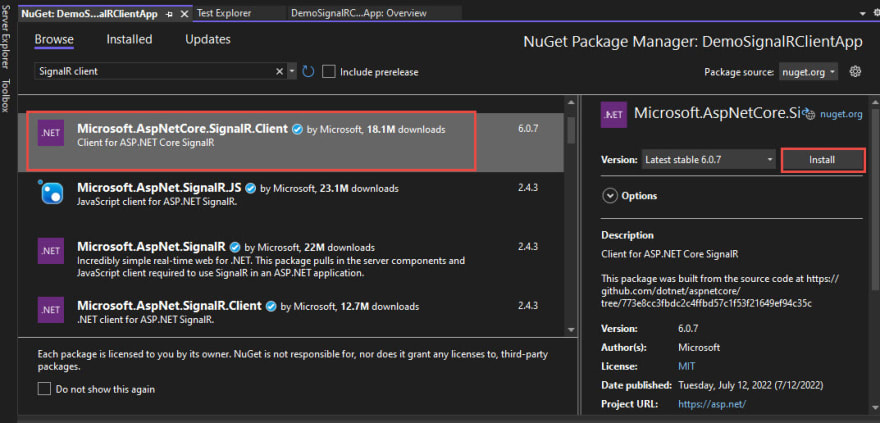
You can open the terminal in Visual Studio, and can install the SignalR .NET client using the command given below.
Install-Package Microsoft.AspNetCore.SignalR.Client

Alternatively, you can search and install it from the NuGet Package manager.
Step 3 - Connecting to Hub (SignalR Server application)
Here, we will become familiar with the connection hub builder. This is required for connecting with the server hub.
To make a connection, we need to create HubConnectionBuilder and start the Build. There we must provide the server URL and message event. The example below, withUrl, contains the signalR server URL and signalR event hub name. You need to provide the correct value in the WithUrl in order to connect with the server.
var connection = new HubConnectionBuilder()
                .WithUrl("http://localhost:53150/ChatHub")
                .Build();
Additionally, to reconnect automatically when the server connection gets lost, we can use WithAutomaticReconnect() method. Moreover, we can use the StartAsync() method to start the connection asynchronously.
The complete code for the connection is given below.
connection = new HubConnectionBuilder().WithUrl("http://localhost:39823/events-hub", options => {
    options.Transports = HttpTransportType.WebSockets;
}).WithAutomaticReconnect().Build();
await connection.StartAsync();
Let’s go to the project and create a connection with the Server and receive the message. For simplicity, I will use the Privacy Action Controller. In a real application, you can keep the connection and data receive code in your service class and call it in wherever you need it.
For simplicity, let’s go to the Privacy Action of HomeController and create a connection with the SignalR server.
Here is the code of my HomeController Privacy.
public async Task < IActionResult > PrivacyAsync() {
    var connection = new HubConnectionBuilder().WithUrl("http://localhost:39823/events-hub", options => {
        options.Transports = HttpTransportType.WebSockets;
    }).WithAutomaticReconnect().Build();
    await connection.StartAsync();
    return View();
}
using Microsoft.AspNetCore.Http.Connections;
using Microsoft.AspNetCore.SignalR.Client;
Note: The above should be included in the controller, and the HubConnection connection should be defined in the Home Controller.
Now, we need to change the default Privacy ActionResult to the Async as well.

Up until now, we have created the connection to the Server. Now we will move to receiving data in the client application.
To receive the data, write the following code just below the connection code in the same controller action.
public async Task < IActionResult > PrivacyAsync() {
var connection = new HubConnectionBuilder().WithUrl("http://localhost:39823/events-hub", options => {
options.Transports = HttpTransportType.WebSockets;
}).WithAutomaticReconnect().Build();
await connection.StartAsync();
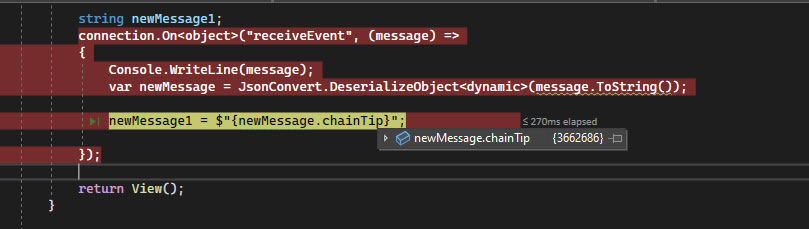
string newMessage1;
connection.On < object > ("receiveEvent", (message) => {
Console.WriteLine(message);
var newMessage = JsonConvert.DeserializeObject < dynamic > (message.ToString());
newMessage1 = $ "{newMessage.chainTip}";
});
return View();
}
In my case, the server will send data to the client with the name receiveEvent. In the chat application, it can appear as ReceiveMessage. You can check your server code for your own case.
Once receive the message, I have deserialized the it.
The complete code can be found below.
using DemoSignalRClientApp.Models;
using Microsoft.AspNetCore.Http.Connections;
using Microsoft.AspNetCore.Mvc;
using Microsoft.AspNetCore.SignalR.Client;
using Newtonsoft.Json;
using System.Diagnostics;
namespace DemoSignalRClientApp.Controllers {
    public class HomeController: Controller {
        private readonly ILogger < HomeController > _logger;
        HubConnection connection;
        public HomeController(ILogger < HomeController > logger) {
            _logger = logger;
        }
        public IActionResult Index() {
            return View();
        }
        public async Task < IActionResult > PrivacyAsync() {
                var connection = new HubConnectionBuilder().WithUrl("http://localhost:39823/events-hub", options => {
                    options.Transports = HttpTransportType.WebSockets;
                }).WithAutomaticReconnect().Build();
                await connection.StartAsync();
                string newMessage1;
                connection.On < object > ("receiveEvent", (message) => {
                    Console.WriteLine(message); //write in the debug console
                    var newMessage = JsonConvert.DeserializeObject < dynamic > (message.ToString());
                    newMessage1 = $ "{newMessage.chainTip}";
                });
                return View();
            }
            [ResponseCache(Duration = 0, Location = ResponseCacheLocation.None, NoStore = true)]
        public IActionResult Error() {
            return View(new ErrorViewModel {
                RequestId = Activity.Current?.Id ?? HttpContext.TraceIdentifier
            });
        }
    }
}
So, our client application is ready now. We can run client and server applications at once and test whether the client app is able to receive data from the server or not.
Below is the result of my Client application successfully receiving the data from the server.
Conclusion
In this article, we have learned to how get the data in a client application from the server application using SignalR .Net client in ASP.NET Core web application.
As Microsoft has provided different ways to connect with the SignalR Server application from a client application, using various client libraries such as .NET Client, JavaScript Client, Java Client, and so on. In the next part of this series, we will learn how to use a JavaScript client library for the same purpose. If you have any queries, concerns, or feedback, please feel free to write them in the comment section.
References

Top comments (0)