
I’m not that old, but when I built my first website I manually copied code to an Apache server with FTP. That server was also running in my closet. As you can imagine, this deployment process was not exactly fullproof and I experienced frequent outages on my website. Deployments have come a long way in the 10 years since my first website and the general goal today is to automate code deployments as much as possible. Let’s explore how we can deploy code from GitHub to EC2 using CodePipeline.
Why automate?
Put simply, the more repeatable your deployments are, the less downtime you will have. Automated deployments are easier to test, easier to troubleshoot, lend themselves to scalability, can perform rollbacks on failure, support blue/green and canary deployments. The list goes on.
Ideally, your resources should be treated like cattle, not like pets. If it gets sick, you shoot it and replace it with another one. Automated deployments make that easy.
First, a Git repo
Before we do anything else, we will need a Git repository to house the code. I’ll clone down a empty repo and create a demo file.
git clone git@github.com:seanziegler/AWSDeployDemo.git
touch demo.txt
echo "This is prod" > demo.txt
git add .
git commit -m "Init commit"
git push origin master
I’m going to create a seperate branch so I can push seperately to test and master.
git branch test
git checkout test
echo "This is test" > demo.txt
git add .
git commit -m "Create test branch"
git push origin test
Obviously, you’d normally be deploying an application, not just a text file.
Creating deployment targets
Now that we have repositories set up, some instances are needed. I’m going to use the management interface since this is just a demo but you can also use the awscli or Terraform/Cloudformation.
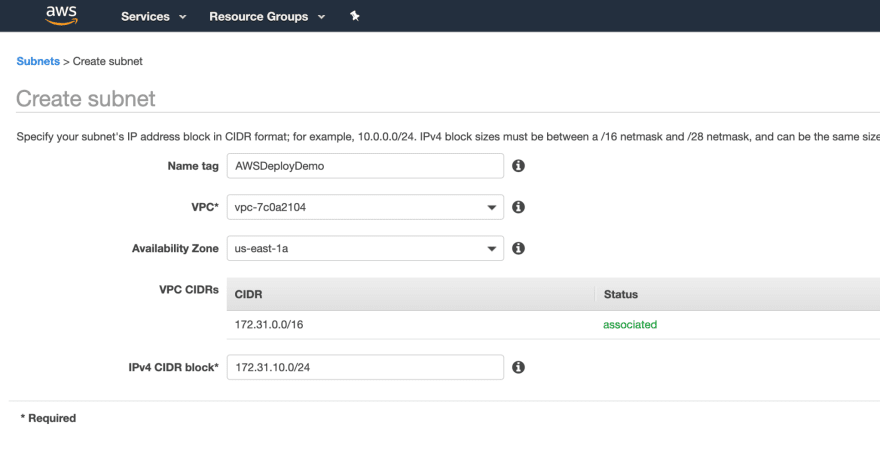
It’s good practice to create a new subnet inside your VPC for each application you deploy.
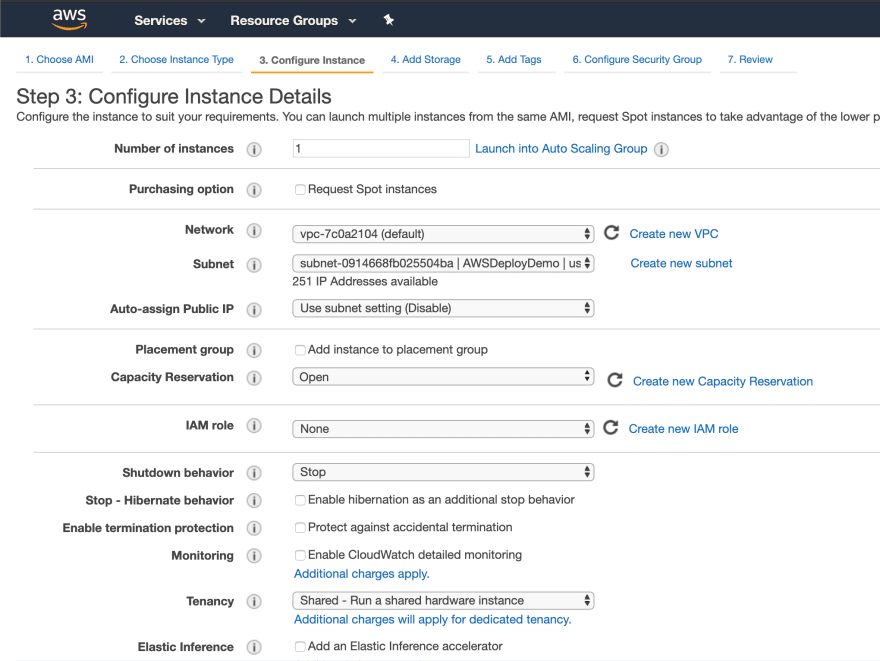
Okay, next up are the EC2 instances themselves. I’m going to make two: one for test and one for production. Obviously this is just a dummy deployment but CodePipeline is versatile enough to allow deployments across hundreds of resources if needed.
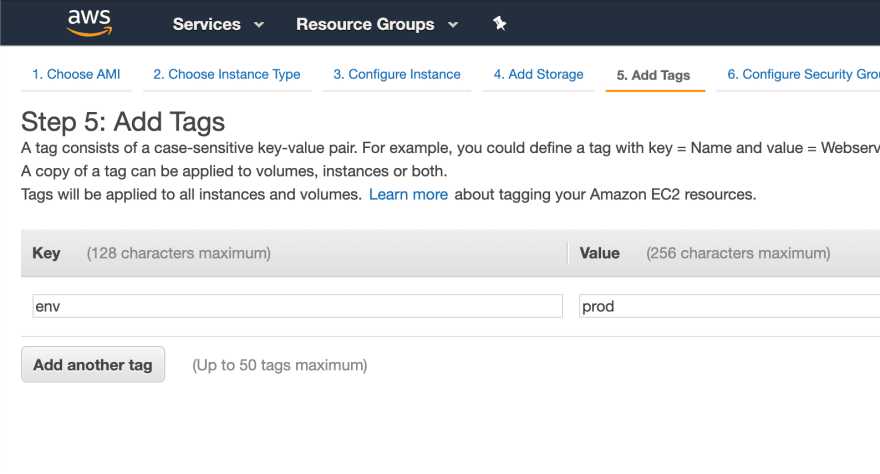
I’ll also add some tags to identify the production vs test instance. I’ll be using these later to tell CodePipeline which one is which.
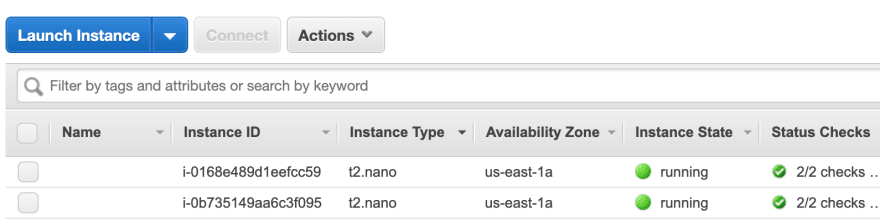
Okay, we have what we need for instances.
Installing the CodeDeploy agent
Before we can build a pipeline, we need to configure CodeDeploy and it’s agent. CodeDeploy requires a small agent daemon installed on every machine that is a deployment target.
You can check if you have the CodeDepoy agent installed by connecting to your instance and running (on Amazon Linux or RHEL):
sudo service codedeploy-agent status
You’ll either get an error or a message that the service is stopped. If the service is stopped, simply run:
sudo service codedeploy-agent start
If you get an error, the codedeploy-agent isn’t installed. So it becomes a bit more involved. Here’s the docs page on how to install the CodeDeploy agent. Essentially it boils down to the following commands:
sudo yum update -y
sudo yum install ruby wget -y
cd /home/ec2-user
wget https://bucket-name.s3.region-identifier.amazonaws.com/latest/install
chmod +x ./install
sudo ./install auto
In the wget command above, you’ll need to replace both bucket-name and region-identifier with the values that corresponds to your region.
| Region Name | bucket-name | region-identifier |
| US East (Ohio) | aws-codedeploy-us-east-2 | us-east-2 |
| US East (N. Virginia) | aws-codedeploy-us-east-1 | us-east-1 |
| US West (N. California) | aws-codedeploy-us-west-1 | us-west-1 |
| US West (Oregon) | aws-codedeploy-us-west-2 | us-west-2 |
| Canada (Central) | aws-codedeploy-ca-central-1 | ca-central-1 |
| Europe (Ireland) | aws-codedeploy-eu-west-1 | eu-west-1 |
| Europe (London) | aws-codedeploy-eu-west-2 | eu-west-2 |
| Europe (Paris) | aws-codedeploy-eu-west-3 | eu-west-3 |
Once installed, check one last time to make sure the agent is running.
sudo service codedeploy-agent status
CodeDeploy Role
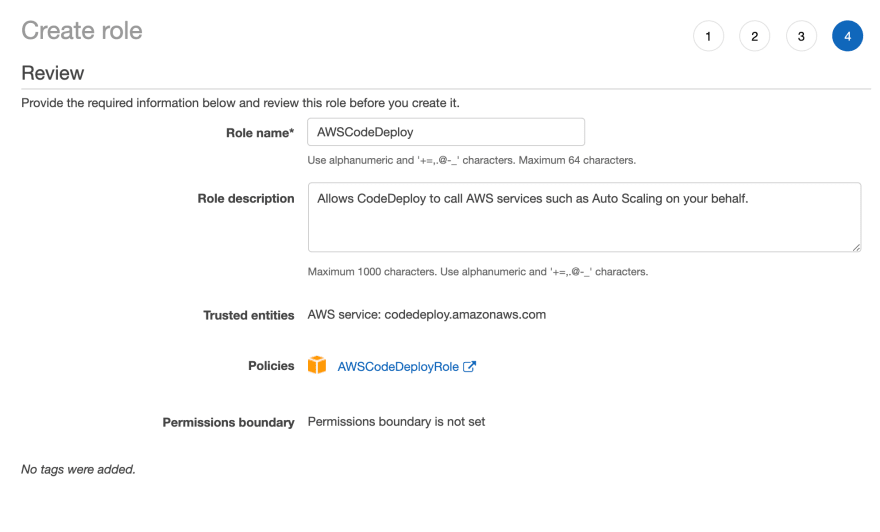
In order for CodeDeploy to work, we need to assign it a service role with the correct permissions. Let’s create a role with the AWSCodeDeployRole policy attached to it.

Now that the instance roles are setup, it’s time to turn to CodeDeploy.
Creating an Application and Deployment Group
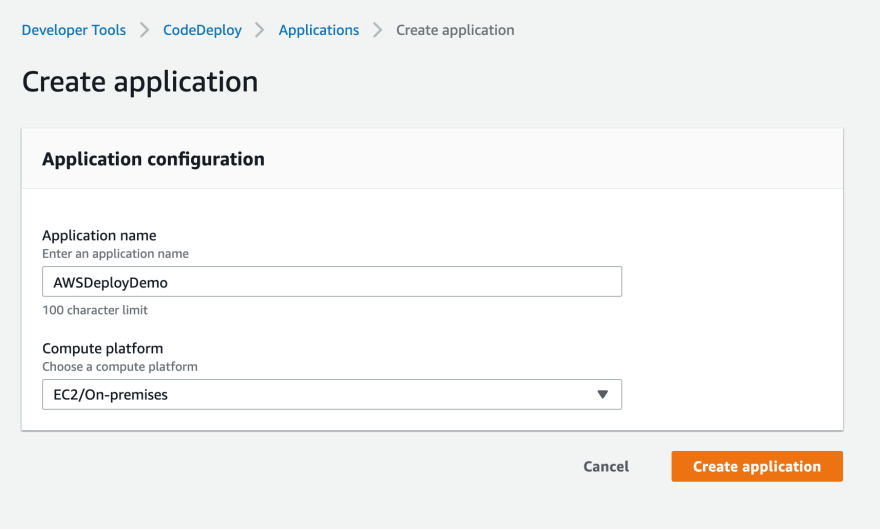
Creating an application in CodeDeploy is straightforward. Just give it a name and tell it that you plan on deploying code to EC2 instances.
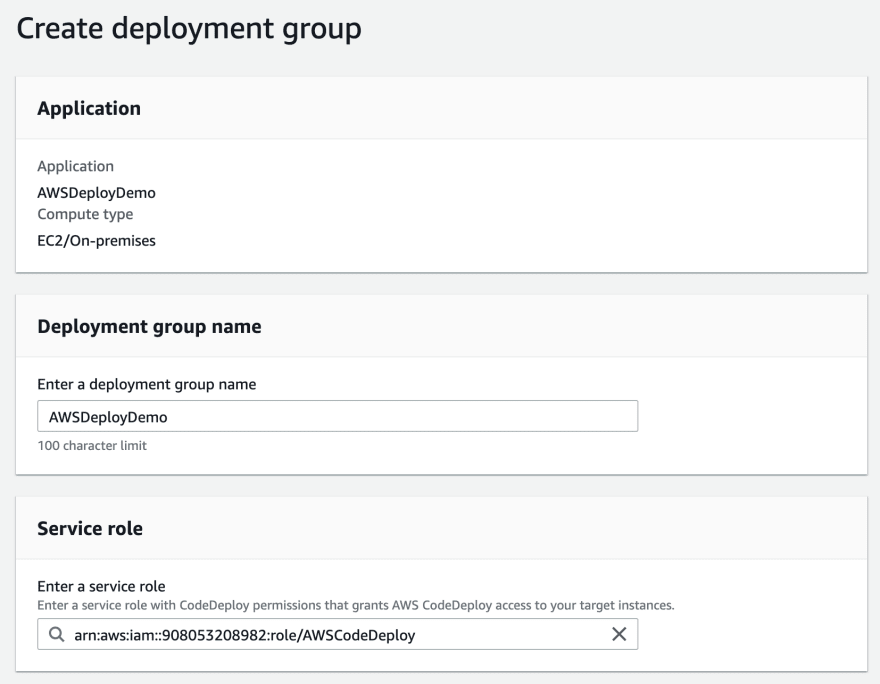
Creating a deployment group is a bit more complicated but not difficult. Give it a name and assign the CodeDeploy service role you created previously. This will allow CodeDeploy to access the resources specified in this deployment group.
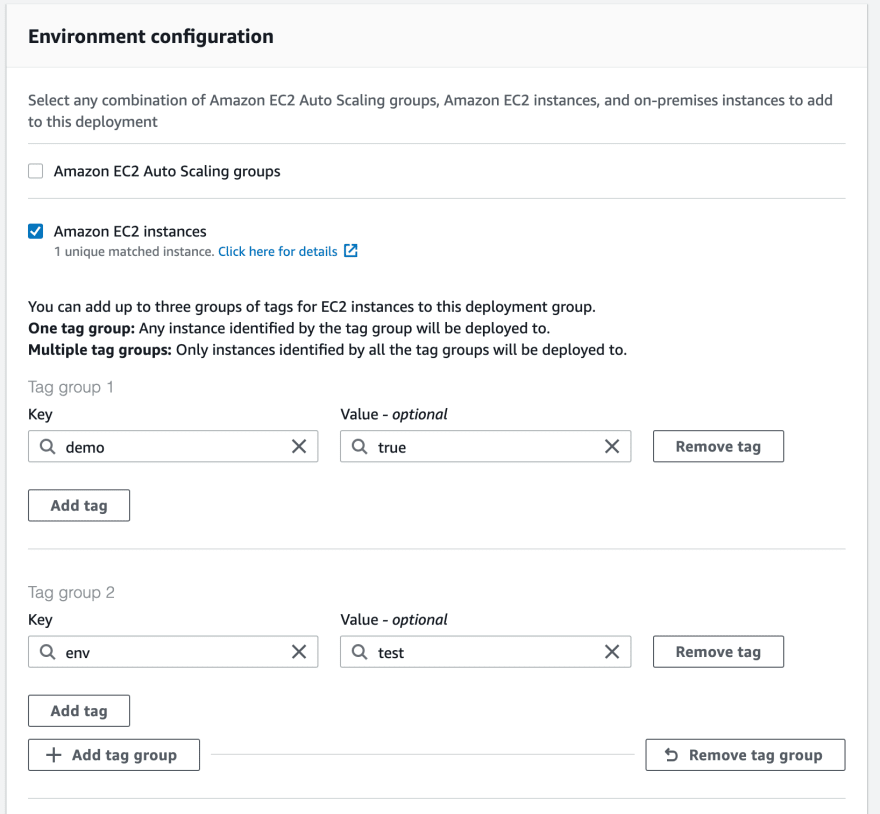
Next, choose EC2 instances for deployment. You can also deploy to autoscaling groups but for now I’ll deploy to a single instance. Don’t forget to add the env:test tag. You should see one matched instance that corresponds to the test instance created earlier.
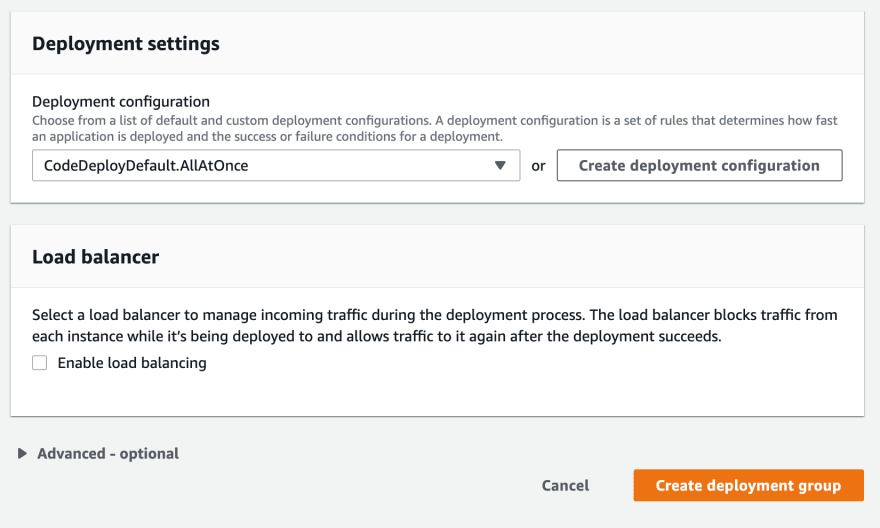
We don’t need a special deployment setting so just leave the default AllAtOnce setting in place. Uncheck Enable load balancing since we haven’t set that up.
Repeat this process again but target the instances with the env:prod tag.
appspec.yml
CodePipeline needs to know what to do with the files in your Git repository when you deploy. A file called appspec.yml is CodePipeline’s way of defining the tasks you want to run when deploying code. There’s too much to cover here, but AWS has examples of how to build out an appspec.yml file.
For this project, I’m just going to copy in some text files from the Git repo to test that the pipeline is working. You’ll need to do your own research on how to build an appspec file to suit your deployment. If you want to follow along with my dummy deployment, put this in a file at the root of your git repo. Don’t forget to name it appspec.yml!
version: 0.0
os: linux
files:
  - source: ./demo.txt
    destination: /
Building a pipeline
We need to build two pipelines for this to work. One pipeline that deploys the test branch to test instances and one pipeline that deploys the master branch to production instances.
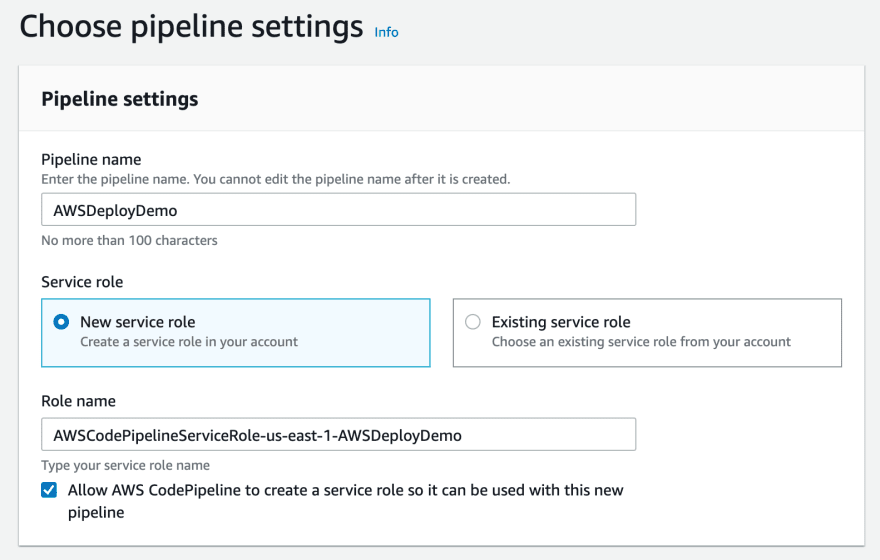
Creating a pipeline is a straightforward process. I suggest letting CodePipeline create your servie role for you. It’s just easier that way.
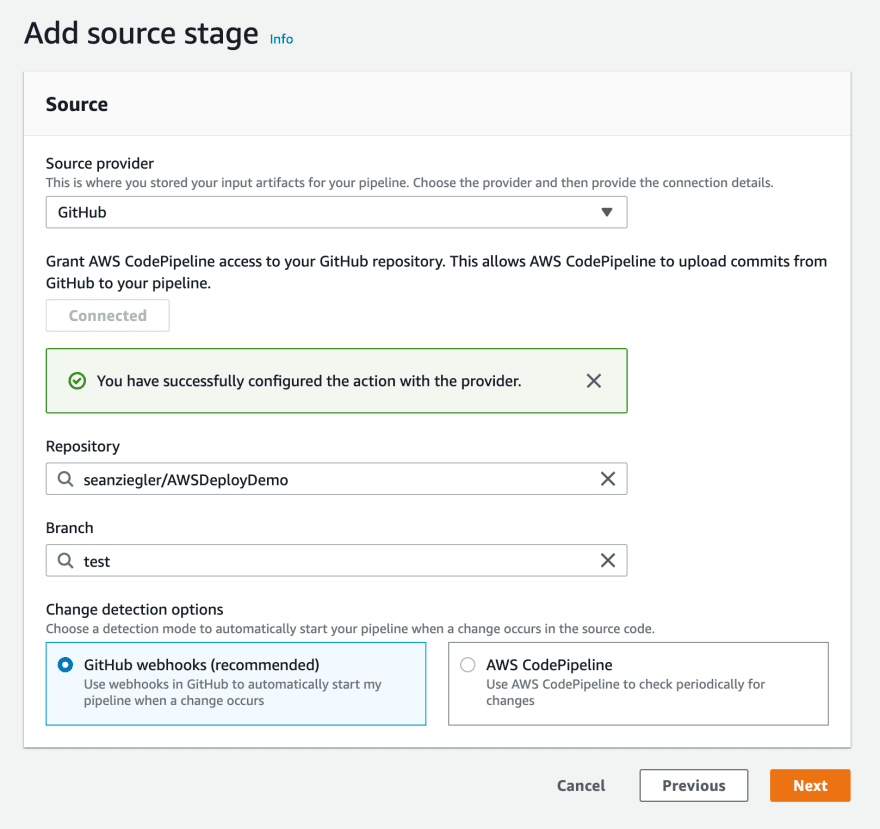
Create a stage that uses your Github repository and the test branch as the source.
Skip the build stage for now. If you want, you can come back later and setup CodeBuild to do integration tests or build binaries if you need that sort of thing.
Select the CodeDeploy provider and choose the application and deployment group for your test instances.

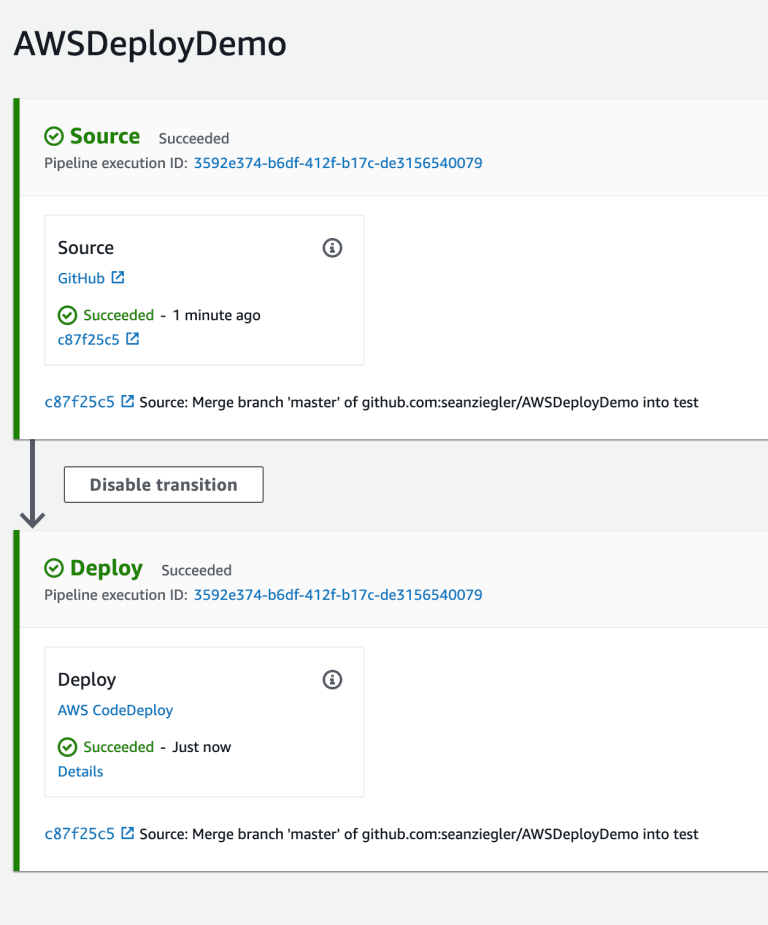
Click next and deploy the pipeline. You’ll see it try to download your source and deploy it to your test instances.
Great, we deployed to our test instances. But what about production? Click “Edit” at the top of the pipeline page. And then click “Edit” on each stage of the pipeline. From here, you can add another source and deploy action for the master branch and production deployment group.
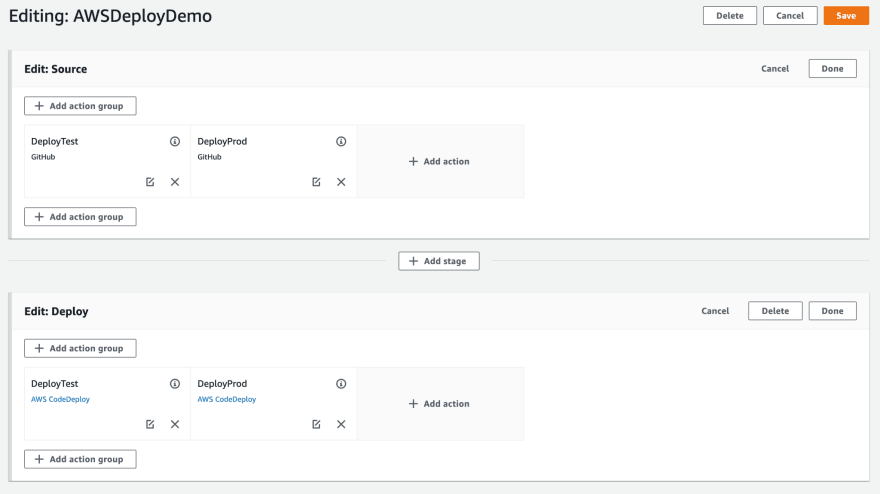
When you click save, your pipeline will deploy the test branch to the test deployment group and the master branch to the production deployment group.
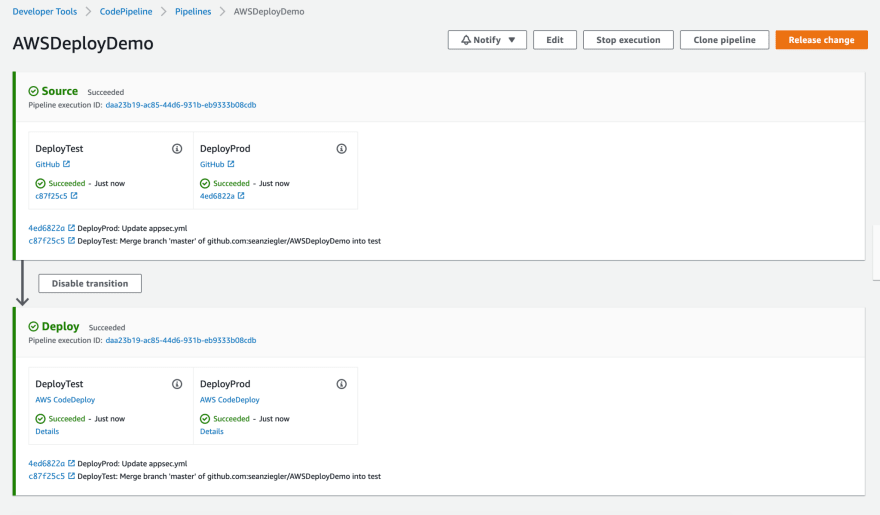
Now, let’s just check and see if the deployments worked. First, let’s check the test instance.
ssh ec2-user@test-instance

Last login: Sun Apr 26 16:00:02 2020 from <IP>

       __|  __|_  )
       _|  (     /   Amazon Linux 2 AMI
      ___|\___|___|

https://aws.amazon.com/amazon-linux-2/

[ec2-user@test-instance ~]$ cat /demo.txt
This is test
Next, check the production instance.
ssh ec2-user@prod-instance

Last login: Sun Apr 26 16:00:02 2020 from <IP>

       __|  __|_  )
       _|  (     /   Amazon Linux 2 AMI
      ___|\___|___|

https://aws.amazon.com/amazon-linux-2/

[ec2-user@prod-instance ~]$ cat /demo.txt
This is prod
Awesome! Just what was expected. Your pipeline is setup and ready to go.
Customising the deployment.
There are several ways you can customize your pipeline.
appspec.yml
For one thing, you’ll want to start with building out an appspec.yml file that reflects the structure of your application. Copy over all the files you need, run scripts to setup dependencies, etc.
AMI
Make a custom AMI for the instances in each of your group. Include any dependencies your code needs to run (and the codedeploy-agent) in the AMI rather than installing it every deployment. This will increase the relability and speed of your deployments.
Autoscaling groups
Instead of creating deployment groups with specific EC2 instances identified, consider deploying to autoscaling groups instead so you can apply scale-in and scale-out rules.

Top comments (0)