INTRODUCTION
Devise is an effective authentication gem for Ruby on Rails that makes it easier to integrate user authentication into your online applications. Numerous functions are offered, such as session management, third-party sign-in, password reset capability, and others. By providing pre-built modules and functions that are simple to incorporate into your Rails applications, Devise streamlines the process rather than requiring you to construct these features from scratch.
COMPONENTS OF DEVISE
Devise has a rich actionable pact composed of 10 modules:
- Database Authenticatable: hashes and stores a password in the database to validate the authenticity of a user while signing in. The authentication can be done both through POST requests or HTTP Basic Authentication.
- Omniauthable: adds OmniAuth support.
- Confirmable: sends emails with confirmation instructions and verifies whether an account is already confirmed during sign in.
- Recoverable: resets the user password and sends reset instructions.
- Registerable: handles signing up users through a registration process, also allowing them to edit and destroy their account.
- Rememberable: manages generating and clearing a token for remembering the user from a saved cookie.
- Trackable: tracks sign in count, timestamps and IP address.
- Timeoutable: expires sessions that have not been active in a specified period of time.
- Validatable: provides validations of email and password. It's optional and can be customized, so you're able to define your own validations.
- Lockable: locks an account after a specified number of failed sign-in attempts. Can unlock via email or after a specified time period.
Devise, an exceptionally thorough gem, does the majority of the authentication chores on your behalf. Even if you're thinking about implementing highly specialised features, Devise can still manage a sizable chunk of the effort involved because it maintains all crucial authentication processes.
STEPS:
Making a New Rails Application is the first step.
rails new device-sample
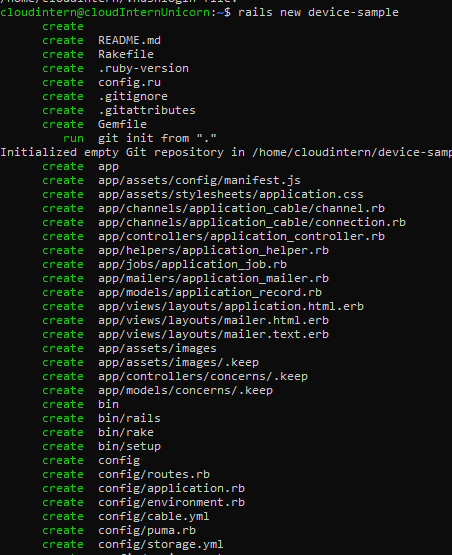
A new Rails project with a number of generated files and folders will be created under the directory device-sample by the rails new command.
Insert devise into the gemfile as the next step
gem 'devise'
Run bundle install from your terminal after that.
bundle install
In Ruby on Rails applications, the command "bundle install" is used to install each of the required gems (libraries) listed in the project's Gemfile. This command resolves dependencies, downloads and installs the requested gems, and then verifies the Gemfile for the necessary gems and their versions. It guarantees that your project has all the dependencies needed to function properly.
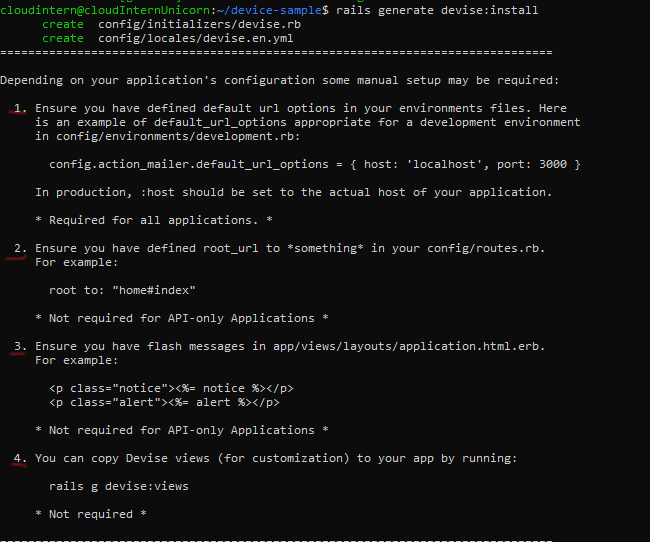
Next step is to run the command to install devise to the project
$ rails generate devise:install
Lets go over some of the instructions signalled above:
-
Default URL: Use the
config.action_mailer.default_url_optionsparameter to define default URL options in your environment files. For instance, update the host and port in config/environments/development.rb to the real host in production. -
Root URL: Create a root URL by specifying it in your config/routes.rb file, unless you're developing an API-only service. Use root to:
"home#index"as an example to establish your root URL. -
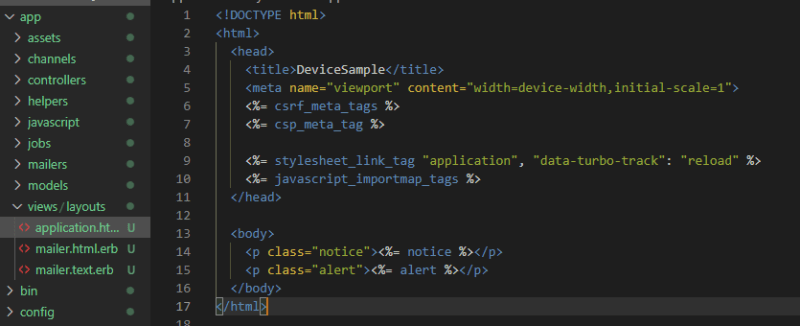
Flash Messages Setup: To improve user experience, incorporate flash messages into your application's layout (often located in app/views/layouts/application.html.erb). Include
p class="notice">%= notice%> and p class="alert">%= alert%>in your text.
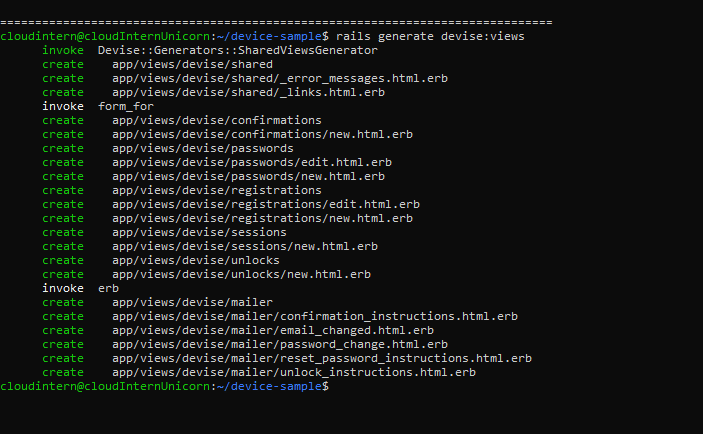
Next we generate view for our application where the login will be
rails generate devise:views
Great! We can now generate our model. You can call your devise model whatever you want, I will call it "User". It's a generic name understandable by anyone. Let's run the command now.
$ rails generate devise User
opening the migration file (db/migrate/2........_devise_create_users.rb) to review the default code:
Here, you can uncomment the fields you want to use, for example, if you want to be able to confirm your users sending them an email, you can uncomment the four lines below # Confirmable. The devise gem will do the rest (plus some configuration of your own you will have to investigate, as it's not going to be covered in this tutorial).
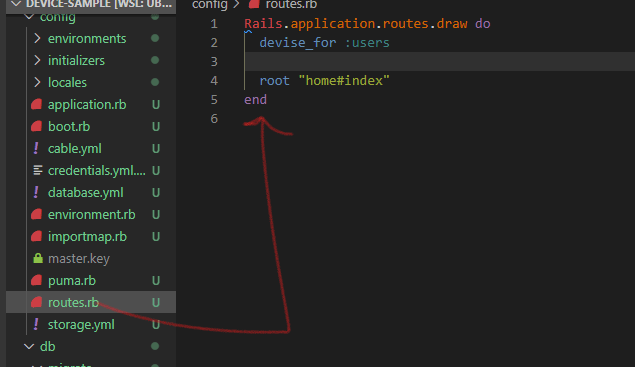
Next step is adding a route
After reviewing the Devise-generated files and configuration, you may use the following command to execute the migration you created at the beginning of this step:
$ rails db:migrate
Or you can also write:

$ rake db:migrate
** Finally lets run the server**
$ rails server
You've successfully learned how to install devise in your apps, add models using devise, add fields to those models, and modify devise's views. The remaining portions of your web application may now be completed.
Thank you for reading!






Top comments (2)
Good tutorial. For those that don't want to implement it themselves, all of this basic Devise configuration is part of my Business Class SaaS template.
Looks really good @strzibny. I'll follow you up🤗