
The Fruit Cart project was born from one three-hour training course, the desire to create an entire application strictly test-driven development (TDD) style, and, well, Jeff. Jeff is my pair for this project. It's his little blueberry.

In this series, I'm going to be walking through our process of creating a SPA using ReactJS that fetches info from a Java/Spring Boot API and Postgres database. It's entirely test-driven: our tests write our code and take just as much primacy in the process as functionality. We'll be using JUnit with the Hamcrest library, Jest with Enzyme, and (eventually) Selenium.
Now it's not my intention to create a tutorial that can be repeated step-by-step. My aim is to reflect on the process and reinforce what I'm learning. For instance, what were the pain points? What did we have to research? Which resources were valuable and why? Where were their pain points? What do we wish we had?
So here's where we started:
Inception

I'm a fairly organized person, so I like to know what I need to do, when I need to do it, and why I need to do it. Otherwise I find myself in what I call a "code hole": an internet wormhole composed of nothing but docs, Stack Overflow posts, Baeldung pages, and DZone tutorials. By the time I emerge, I frequently have lost sight of what I was researching in the first place.

To avoid a code hole, we split our very basic CRUD cart into user stories. It's an easy way to task out what, exactly, we want to happen.
We ended up with 5 stories detailing the 7 RESTful routes (index, show, new, create, edit, update, destroy), 1 story for navigation, and 2 cards related to image uploads. Here's an overview of what we want the user to do on the cart:
When a user reaches the landing page and there are fruits in the
database, they should see a list (name, description) of all those
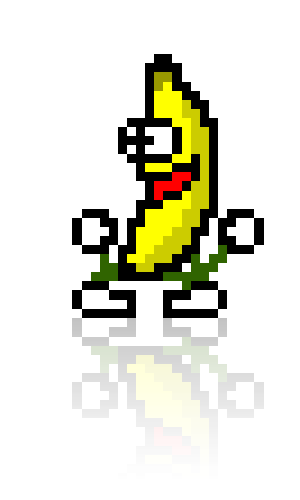
fruits. Otherwise, if there are no fruits, they see the Banana Man and
are prompted to add a fruit.
The user should also see a navbar with "Add Fruit" and "Home" as
options; the navbar will be visible on any "page" in the Fruit Cart
app. Each fruit description and name is a link that routes users to
the show page for that particular fruit (see #4 below).
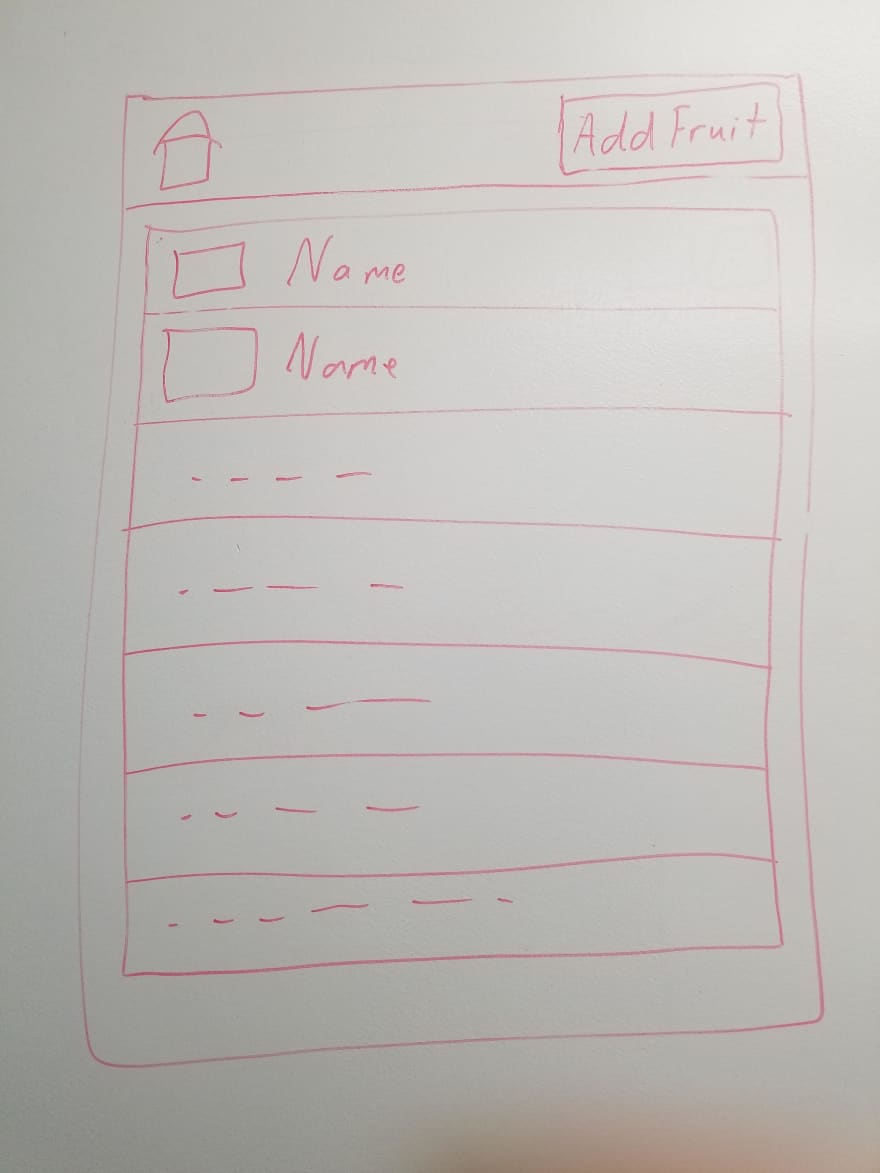
When the user clicks on the "Add Fruit" message or "Add Fruit" option
in the navbar, it takes them to a form with name and description
fields with the save button.
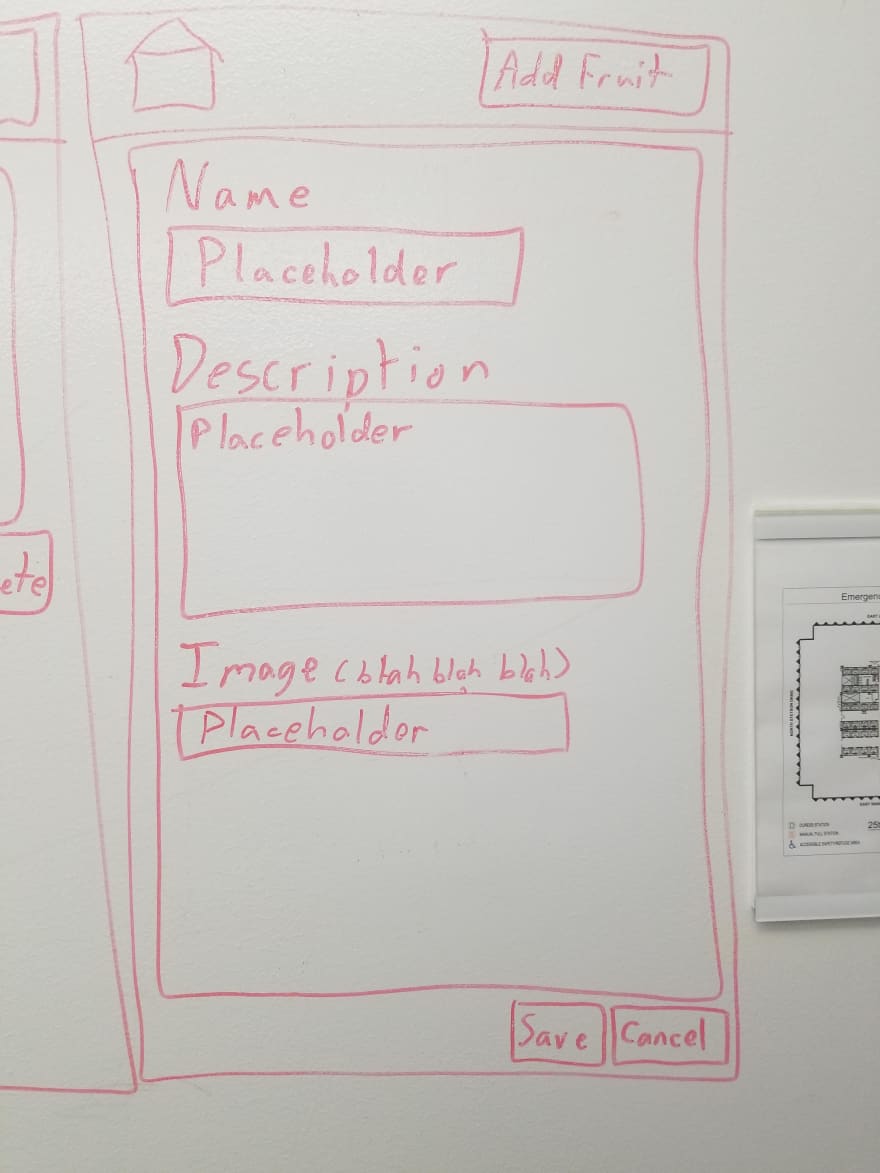
Upon submission of a completed fruit form (i.e. when the user clicks
"save"), the fruit is created, and the user is taken to the show page
for that fruit.
The show page displays the name and description of the fruit, as well
as a button to edit the fruit.
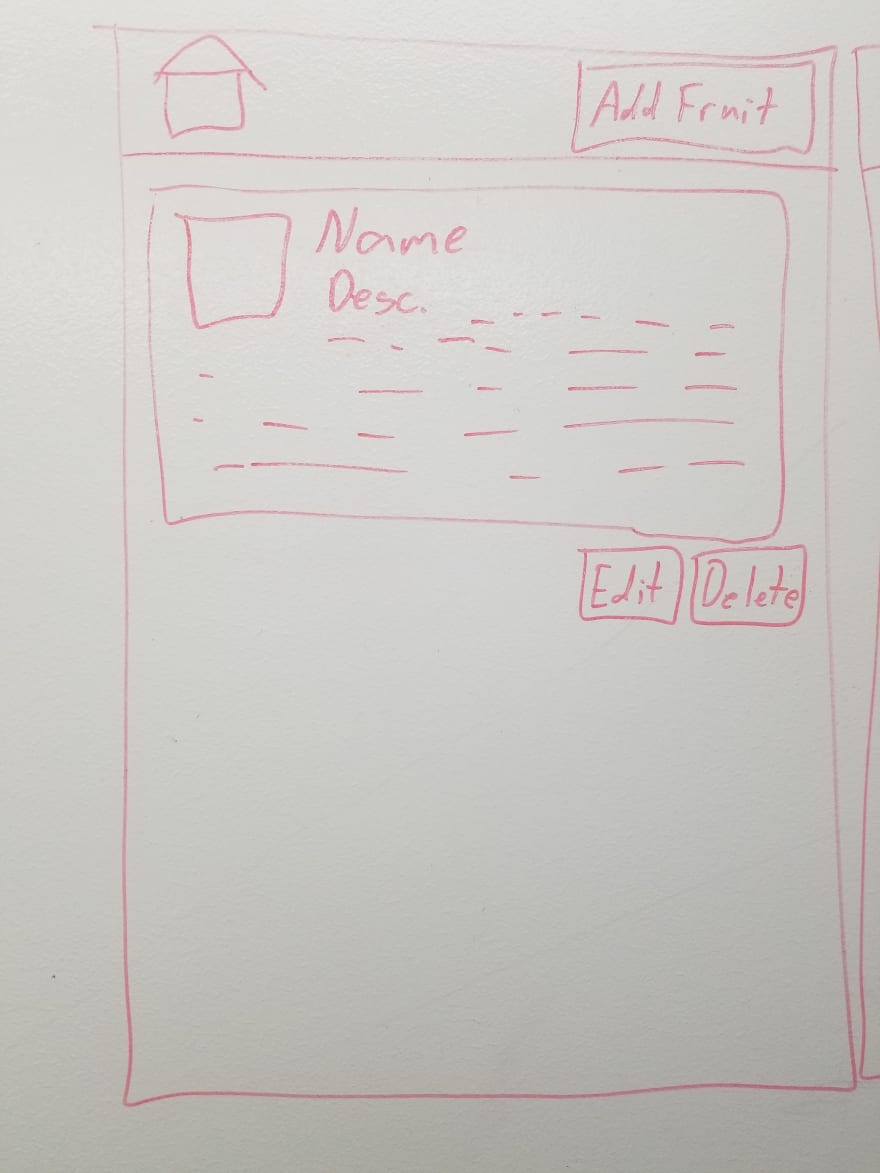
When the user clicks the "edit" button, they are directed to the edit
form with pre-filled information in the name and description fields.
They edit, then submit the form to update the fruit. They are then
redirected to the newly-updated show page for the fruit they just
edited. If they were to click on the home link in the navbar, they
would be redirected to the landing page, now with any new or updated
fruits they have created.
And that's it! Additional functionality will include the ability to upload and insert images, but that's likely for version 2.0.
Now it's not super complicated; there's no log in or log out functionality or social media aspect, but that's not the point. The basics are the point: TDD and RESTful APIs, small React components and minimal dependencies, Java and Spring Boot. The experience is the point.
Next up: Landing page! Let's see all those beautiful fruits. 🍉 🍌🍎 🍍 🍒

Top comments (0)