
Quadri Sheriff, aspiring technical writer, software programmer and Amir Tadrisi, fullstack engineer who love the challenges of working with cutting-edge technologies wrote great articles; Implementing Previews with Next Applications using a Strapi backend & How to use Image and preview in your Nextjs - Strapi blog about using the preview system of Next.js with Strapi.
I'm taking this opportunity to thank them because this use case is very requested and their articles answer to a lot of questions. I want to emphasize that this type of contribution is very important for the Strapi community and if you wish to be part of it, I invite you to join our Write for the Community Program.
This (very) short article will be a complement to what Quadri and Amir wrote. You'll see how to implement a preview button directly in the Strapi admin. Great isn't it?

Customization
As you must surely know, Strapi is completely open-source. If you want to include a button in your Content Manager that generates a random GIF, know that it is absolutely possible. Simply create your component and inject it into the admin.
Injecting a component is exactly what we're going to do here.
Attention, this tutorial is based on the v3 of Strapi. A version of this tutorial for the v4 version will be mentioned at the top of the page when it will be available.
As mentioned earlier I'm going to assume that you already have a preview system on your favorite front-end framework like Next.js that requires a specific preview URL like this:
http://localhost:3000/api/preview?secret=fdsfasdmgrNPQXtfdsfMswfdsfdsfasdkjfow&slug=pricing](http://localhost:3000/api/preview?secret=fdsfasdmgrNPQXtfdsfMswfdsfdsfasdkjfow&slug=pricing&lang=en&type=page
We'll simply create a button in the Content-Manager that will build this URL based on your collection-type.

Extensions
The /extensions folder contains all the plugins customizable files. Find more information on the dedicated documentation page.
You should have a content-manager folder like below:

- Create a
./extensions/content-manager/admin/src/index.jsfile containing the following:
import pluginPkg from '../../package.json';
import pluginId from './pluginId';
import pluginLogo from './assets/images/logo.svg';
import App from './containers/Main';
import ExternalLink from './InjectedComponents/ExternalLink';
import ConfigureViewButton from './InjectedComponents/ContentTypeBuilder/ConfigureViewButton';
import lifecycles from './lifecycles';
import reducers from './reducers';
import trads from './translations';

export default (strapi) => {
  const pluginDescription = pluginPkg.strapi.description || pluginPkg.description;
  const plugin = {
    blockerComponent: null,
    blockerComponentProps: {},
    description: pluginDescription,
    icon: pluginPkg.strapi.icon,
    id: pluginId,
    initializer: null,
    injectedComponents: [
      {
        plugin: 'content-type-builder.listView',
        area: 'list.link',
        component: ConfigureViewButton,
        key: 'content-manager.link',
      },
      // This is the injection zone
      {
        plugin: 'content-manager.editView',
        area: 'right.links',
        component: ExternalLink,
        key: 'content-manager.preview-link',
      },
    ],
    injectionZones: {
      editView: { informations: [] },
      listView: { actions: [], deleteModalAdditionalInfos: [] },
    },
    isReady: true,
    isRequired: pluginPkg.strapi.required || false,
    layout: null,
    lifecycles,
    mainComponent: App,
    name: pluginPkg.strapi.name,
    pluginLogo,
    preventComponentRendering: false,
    reducers,
    trads,
  };

  return strapi.registerPlugin(plugin);
};
This file will simply allows you to inject a custom component that you will create just after. This component, you are already importing it:
import ExternalLink from './InjectedComponents/ExternalLink';
And then you inject it:
injectedComponents: [
  {
    plugin: 'content-type-builder.listView',
    area: 'list.link',
    component: ConfigureViewButton,
    key: 'content-manager.link',
  },
  // This is the injection zone
  {
    plugin: 'content-manager.editView',
    area: 'right.links',
    component: ExternalLink,
    key: 'content-manager.preview-link',
  },
],
Find more information about it on our documentation.
- Create a
./extensions/content-manager/admin/src/InjectedComponents/ExternalLink/index.jsfile containing the following:
import React from 'react';
import styled from 'styled-components';
import { useContentManagerEditViewDataManager } from 'strapi-helper-plugin';
import EyeIcon from './view.svg';

const StyledExternalLink = styled.a`
  display: block;
  color: #333740;
  width: 100%;
  text-decoration: none;
  span,
  i,
  svg {
    color: #333740;
    width: 13px;
    height: 12px;
    margin-right: 10px;
    vertical-align: 0;
  }
  span {
    font-size: 13px;
  }
  i {
    display: inline-block;
    background-image: url(${EyeIcon});
    background-size: contain;
  }
  &:hover {
    text-decoration: none;
    span,
    i,
    svg {
      color: #007eff;
    }
  }
`;

const ExternalLink = () => {
  const { modifiedData, layout } = useContentManagerEditViewDataManager();

  if (modifiedData.published_at) {
    return null;
  }

  if (!modifiedData.slug) {
    return null;
  }

  if (!CLIENT_URL || !CLIENT_PREVIEW_SECRET) {
    return null;
  }

  return (
    <li>
      <StyledExternalLink
        href={`${CLIENT_URL}/api/preview?secret=${CLIENT_PREVIEW_SECRET}&slug=${modifiedData.slug}&locale=${modifiedData.locale}&apiID=${layout.apiID}&kind=${layout.kind}`}
        target="_blank"
        rel="noopener noreferrer"
        title="page preview"
      >
        <i />
        Preview
      </StyledExternalLink>
    </li>
  );
};

export default ExternalLink;
There is quite some stuff to explain here. The first one is that you import an SVG eye icon for the button.
- Create a
./extensions/content-manager/admin/src/InjectedComponents/ExternalLink/view.svgfile containing the following:
<svg xmlns="http://www.w3.org/2000/svg" height="24" viewBox="0 0 24 24" width="24"><path d="M0 0h24v24H0z" fill="none"/><path d="M12 4.5C7 4.5 2.73 7.61 1 12c1.73 4.39 6 7.5 11 7.5s9.27-3.11 11-7.5c-1.73-4.39-6-7.5-11-7.5zM12 17c-2.76 0-5-2.24-5-5s2.24-5 5-5 5 2.24 5 5-2.24 5-5 5zm0-8c-1.66 0-3 1.34-3 3s1.34 3 3 3 3-1.34 3-3-1.34-3-3-3z"/></svg>
Now let's focus on this:
const ExternalLink = () => {
  const { modifiedData, layout } = useContentManagerEditViewDataManager();

  if (modifiedData.published_at) {
    return null;
  }

  if (!modifiedData.slug) {
    return null;
  }

  if (!CLIENT_URL || !CLIENT_PREVIEW_SECRET) {
    return null;
  }

  return (
    <li>
      <StyledExternalLink
        href={`${CLIENT_URL}/api/preview?secret=${CLIENT_PREVIEW_SECRET}&slug=${modifiedData.slug}&locale=${modifiedData.locale}&apiID=${layout.apiID}&kind=${layout.kind}`}
        target="_blank"
        rel="noopener noreferrer"
        title="page preview"
      >
        <i />
        Preview
      </StyledExternalLink>
    </li>
  );
};
This is the code that is implemented on FoodAdvisor, our live demo which has a Next.js front-end. First of all we get modifiedData and layout from useContentManagerEditViewDataManager hook. The first is an object containing your entry data, and the second has more interesting information about your entry (apiID, kind of content-type, metadatas etc...)
We do nothing if the content is already published, if there is no slug field or if the necessary env variables don't exist. In fact we only want to show the preview button when the content has not been published yet. Also, if it doesn't contains a slug or the necessary env variables, it means that you will not be able to preview it on your front-end.
if (modifiedData.published_at) {
  return null;
}

if (!modifiedData.slug) {
  return null;
}

if (!CLIENT_URL || !CLIENT_PREVIEW_SECRET) {
  return null;
}
Then if there is no problem, we simply render the button in the edit view of your content-manager:
return (
    <li>
      <StyledExternalLink
        href={`${CLIENT_URL}/api/preview?secret=${CLIENT_PREVIEW_SECRET}&slug=${modifiedData.slug}&locale=${modifiedData.locale}&apiID=${layout.apiID}&kind=${layout.kind}`}
        target="_blank"
        rel="noopener noreferrer"
        title="page preview"
      >
        <i />
        Preview
      </StyledExternalLink>
    </li>
  );
Please take a moment to see how the url is built:
`${CLIENT_URL}/api/preview?secret=${CLIENT_PREVIEW_SECRET}&slug=${modifiedData.slug}`
Nothing really complicated here, I simply take the url of your client application and I append the right path (here for Next.js): /api/preview?secret=xxx&slug=xxx
You probably already have the file in your Next.js application that will handle this call. To give you an idea, this is what we do on FoodAdvisor:
// ./pages/api/preview.js

import { getData } from '../../utils';

export default async (req, res) => {
  if (
    req.query.secret !== process.env.PREVIEW_SECRET ||
    (req.query.slug != '' && !req.query.slug)
  ) {
    return res.status(401).json({ message: 'Invalid token' });
  }

  const previewData = await getData(
    req.query.slug,
    req.query.locale,
    req.query.apiID,
    req.query.kind,
    null
  );

  if (!previewData.data) {
    return res.status(401).json({ message: 'Invalid slug' });
  }
  res.setPreviewData({});

  res.writeHead(307, {
    Location: previewData.slug,
  });

  res.end();
};
For our demo I needed to have more information concerning the data I want to preview for more flexibility such as the locale, the apiID and the kind of content-types. I can do that by simply adding more params to my url:
`${CLIENT_URL}/api/preview?secret=${CLIENT_PREVIEW_SECRET}&slug=${modifiedData.slug}&locale=${modifiedData.locale}&apiID=${layout.apiID}&kind=${layout.kind}`
This is why I needed to have the layout object but you can remove it if you don't need it. I will not detail why I needed these fields in this article but feel free to check the source code of FoodAdvisor to better understand my approach:
Well, there is nothing else to do! You can build your admin, run your server and preview your content!
- Build your admin with the following command:
yarn build --clean
- Restart your server
yarn develop
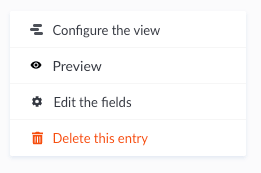
Now, after creating an entry or by just filling the slug field, you are able to see a preview button on the right on your Content Manager.
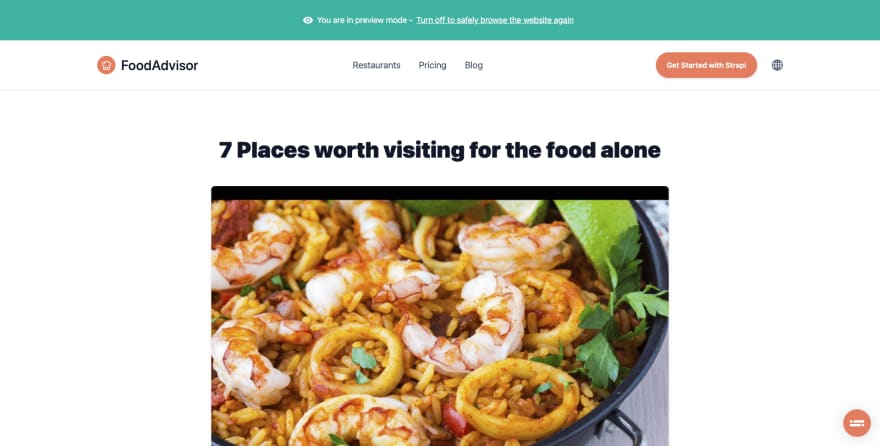
This is what it will look like on the FoodAdvisor front-end:
Conclusion
Customizing Strapi can be very easy. We only created 3 files here, and one of them is an .svg!
Strapi doesn't provide a native preview feature since it is a headless CMS but by being open-source, it gives you the freedom and flexibility to adapt it for the needs of your front-end application.
This probably was the easiest implementation of a preview you can do in the admin. I challenge you to go further by creating a component that will directly display the front-end application previews in the Content Manager!
See you in a next article!


Top comments (0)