
Welcome to the first part of building an e-commerce website with Jekyll, Strapi, Snipcart, and Tailwind CSS series. In this tutorial series, we are going to build an Ecommerce store. After completing the tutorial series, you should have a website that looks like this.
Below is a preview of the project we will be building in this article and here are the links to the final source code Frontend repository & the Backend repository

Introduction
Strapi:
Strapi is the world-leading node.js open-source headless CMS. Strapi simplifies our development process, making it easier to access our content by providing us fast and secure APIs built in an efficient and scalable manner.
Jekyll:
Jekyll is a simple blog-aware static site generator used for creating personal websites, blogs, documentation websites, corporate websites, etc.
Jekyll was built with the Ruby programming language, and it uses the liquid templating engine as its templating engine. Jekyll is also the engine powering GitHub pages.
TailwindCSS:
Tailwind is a utility-first CSS framework for rapidly building custom user interfaces. By using Tailwind, we can write our css directly in our HTML classes. This leads to faster development time since writing CSS this way is much easier.
Snipcart:
Snipcart is an easy-to-implement shopping cart platform. With Snipcart, you can create a seamless online buying experience no matter your web stack with just 2 lines of code.
Prerequisites
To complete this tutorial series, you need to have:
Ruby, RubyGem, and Bundler installed locally - Visit the installation page for instructions on installing Ruby, RubyGem, and Bundler on your local machine.
Node.js and NPM installed locally - Visit this article from Teamtreehouse for instructions on installing Node.js and NPM on your local machine.
Git installed locally and GitHub account - Follow the instructions here to install Git on your local machine. Create a GitHub account here.
Project Setup
Strapi installation
The first step in our tutorial will be to install and set up Strapi as our headless CMS.
Note - Make sure Node.js and NPM are fully installed before running this step.
Create a new project with the following command.
npx create-strapi-app my-project
Change my-project to the preferred name of your project. Select Quickstart and select n when asked for a configuration template.
Wait for the complete installation. You will be redirected to http://localhost:1337/admin, where you will be prompted to register your details.
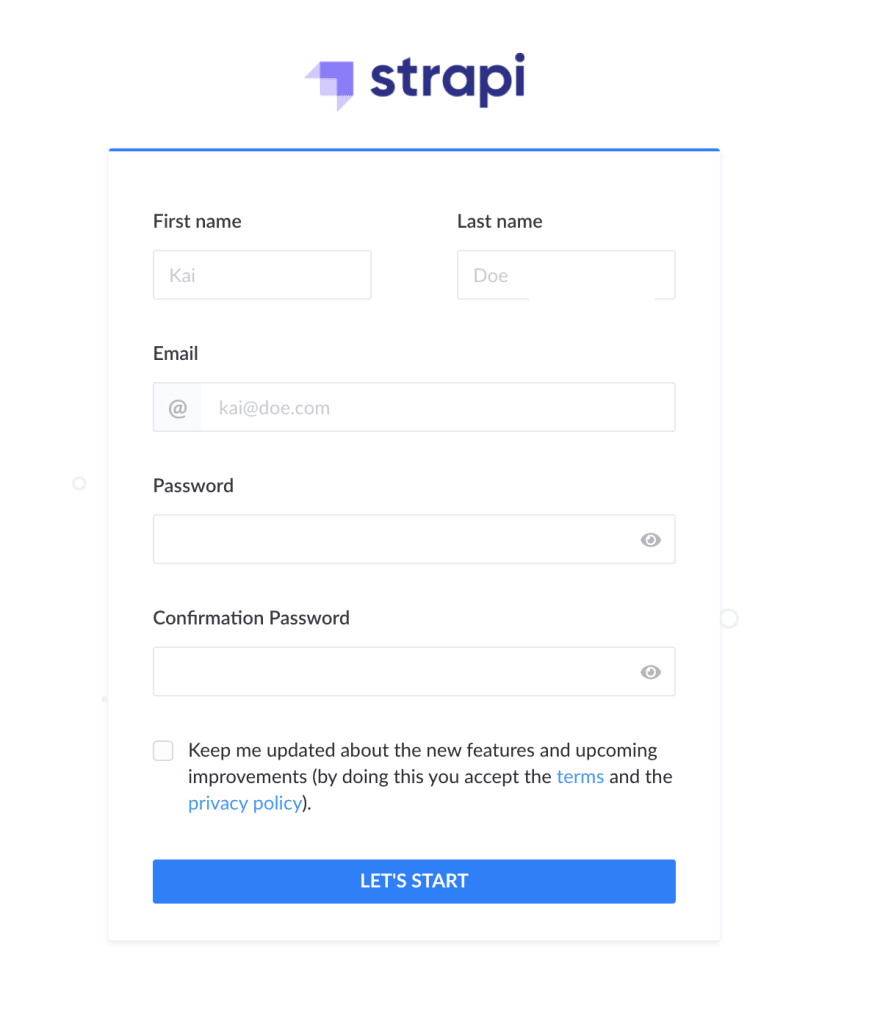
Add your details and click LET’S START access the Strapi dashboard.
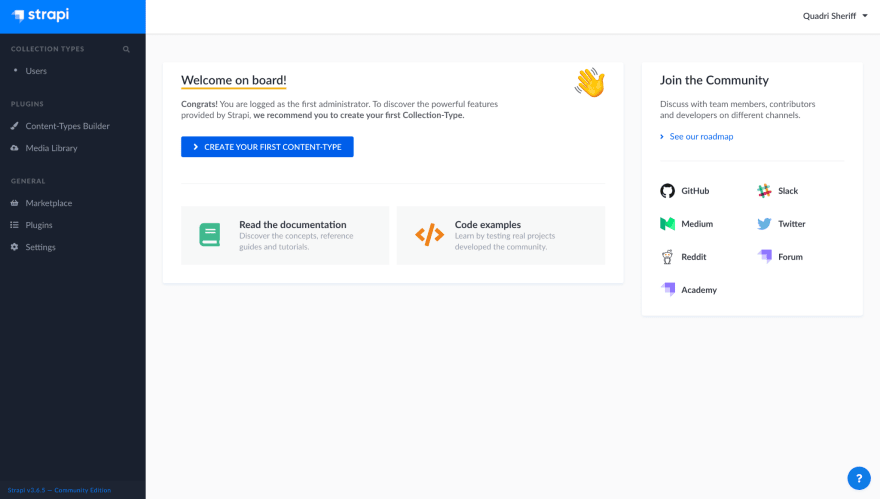
Also, we will add a folder with the project name to the root directory of your computer. Open the folder in your preferred code editor to access the backend code and configurations.
Jekyll and Tailwind CSS installation and setup
We will be using Jekyll as our preferred static site generator for this tutorial. Jekyll is a simple blog-aware static site generator used for building blogs, personal websites, corporate websites, documentation websites, etc.
Note - Make sure Ruby, Ruby gems, and Bundler are fully installed before running this step.
Jekyll Installation
The first step in the frontend setup will be to install Jekyll locally on your computer.
For mac installation, run.
sudo gem install bundler jekyll
For windows installation, run.
gem install jekyll bundler
Visit the Jekyll installation page for more information on installing Jekyll on your local computer.
Adding Tailwind CSS to Jekyll
For this guide, we will be using the Jekyll starter styled with Tailwind CSS template.
This template has Tailwind CSS ultimately set up with Jekyll, making our development journey more accessible and faster. To set up the starter project, navigate to the Tailwind starter GitHub repository on your browser.
Click Use this template on the top right part of the repository.

You will be directed to the Create a repository page.

Add your project name as the Repository Name, and Click Create repository from the template to create a new repository with the template.
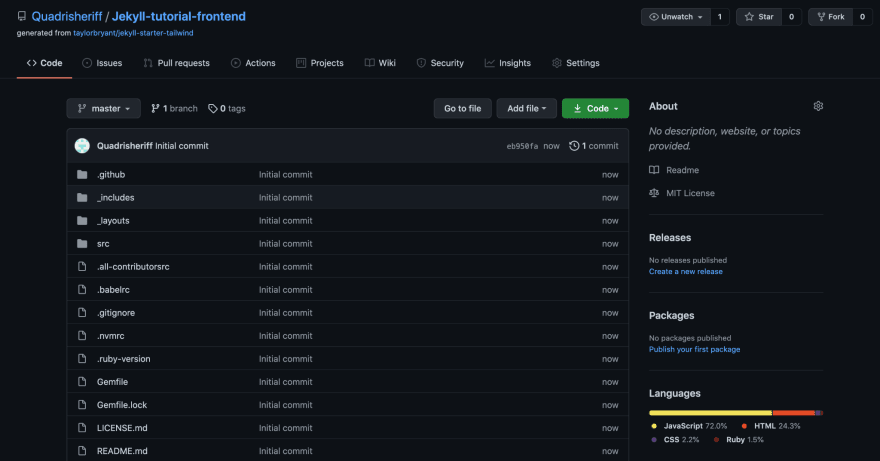
Clone the newly created repository. Navigate to the cloned repository, and run bundle install to install all the required gems.
Run npm ci to install the required NPM packages in the project’s package.lock.json file, and run npm run dev to start the Jekyll development server.
You will be redirected to http://localhost:4000/, where the development server is hosted. The page should look like this -

Backend Setup
Creating the Product collection types
The next thing to do is to add our products to the backend. Navigate to your backend repository and start the backend with npm run develop. We are using npm run develop instead of npm run start because we will be making changes to the server collection types.
Login to your dashboard, navigate to Content-Types Builder and click create new collection type. Set the display name to Product and add the following fields to the collection type:
- name(Text(Short text))
- price(Number(float))
- description(Text(Long text))
- image(Media(single media))
- images(Media(multiple media))
- videos(Media(multiple media))
- additional_information(Text(Long text))
Click Save to register your changes and restart the server.
Adding Slug to the Product collection type
Next, we will be adding a dynamic autogenerated slug system to the Product collection type. Using a slug will make it easier to query for our products in the frontend.
First, navigate to Content-Types Builder and click Product, then click Add another field. Select UID. Set the field slug, and set the attached field to name. Save your changes and click Configure the view, and select the slug field. Then, set the Editable field off in the window that appears. Click Save to register your changes.
With the slug system fully set up, a new slug will be automatically generated in an uneditable slug field anytime you create a new product. The Slug will be created from the product name.
Adding products to our backend
Now that we are done creating our collection types, we need to add products to our backend. On the Strapi dashboard, click Products under COLLECTION TYPES to navigate to the product page.
Select Add New Products to create new products. You will be directed to the create an entry page.
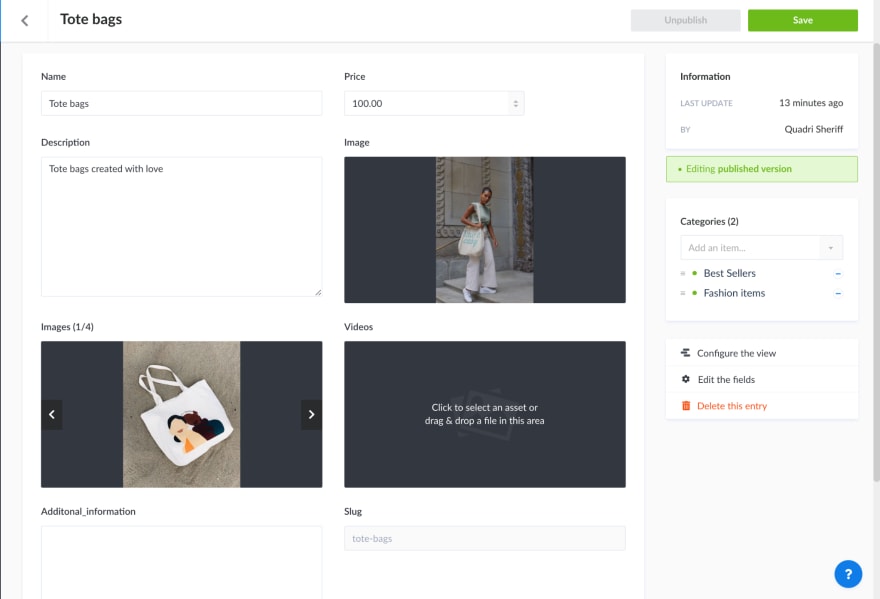
Make sure to add many products to your backend before moving to the next step in this tutorial. After adding a product, click publish to publish the product.
Storing our products under different collections
To create different product collections, we will be storing our products in different collection types.
We won’t use single types because single type requests are not retrievable in Jekyll with the Strapi-Jekyll plugin.
To create the collection, navigate to Content-Types Builder and click create new collection type. Add your collection name as the Display name, and add the following fields to the collection type:
- products(Text(Short text))
To connect products to a collection, select the collection and click Add another field. Select Relation, select product on the left menu, and set the relation field to The collection name has and belongs to many products, ie.

Click Save to register your changes. For this tutorial, I will be using four product collections:
- BestSellers
- Gadgets
- Fashion items
- Weekend deals
Please make sure to create these product collections as they will be needed going forward.
Adding products to your collections
To add your products to your collections, click the collection name under COLLECTION TYPES to navigate to the collection’s page. Click Add new Collection name.
Click the Product dropdown menu on the left side of the page to reveal your products, and select the products you want to add to the collection.

Click Save to register your changes and Publish to publish the collection.
Allowing access to our backend
The last step in our backend setup is to allow access to our backend by editing user roles and permissions. This is done to enable our frontend to access our backend without the need for a token.
To do this, navigate settings on the Strapi dashboard. Click Roles under USERS AND PERMISSIONS PLUGIN and select Public. Tick finds and findone for all collection types and click Save to register your changes.
By setting the find and findone permissions, a user will make GET requests for each collection type from any medium without the server asking for any authorization.
Conclusion
The backend setup for this part of our tutorial series is complete. You can now add products and categories to the backend. In the next part of this tutorial series, we will start implementing our frontend and create a layout for our eCommerce website.
Make sure to add plenty of products to your backend before moving to the next part of the tutorial series.
In the first part of the series, we completed our backend setup and our frontend installation. In the second part, we created the default layout of our eCommerce website. We added the homepage in the third part of the series, and we implemented the product catalog and single product views in the fourth part and final in the fifth part we will add a cart functionality to our website with Snipcart

Top comments (0)