
If you use any kind of web or mobile application, you may have come across a data table that lets you view data by breaking it up into multiple pages. In the world of software development, this is known as pagination.
Pagination is an optimization technique that is used both on the frontend and backend to enhance the performance of your applications. With pagination, you can skip to the desired page and view the results for that particular page without loading any additional data. In this tutorial, you’ll learn how to work with Strapi for the backend and implement the pagination controls UI by building the frontend in Svelte.
Strapi is a headless CMS (content management system) for Node.js to build and develop APIs. It’s free and open-source, and lets you customize its behavior according to your needs.
To build the frontend, you’ll use SvelteKit, which is a framework for building web applications of all sizes. It gives you the best frontend and backend capabilities in a single-page application.
The entire source code for the tutorial is available in this GitHub repo.
What is Pagination?
As mentioned above, pagination is an optimization technique that is used to enhance the performance of your applications. For instance, if you have a huge blog that contains more than ten thousand articles, you’ll have an API that delivers that data to your frontend application.
If you try to fetch and send all the articles at once, you may run into bandwidth issues, latency issues, slow server response times, and memory-related issues. Even if you’re successful in sending all the articles, you may experience issues on the frontend, like a slow-response browser freeze, since you have to render tens of thousands of records on the frontend. In short, your browser can become unresponsive.
All these issues can lead to frustrated users and revenue loss.
The best way to overcome these issues is to fetch the articles in small quantities. For example, you can fetch the first fifty articles, and then once the user reaches the end of the list, you can fetch the next fifty articles, and so on. This keeps your server and client-side performant and provides a positive user experience. This whole process is pagination.
Pagination Types
Generally, there are two ways you can implement pagination:
Offset-Based Pagination
In offset-based pagination, the following two inputs are used to slice the data from the database:
- Start is used to specify the index from where the records are fetched.
- Limit is used to specify the number of records to fetch.
Cursor-Based Pagination
In cursor-based pagination, the limit and cursor inputs are used to slice the data from the database:
- Limit is used to specify the number of records on each page.
- Cursor is used to specify the number of records to skip before fetching the records and is used in combination with the limit input.
Prerequisites
To follow along with this tutorial, you’ll need the following installed:
- Node.js: this tutorial uses Node v14.19.0.
- Strapi: this tutorial uses Strapi v4.1.0.
-
SvelteKit: this tutorial uses the
nextversion of SvelteKit.
Project Setup
To set up the project, you’ll need a master directory that holds the code for both the frontend (Svelte) and backend (Strapi). To begin, open up your terminal, navigate to a path of your choice, and create a project directory by running the following command:
mkdir strapi-svelte-pagination
In the strapi-svelte-pagination directory, you’ll install both Strapi and Svelte projects.
Strapi v4 Setup
In your terminal, execute the following command to create the Strapi project:
npx create-strapi-app@latest backend --quickstart
This command will create a Strapi project with quickstart settings in the backend directory.
Once the execution for this command is complete, your Strapi project will start on port 1337 and open up localhost:1337/admin/auth/register-admin in your browser. At this point, set up your administrative user:

Enter your details and click the Let’s start button, and you’ll be taken to the Strapi Dashboard:
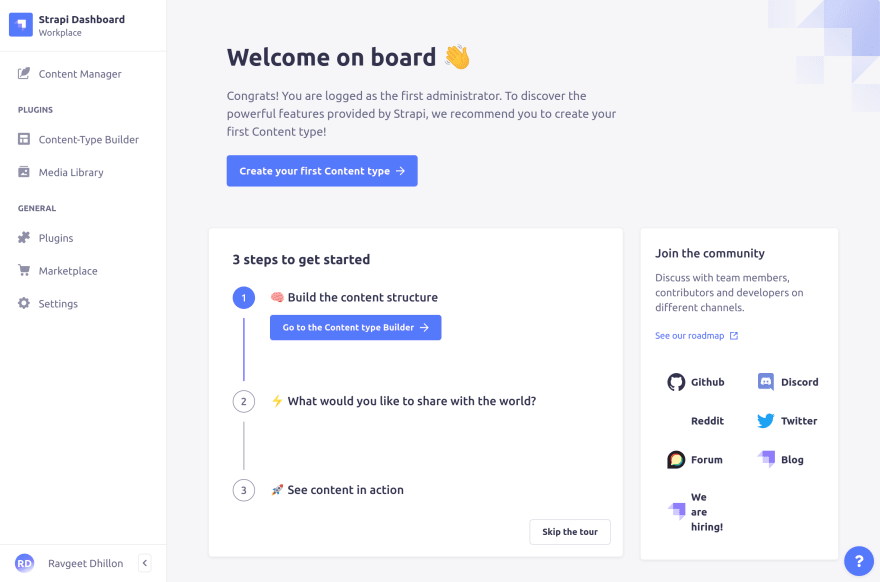
Creating the Article Collection Type
Under the Plugins header in the left sidebar, click the Content-Type Builder tab, and then click Create new collection type to create a new Strapi collection.

In the modal that appears, create a new collection type with “Article” as Display Name; then click Continue:

Next, create two fields for your collection type:
- Add a new text field named “title” and select the Short text type.

- Create a new text field named “description” and select the Long text type.

Once you’ve added all the fields, click the Finish button and select Save. It should now show you the title and description fields:

At this point, your collection type is set up, and the next thing you need to do is add some data to it.
Seeding Strapi with Articles
To effectively test out pagination, you need to add lots of records. Manually adding these records can take a lot of time, so you can write a short script to seed the Article collection type.
To begin, you need to shut down the Strapi development server and install Faker, which lets you generate massive amounts of fake (but realistic) data for testing and development. To do so, run the following command in your terminal:
npm install --save-dev @faker-js/faker
Next, create a utils directory in the src directory. Then in the utils directory, create a seed.js file and add the following code to it:
const { faker } = require("@faker-js/faker");

// 1
async function seedArticlesCollection() {
  const numberOfRecordsToCreate = 207;

  // 2
  for (let i = 0; i < numberOfRecordsToCreate; i++) {
    // 3
    await strapi.api.article.services.article.create({
      data: {
        title: faker.lorem.words(),
        description: faker.lorem.sentence(),
      },
    });
  }

  console.log(`Added ${numberOfRecordsToCreate} records`);
}

module.exports = { seedArticlesCollection };
In the above code, you define a function (seedArticlesCollection) to seed the Article collection type. You also run a for loop to create a numberOfRecordsToCreate number of records. Then you use the Strapi service to create a new article and generate the title (faker.lorem.words()) and description (faker.lorem.sentence()) using Faker.
Next, open src/index.js and add the following code to it:
"use strict";

// 1
const { seedArticlesCollection } = require("./utils/seed");

module.exports = {
  ...
  // 2
  async bootstrap() {
    await seedArticlesCollection();
  },
};
Here, you import the seedArticlesCollection function, and you call the seedArticlesCollection function in the bootstrap method that runs before your Strapi application starts.
Finally, start the Strapi development server by running the following command:
npm run develop
Once the server starts, check the console for the following message:

Next, check the Article collection type, and you should see records created there:

Now you can remove the seedArticlesCollection function call in the bootstrap method; otherwise, every time you restart the Strapi server, new records will be created.
Setting Up Permissions for Strapi Article API
Now that you’ve successfully seeded Strapi, next, you need to set up the permissions to allow access to the Strapi API. At this point, you have enough data in your Strapi CMS to test the API.
Start by opening Postman and then send a GET request to the Article API endpoint: localhost:1337/api/articles. You won’t be able to access the endpoint until you allow public access to it.

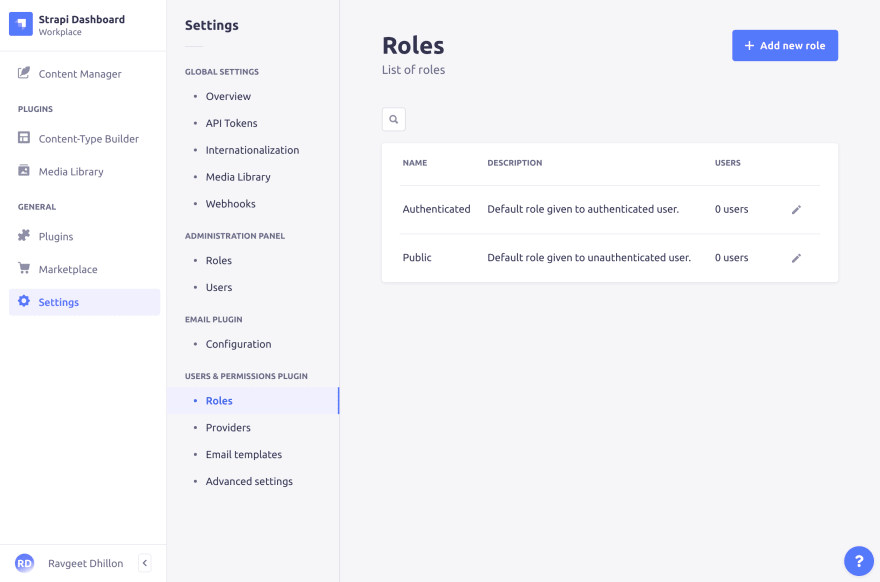
To configure the permissions for your Article content type API endpoints, click on the Settings tab under the General header, and then select Roles under the Users & Permissions Plugin. Because you want to allow public access to your articles, you need to configure the permissions related to the Public role. Click the Edit pen icon on the right of the Public role:
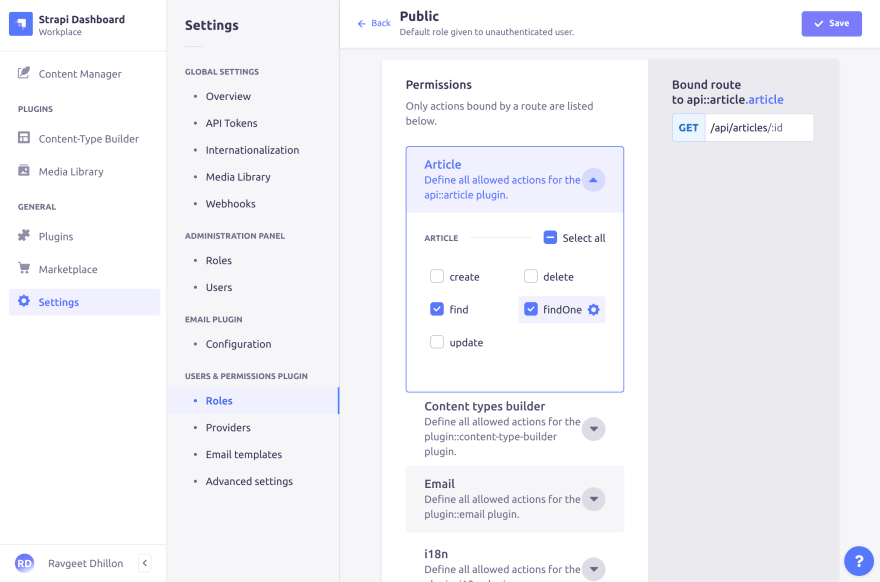
Scroll down to find the Permissions tab and check the find and findOne routes for the Article collection type. Once done, click on Save to save the updated permissions:
Navigate back to Postman and send a GET request to the localhost:1337/api/articles, and you’ll get a list of articles from Strapi:

When you scroll down in the response window, you’ll find some meta details related to pagination:

Next, send another request to the articles endpoint with pagination[page] query parameter to fetch the list of articles on page 2:

Then send another request to the articles endpoint with pagination[page] and pagination[pageSize] query parameters to fetch the list of articles on page 2 and a total of fifty items, respectively:

And that’s it. Your Strapi project is ready, and you can connect it with any kind of frontend application.
Svelte Setup
In this section, you’ll build the Svelte frontend application and connect it to the Strapi backend.
Since your current terminal window is serving the Strapi project, open another terminal window and execute the following command to create a Svelte project:
npm init svelte@next frontend
On the terminal, you’ll be asked some questions about your Svelte project. For this tutorial, choose the options highlighted below:

Once you’ve answered all the questions, Svelte CLI will install some initial dependencies. Once this installation process is complete, navigate into the frontend directory and install all the remaining dependencies by running the following commands:
  cd frontend
  npm install
When the installation is finished, run the following command to start the Svelte development server:
npm run dev -- --open
This will start the development server on port 3000 and take you to localhost:3000. Your first view of the Svelte website will look like this:

Installing NPM Packages
For your Svelte application, you need the following two NPM packages:
- axios: this lets you work with HTTP requests.
- qs: this lets you parse and stringify the query strings with some added security.
Begin by shutting down the Svelte development server by pressing Control-C in your terminal; then execute the following command to install the above NPM packages:
npm install axios qs
Now, you’re ready to write code in your Svelte application to fetch articles.
Fetching Articles from Strapi
After you’ve set up the necessary packages for developing your Svelte website, you need to design an Article page. On this page, you’ll fetch the articles from the Strapi CMS and display them in the UI.
To begin, in the src/routes directory, open up index.svelte and replace the existing code with the following code:
<script>
// 1
    import { onMount } from 'svelte';
    import axios from 'axios';
    import * as qs from 'qs';

    // 2
    let stateLoading = true;
    let stateArticles = null;
    let stateMeta = null;
    let stateCurrentPageNumber = 1;
    let stateCurrentPageSize = 20;

    // 3
    async function getArticles(pageNumber, pageSize) {
        const query = qs.stringify(
            {
                pagination: {
                    page: pageNumber,
                    pageSize: pageSize
                }
            },
            {
                encodeValuesOnly: true
            }
        );
        const res = await axios.get(`http://localhost:1337/api/articles?${query}`);
        return {
            articles: res.data.data,
            meta: res.data.meta
        };
    }

    // 4
    async function updateArticlesByPage(pageNumber) {
            stateLoading = true;
            stateCurrentPageNumber = pageNumber;
        const { articles, meta } = await getArticles(stateCurrentPageNumber, stateCurrentPageSize);
        stateArticles = articles;
        stateMeta = meta;
        stateLoading = false;
    }

    // 5
    onMount(async () => {
        await updateArticlesByPage(stateCurrentPageNumber);
    });
</script>

<!-- 6 -->
<section>
    <div class="container">
        {#if stateLoading}
            <p>Loading...</p>
        {:else}
            <div>
                <h1>Strapi Articles ({stateMeta.pagination.total})</h1>

                <div class="mb-4">
                    <!-- 7 -->
                    {#each stateArticles as article}
                        <div class="mb-4">
                            <h2 class="h4">{article.id} - {article.attributes.title}</h2>
                            <p class="mb-1">{article.attributes.description}</p>
                        </div>
                    {/each}
                </div>
            </div>
        {/if}
    </div>
</section>
In the code above, you import the required NPM packages and define the state variables.
You also define the getArticles function, to which you pass the page and pageSize parameters. Then you convert those parameters to a string using the stringify method from qs. Next, it makes a GET request to the /api/articles endpoint on localhost:1337 and returns an object containing a list of articles and pagination details in the meta.
After that, you define the updateArticlesByPage function to which you pass the pageNumber parameter. This function calls the getArticles function and updates the state variables: stateArticles and stateMeta. Then you call the udpateArticlesByPage function in the onMount method, which runs when the Svelte page or component is rendered for the first time and defines the HTML template for the index page. Finally, you loop over the fetched articles and render a list of articles on the current page.
Now, save your progress and restart the Svelte development server by running the following command in your terminal:
npm run dev
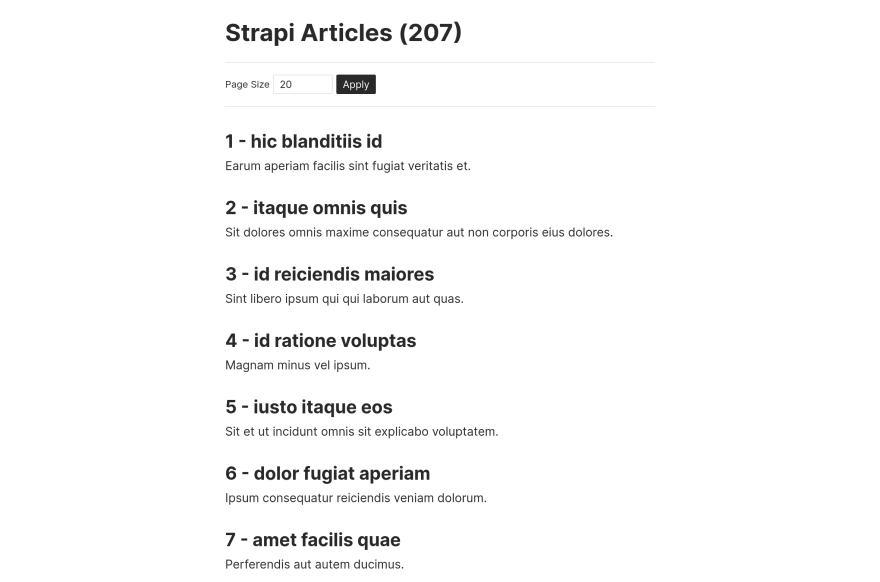
Visit localhost:3000 and see your articles fetched from Strapi in the UI:

Implementing Pagination Controls in Svelte
To implement the pagination controls in Svelte, update the HTML template in index.svelte by adding the following code under the else block:
<!-- ... -->
<h1>Strapi Articles ({stateMeta.pagination.total})</h1>

<div class="controls">
    <div>
        <label for="inputPageSize">Page Size</label>
        <!-- 1 -->
        <input
            name="inputPageSize"
            type="number"
            bind:value={stateCurrentPageSize}
            min="1"
            max={stateMeta.pagination.total}
        />
        <!-- 2 -->
        <button
            on:click|preventDefault={() => updateArticlesByPage(stateCurrentPageNumber)}
            disabled={stateMeta.pagination.total <= stateCurrentPageSize}>Apply</button
        >
    </div>
</div>

<!-- ... -->

<div class="controls">
    <!-- 3 -->
    <button
        on:click|preventDefault={() => updateArticlesByPage(--stateCurrentPageNumber)}
        disabled={stateMeta.pagination.page === 1}>Previous</button
    >
    <!-- 4 -->
    <div class="pagination">
        {#each { length: stateMeta.pagination.pageCount } as _, p}
            <button
                on:click|preventDefault={() => updateArticlesByPage(p + 1)}
                disabled={stateMeta.pagination.page === p + 1}>{p + 1}</button
            >
        {/each}
    </div>
    <!-- 5 -->
    <button
        on:click|preventDefault={() => updateArticlesByPage(++stateCurrentPageNumber)}
        disabled={stateMeta.pagination.page === stateMeta.pagination.pageCount}>Next</button
    >
</div>
<!-- ... -->
In the code above, you define a numeric input field for specifying the page size and bind it to the stateCurrentPageSize state variable. You also define a button with a click handler (on:click) to call the updateArticlesByPage function.
Next, you define a Previous button that takes the user back by one page (--stateCurrentPageNumber). You disable this button if the user is currently on the first page, and you loop over the number of pages (stateMeta.pagination.pageCount) and create a button that takes the user to the exact page. Finally, you define a Next button that takes the user forward by one page (++stateCurrentPageNumber) and disable this button if the user is currently on the last page.
Next, as a bonus, add the following styles at the end of index.svelte:
<style>
    * {
        --light: #e2e2e2;
        --light-dark: #a0a0a0;
        --dark: #292929;
        --disabled: #c4c3c3;
        box-sizing: border-box;
        font-family: 'Inter';
        color: var(--dark);
    }
    section {
        max-width: 100%;
        padding-top: 1rem;
        padding-bottom: 1rem;
    }
    .container {
        max-width: 576px;
        width: 100%;
        margin: auto auto;
    }
    h1 {
        font-size: 2rem;
        margin-top: 0;
        margin-bottom: 1.25rem;
    }
    h2 {
        font-size: 1.5rem;
        margin-top: 0;
        margin-bottom: 0.5rem;
    }
    p {
        margin-top: 0;
    }
    label {
        font-size: 0.8rem;
    }
    .mb-4 {
        margin-bottom: 2rem;
    }
    .controls {
        display: flex;
        justify-content: space-between;
        align-items: center;
        border-top: 0.0625rem solid var(--light);
        border-bottom: 0.0625rem solid var(--light);
        padding-top: 1rem;
        padding-bottom: 1rem;
        margin-bottom: 2rem;
    }
    .pagination {
        display: flex;
        flex-wrap: nowrap;
        overflow: auto hidden;
        border-radius: 0.125rem;
        margin: auto 1rem;
    }
    .pagination::-webkit-scrollbar {
        height: 0;
    }
    .pagination button {
        border-radius: 0;
    }
    input {
        vertical-align: middle;
        outline: none;
        border: 0.0625rem solid var(--light);
        border-radius: 0.125rem;
        padding: 0.25rem 0.5rem;
    }
    input:focus {
        border: 0.0625rem solid var(--light-dark);
    }
    button {
        vertical-align: middle;
        cursor: pointer;
        background: var(--dark);
        outline: none;
        border: 0.0625rem solid var(--dark);
        color: #ffffff;
        border-radius: 0.125rem;
        padding: 0.25rem 0.5rem;
    }
    button:hover {
        background: #000000;
    }
    button:disabled {
        background: var(--disabled);
        border: 0.0625rem solid var(--disabled);
        cursor: not-allowed;
    }
</style>
Because you can style the app based on your liking, the code above lets you use the existing styles.
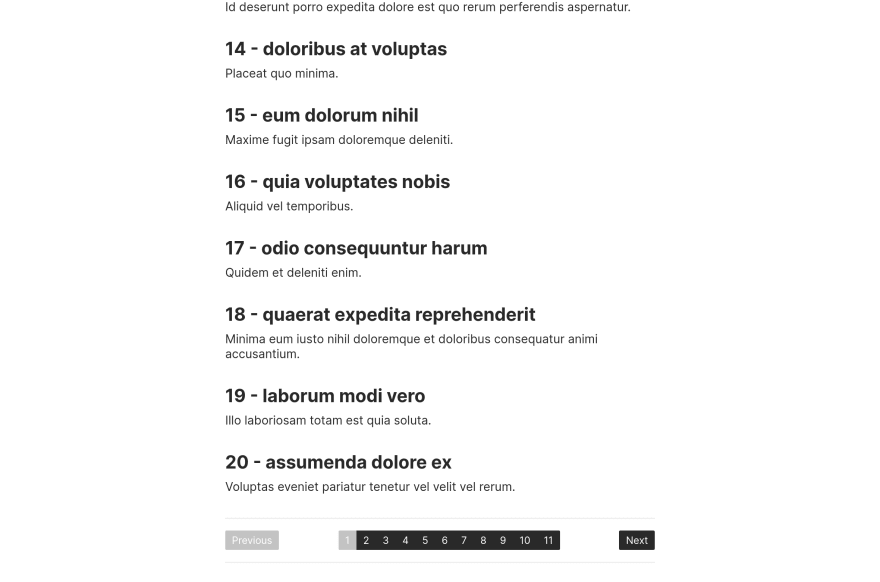
Finally, save your progress and visit localhost:3000 to check out the pagination controls on the top and bottom of the index page:
Testing Pagination
On the localhost:3000, make sure that the pagination functionality works as expected by playing with the pagination controls:

Now, you’ve successfully completed the pagination functionality in Svelte and Strapi CMS.
Conclusion
In this tutorial, you learned to work with Strapi pagination and implemented the pagination controls UI by building the frontend in Svelte. You can add pagination to API endpoints that return a huge amount of data and create better, more performant applications.
Pagination may seem like a complex topic, but once you go through implementing it, you can use the underlying techniques with different combinations of frontend and backend frameworks.
The entire source code for this tutorial is available in this GitHub repository.

Oldest comments (0)