If you are developing a mobile app, it's worth enabling VoiceOver on iOS and considering the usability from the perspective of people who rely on these tools to access your app.
Out of the box, Xamarin Forms comes with some nice accessibility features that can control the VoiceOver experience, in particular Automation Properties allow you to annotate your XAML elements with metadata such as what text to read out when selected by VoiceOver.
In this post I won't be focusing on these features, but instead, looking at Headings.
Headings
Consider the following screen:
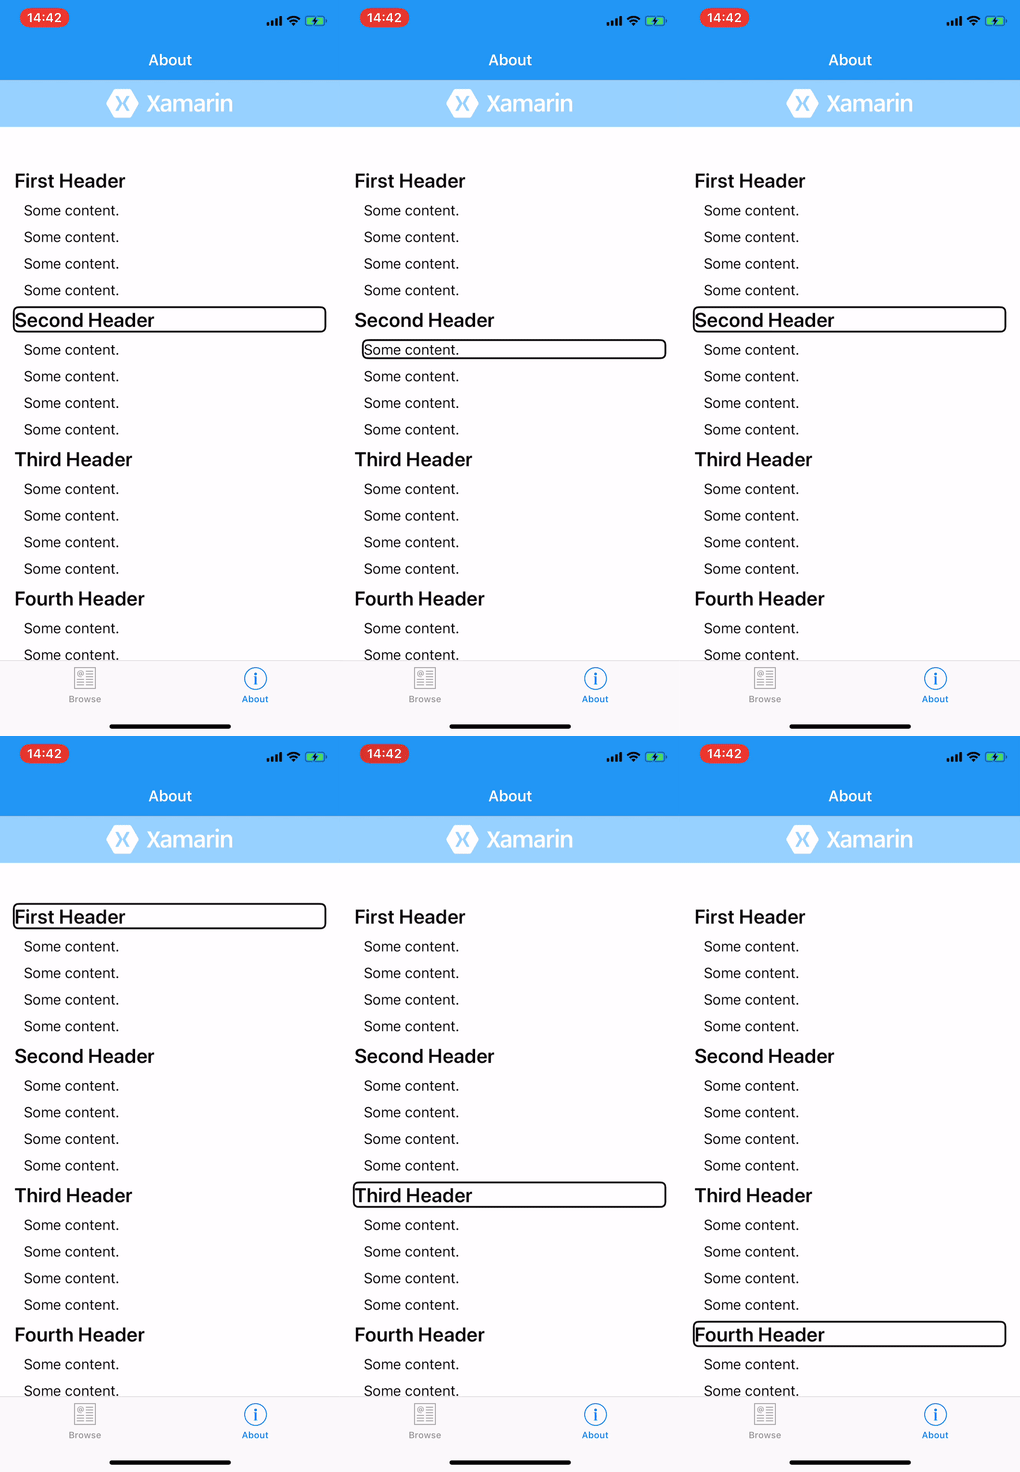
Visually, these headers convey the structure of the screen to the user. However, now let's try to navigate the page using solely VoiceOver. In this animation as we swipe left/right, the previous/next element is selected and its description is read aloud.
While all the content can be accessed, the headings just fade into the regular content if VoiceOver is your only UI.
Let's try using the Rotor navigation control to select Headings (with a two-finger twist gesture). Now we can navigate the screen by jumping through the headers with a swipe up/down gesture, however at the moment VoiceOver just says: "No Headings Found", which isn't very helpful.
On iOS, elements can be given a header accessibility trait. Using this, VoiceOver considers these elements as headings, and the swipe up/down gesture will now work and jump the selection to the next/previous heading.
This now functions much better as we can quick-jump between headings and still navigate to the items around them. Now let's build it.
How do we do it?
It turns out we don't need much code to make this happen. We'll create an attached property that will automatically add an effect to the element it's added to.
We first need to define our attached property, and create the effect which will be implemented only for iOS:
using System;
using System.Linq;
using Xamarin.Forms;

namespace XamAppWithHeaders
{
    public static class Accessibility
    {
        [Flags]
        public enum AccessibilityTrait
        {
            None,
            Header
        }

        public static readonly BindableProperty AccessibilityTraitsProperty =
            BindableProperty.CreateAttached("AccessibilityTraits", typeof(AccessibilityTrait), typeof(Accessibility), AccessibilityTrait.None, propertyChanged: OnAccessibilityTraitsChanged);

        public static AccessibilityTrait GetAccessibilityTraits(BindableObject view)
        {
            return (AccessibilityTrait)view.GetValue(AccessibilityTraitsProperty);
        }

        public static void SetAccessibilityTraits(BindableObject view, AccessibilityTrait value)
        {
            view.SetValue(AccessibilityTraitsProperty, value);
        }

        static void OnAccessibilityTraitsChanged(BindableObject bindable, object oldValue, object newValue)
        {
            if (!(bindable is View view))
            {
                return;
            }

            var newTraits = (AccessibilityTrait)newValue;
            var hasTraits = newTraits != AccessibilityTrait.None;

            if (hasTraits)
            {
                if (!view.Effects.OfType<AccessibilityTraitEffect>().Any())
                {
                    view.Effects.Add(new AccessibilityTraitEffect());
                }
            }
            else
            {
                var accessibilityTrait = view.Effects.OfType<AccessibilityTraitEffect>().FirstOrDefault();
                if (accessibilityTrait != null)
                {
                    view.Effects.Remove(accessibilityTrait);
                }
            }
        }

        public class AccessibilityTraitEffect : RoutingEffect
        {
            public AccessibilityTraitEffect() : base("XamAppWithHeaders.AccessibilityTraitEffect")
            {
            }
        }
    }
}
Be sure to change XamAppWithHeaders in the RoutingEffect base call to match your own namespace.
Now in our iOS project we will implement the effect and actually set the accessibility trait:
using UIKit;
using Xamarin.Forms;
using Xamarin.Forms.Platform.iOS;
using static XamAppWithHeaders.Accessibility;

[assembly: ResolutionGroupName("XamAppWithHeaders")]
[assembly: ExportEffect(typeof(XamAppWithHeaders.iOS.AccessibilityTraitEffect), "AccessibilityTraitEffect")]

namespace XamAppWithHeaders.iOS
{
    public class AccessibilityTraitEffect : PlatformEffect
    {
        protected override void OnAttached()
        {
            AddAccessibilityTraits();
        }

        protected override void OnDetached()
        {
        }

        protected override void OnElementPropertyChanged(System.ComponentModel.PropertyChangedEventArgs args)
        {
            if (args.PropertyName == AccessibilityTraitsProperty.PropertyName)
            {
                AddAccessibilityTraits();
            }
            else
            {
                base.OnElementPropertyChanged(args);
            }
        }

        void AddAccessibilityTraits()
        {
            var traits = Control.AccessibilityTraits;

            var newTraits = GetAccessibilityTraits(Element);

            if ((newTraits & AccessibilityTrait.Header) > 0) traits |= UIAccessibilityTrait.Header;

            Control.AccessibilityTraits = traits;
        }
    }
}
... and that's it, we can now bring the namespace into our xaml view and add it to any elements that we want to indicate as a heading.
<Label local:Accessibility.AccessibilityTraits="Header" Text="First Header" Style="{StaticResource headerStyle}" />
However, you can see that we already have a shared style for heading as is often the case with a real world app, in this case headerStyle. It turns out that you can add attached properties via a shared style, which looks like this:
<Style x:Key="headerStyle" TargetType="Label">
    <Setter Property="FontAttributes" Value="Bold" />
    <Setter Property="FontSize" Value="22" />
    <Setter Property="local:Accessibility.AccessibilityTraits" Value="Header" />
</Style>
Closing Thoughts
With just 2 code files and 1 line added to your heading styles, it couldn't be much simpler to make your app more accessible for people who rely on VoiceOver. Give it a try 😀
A working sample can be found here.


Top comments (0)