
In this article we will learn to build a MERN (Mongodb, Express, React, Nodejs) app using Docker and Docker Compose for both development and production build.
The Source Code of the project is open source and any contributions are most welcome - mern-docker. You can just clone or fork the repo to get started in seconds ! 🚀
1. Creating our App (Folder Structure)
Let's create a new directory for our App.
mkdir myapp
We will be separating our server with client, Let's create our server folder:
cd myapp
mkdir server
Now lets switch to building our Server first :
cd server
2. Building Express Server
Let's now create our Node App inside the server directory. I am using VS Code as editor
- Let's initialize our app using:
npm init
It will ask some questions about you app, just hit enter to save the defaults, to create a package.json file.

Installing Dependencies
Since we will be using express and mongodb, lets install the required dependencies :
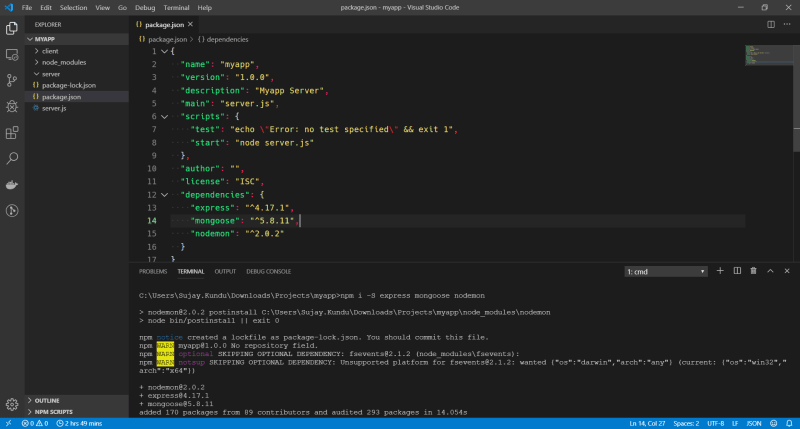
npm i -S express
and our development dependencies :
npm i -D nodemon
Since we will be using Nodemon to watch our changes, lets add a command to run our server using nodemon in our package.json
  "scripts": {
    "test": "echo \"Error: no test specified\" && exit 1",
    "start": "node server.js",
    "dev": "nodemon server.js"
  }
Creating our server
Lets now create our Express server
Create a new file server.js :
// server.js
const express = require('express');
const app = express();
const PORT = 8080;

app.get('/', (req, res) => {
    res.send("Hello World ! ");
});

app.listen(PORT, function () {
    console.log(`Server Listening on ${PORT}`);
});
Cool ! We created a server, which will be listening to PORT 8080. Let's run it :

npm run dev // runs the app in nodemon (watch) mode for any changes to reflect
It should run the app :
Server Listening on 8080
So now, if we visit http://localhost:8080 in our browser, it should show
Hello World !

Connecting to Mongodb
Cool ! Let's now create our mongodb database connection :
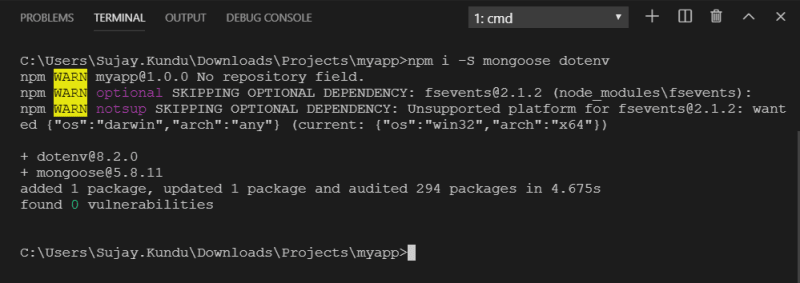
We need to install mongoose a ODM for mongodb and dotenv to use environment variables,
npm install -S mongoose dotenv
Create a new folder "src" where we will host our rest of our files, Inside it create a database.js
const mongoose = require('mongoose');
const dotenv = require('dotenv');
dotenv.config();

// mongoose options
const options = {
  useNewUrlParser: true,
  useFindAndModify: false,
  useCreateIndex: true,
  useUnifiedTopology: true,
  autoIndex: false,
  poolSize: 10,
  bufferMaxEntries: 0
};

// mongodb environment variables
const {
    MONGO_HOSTNAME,
    MONGO_DB,
    MONGO_PORT
} = process.env;

const dbConnectionURL = {
    'LOCALURL': `mongodb://${MONGO_HOSTNAME}:${MONGO_PORT}/${MONGO_DB}`
};
mongoose.connect(dbConnectionURL.LOCALURL, options);
const db = mongoose.connection;
db.on('error', console.error.bind(console, 'Mongodb Connection Error:' + dbConnectionURL.LOCALURL));
db.once('open', () => {
     // we're connected !
     console.log('Mongodb Connection Successful');
});
We need to create a .env file to store our database varibles (in the server directory)
MONGO_HOSTNAME=localhost
MONGO_DB=myapp_db
MONGO_PORT=27017
Also to use the connection in our express app , call the database connection inside server.js
// Our DB Configuration
require('./src/database');
Now if we run our app, (remember - your local mongodb should be available) :
npm run dev
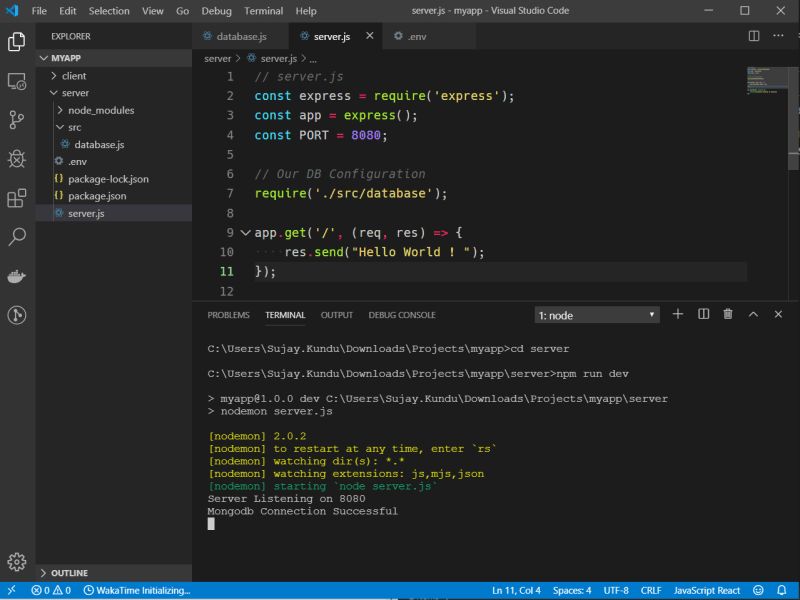
Your App should be running at PORT 8080 with Mongodb connection at PORT 27017
Creating our Post Model
Before we create our first api endpoint, we need a model for our Blog Posts. Simply say what a blog post will have - title, description, author etc. Let's describe that in our Post Model
Create a new folder models inside src folder and create a new file post.model.js
// Post.model.js
const mongoose = require('mongoose');
const postSchema = new mongoose.Schema({
   title: {
       type: String,
       required: true
   },
   body: {
       type: String
   },
   author: {
       type: String
   }
});

const Post = mongoose.model("Post", postSchema);
module.exports = Post;
Great ! We defined a model for our Post document. Post model has title, body and author all of them are string. Enough for now :)
Creating our Blog API Routes
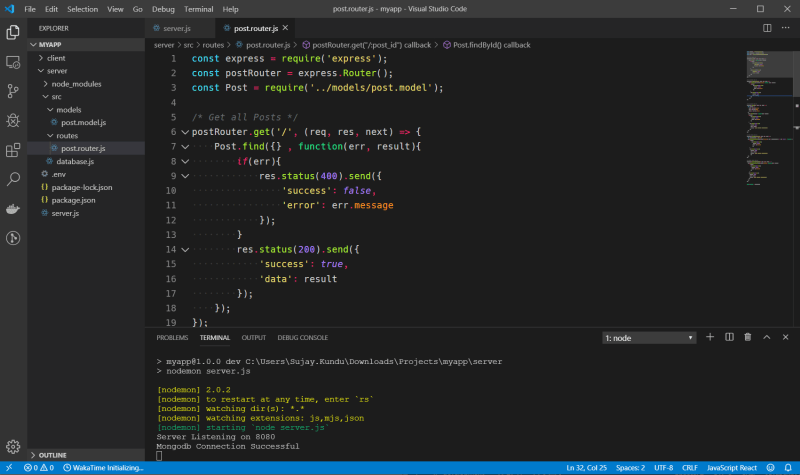
Let's create our routes : Create a new folder routes inside src folder. Inside it create a file post.router.js
const express = require('express');
const postRouter = express.Router();
const Post = require('../models/post.model'); // post model

/* Get all Posts */
postRouter.get('/', (req, res, next) => {
    Post.find({} , function(err, result){
        if(err){
            res.status(400).send({
                'success': false,
                'error': err.message
            });
        }
        res.status(200).send({
            'success': true,
            'data': result
        });
    });
});

/* Get Single Post */
postRouter.get("/:post_id", (req, res, next) => {
    Post.findById(req.params.post_id, function (err, result) {
        if(err){
             res.status(400).send({
               success: false,
               error: err.message
             });
        }
        res.status(200).send({
            success: true,
            data: result
        });
     });
});


/* Add Single Post */
postRouter.post("/", (req, res, next) => {
  let newPost = {
    title: req.body.title,
    body: req.body.body,
    author: req.body.author
  };
   Post.create(newPost, function(err, result) {
    if(err){
        res.status(400).send({
          success: false,
          error: err.message
        });
    }
      res.status(201).send({
        success: true,
        data: result,
        message: "Post created successfully"
      });
  });
});

/* Edit Single Post */
postRouter.patch("/:post_id", (req, res, next) => {
  let fieldsToUpdate = req.body;
  Post.findByIdAndUpdate(req.params.post_id,{ $set: fieldsToUpdate }, { new: true },  function (err, result) {
      if(err){
          res.status(400).send({
             success: false,
            error: err.message
            });
      }
      res.status(200).send({
        success: true,
        data: result,
        message: "Post updated successfully"
        });
  });
});

/* Delete Single Post */
postRouter.delete("/:post_id", (req, res, next) => {
  Post.findByIdAndDelete(req.params.post_id, function(err, result){
      if(err){
        res.status(400).send({
          success: false,
          error: err.message
        });
      }
    res.status(200).send({
      success: true,
      data: result,
      message: "Post deleted successfully"
    });
  });
});

module.exports = postRouter;
Now let's now use this route in our app. In server.js add the below code :
we need to install body-parser module :
npm install -S body-parser
const bodyParser = require('body-parser');

// Routes
const postRouter = require('./src/routes/post.router');

app.use(
  bodyParser.urlencoded({
    extended: true
  })
);
app.use(bodyParser.json());

app.use('/posts', postRouter);
Great ! All set, let's run our server and check if everything works fine :
npm run dev
Now lets open Postman app to test our API's that we created :
    GET -      /         - Get all posts
    POST -     /         - Create a new Post
    GET -      /:post_id - Get a Single Post using Post Id
    PATCH -    /:post_id - Edit a Single Post using Post Id
    DELETE -   /:post_id - Delete a single Post using Post Id
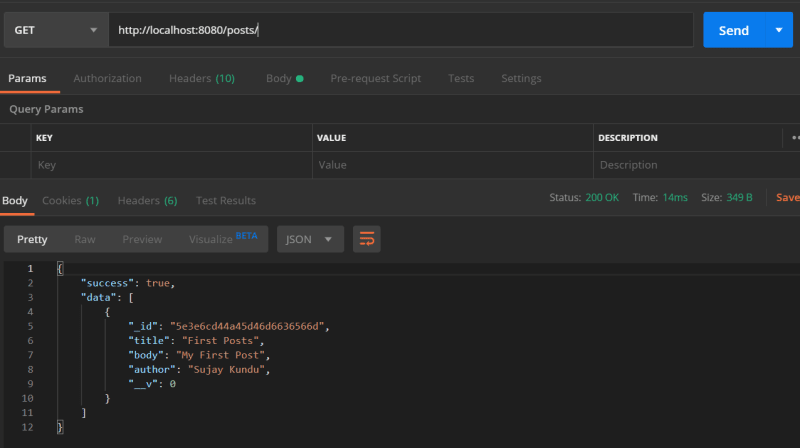

Great ! All our API's are working fine !
Dockerize Express and Mongodb
Add Dockerfile to the root folder :
#  Dockerfile for Node Express Backend api (development)

FROM node:10.16-alpine

# ARG NODE_ENV=development

# Create App Directory
RUN mkdir -p /usr/src/app
WORKDIR /usr/src/app

# Install Dependencies
COPY package*.json ./

RUN npm ci

# Copy app source code
COPY . .

# Exports
EXPOSE 8080

CMD ["npm","start"]

We can simply build our express app with this command
docker build -t node-app .
But.. this will only run our express app, but not together with MongoDb. That’s why we need a docker-compose file. 🐳
Now create another file called docker-compose.yml and paste this:
version: '3.7'

services:
    webapp-server:
      build:
        context: .
        dockerfile: Dockerfile
      image: myapp-server-img
      container_name: myapp-node-express
      volumes:
       - .:/usr/src/app
       - /usr/src/app/node_modules
      ports:
        - "8080:8080"
      depends_on:
        - mongo
      env_file: .env
      environment:
        - MONGO_HOSTNAME=$MONGO_HOSTNAME
        - MONGO_PORT=$MONGO_PORT
        - MONGO_DB=$MONGO_DB
    mongo:
      image: mongo
      container_name: myapp-mongodb
      ports:
        - "27017:27017"
Also we need to change our connection url from localhost to mongo !
Edit your MONGO_HOSTNAME=mongo in .env file
Let's run our App using docker-compose :
Build the images :
docker-compose build
Run the containers :
docker-compose up

Great ! Everything Works :D
3. Building React Client
Let's now build and setup our frontend for our App, Initialize a react-app using npx.
npx create-react-app client

This will create a react-app inside a folder named "client". Let's run the app :
yarn start
This will start a development server at port 3000. You can open browser at http://localhost:3000

Great ! we got our development server up, lets now dockerize our react app
Let's now create our Dockerfile
# Dockerfile for client

# Stage 1: Build react client
FROM node:10.16-alpine

# Working directory be app
WORKDIR /usr/app

COPY package*.json ./

# Install dependencies
RUN yarn install

# copy local files to app folder
COPY . .

EXPOSE 3000

CMD ["yarn","start"]
Let's start building our container using command :
docker build -t myapp-react:v1 .
To verify everything is fine, we run our newly built container using command:
docker run -p 3000:3000 myapp-react:v1
Lets now visit http://localhost:3000 . Great our client is
Okay ! We got our independent containers both for client and server, but they are not currently interacting each other. Let's solve this problem by using docker-compose
4. Connecting Client and Server using Docker Compose
To do this, we need to tell our server about our client !
In our /server/server.js add this :
// will redirect all the non-api routes to react frontend
router.use(function(req, res) {
    res.sendFile(path.join(__dirname, '../client','build','index.html'));
});
And we need to tell our React Client to proxy the API requests at port 8080 (where our server is running):
In our /client/package.json add this :
"proxy": "http://server:8080"
Cool, let's create a new docker-compose.yml at the root of our project, which will interact with individual Dockerfile's of the client and server and create a network between this containers:
Add this code in docker-compose.dev.yml
version: '3.7'

services:
  server:
    build:
      context: ./server
      dockerfile: Dockerfile
    image: myapp-server
    container_name: myapp-node-server
    command: /usr/src/app/node_modules/.bin/nodemon server.js
    volumes:
      - ./server/:/usr/src/app
      - /usr/src/app/node_modules
    ports:
      - "8080:8080"
    depends_on:
      - mongo
    env_file: ./server/.env
    environment:
      - NODE_ENV=development
    networks:
      - app-network
  mongo:
    image: mongo
    volumes:
      - data-volume:/data/db
    ports:
      - "27017:27017"
    networks:
      - app-network
  client:
    build:
      context: ./client
      dockerfile: Dockerfile
    image: myapp-client
    container_name: myapp-react-client
    command: yarn start
    volumes:
      - ./client/:/usr/app
      - /usr/app/node_modules
    depends_on:
      - server
    ports:
      - "3000:3000"
    networks:
      - app-network

networks:
    app-network:
        driver: bridge

volumes:
    data-volume:
    node_modules:
    web-root:
      driver: local
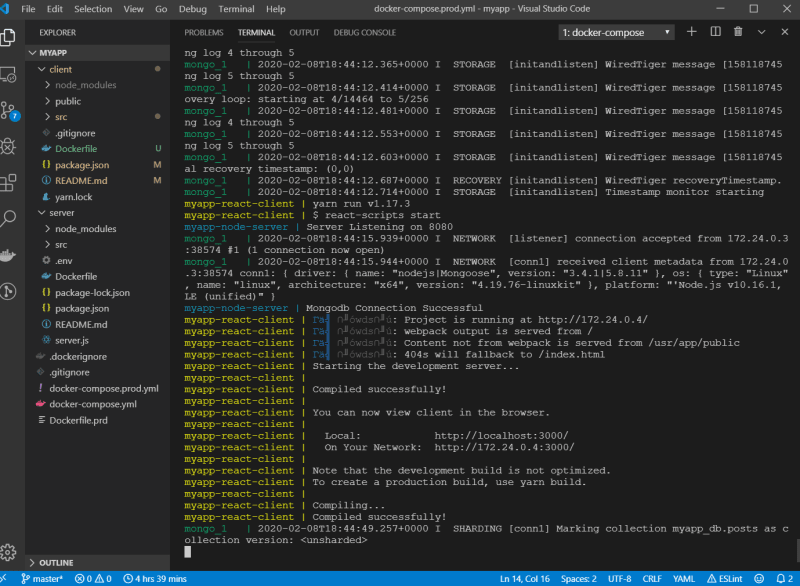
What this will do is, it will run all the services parallely, our express backend will run at port 8080, mongodb at 27017 , and react client at port 3000. Let's test it by running the following command in our project root directory :
Now to run docker-compose. We need to create a new file "docker-compose.yml" where we will copy the contents of the docker-compose.dev.yml . It's a good practice to seperate dev and prod docker-compose.
So copy all the content of docker-compose.dev.yml to docker-compose.yml and run :
docker-compose up --build
By this, the docker-compose.yml that we created inside will only be required/used, if you want to work only on the server independent of the client :D
As you can see, if any changes you do either in server or client, will be reflected instantly (best for development)
Awesome ! We created our Blog App :D , lets now check on how to create a production build for our App.
Production Build
For Production, we will be building our client and use it in our server to serve it. Let's create a new Dockerfile.prd (for production) in the project's root directory :
In our server/server.js add the following to tell express that our react client will be served from the build path :
const CLIENT_BUILD_PATH = path.join(__dirname, "../client/build");

// Static files
app.use(express.static(CLIENT_BUILD_PATH));

// Server React Client
app.get("/", function(req, res) {
  res.sendFile(path.join(CLIENT_BUILD_PATH , "index.html"));
});
Great ! Let's now create a production Dockerfile, which will help in copying the build files from the react client and put it in the client folder of our server, which we will use to serve the app.
# Production Build

# Stage 1: Build react client
FROM node:10.16-alpine as client

# Working directory be app
WORKDIR /usr/app/client/

COPY client/package*.json ./

# Install dependencies
RUN yarn install

# copy local files to app folder
COPY client/ ./

RUN yarn build

# Stage 2 : Build Server

FROM node:10.16-alpine

WORKDIR /usr/src/app/
COPY --from=client /usr/app/client/build/ ./client/build/

WORKDIR /usr/src/app/server/
COPY server/package*.json ./
RUN npm install -qy
COPY server/ ./

ENV PORT 8000

EXPOSE 8000

CMD ["npm", "start"]
This will do all the heavy work of building our server and client, using multi-stage builds.
Let's utilize this multi-stage Dockerfile to use it with Docker Compose to run our App (along with mongodb)
:
Add this code in docker-compose.prd.yml :
version: '3.7'
services:
  web:
    build:
      context: .
      dockerfile: Dockerfile
    ports:
      - "8080:8080"
    # env_file: ./server/.env # TODO - uncomment this to auto-load your .env file!
    environment:
      NODE_ENV: production
    depends_on:
      - mongo
    networks:
      - app-network
  mongo:
    image: mongo
    volumes:
      - data-volume:/data/db
    ports:
      - "27017:27017"
    networks:
      - app-network

networks:
    app-network:
        driver: bridge

volumes:
    data-volume:
    node_modules:
    web-root:
      driver: local
Since, we already have a docker-compose.dev.yml and docker-compose.yml already in the root directory. To run production, we need to copy the docker-compose.prd.yml content and replace the docker-compose.yml content.
docker-compose.yml should now have the same content as of docker-compose.prd.yml
Let's test our Production build by running (removing any orphan containers):
docker-compose up --build --remove-orphans

Lets now visit the url : http://localhost:8080

As you can see by the sign in browser navbar, this will be the production react build. Let's now check whether our API's and DB are working properly or not, Since express is serving react, the api's should be working fine:
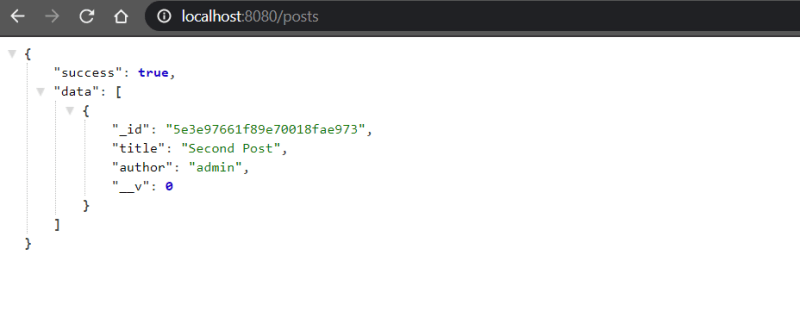
That's it ! Our App's Production Build is ready for Deployment :D
The Source Code of the project is open source and any contributions are most welcome - mern-docker. You can just clone or fork the repo to get started in seconds ! 🚀
You can checkout and subscribe to my Blog for more interesting tutorials in JS Ecosystem

Oldest comments (8)
Great!
Hello!
For react client, docker run is not working. I get the following output:
$ docker run -p 3000:3000 myapp-react:v1
yarn run v1.17.3
$ react-scripts start
ℹ 「wds」: Project is running at 172.17.0.2/
ℹ 「wds」: webpack output is served from
ℹ 「wds」: Content not from webpack is served from /usr/app/public
ℹ 「wds」: 404s will fallback to /
Starting the development server...
Done in 1.98s
If I run Docker ps command, it shows no running container.
What I have missed?
regards,
this worked with me ( added -i -t flags)
docker run -i -t -p 3000:3000 myapp-react:v1
-i leaves the stdin of the container opened
-t assigns a pseudo-tty (for interactive session with shell)
Thanks, solved my problem
Have you created the client image first.You need to create individual images for both the client and server first. Then run the above commands.
thanks a lot, this is exactly what I was looking for
I think the command part in docker-compose is unnecessary, what do you think?
I get errors with building a docker container from the following:
"""
Connecting Client and Server using Docker Compose
To do this, we need to tell our server about our client !
In our /server/server.js add this :
// will redirect all the non-api routes to react frontend
router.use(function(req, res) {
res.sendFile(path.join(__dirname, '../client','build','index.html'));
});
"""
I resolved this by replacing "router.use" with "app.use" and adding a path variable to server.js: const path = require('path');