
With increase in business and startups, setting up large physical servers was becoming very hectic for owners. Using large number of physical servers and implementing various computing techniques to manage them, people were in need of something more flexible and budget friendly. And finally, in around 2006-2008 Amazon Web Services launched the era of Cloud Computing with it's first virtual servers or machines Amazon Elastic Compute Cloud or EC2 instances. Since then EC2 has helped perform so many operations and provided uncountable solutions.
In this blog, I have tried to show three of the simple techniques to host a very basic website into your EC2 instance.
For a very simple basic website we have files of CSS,JS,HTML and many more. Here I have chosen a sample website contents from here.
Summary of Steps:
- Step 1 : Launch an EC2 instance
- Step 2 : Install Apache Server
- Step 3 : Add the files of website(three ways):
Step 1 : Choose an EC2 instance , Launch the instance and then SSH into the instance.
I have chosen here the Amazon Linux. You can choose any one of your choice. You can find the steps to setup your EC2 instance in this amazing tutorial by one of my friend here. Only while selecting the Security Group here's what different you have to do:
- For type SSH change Source to MyIP (This will allow only your IP to SSH into your EC2).
- Now, add rule and select HTTP and for Source select Anywhere.
- Again add rule HTTPS and for Source select Anywhere.
These are the simplest rules for a beginner, incase you want to have custom and enhanced security, you can always add the allowed custom IPs only
Step 2 : Install the Apache Server into EC2
To host a website into EC2, you will need to install Apache Server into EC2. Here are the Linux commands to install Apache Server into your EC2.
1. Login as root user:
Initially when you connect to EC2, you will be logined as ec2-user. Change it to root user. Use these linux commands:
sudo su ,then cd
2. Install Apache Server:
Now, install Apache Server with the command:
yum install httpd
While installing you will get a confirmation message , just type yes for it. After successfully installation you will get a Complete message.

3. Start and Enable Apache:
After installing apache, you have to start the Apache. Here is the command to do so.
systemctl start httpd
Now, you need to enable the Apache server to avoid stopping the server when you stop and restart your EC2 instance. Here is the command to do so.
systemctl enable httpd

After all these setup done , now we just need to add our files into EC2. Here are the three simple ways to do so:
Step 3 : Add your website files into EC2
Way 1 >>> By adding the files directly from your device:
You can directly copy paste your files from your device into EC2 instance. For this you need to have an application called WinSCP . Here is the download link for the same.
Now follow the following steps:(Refer the picture below)
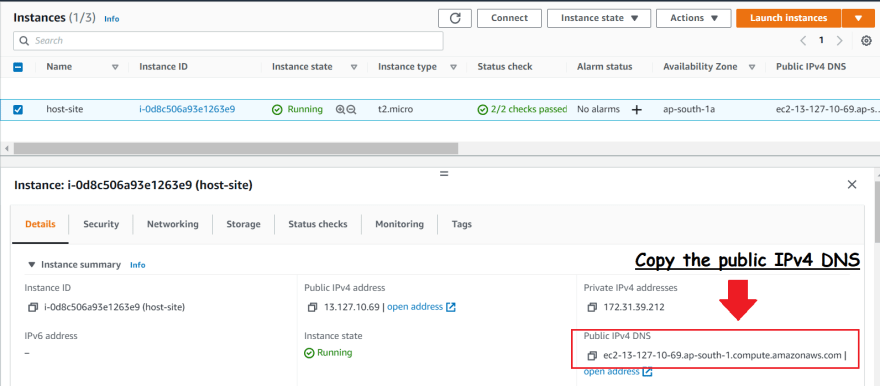
- In the Host Name fill the public IPv4 DNS of your EC2 instance.
- For the User Name enter ec2-user
- Now, click on Advanced

- Now, select the Authentication option in the left side menu and browse your key file (created while launching the EC2 instance). If your key file is of .pem extension , change the search filter to all files, select the .pem file and it will ask you to convert into a .ppk file. Allow for the same and select the .ppk file.
Now click on OK.

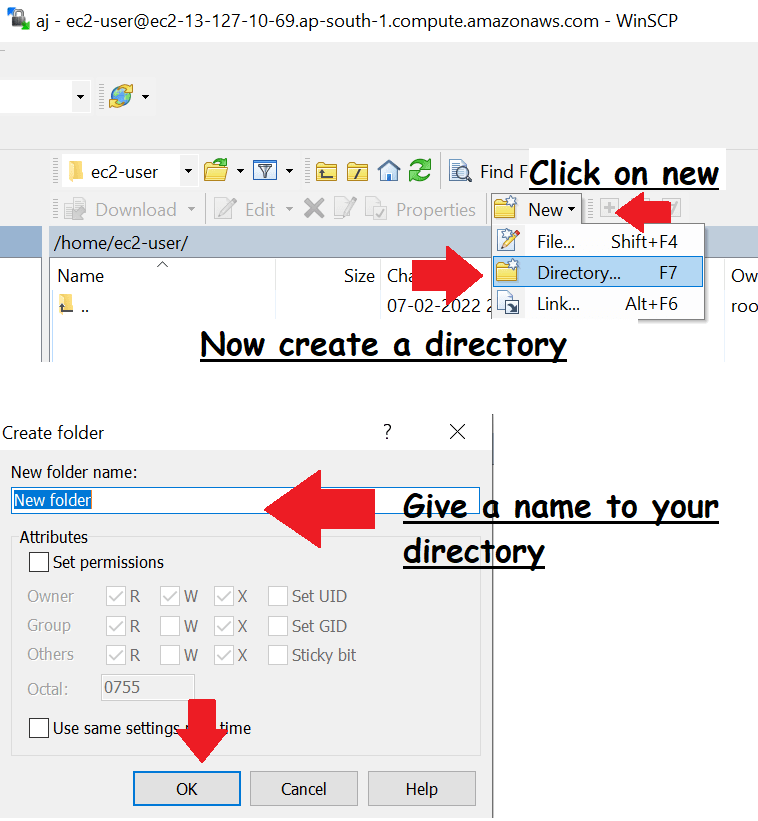
Now, click on Login , and you will be connected to your EC2 as ec2-user in the right side window.
Now, browse the location where your files are present on the window on the left side.

Now, create a new directory into ec2-user and drag and drop all your files from the left window to the right into the new directory.

Go back to your Xshell and check if the file is present by the command
ls /home/ec2-user/<your-directory>Now, you have to copy the file into another directory which is the html directory.
You can copy the entire contents of your directory into html directory by command :
rsync –a /home/ec2-user/<your-directory-name>/. /var/www/html/

- Now copy paste the public IP of the EC2 and hit into the browser and you will be able to see your website.
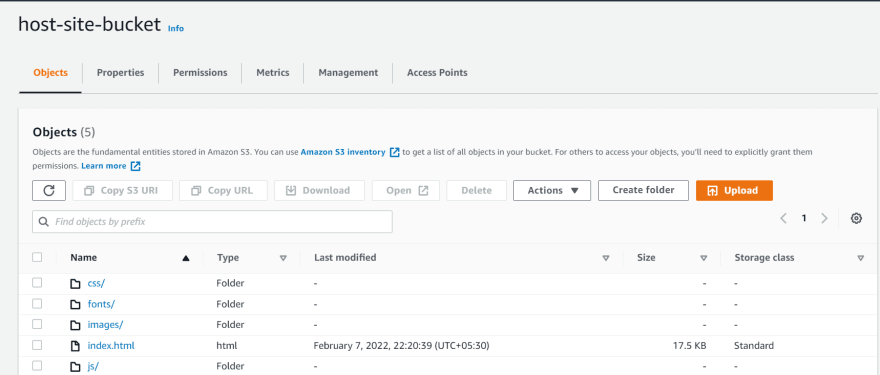
Way 2 >>> By copying the files from your S3 bucket:
- First you need to create a S3 bucket and upload your files. Here is a tutorial by one of my friend on how to create and upload files into S3 bucket.
- Now, to access your S3 bucket and contents into EC2 instance you must create an IAM role with S3 full access and attach it to your EC2 instance. Learn how to create IAM roles here.
- List out the S3 buckets name using command
aws s3 ls - List out the contents of S3 bucket using command
aws s3 ls s3://<your-bucket-name> - Go to the html directory using command
cd /var/www/html/ - Now copy the contents to html directory using command
aws s3 sync s3://<your-bucket-name>/ .(dot represents current directory)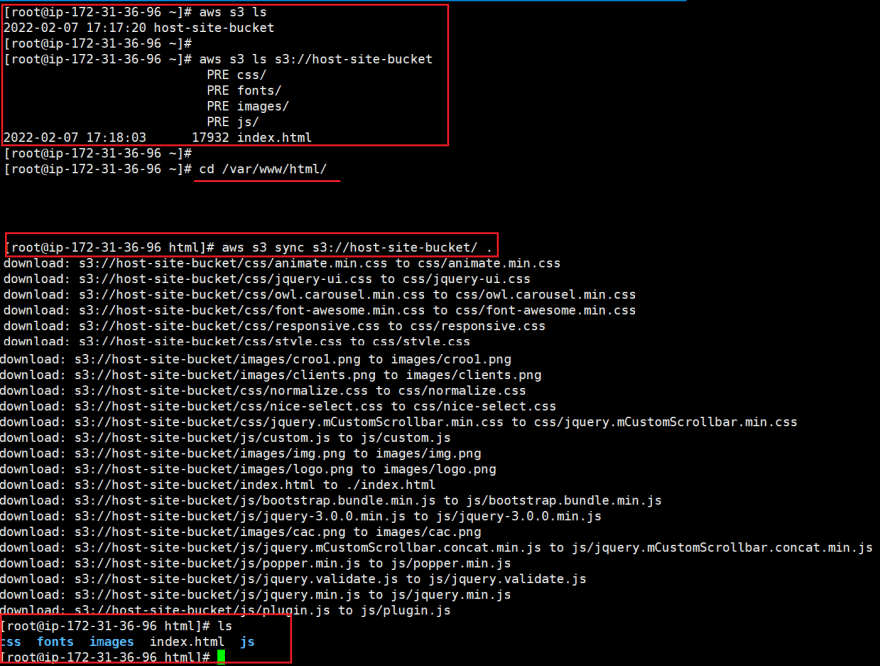
7.Now copy paste the public IP of the EC2 and hit into the browser and you will be able to see your website.
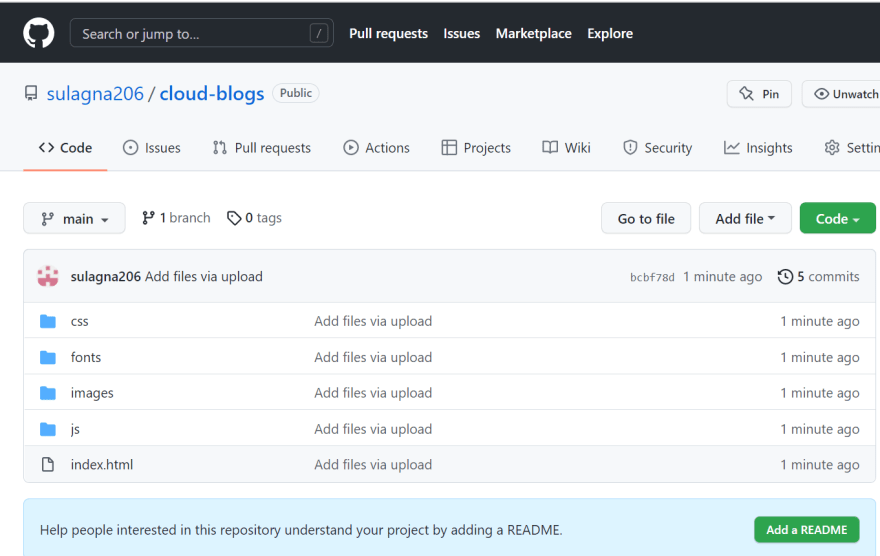
Way 3 >>> By copying the files from your Github Repo:
- First create a GitHub Repository and upload the files in that repository. Here is a tutorial on the same.
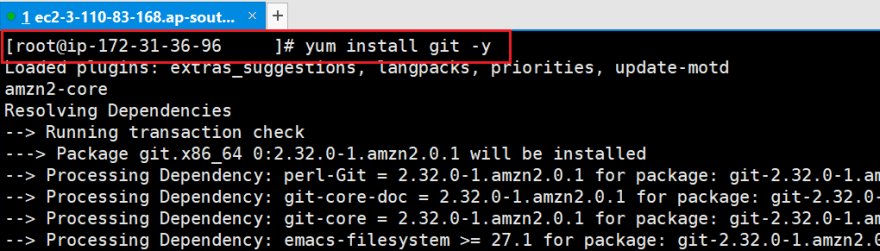
Now to access GitHub from your EC2 install git. To do so use the command
yum install git -yin your XShell. Accept any confirmation asked.
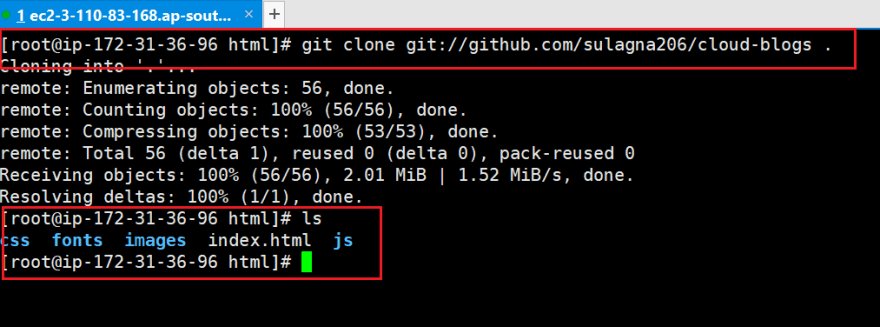
Go to the html directory using command
cd /var/www/html/Now download all the files of your GitHub repo into the directory using command
git clone git://github.com/<your-account-name>/<your-repo-name> .(dot represents current directory)
Now copy paste the public IP of the EC2 and hit into the browser and you will be able to see your website.
This is how you can view your website:

That's all in this blog. Hope so this has helped you!

Oldest comments (0)