DEV Community

Cover image for Maintenance free system multi booting
suntong
suntong

Posted on • Edited on

1

Maintenance free system multi booting

The journey continues

First, recap from the previous article, a single grub boot menu entry can be as simple as:

menuentry 'Debian GNU/Linux' {
set root='hd0,gpt2'
probe -u $root --set=rootuuid
echo 'Loading Linux ...'
linux /vmlinuz root=UUID=$rootuuid ro text net.ifnames=0
echo 'Loading initial ramdisk ...'
initrd /initrd.img
}
view raw os0_default.cfg hosted with ❤ by GitHub

With it, we don't need to hunt for the UUIDs, and we don't need to remember to mount boot partition and update the boot entries any more. It can boot to whatever latest kernel it is, and it will still work even we reformat the partition and install a new Linux, and it will still work even we change the distro from Debian, to Mint, Arch, Fedora, or openSUSE etc.

In this article, we'll first look at those few more boilerplates that enable you to only write the above few lines and everything will work out magically. Then we'll move on to how to make things even simpler, with the help of easygen.

The supporting files

To break free from the rigid format requirement of 40_custom and allow people only write the above few lines, or to order boot entries in the order we want, instead of being determined by their partition orders, we need to build our grub.cfg file from ground up ourselves. And, it is not that scary either and could be really straightforward. Here are all the code it needs:

source /boot/grub/grub-main.cfg
view raw grub.cfg hosted with ❤ by GitHub

The grub.cfg file that replace grubs default .cfg file. Deliberately made so simple so that it can be easily restored if it was accidentally overwritten.

## grub2 configuration
source /boot/grub/grub-header.cfg
insmod regexp
for config in /boot/grub/*_default.cfg ; do source "$config" ; done
for config in /boot/grub/*_options.cfg ; do source "$config" ; done
if [ -f /boot/grub/grub-addons.cfg ] ; then
source "/boot/grub/grub-addons.cfg"
fi
source /boot/grub/grub-footer.cfg
view raw grub-main.cfg hosted with ❤ by GitHub

The grub-main.cfg that the grub.cfg file actually calls. The idea comes from grml. We can see that it is sourcing a header, a footer, and the main/real .cfg files, like the entry shown above.

Arrange those .cfg files so that their order show up in the order you want in the grub menu. For example, this is how I arrange my grub menu:

image

I.e., in my preference, I want my grub menu to be in the order of:

  • My current Linux
  • Live Linux from ISO, in case I need to check/repair anything
  • My Windows
  • My old Linux versions

They are ordered from most probably used to the least probably used. Changing the order is simple, just shift them around in the .cfg text file.

The grub menu's look-and-feel is defined in the header, and the "Shutdown / Reboot" is defined in footer, showing below respectively.

# == fundementals
set menu_color_normal=cyan/blue
set menu_color_highlight=white/blue
set timeout=3
# == loadfont
font=unicode
set locale_dir=$prefix/locale
set lang=en_US
# -- load_video
insmod gettext
insmod gfxterm
insmod all_video
# load common modules
insmod gzio
insmod part_gpt
insmod ext2
view raw grub-header.cfg hosted with ❤ by GitHub
view raw grub-footer.cfg hosted with ❤ by GitHub

ISO Booting

The bonus and prestige of the whole article, here is how ISO files are automatically discovered and listed:

submenu "Boot from ISO ... >" {
set menu_color_normal=black/light-gray
set menu_color_highlight=yellow/dark-gray
insmod regexp
for isofile in /boot/iso/*ubuntu-*-desktop*.iso; do
regexp --set=isoname "/boot/iso/(.*)" "$isofile"
submenu "$isoname >" "$isofile" {
set menu_color_normal=black/light-red
set menu_color_highlight=yellow/light-red
iso_path="$2"
loopback loop "$iso_path"
menuentry 'Live (amd64)' {
bootoptions="boot=casper iso-scan/filename=$iso_path noeject noprompt"
linux (loop)/casper/vmlinuz $bootoptions
initrd (loop)/casper/initrd
}
menuentry 'Live (amd64 failsafe)' {
bootoptions="boot=casper iso-scan/filename=$iso_path memtest noapic noapm nodma nomce nolapic nomodeset nosmp nosplash vga=normal"
linux (loop)/casper/vmlinuz $bootoptions
initrd (loop)/casper/initrd
}
}
done
}
view raw iso-all.cfg hosted with ❤ by GitHub

It can automatically discover and list whatever ISO available on disk:

image

and boot from them:

image

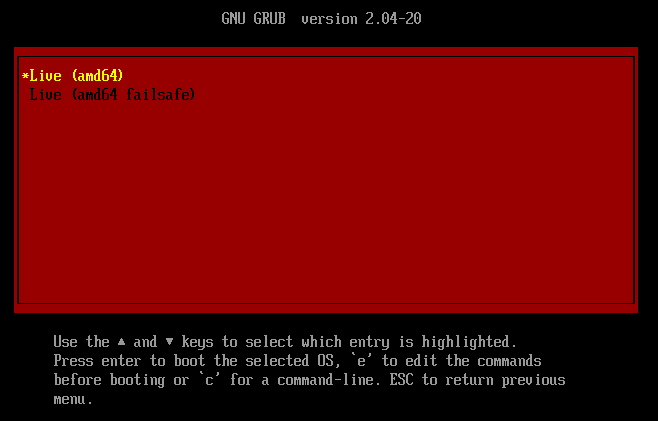
The red background color is chosen for the grub menu, to symbolize the live system, and also as the notification sign that this will be the last grub menu level, after which the system will be in booting mode.

Can it be even simpler

So far, we can see that using some simple scripts/configs, we can let the grub to show whatever we want it to show, in whatever order we want as well. Now,

Can it be even simpler?

As pointed out in the "Conclusion" section in the last article, the only things that matter in a grub menu entry are the 'Debian GNU/Linux' and the 'hd0,gpt2', the rest are just the boilerplate that don't normally need to be changed.

What if I only want to specify the 'Debian GNU/Linux' and the 'hd0,gpt2' part, and let the machine to generate the grub menu entry/entries for me? -- Not a problem, if with the help of easygen.

This is all what you need to specify:

OS:
- # Name - Name of the boot entry
Name: Debian 11 bullseye
# Type - Type of the boot entry
# Values can be LinOS, WinOS
Type: LinOS
# Root - Partition to set grub root with
Root: hd0,gpt2
# Disk - Optional, Disk label of the partition
Disk:
view raw os2grub-1.yaml hosted with ❤ by GitHub

Feed that to easygen as:

easygen os2grub-1

then you'll get:

menuentry 'Debian 11 bullseye' {
set root='hd0,gpt2'
probe -u $root --set=rootuuid
echo 'Booting - Debian 11 bullseye'
echo 'Loading Linux Kernel ...'
linux /vmlinuz root=UUID=$rootuuid ro text net.ifnames=0
echo 'Loading initial ramdisk ...'
initrd /initrd.img
}
view raw os2grub-1.gold hosted with ❤ by GitHub

The secret is the easygen's template:

{{range .OS}}
{{if eq .Type "LinOS" -}}
menuentry '{{.Name}}' {
set root='{{.Root}}'
probe -u $root --set=rootuuid
echo 'Booting - {{.Name}}'
echo 'Loading Linux Kernel ...'
linux /boot/vmlinuz root=UUID=$rootuuid ro text net.ifnames=0 zswap.enabled=1 zswap.compressor=lz4 zswap.zpool=z3fold zswap.max_pool_percent=52
echo 'Loading initial ramdisk ...'
initrd /boot/initrd.img
}{{else}}{{if eq .Type "WinOS" -}}
menuentry '{{.Name}}' {
set root='{{.Root}}'
echo 'Booting - {{.Name}}'
chainloader /EFI/Microsoft/Boot/bootmgfw.efi
}{{end}}{{end}}
{{end}}
view raw os2grub.tmpl hosted with ❤ by GitHub

Customize it to whatever you like.

But, most people not just has a single boot menu. How do you deal with that? Simple -- with another small tool of grub2yaml.sh:

sed -En '
1{s/^.*$/OS:/; p}
/^submenu .Advanced options for /,/^}/d
# WinOS
/^menuentry .*Windows/{
s/^menuentry /\n - Name: /
s/ --(class|id) .*$/\n Type: WinOS/
p
}
# LinOS
/^menuentry /{
s/^menuentry /\n - Name: /
s/ --(class|id) .*$/\n Type: LinOS/
p
}
# Root
/set root=/{
s/^\s*set root=/ Root: /
p
}
' "$@"
view raw grub2yaml.sh hosted with ❤ by GitHub

Just run it with

grub2yaml.sh /boot/grub/grub.cfg | tee /tmp/myOSs.cfg

Slightly edit it, and you'll get more entries like this:

OS:
- Name: 'Ubuntu 20.04 LTS (20.04) (on /dev/sda3)'
Type: LinOS
Root: 'hd0,gpt3'
- Name: 'Ubuntu 19.04 (19.04) (on /dev/sda7)'
Type: LinOS
Root: 'hd0,gpt7'
- Name: 'Ubuntu 18.04 LTS (18.04) (on /dev/sda6)'
Type: LinOS
Root: 'hd0,gpt6'
- Name: 'Ubuntu 17.04 (17.04) (on /dev/sda8)'
Type: LinOS
Root: 'hd0,gpt8'
- Name: 'Windows Boot Manager (on /dev/sda13)'
Type: WinOS
Root: 'hd0,gpt13'
view raw os2grub.yaml hosted with ❤ by GitHub

With multiple entries like that, easygen really starts to shine. You can get the following without a drop of sweat:

menuentry 'Ubuntu 20.04 LTS (20.04) (on /dev/sda3)' {
set root='hd0,gpt3'
probe -u $root --set=rootuuid
echo 'Booting - Ubuntu 20.04 LTS (20.04) (on /dev/sda3)'
echo 'Loading Linux Kernel ...'
linux /boot/vmlinuz root=UUID=$rootuuid ro text net.ifnames=0 zswap.enabled=1 zswap.compressor=lz4 zswap.zpool=z3fold zswap.max_pool_percent=52
echo 'Loading initial ramdisk ...'
initrd /boot/initrd.img
}
menuentry 'Ubuntu 19.04 (19.04) (on /dev/sda7)' {
set root='hd0,gpt7'
probe -u $root --set=rootuuid
echo 'Booting - Ubuntu 19.04 (19.04) (on /dev/sda7)'
echo 'Loading Linux Kernel ...'
linux /boot/vmlinuz root=UUID=$rootuuid ro text net.ifnames=0 zswap.enabled=1 zswap.compressor=lz4 zswap.zpool=z3fold zswap.max_pool_percent=52
echo 'Loading initial ramdisk ...'
initrd /boot/initrd.img
}
menuentry 'Ubuntu 18.04 LTS (18.04) (on /dev/sda6)' {
set root='hd0,gpt6'
probe -u $root --set=rootuuid
echo 'Booting - Ubuntu 18.04 LTS (18.04) (on /dev/sda6)'
echo 'Loading Linux Kernel ...'
linux /boot/vmlinuz root=UUID=$rootuuid ro text net.ifnames=0 zswap.enabled=1 zswap.compressor=lz4 zswap.zpool=z3fold zswap.max_pool_percent=52
echo 'Loading initial ramdisk ...'
initrd /boot/initrd.img
}
menuentry 'Ubuntu 17.04 (17.04) (on /dev/sda8)' {
set root='hd0,gpt8'
probe -u $root --set=rootuuid
echo 'Booting - Ubuntu 17.04 (17.04) (on /dev/sda8)'
echo 'Loading Linux Kernel ...'
linux /boot/vmlinuz root=UUID=$rootuuid ro text net.ifnames=0 zswap.enabled=1 zswap.compressor=lz4 zswap.zpool=z3fold zswap.max_pool_percent=52
echo 'Loading initial ramdisk ...'
initrd /boot/initrd.img
}
menuentry 'Windows Boot Manager (on /dev/sda13)' {
set root='hd0,gpt13'
echo 'Booting - Windows Boot Manager (on /dev/sda13)'
chainloader /EFI/Microsoft/Boot/bootmgfw.efi
}
view raw os2grub.gold hosted with ❤ by GitHub

Enjoy

IMHO, the way grub2 generates boot entries automatically, at least as of this article is written, is still a big mess. You may not agree with that, but I do enjoy my grub menu system to be plain and simple, straightforward and out of my way. And, I enjoy my freedom to hand-craft my own boot menus again, just like the good old days, but without an extra spare letter to waste.

Hope you enjoy that as well.

Cheers

Image of Timescale

🚀 pgai Vectorizer: SQLAlchemy and LiteLLM Make Vector Search Simple

We built pgai Vectorizer to simplify embedding management for AI applications—without needing a separate database or complex infrastructure. Since launch, developers have created over 3,000 vectorizers on Timescale Cloud, with many more self-hosted.

Read full post →

Top comments (0)

Billboard image

The Next Generation Developer Platform

Coherence is the first Platform-as-a-Service you can control. Unlike "black-box" platforms that are opinionated about the infra you can deploy, Coherence is powered by CNC, the open-source IaC framework, which offers limitless customization.

Learn more