Recently, I have become a Microsoft learn student ambassador. As I was upgraded to Alpha MLSA, I was given credits to use Microsoft Azure for free along with other benefits. While I was exploring I happened to see Azure Functions and I started learning that. Since my favorite programming language is python, I thought of creating a Azure functions using python. It was pretty exciting. Through this blog post, I'll explain how to create a function using python in Microsoft Azure with the help of Visual Studio Code.
Step-1: Configuration of the Environment
Before getting started, we have to make sure of certain requirements. They are:
- You need to have a active Microsoft Azure Subscription, If you are a student you can get the Student benefits from here. If you are not a student you can create an account with a proper subscription.
- You need to have azure functions core tools with version 3.x.
- You need to install Visual Studio Code and the required extensions (Python extension and Azure Functions Extension).


Sign in to Azure
- To sign-in to Azure, you need to choose the Azure icon in the activity bar and in the "Azure:Fuctions" area choose "Sign in to Azure...".
- When prompted in the browser, you can sign in using your Microsoft Azure account credentials.
- After successful sign in you can close the browser and go back to VS code.
Create the local project and Run the function locally
To create the local project, choose the Azure icon in the Activity Bar, then choose "Create New project..." in the "Azure:Fuctions" area, then choose the location for the workspace and select.
After selecting the location, It will prompt for some information. Provide this information at the prompts,
- language for the project: Python
- Select python alias to create virtual environment: Select the location for python interpreter.
- Template: HTTP Trigger
- Function name: (Choose any unique name of your choice).
- Authorization: Anonymous
- Choose how you would prefer to open this project from the given options.
With the information that you have given above, VScode creates an azure function project with HTTP trigger.
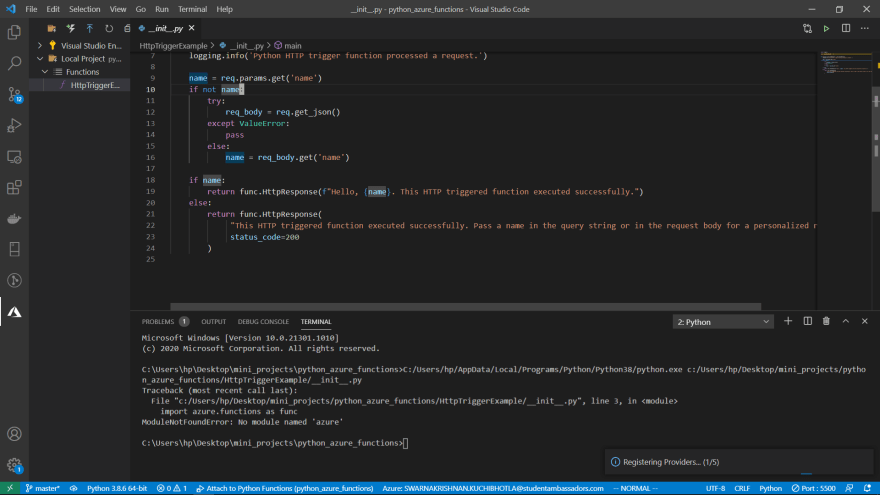
To run this function,
- Press F5 key or Choose the Run> Start Debugging to start the function app project, Output is displayed in the Terminal Panel.

Here you can see the URL endpoint that HTTP triggered function running locally.
- Go to "Azure:Fuctions" through Azure icon from the workspace and choose Local Prject>Functions>(your Function) right click on it and select "Execute Function Now..."
- Then, Enter request Body will be prompted and you'll see {"name": "azure"}, press Enter to send the request to your function. This will take you to..

In the URL type ?name=(any name) and Press Enter, then

You can see that the HTTP triggered Successfully.
- Go back to the visual studio code and you will see "Function executed successfully" in the terminal panel. Press Ctrl+C to stop and disconnect the debugger.
Now you have verified that the function runs perfectly on your local computer. Now, lets publish the project to azure using Visual Studio Code.
Publish the Project
- Choose the Azure Icon in the Activity Bar and select the "Deploy to function app..." button in the "Azure:Functions" area.
- Give this information at the prompts,
- Select the folder in which you function exist.
- Select your azure Subscription
- Choose "Create new Function app" from the prompts.
- Enter the name for your project based on requirements.
- Select the runtime version of python.
- Select the location for new resources.
The extension will show the status of individual resources as they are being created,
After completion,
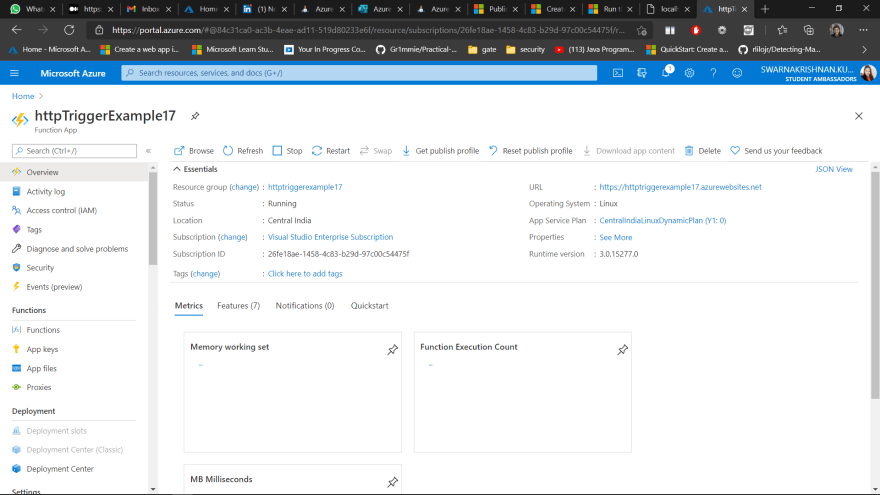
This is how you can create an Azure Function using python with the help of visual studio code. You can also create the azure functions with command line using Azure CLI and Azure powershell.

Top comments (0)